Part 3 – Capturing User Information, Sending Reminders / Email Alerting
If you saw Parts 1 and 2 of this series over the last few months, you will know that we built a simple database in Access 2013 Web Apps (AWA) to record details of our customers with a related table holding Activities associated with them. In this article, I will show how we can use Macros in more sophisticated fashion to send emails to users to alert them of tasks that need attention. This will involve creating a ‘Users’ table, linking this to Activities and then creating the macros required to send out required emails.
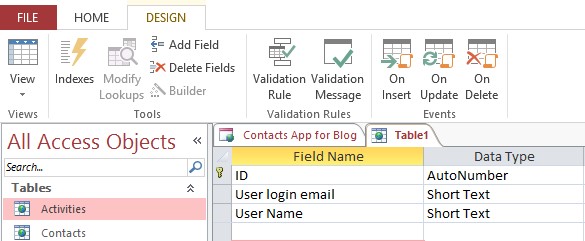
Create the Users Table
This new table will hold the names and login emails (passed from Office 365) of all users. We are assuming in this article that you are using an Office 365 account rather than a Sharepoint Online account because the latter cannot pass an email address to us. If you are on Sharepoint online then you can use the Sharepoint ‘Display Name’ in the macros to identify the user – feel free to contact me for advice about this.
As before, create a new blank table and add fields as follows:
After saving the table as ‘Users’, the next step is to update the Activities table to include a Lookup to Users:
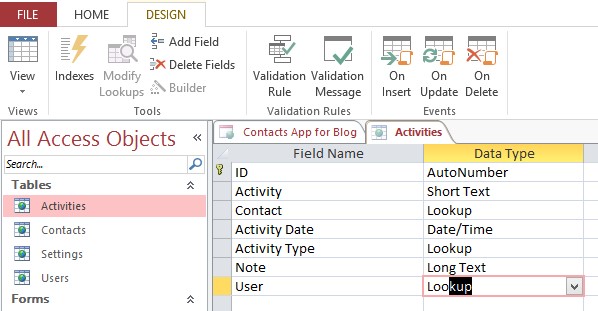
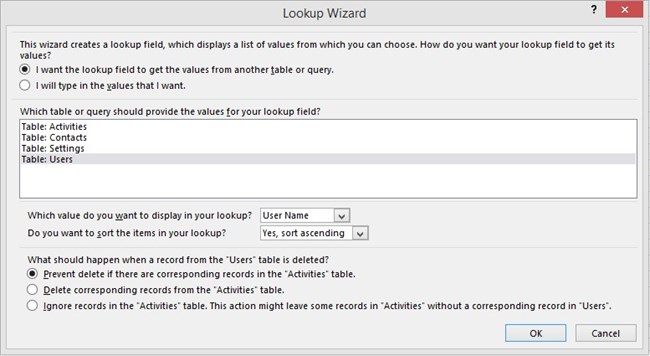
Then complete the details of the lookup as follows:
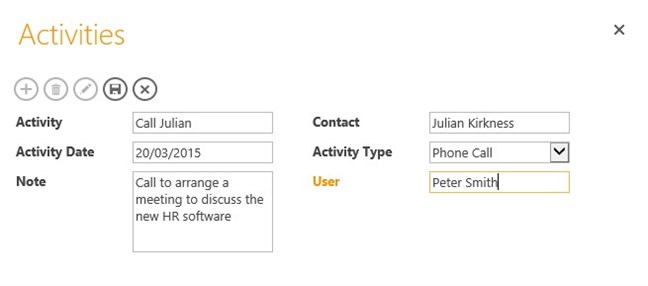
You are now able to link each Activity to a User (as well as a Contact), as follows:
Discovering the ‘Current User’
When a user logs into an Access Web App from Office 365, you are able to create a macro to access their login email address using a UserEmailAdress() macro function. What we are going to do now is create an ‘On Start Macro’ (a special macro which runs when the system loads) which will call a Data Macro. In the macros we are going to do the following:
1. Get the user’s email address and display name in On Start and pass it to the Data Macro.
2. Look for a matching record in users and if found set a variable called CurrentUserID – this will be the value of the ID field in their user record.
3. If there is no record for them, create a new User record populating it with their Email address and Sharepoint Dispay Name (using the function UserDisplayName()). Once the record is saved set the CurrentUserID.
To do this we will have to use a Data Macro (called by the On Start Macro) to lookup a record, create the new record if required and, once it is saved, look it up again to find out what the ID field value is (because the ID field is only populated by Access on saving a record). We need to start with the Data Macro:
The first section of the macro tries to find the user and if found returns a value to the calling macro (On Start) of the user’s ID. Note the user of a Parameter for the macro called UserEmail:
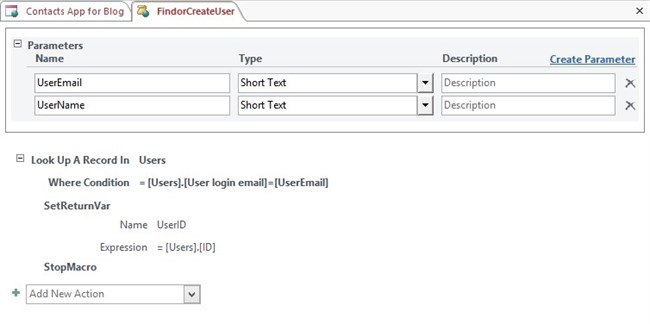
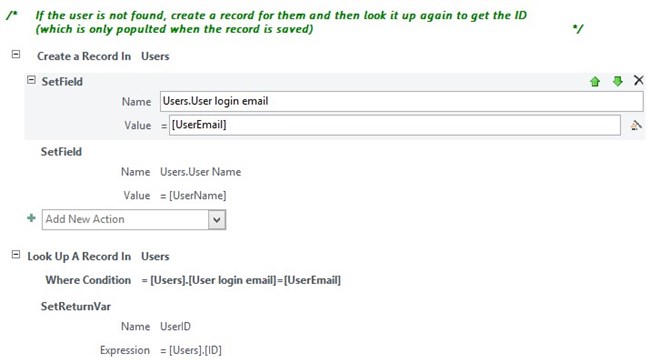
This totally caters for the situation where the User already exists in the Users table and will return UserID to the calling macro (Stop Macro). The next section will create a new record if not:
So, there we have our data macro (if you’re following this then save it as FindorCreateUser).
In order for this to work, we now need to call the data macro from the On Start Macro (which is a special macro which can be edited from the Advanced section on the Ribbon – here is what is needed:

Now when a user logs onto the app, a User record will be created for them if none existed and they will be available to be used in the User field on Activities.
Sending an Email to Alert a User about an Activity
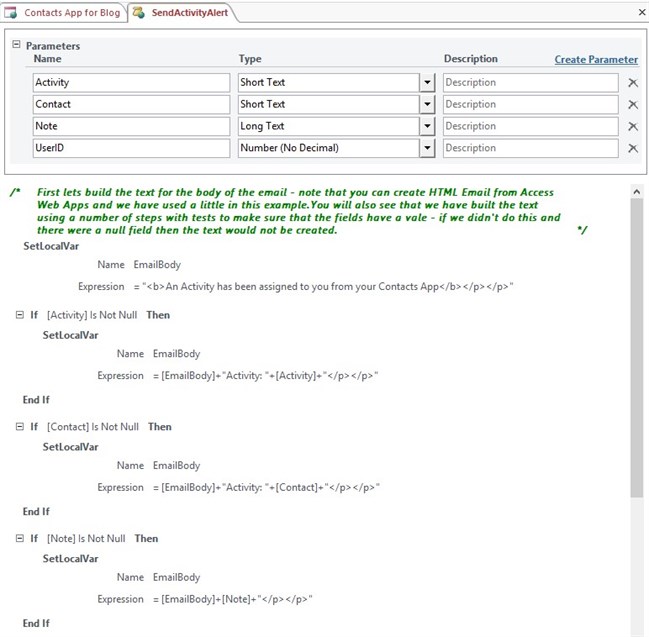
In this article we are only going to look at a simple scenario for sending emails when a button is clicked to send details of an Activity to a user. Once again, it is a Data Macro which will do the heavy lifting. Let us provide a feature so that the system will email details of an Activity when someone clicks a button on the Activites View. A scenario here may be that someone creates an activity and assigns it to someone else.
We are going to create a Data Macro which will build the text of the email from the fields from the activity and then sends it:

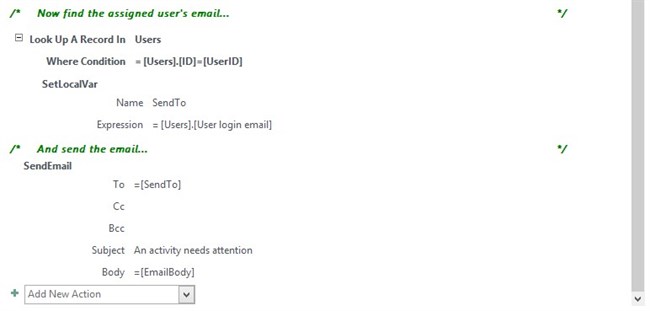
The next section of the Data Macro now looks up the email address to send the alert to an then send the email:
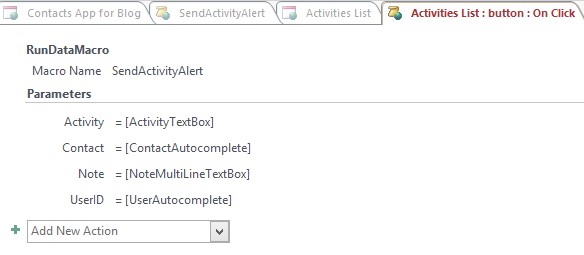
Finally, to make this work, we need to add a button to the activities screen and call the data macro (SendActivityAlert):
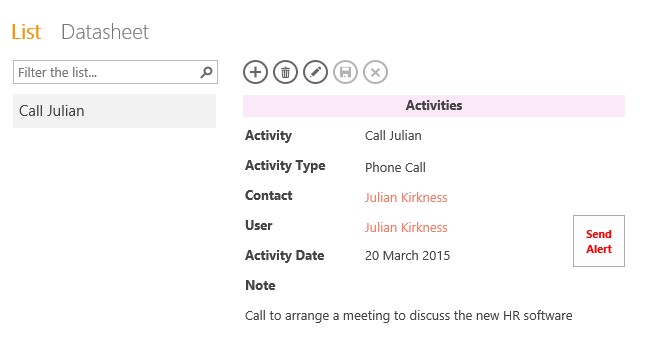
Note that I have tidied up the View and also user the background colour setting technique shown last time to colour the heading.
The macro for the button is as follows:
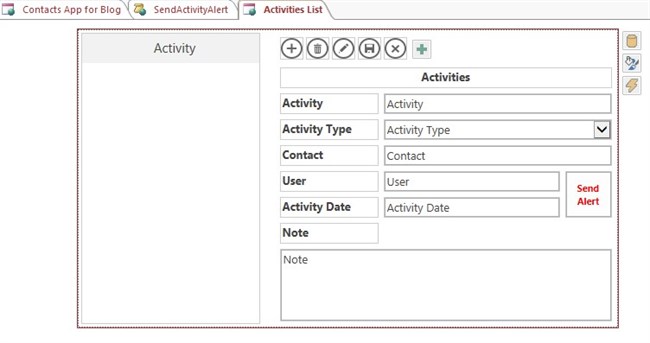
So there we have it – this is what the final Activities View (Activities List) looks like:
And here is an example of the email sent from this record:
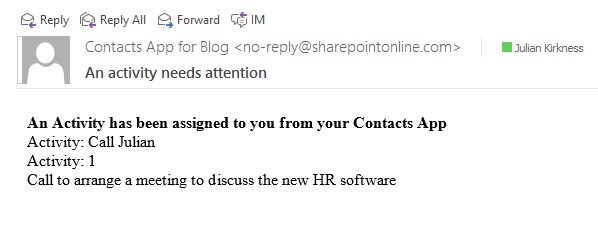
Note that this email is not very attractive to look at yet – I propose to look at how we can enhance this next time. I will also be covering how we can use alerts to remind users of multiple incomplete Activities and look at ways to use the CurrentUserID we have learnt how to find above.
Read More: /community/member/ebook-archive/microsoft-access-web-apps