Mostly our intend to get work done at the same place, based on that now all the organization moved into Microsoft Teams as a communication platform, as same way Approvals is also moved into the Microsoft teams without working in Power Automate.
We can directly work with approvals in Microsoft teams without making flow as a part. Microsoft will make the Power Automate as an infrastructure to work with this app. And Power Automates stores the request in Dataverse.
From where we can create Approvals?
- Chat
- Channel
- Approval Hub
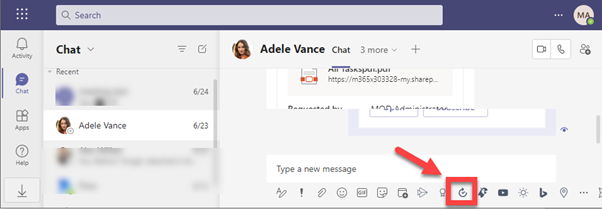
Create approval from chat:
we can directly create approval from Microsoft teams chat by selecting the approval icon as shown in the below image.
When creating the approval from a 1:1 chat, we can add only the corresponding chat user as an approver. If we want to add a few more approvals then turn to group chat or else from the teams channel.
Approval from channel:
Let’s start the approval from the channel by selecting the approval app icon in the conversation window.
When Creating the approval from the channel we can add only the corresponding team member as approvers, we can’t add other than team members as an approver.

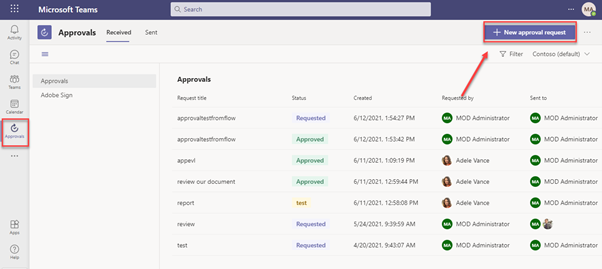
Approval from Approval Hub:
We can create an approval in Approval hub through New approval request button, here we can add all the tenant user as an approver.
Approval Request:
The following details common in an approval, wherever it is created (chat, channel, approval hub).
- Request type1.1. Basic1.2. eSign
- Name of the request
- Approvers
- Additional details
- Attachments (if need)
- Custom response
- Send to another environment.
1. Request type:
1.1. Basic :
we can create a regular approval request by selecting the Basic type.
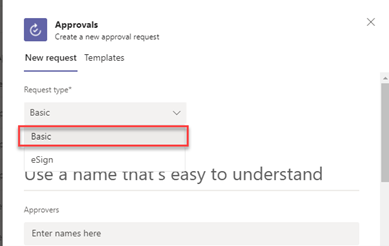
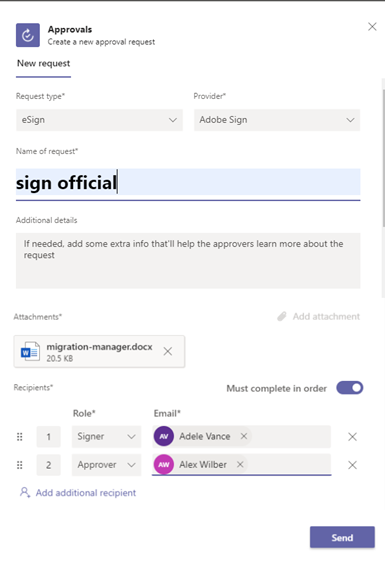
1.2. eSign:
In order to add an e-signature such as Adobe Sign, DocuSign, or other 3rd party providers natively in the Approval app, use this type.
We can add the same member as signer and approver, or we can add a different signer and approver in an approval request. When adding signer and approver differently then the signer initially receives an email. Then signer signed the approval, the approver will receive an email to approve the request.
Let’s take a look at this in detail.
Once the request is submitted signer will receive the requested email.
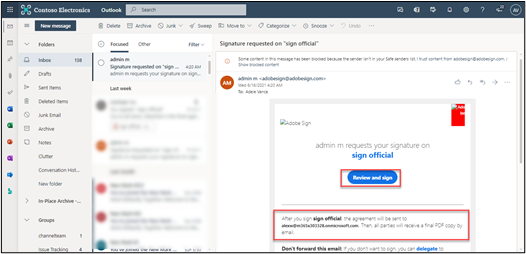
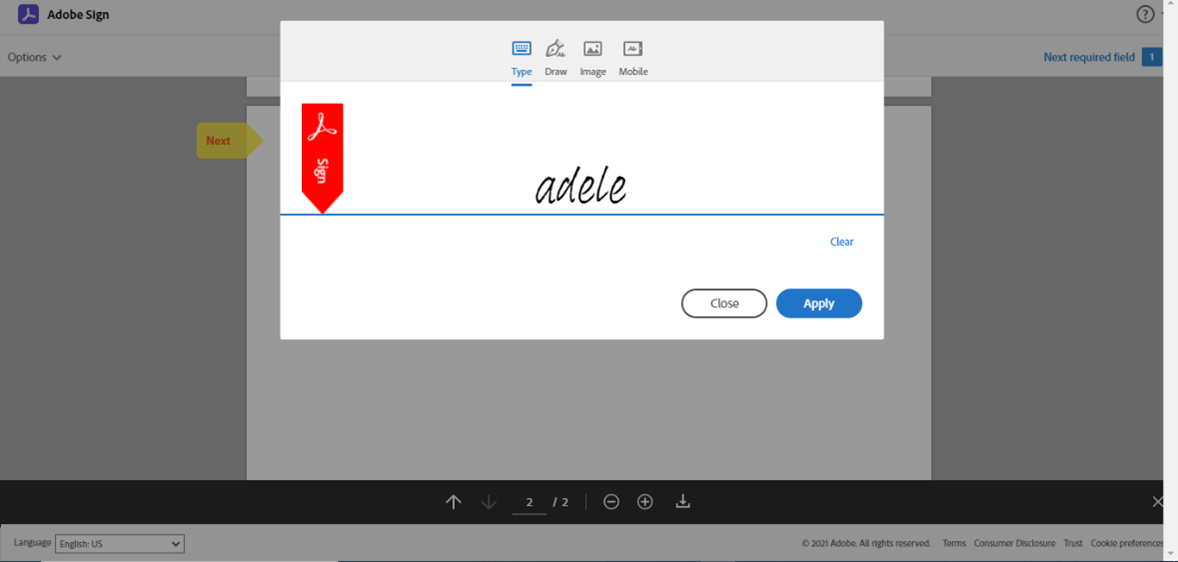
The Signer will Review and sign the request.
Once the signer signed, the requester receives an email that the signer has signed the approval request.
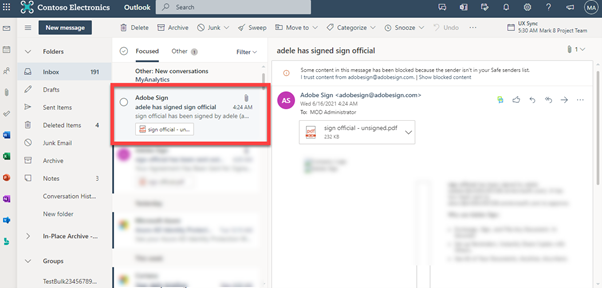
Second, the approver will receive an email to approve the request.

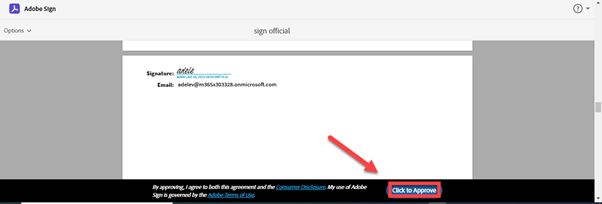
Now approver can click on Approve button to approve the request.
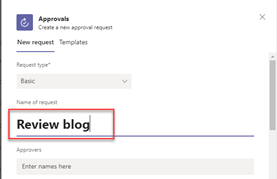
2. Name of the request
Name the approval that’s easy to understand about the Approval request.
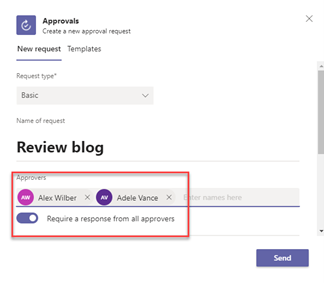
3. Approvers

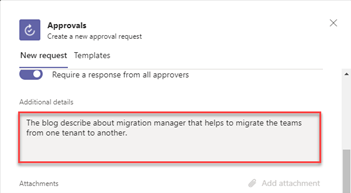
4. Additional details
Using this option, we can add some more information about approval to make help approvers learn more about the request.
5. Attachments:
We can add the attachment from OneDrive for Business/SharePoint Online or desktop.
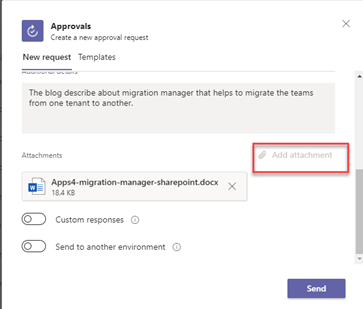
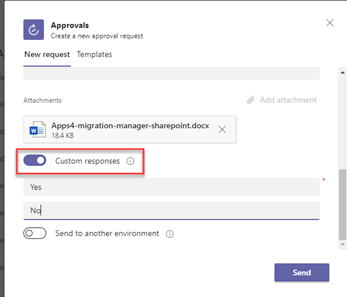
6. Custom response
By default Approval request deliver the Approve/Reject option for Approvers. Using this option, we can change the approve option with some other value like Yes/No.
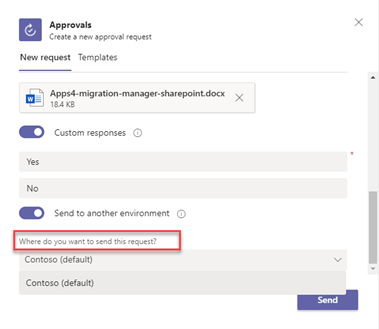
7. Send to another environement
To send the approval for another environment then we can choose this option, and then select the environment where we need to send the approval request.
Approve or reject the request:
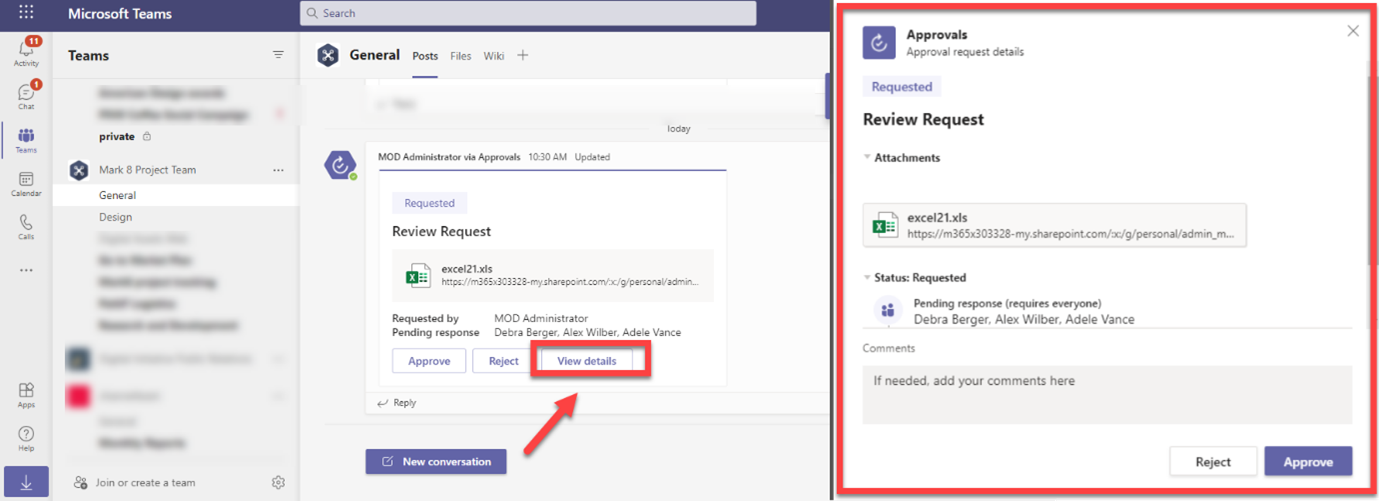
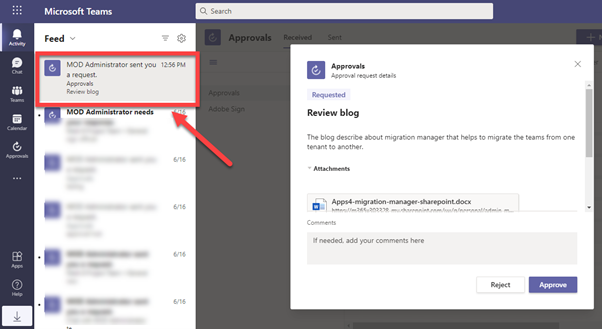
Once approval is submitted, approver will receive the notification in Microsoft Teams. If the request is submitted from chat or channel then they can approve or reject in the approval card or we can directly approve/reject the approval through the approval hub.

Approve from approval card:
When a request is done from the channel, we can Approve or Reject through Approve card in the channel.
Approval from Approval hub:
we can also approve or reject the approval from the Approval hub.
Approval Hub:
In the approval hub, we can view and manage all the approval that is received and send from chat, channel, and even from flow in one location. The details from the approval hub cannot be deleted.
Received:
In the Received Tab, we can view all the approval requests that were received for approval.
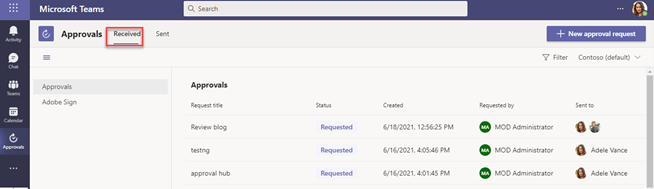
Sent:
In the Sent tab, we can view all the approval requests send by us.

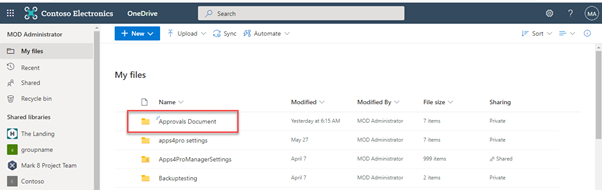
File’s storage:
When we attach the files from the computer in the chat, channel, or flow in approval Request, then the files will be stored in OneDrive with folder name Approval Document. And these files have been shared with the approver/signer.
This blog post is part of Microsoft Teams Week. Find more great blogs here.
About the Author:
Narasima Perumal Chandramohan is a Co-Founder of Apps4.Pro, which provides migration solution for Microsoft 365 workloads. He is also a Microsoft MVP for past 5 years. You can contact him through LinkedIn.
Reference:
Chandramohan, N. (2021). Approvals in Microsoft Teams. Available at: https://blog.jijitechnologies.com/approvals-in-microsoft-teams [Accessed: 8th December 2021].