“My name is Andy and I am a huge fan of source control.” That said, I confess I have struggled with git for a couple years now. I recently had some “play time” – I love play time – and decided to play with git.
In this post I will demonstrate how to create an Azure DevOps account, configure it, create a new Azure DevOps Project, connect my Azure DevOps project to SQL Server Data Tools (SSDT), clone the Azure DevOps project to a local repository, create an SSIS project in the local repository, perform an initial checkin, update the local SSIS project, and check in the changes so they are stored in our Azure DevOps remote repository.
That’s a lot and I know you’re itching to get started walking through this demo. But first I’d like to share why I’m writing about Azure DevOps, Git, and SSIS – and recommend a book while I’m at it.
Why?

I have been listening to Can’t Hurt Me, an audio book by David Goggins and Adam Skolnick based on Goggins’ life. The audio book (and hard copy) contains profanity. I am not a fan of gratuitous profanity – profanity for the sake of profanity. In my opinion, that’s not what I’m hearing when I listen to Can’t Hurt Me.
I’m hearing a man communicate.
Goggins offers solid advice for, well… life. The audio book is better than the hard copy because the co-authors chat in between (and during) chapters about the experiences recorded in the book. (Shameless plug: You can get a free audio book from Audible and help out the Data Driven Podcast if you sign up using this link.)
One piece of advice Goggins offers is: face your challenges and fears. Overcome them. With a tip o’ the cap to Mr. Goggins, let’s “get after this.”

Git is a distributed version control system (VCS) that is free and open source. I can hear some of you thinking, “What does that have to do with SQL Server Integration Services (SSIS), Andy?” I’m glad you asked:
SSIS is software development.Andy, circa 2006
Learning By Example
There are a few moving parts to using SSIS with Azure DevOps. In this post I’m going to share how to configure the parts and then get them moving. Cool?
Setup an Azure DevOps Account
First, you need Azure DevOps. Browse to dev.azure.com and set up an account:

Before I dive into something like this, I prefer to count the cost. At the time of this writing Azure DevOps may be used for free:

See the Azure DevOps Pricing page for details (note: this may have changed since I wrote this post).
Once you have Azure DevOps up and running, create a project:

Clicking the Create project button opens the Create New Project window. Configure the project by selecting a version control engine and a work item process :

Please note TFS is an option for version control engine. Are you using TFS on-premises but thinking of migrating to the cloud? Here you go.
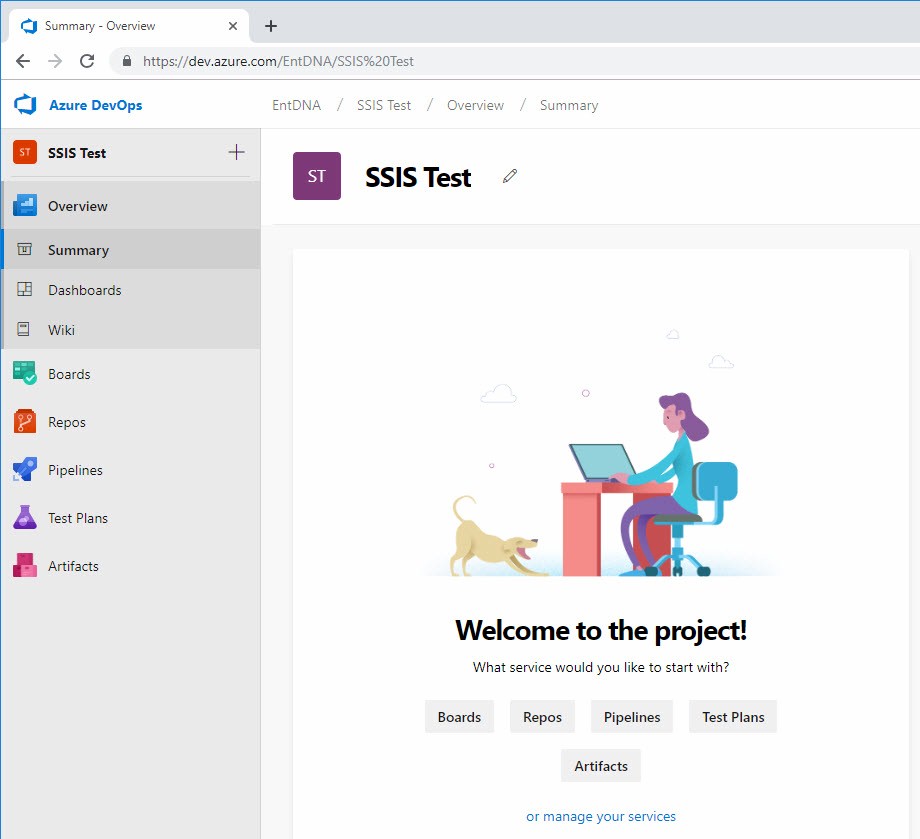
Click the Create button to proceed. In a minute or so, the Overview>Summary page for the project displays:
Connect to the Azure DevOps Project
The next step is to connect SSDT to the Azure DevOps project. Begin by clicking Team>Manage Connections:

Note: You may need to disconnect a current connection first:

You may need to add an account to Visual Studio’s connections:
If so, you are prompted for credentials from Azure:

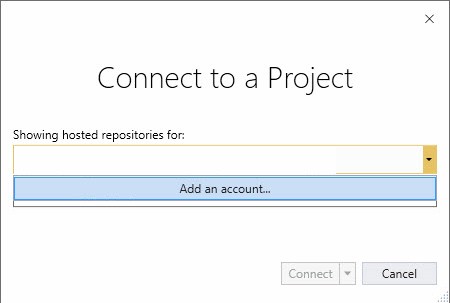
Once connected to Azure DevOps via Azure security, you may select an account:

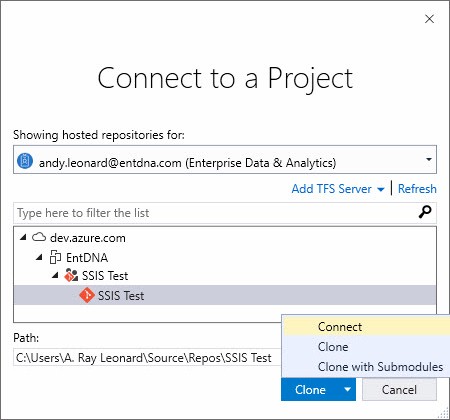
After connecting, you may select the project you created earlier:
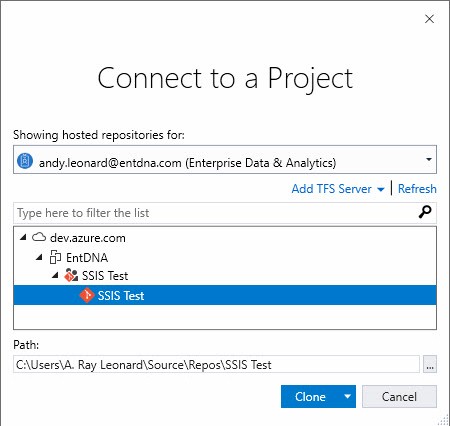
Git works in a local repository which exists on the developer’s machine. The Clone button surfaces three options:
- Connect
- Clone
- Clone with Submodules
The default option for the highlighted button is “Clone.” That’s a clue, cloning is our next step but for our introductory demonstration, we select Connect:
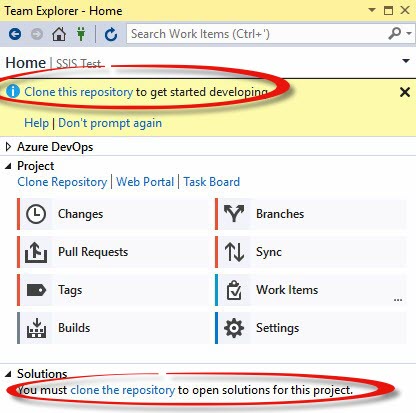
Note we cannot continue unless we clone the repository (that’s why it was shown by default!):
WHAT JUST HAPPENED?
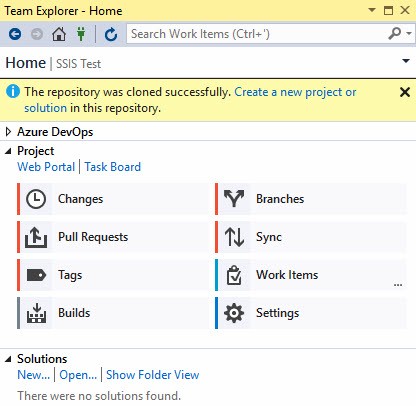
When we cloned the SSIS Test Azure DevOps git repository, we created a local, linked copy of the SSIS Test Azure DevOps git repository in the specified folder – in my case, the local folder was C:\Users\A. Ray Leonard\source\repos\SSIS Test:
.git
The next step is to “Create a new project or solution” in this new local repository (it still has that new repository smell!):T
Create an SSIS Project
Click the”Create a new project or solution” link in Team Explorer to create a project in our new local repository:


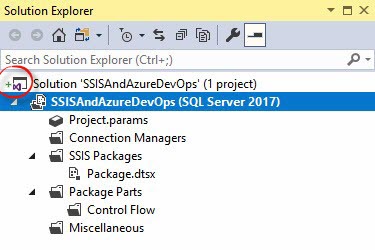
The “+” sign indicates the solution has been added to source control, which – again – we may view the solution in our local repository using Windows Explorer:

But when we check our Azure DevOps SSIS Test project, we see a message indicating the remote repository is empty:
Committing Code (Locally)
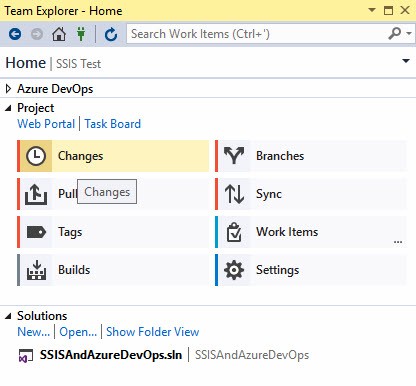
Click View>Team Explorer to open the Team Explorer dialog:

Once Team Explorer opens, click the Changes button:
Enter a Commit Message:

Click the Commit All button to commit the changes locally:
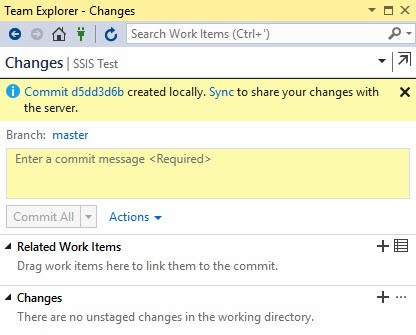
What does locally committed mean? Your local repository has been updated but no changes have been transmitted to your remote repository…yet.
As the message above reads, “Sync to share your changes with the server.” Click the “Sync” link (hey, that rhymes!):
Syncing
Clicking the Sync link triggers a git “push”
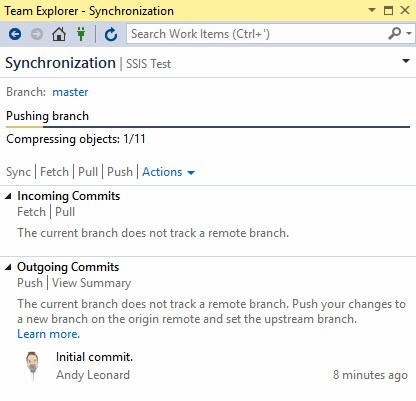
Team Explorer lets you know once the sync and push operations complete:
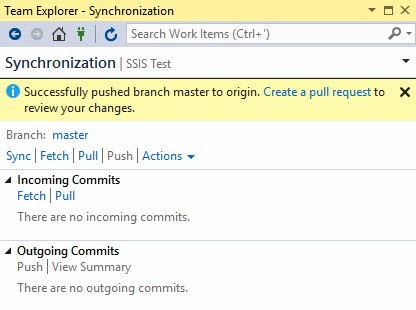
Team Explorer – Synchronization
Now you can see files in your remote repository – up in Azure DevOps, finally!

You can learn a lot more about interacting with your local and remote repository from the Pro Git book, available online for free:

Update, Commit, Sync (Push)
We now have a copy of our mostly-empty SSIS project stored in the cloud. w00t! Let’s make some changes to the project and push them to Azure DevOps.
I opt to rename the package:
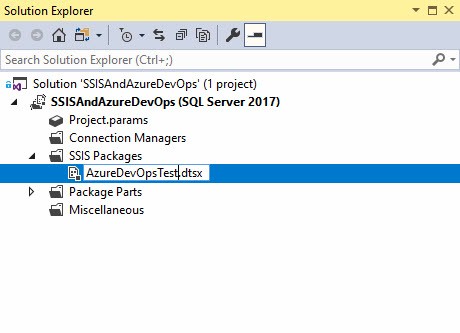
I opt to add a Script Task for ETL Instrumentation as recently posted, SSIS Design Pattern: Use Script Tasks for ETL Instrumentation:

I Confess, This (Still) Confuses Me…
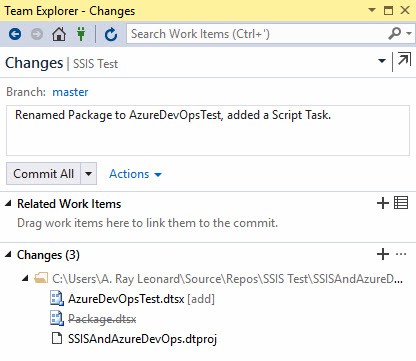
After a save, I add a message and commit the changes locally:
Once the changes are committed locally, I click the Sync button as before:
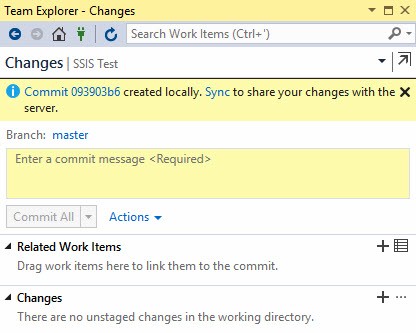
After clicking Sync, I need to Push the changes to the Azure DevOps remote repository:
This confuses me. Why doesn’t Sync issue a git push – like with the initial sync?
I’d be ok with the initial git sync not pushing, even; I crave consistency.
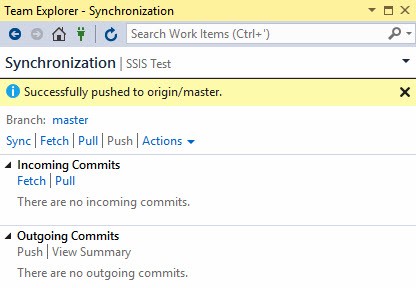
Regardless, my updates now reside in the Azure DevOps remote repository:

Conclusion
In this post we configured Azure DevOps, added an Azure DevOps Project, connected the Azure DevOps project to SQL Server Data Tools (SSDT), cloned the Azure DevOps project locally, added an SSIS project to the local repository, performed an initial checkin, updated the local SSIS project, and checked in the changes.
Mission accomplished.
:{>
About the Author:
Andy Leonard is the founder and Chief Data Engineer at Enterprise Data & Analytics, an SSIS trainer, consultant, and developer; a Biml developer and BimlHero; SQL Server database and data warehouse developer, community mentor, engineer, and farmer.
Reference:
Leonard, A. (2019). Azure DevOps, SSIS, and Git Part 0 – Getting Started. Available at:
https://andyleonard.blog/2019/03/azure-devops-ssis-and-git-part-0-getting-started/ [Accessed: 5th June 2019]