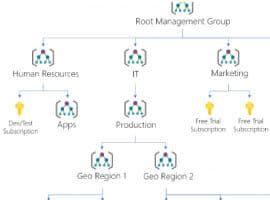
In the first part, I explained why an Azure governance approach makes sense, how management groups can be used as an organizational tool in Azure, and why they are necessary for Azure blueprints. In the second part I will now show what Azure Blueprints are, how they can be set up and what happens when a new subscription is created when an Azure Blueprint is applied to it.
Before Azure Blueprints existed, it was necessary to specify all predefined settings manually or via predefined taks for each new subscription. Thus, settings for centrally authorized persons, the predefined network design and other parameters could only be made in this way. Central specification of ready-made definitions was not possible. That’s where Azure blueprints come in. Azure blueprints allow defined structures for subscriptions. It can be used to set uniform standards for all subscriptions, to achieve more efficient and effective development times in Azure, and to comply with the company’s compliance rules.
Azure Blueprints are a central collection of different artifacts. This collection currently includes 4 areas: Role Assignment, Rule Assignments, ARM Templates and Resource Groups. With an Azure blueprint, these 4 areas can be used to define specifications that are used when creating a subscription.
Azure Blueprints – Menu
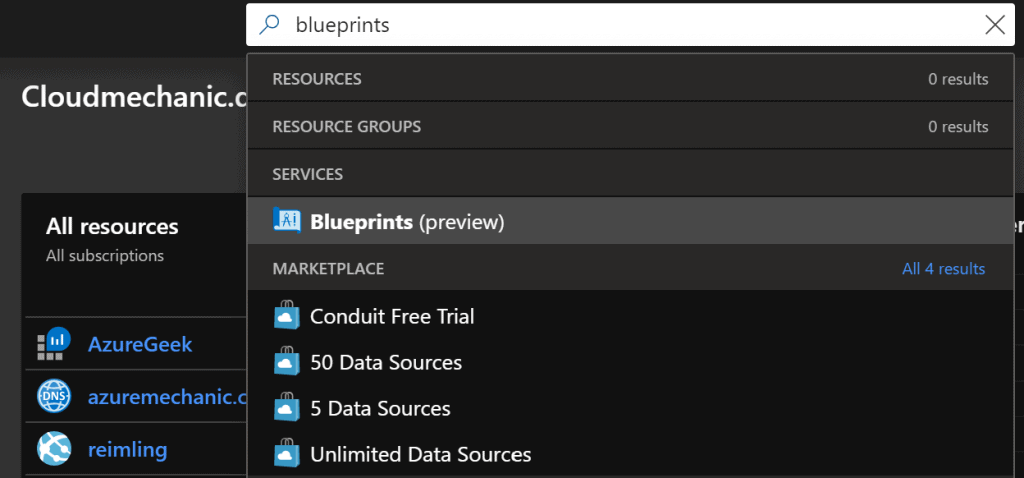
The easiest way to reach the menu for creating and managing blueprints is via the central search in the Portal Blade. If you go through the management groups, it is currently still unfortunate solved, since the blueprints do not have their own menu entry, but are here under the entry Policies sorted.
Azure Blueprints – Overview
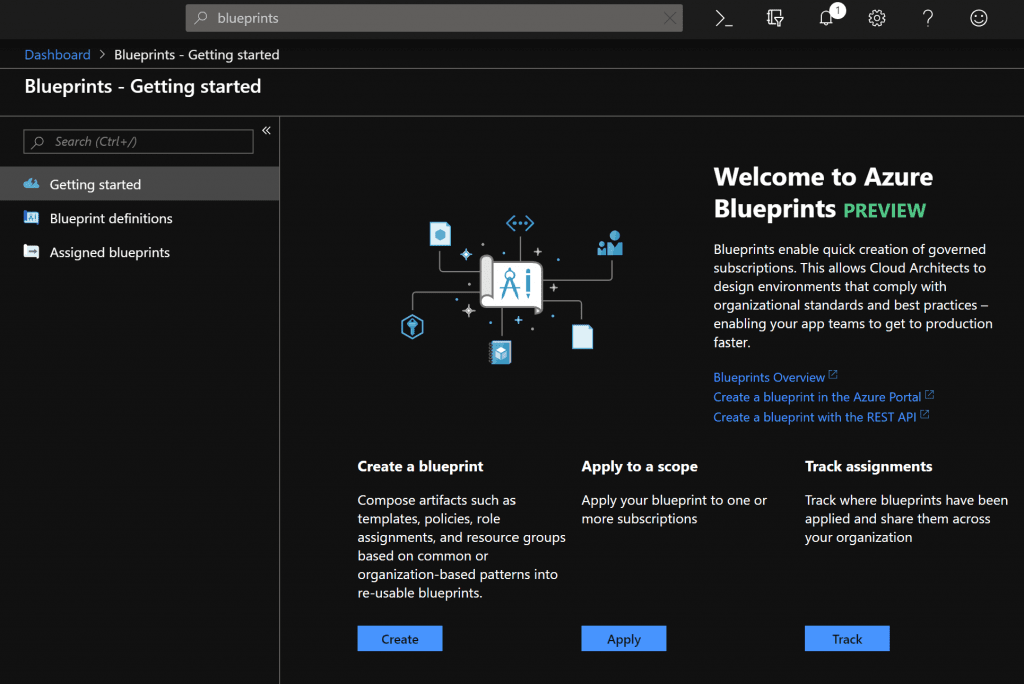
In the subsequent Getting Started Blade you have various options to choose from, which in principle also specify the steps. First you create a blueprint over “Create”.
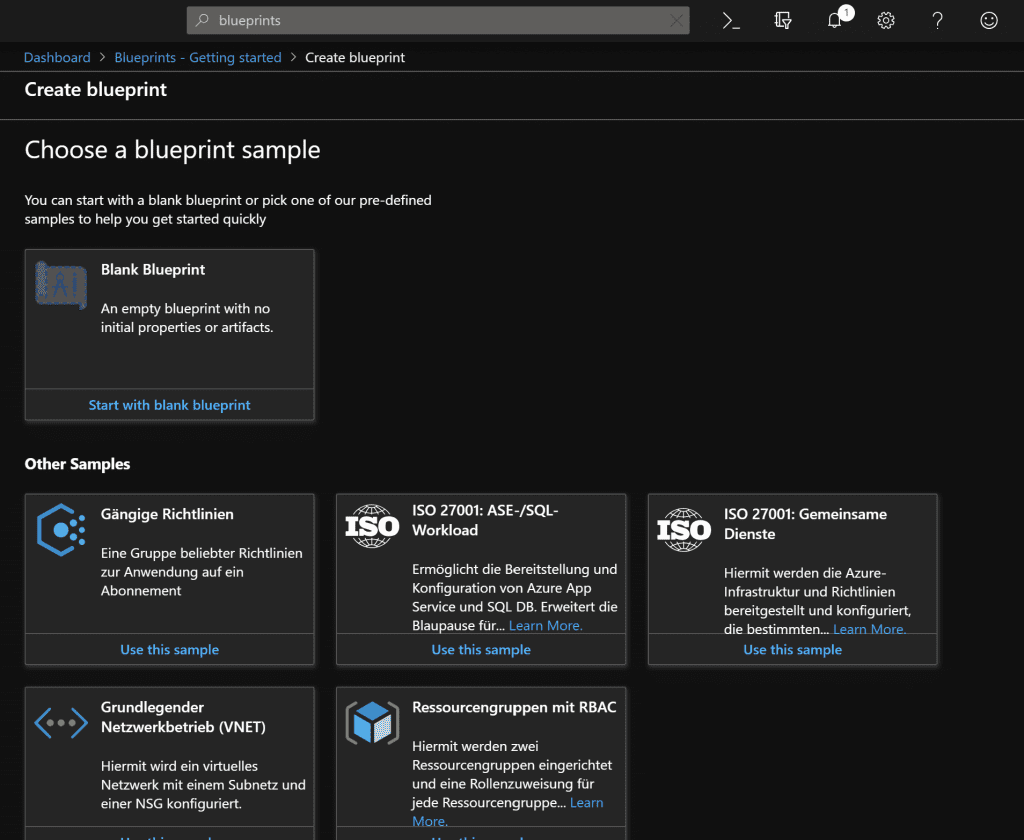
In the following Blade you can already see some changes since the Ignite. With the first release only the option “Blank Blueprint” was available. Meanwhile, Microsoft has published its own templates as blueprints that meet various requirements. Brand new is for example the ISO 27001 template , which already contains a multitude of artifacts which are applied to it when creating a new subscription under this blueprint. These include Subnets, Policies, RBAC, Log Analyticts, Key Vault and more.
Once you are familiar with the way blueprints work and the individual possibilities, the templates are a super easy way to already take standard measures for new suscriptions or to use these templates for your own blueprints.

For our first try we create a “Blank Blueprint”. The name must not contain any special characters and spaces. In addition, the name should provide an indication of the functionality of the blueprint. The description field is of course to use. It gets interesting at the point “Definition location”
Azure Blueprint – Definition location
The location definition not only specifies the location of the blueprint but also the location of action. Once the Azure blueprint is assigned to a Management Group definition via the location definition, the specified configuration is applied to newly created subscriptions associated with the corresponding Mgmt Group.
Azure Blueprint – Artifacts
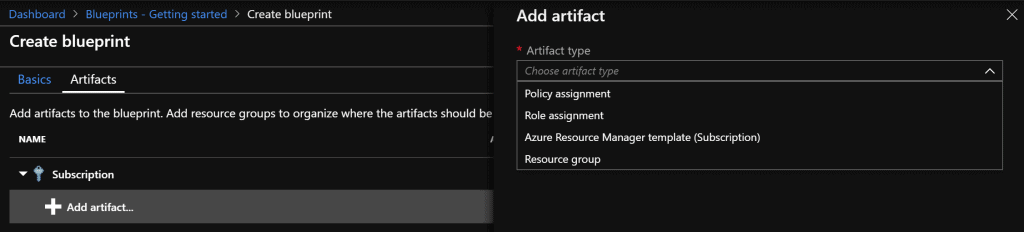
After the basic settings have been confirmed, the overview page for the settings of the artifacts will be displayed. Here, as already mentioned, 4 different artifacts can be applied to the blueprint. For the example Blueprint the two artifacts “Policy Assignment” and “Role assignment” are used.
Azure Blueprints – Add Policy Artifacts

Under Policy Assignments, you can now select the desired policies for newly created subscriptions. For example, two policies that have been identified as Best Practices for VMs are:
- Monitor VMs that do not use managed volumes
- Monitor deployment of the Log Analytics Agent
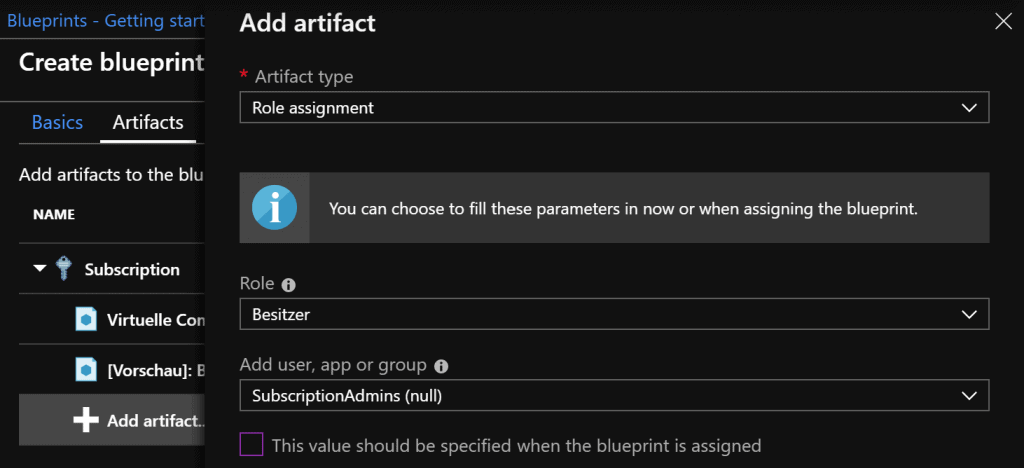
Azure Blueprints – Add Role Artifacts

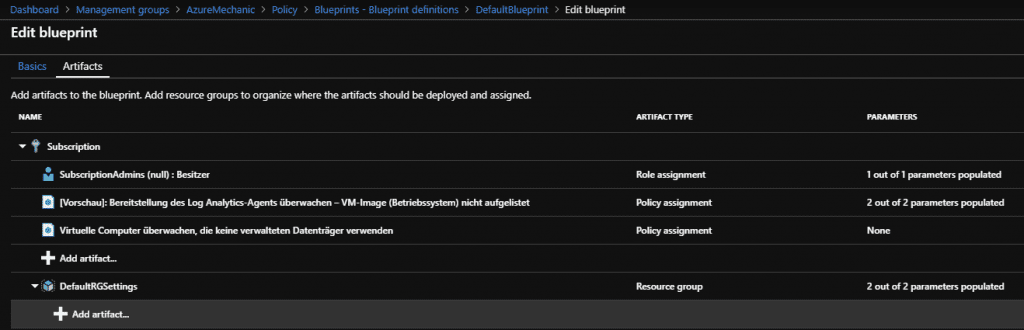
In Edit mode, the configurations made above are now visible. This blueprint is now saved as a template via “Save draft”.
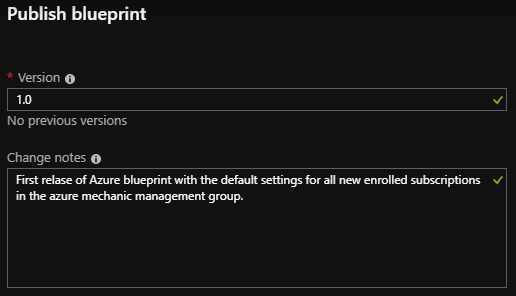
With the button “Publish blueprint” the previously created blueprint can be published. In the opening blade you can (manually) assign a version number and a description. Only the version number is mandatory, but I strongly recommend using the description field.

With the publication of the blueprint, newly created subscriptions below the management group “AzureMechanic” will automatically be provided with the previously configured settings.
It should be noted that this is just an example and should be adapted for productive environments. For example, we recommend using ARM templates to roll out a given VNET infrastructure, which is automatically paged with a VNET that already has a VPN connection to the RZ.
For questions, suggestions or improvements use the comment function.
About the Author:
Gregor is working for sepago GmbH as a Cloud Architect for Azure. Before joining sepago, he was working as Cloud- and Infrastructure architect with main focus on Microsoft technologies.
In October 2018 he was honored with his first MVP award for Azure.
Gregor is mostly find as Speaker on many community conferences, blogs regularly at www.reimling.eu and he is organizer of the Azure Bonn Meetup, an local Azure user group near Cologne.
Reference:
Reimling, G. (2019). Azure Management Groups and Blueprints – Overview and Setup – Part 1. Available at:
http://www.reimling.eu/2019/04/azure-management-groups-und-blueprints-ueberblick-und-einrichtung-teil-2/ [Accessed: 14th May 2019].