Hi there, I was asked to write a blog post for European SharePoint Conference Training Week. After some brainstorming to figure out the topic, it stroke me -why not write a post on some of the configurations and adjustments I have done in Document templates, libraries and Document Centre the last ten years.
Learn how to build a smart Taxonomy and use this as Quick Parts inside Word/Office templates. Furthermore you can use this setup in navigation, search, views, and a lot more to gain super skyrocketing efficiency.
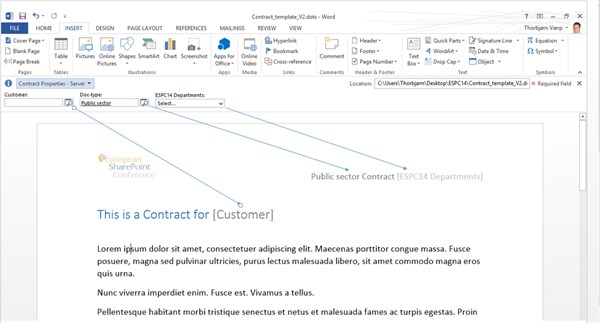
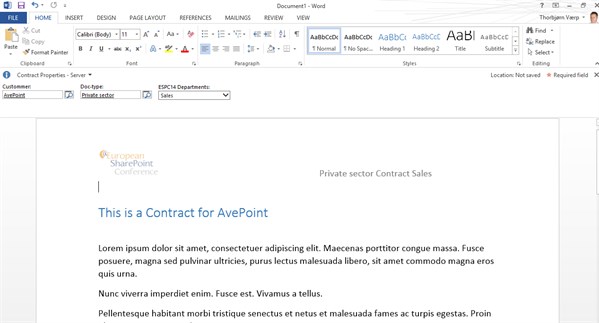
Picture1 – This Contract template contains a combination of terms from the Term store, and SharePoint site columns, used as quick parts inside the document header/footer and body.

Picture; End users will give you high cred for the ability to have smart templates to launch from word.
Please mr.BossMan don’t let me work in Shared Folder no more:
Enough said, let’s get to business;
I did all the work on an Office 365 tenant, using no code or scripting. One of the great additions to Off365 is that you have a Document Centre there. This also works fine on an on premise Enterprise edition.
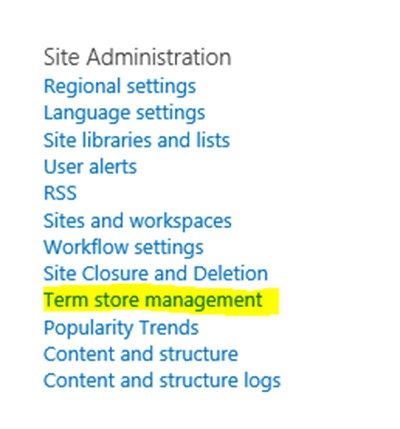
First task to accomplish is to get a nice taxonomy up and running (Document Center is a Site collection). I start off with some Term store management. In Site settings select Term store management.
Inside Term store management locate your Document Center site collection and add New Term Sets. I added Doc-type and Customers.
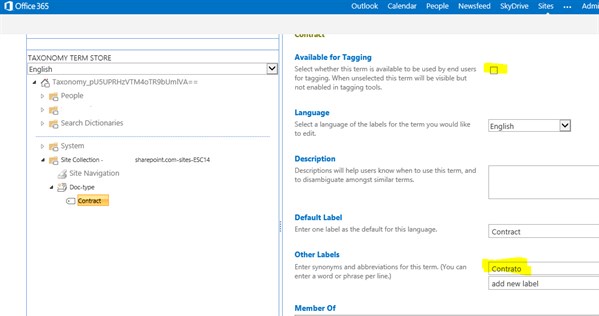
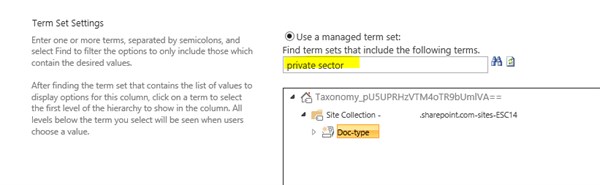
For the Doc-type term “Contract” I removed the availability for tagging, this because I will have my end users to select either private or public-sector (or levels underneath these two) – makes sense huh?
Any observant reader will notice that I have added the Spanish word Contrato as a synonym in Other Labels. (practicing for Barcelona 5-8th May …hehe) This is a nice thing to do to support two languages without full language pack and the hassle with multiple templates. More on this later.
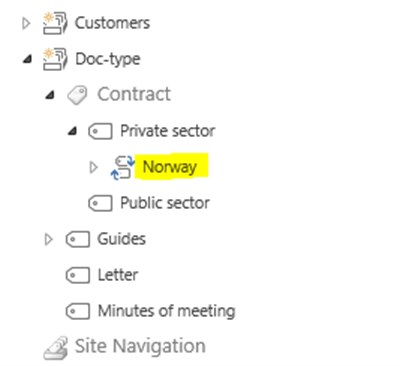
Picture; A good tip in building the Taxonomy is reusing terms. Here you see “Norway” is reused from the Farm Wide Taxonomy -Underneath Norway you will find the 19 counties. “Norway” is a term set that all site collections in my farm can reuse.
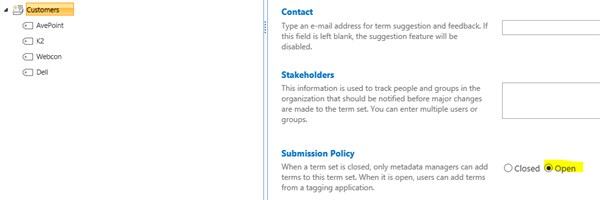
For the Customers term set I set the Submission Policy to open, but still add some of the major customers to select from. Effective and smart. I often experience that open submission are really effective, and when the end user adopt the method to add records they will contribute a lot, and I find seldom typos in these scenarios. -It is also very easy to do, since you add them via Word properties or in Off365. The correct buzzword for this is Folksonomy.
After the term set taxonomy are all set,
We continue with the Site Columns. Site columns is an equal important part to the whole taxonomy as the Term store. While the term store is great on many features -like navigation, cross site references. Site Columns are end user friendly formatted and very flexible. This together with term sets is a match made in heaven.
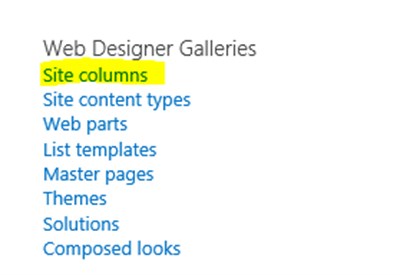
Navigate inside Site settings -select Site columns.
For my document I create a Site Column named Choice, I already have a group called “ESPC 14 Columns” If this is your first Site Column, then you create your group, and add the rest of the site columns in this group.

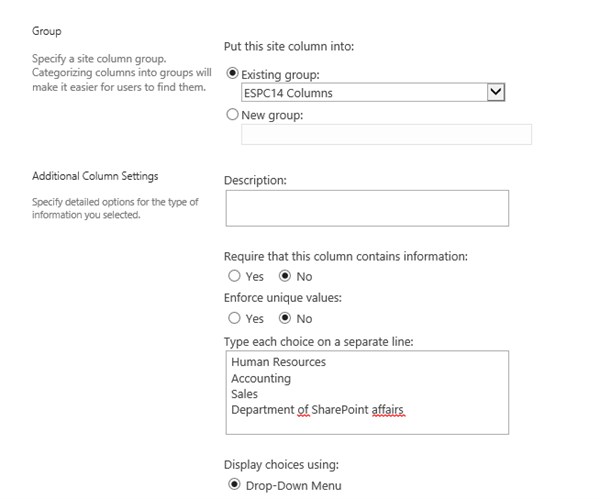
Picture; I formatted this site column as a choise menu, displayed using drop-down menu. There is a lot of other formats and display types, be creative!
I continue creating two more site columns that use the terms I created in the Term Store manager for Doc-type and Customers.
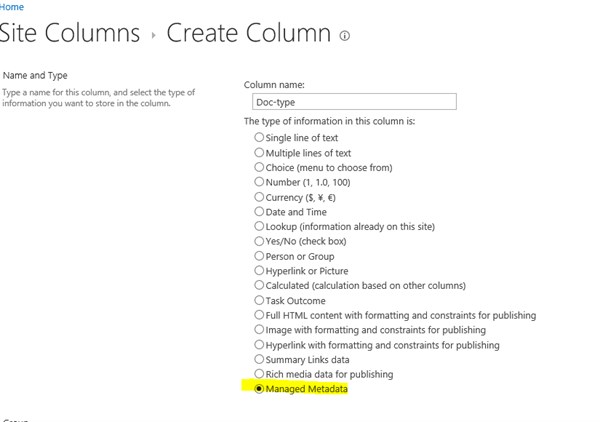
Picture; Here I create a site column for Doc-type and use managed metadata
Picture; Searching for term sets is a nice feature when you have many term sets, and navigation might be tedious.
I now have three site columns, two connected to the term store, and one that is a choice column.
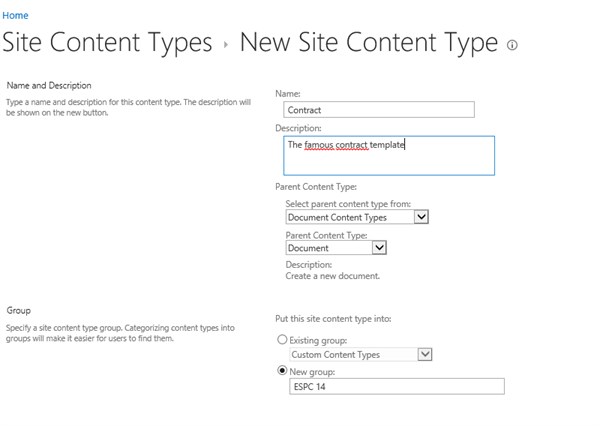
Let’s start creating a site content type template to host these columns.
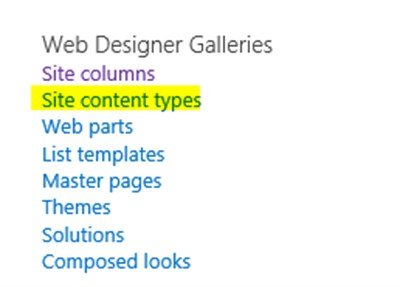
In site settings, click Site content types.
Create a new Site Content Type:

Save the form, open it again to add the site columns from the link “Add from existing site columns”

Picture; add the site columns we created in the Site Content Type.

Picture; grouping the columns and templates make it easy to find and select the correct columns to use.
Next step is to add a template, do this from the advanced settings in the content type
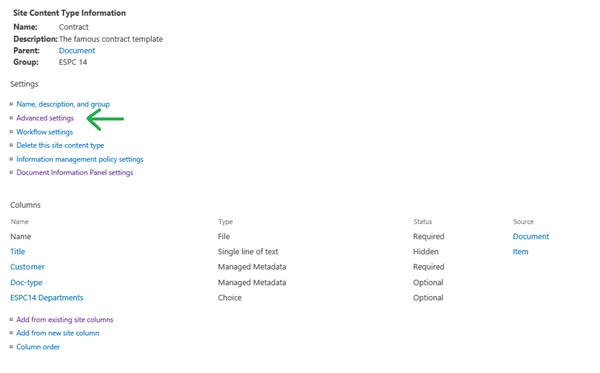
From advanced settings browse for a template, NB! The template must be in the .dotx format (word template). At this point I presume you already have a template, if not you find many nice templates at office.com.
Then it is time to add the template in a document library.
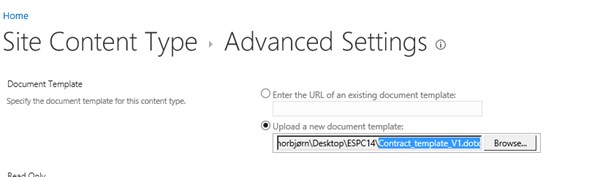
Go to library settings in the documents library in Document Center. Click the “Add from existing site content types”, locate the Contract template.
Picture; if you don’t see the option “Add from existing site content types” inside the library settings, you need to activate it in the advanced library settings link.
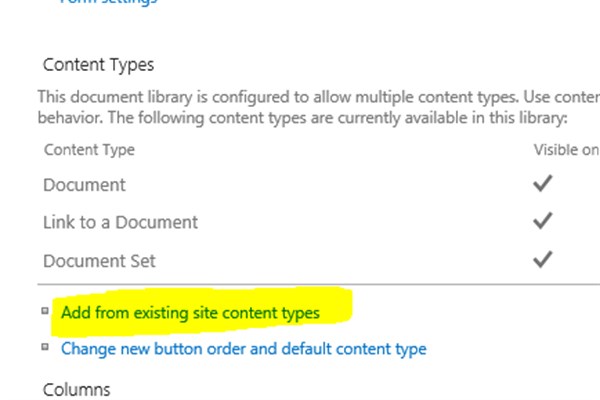
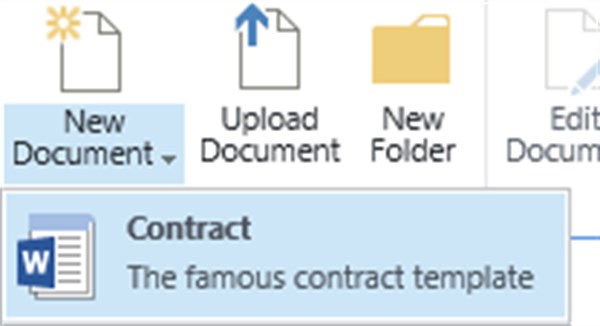
Now it’s time to do some magic – start up the template:
Save the document to a local folder on your computer. This document contains the Site Columns including the managed metadata as quick parts all ready to be inserted anywhere, or as many times as you like inside the document.
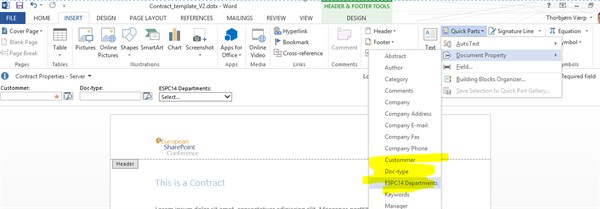
Picture; Document property contains the Site Columns we created and added in the template. Use this as many times as you like, anywhere in the document.
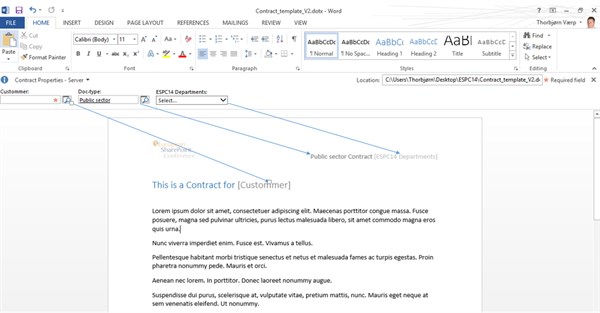
Picture; I use the Site Columns in header, headings, body, footer or simply anywhere as many times as I need inside the document. I can also set a fixed value like public sector for the doc-type, a-haa this gives me the flexibility to set different standard values in different templates, like one contract type for the private sector and another one for the public. Nice!
All set with the template, I simply just upload it to the Site Content Type “Contract” and overwrite the V1 with this new version 2.
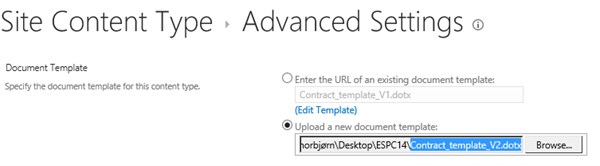
Picture; from the advanced settings of the Contract site content type I upload and overwrite the V1 with my new V2 contract.
Open the document from the library.
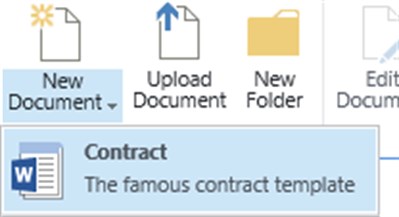
Fill inn data, text and save it back in the library.
Picture; add metadata, fill inn text and save back in to the library!
Yeah!!! Juhuuu!!! -It works
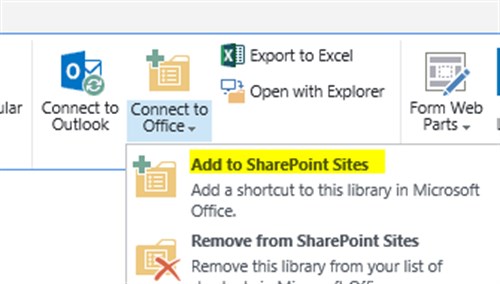
Tell the users to hit the “Add to SharePoint Sites” to link these nice templates inside Word
Good Luck on creating more Skyrocketing Document templates!
If you have any questions or feedback on Thorbjørn’s article please leave a comment below. We would love to hear from you.
See Thorbjørn Værp speak on Implementing ADFS and Hybrid SharePoint at ESPC14 for only €995.
 Thorbjørn Værp is a Technical Evangelist. Certified MCT, MCTS, Scrum Master. Værp has many years of experience in implementing and upgrading SharePoint – from version 2003 to SP 2013. He both participates in and leads projects at national and international level. Public speaker at SharePoint Communities, MeetUps, UserGroups, and International Conferences. Blog at www.sharepoint13.net , Twitter @vaerpn.