Your colleague created a Canvas Apps and bunch of Power Automate Flows; but then he/she left the organization without sharing the canvas app and flows. Even though you are a system admin you find out that you do not have rights to edit or share the canvas apps and flows owned by your colleague who left. Or if you were using ALM process using Power Platform Build Tools in Azure DevOps and the canvas app that was deployed is now owned by your DevOps Admin. Whatever the case – Worry not!! Power Apps have provided bunch of PowerShell scripts for us to work with.
Before we start
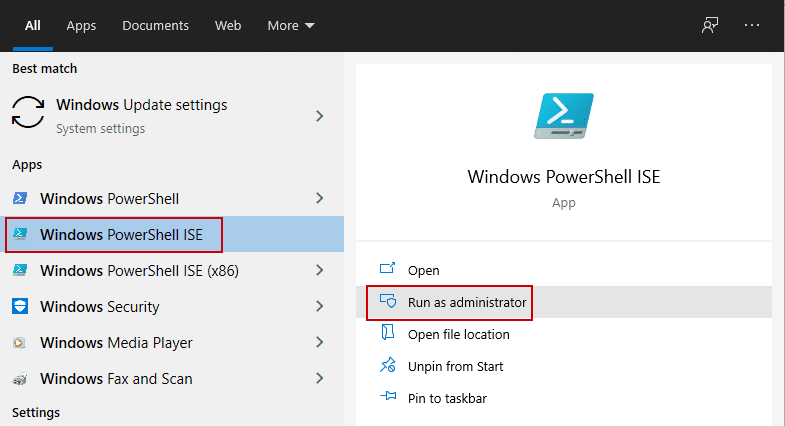
First, we need to install the required Power Shell modules. So, open your Windows PowerShell ISE in admin mode.
Copy, paste the below commands in the scripting area of Windows PowerShell ISE to install the required Power Shell modules.
Add-PowerAppsAccount
Set-AdminPowerAppOwner –AppName '4321fda5-abcd-4321-12bd-1234898a4321' -AppOwner $Global:currentSession.userId –EnvironmentName '12346be2-f047-1234-1234-abcd4d0c1234'
Run the command by using the Run Script button or pressing F5 on your keyboard.
Change owner of canvas app
Once you have installed the required modules. Let us now look into the process of changing the owner of canvas app. To change the owner, you will need the App Id and Environment Id.
Getting the environment id
To get the environment id you have to login to make.powerapps.com and choose your environment from the environment selector option. Once the page loads with the environment you selected observe the URL. It will be something like: https://make.powerapps.com/environments/12346be2-f047-1234-1234-abcd4d0c1234/home. The GUID after environment is your environment id. Copy and save this id as we will need it later.
Getting canvas app id
Using the environment id, you retrieved above create a new script in Windows PowerShell ISE and copy, paste the below command.
Add-PowerAppsAccount
Get-AdminPowerApp –EnvironmentName '12346be2-f047-1234-1234-abcd4d0c1234'
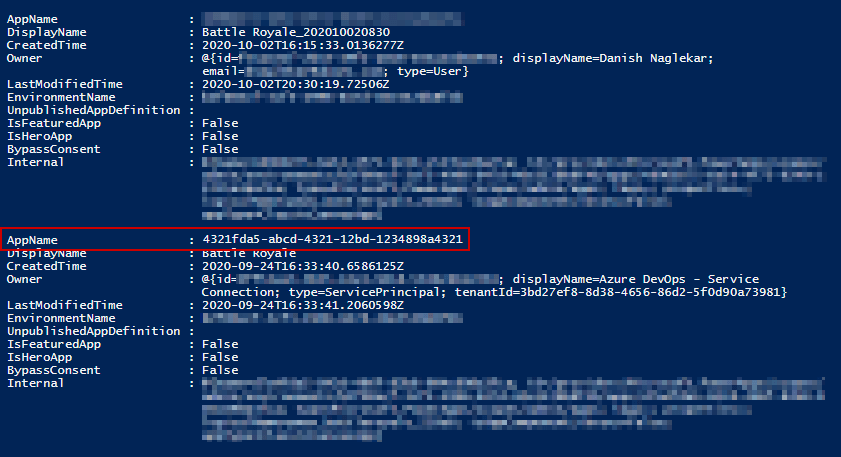
Run the command using F5. After the command fully executes you will see list of all the canvas apps created in this environment (as shown below). Find your app and copy the GUID of your app which is shown as AppName in the list.
Canvas app Owner Change
Now, time to change the owner. As this is an administrative operation you need to be either Global Admin or Dynamics 365 admin. For more information on permissions, read the official MS Docs.
Copy, paste the below command in a new script in Windows PowerShell ISE. This command will assign yourself as the owner of the app.
Add-PowerAppsAccount
Set-AdminPowerAppOwner –AppName '4321fda5-abcd-4321-12bd-1234898a4321' -AppOwner $G

Connect-AzureAD
#Replace this with a correct email address
$emailAddress = "user@demo.onmicrosoft.com";
$userID = Get-AzureADUser -ObjectID $emailAddress | Select-Object ObjectId
Set-AdminPowerAppOwner –AppName '4321fda5-abcd-4321-12bd-1234898a4321' -AppOwner $userID.objectId –EnvironmentName '12346be2-f047-1234-1234-abcd4d0c1234'
Change the owner of Power Automate flow
After owner of the app has been changed; time to now look at how to change the owner of the Flows. There could be multiple flows assigned to that user so you would want to loop through all the Flows that belong to that particular user and reassign them to you. Below code snippet will allow you to do that.
Add-PowerAppsAccount
Connect-AzureAD
#Replace this with a correct email address
$previousUserEmailAddress = "user@demo.onmicrosoft.com";
$previousUserID = Get-AzureADUser -ObjectID $emailAddress | Select-Object ObjectId

Write-Host "Previous User Id: "$previousUserID.objectId
#Replace this with your environment id
$environmentName = '12346be2-f047-1234-1234-abcd4d0c1234'

$flows = Get-AdminFlow –EnvironmentName $environmentName | Select-Object FlowName, DisplayName
foreach($flow in $flows){
    try{
        $flowOwners = Get-AdminFlowOwnerRole –EnvironmentName $environmentName –FlowName $flow.FlowName | Select-Object PrincipalObjectId, RoleId

        foreach($flowOwner in $flowOwners){
            Write-Host "Identifying: "$flow.DisplayName" | "$flow.FlowName

            if($flowOwner.PrincipalObjectId -eq $previousUserID.objectId){
                Write-Host "Changing the owner"
                Set-AdminFlowOwnerRole -PrincipalType User -PrincipalObjectId $Global:currentSession.userId -RoleName CanEdit -FlowName $flow.FlowName -EnvironmentName $environmentName
                Remove-AdminFlowOwnerRole -RoleId $flowOwner.RoleId -FlowName $flow.FlowName -EnvironmentName $environmentName
            }
            Write-Host "---"
        }
    }
    catch [System.Exception]{
       Write-Host $_.Exception.Message
   }
}
Make sure to change the values on the highlighted rows above. And as we did for canvas app instead of using $Global:currentSession.userId you can use any user’s object id from Azure.
Hope this helps.
About the Author:
Microsoft Business Application MVP working with Power Platform, Dynamics 365 CE & Azure; passionate to learn new technology and create innovative solution
Reference:
Danish (2020). Changing the owner of Canvas Apps & Flows. Available at: https://powermaverick.dev/2020/10/06/changing-the-owner-of-canvas-apps-flows/ [Accessed: 3rd March 2021].