Alan Richards was a speaker at the European SharePoint Conference 2011. Why not see if you can expand your knowledge from reading Alan’s insightful blog post!
If you have been to this blog before then you will know about how much use I make of InfoPath 2010 and that one of the major uses for where I work is our Academic Review day. Its a program of interviews with students and their parents that happens twice a year.
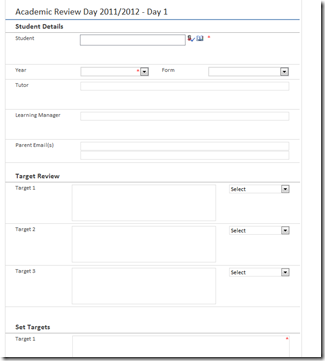
This year I was asked of it was possible to create a way that the forms could be printed for certain students as the main input form is not really printer friendly, as you can see below.
Creating A View
To achieve the desired outcome I started by creating a different view, to do this open the original form in InfoPath 2010 and click on the Page Design tab on the ribbon

Click on the New View button and give the view a name

You will now have a blank form that you can design to include the desired fields and layout that you want for printing

Here is a screenshot of the same form as above but set out in a different print friendly view

Printing View Options
Once you have designed your view you can setup how it prints using the options. In Page Design view (selected from the Ribbon) click on Properties

Here you can set the view to be read only and if you want to use any background colours of images. On the Print Settings tab you can select how the form will be printed; portrait or landscape and if you want to include any header or footer.
Switching Views
Once the view has been created your users will need to select the view they want to print from, one of the ways of doing this is to use the drop down box that appears at the top of the main form when you open it.

Another option is to add a button to the main form which, when clicked, will switch to the print view.
To add the button open the original form and at a convenient place insert a button
![]()
Double click the button and select Rules as the action and enter a label that is appropriate

Now click on the Rules button and for the actions of the rule click Add and select Switch Views

As shown above select your Print view and click OK

Why not keep up to date with Alan’s brilliant work by joining our community or by following us on twitter or facebook!