We all remember our first time, whatever that means. In this blog post I want to walk you through your first SharePoint 2013 installation. The public beta has just been announced, and can be downloaded here. There are hoards of rabid SharePoint lovers out there that can’t wait to get their hands on it. Hopefully after this blog post you’ll have a working and functional SharePoint 2013 VM to tear into and start your learning. You can also use it to impress your friends if your TV isn’t as big as theirs.
This blog post is not the SharePoint 2013 version of my SharePoint 2010 Install Guidance blog post. It’s much, much too early for that. And SharePoint 2013 is not even finished. This blog post will just hold your hand through the install to get it up and running. After we’ll all played with it for a few months (or years) then we’ll have a better idea what the “do”s and “don’t”s are. This is not a best practices document.
The first step is to get your platform ready. In my case that’s a Windows 2008 R2 server with all the patches on it. SharePoint 2013 requires at least SP1 for Windows 2008 R2, so I patched it to the gills. As I expect resources requirements for SharePoint 2013 to be higher I gave this VM 10 GB of RAM. Since it’s a test environment I’m also running SQL 2012 on this box and it’s an Active Directory Domain Controller. You should never do this in production, but I cheated a little for this blog post. For the time being I’m creating the same users as I did for SharePoint 2010. You can find that list in this blog post. I also installed SQL 2012. I installed Enterprise Edition, but any edition should work. Go ahead and make sp_install a local admin (or domain admin if you’re foolish like me and doing it on a DC) on the VM, and like SharePoint 2010, give it the DBCreator and SecurityAdmin Server Roles in SQL. Now that the groundwork is laid it’s time to get to the exciting part and actually install SharePoint 2013.
The download is an IMG file and mounts as a virtual optical drive. For my virtualization software to see it I had to rename it to an ISO file. You may need to do some other dance to get it to work. Mount it up and let’s get this party started. As you’re walking through the install you’ll notice that it’s not radically different than the SharePoint 2010 install. You should feel very at home during this process. Like SharePoint 2010 the first step is to run the Prerequisites.

SharePoint Server 2013
This process is very similar to the SharePoint 2010 version, though as times have changed, so have the list of the Prerequisites. Here is the list Prerequisites that SharePoint 2013 installs:

List of Prerequisites
The developers in the audience (I know you’re out there) will love that the .NET Framework 4.5 is there. This will download all the latest versions of the files need to make SharePoint 2013 run. If your server does not have Internet access you can download the files ahead of time and point the Prereq installer at your local copies. You might get to reboot your server after the Prereq installer is finished. Consider this a good time to refill your coffee or see what those crazy cats at I Can Haz Cheezburger are up to. If you do get to reboot, make sure the Prerequisite Installer gives you the “Installation Complete” message. That lets you know it has done its job and you can move on.
After that’s finished go back to the splash screen and click “Install SharePoint Server” You’ll notice these screens are also very familiar. Make sure you pass the SharePoint Installation Intelligence Test and don’t click “Stand-Alone.” If your machine has a D drive, move as many of the installation files off of the C drive as you can.

Choose a file location
If you do everything right, hopefully you’ll see this screen:
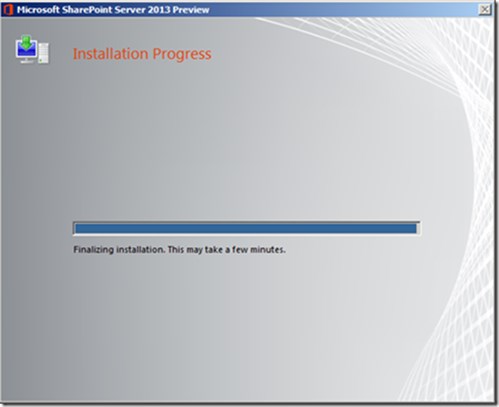
Installation Progress
On my VM they weren’t kidding, this did take a few minutes. I passed the time with The Oatmeal this time.
When the installation if finished we’re greeted by another familiar screen.

Run Configuration Wizard
Under normal situations we would uncheck the “Run the SharePoint Products Configuration Wizard now.” box with extreme prejudice. However, this early in the product cycle, I went ahead and ran it. For those of you just getting your feet wet with SharePoint 2013, this is probably an okay option. Though be completely prepared for a blog post in a couple of months saying how dumb people are that run this wizard. It’s already in draft mode.
The steps of install are almost page by page identical to the SharePoint 2010 installation. You need to answer all the same questions you answered three years ago. Once again it’s a best practice to put the Central Administration port on my anniversary date, 1026. Just kidding.
The first time I ran through the wizard I got this error:

Configuration Failed
(insert sad trombone sound here)
Error messages have gotten pretty good lately, and this is another example of that. This error told me that my SQL instance’s “maxdegree of parallelism” (MAXDOP) setting was not compatible with SharePoint 2013’s needs. The default value is 0. In SharePoint 2010 it was suggested that MAXDOP be set to 1. In SharePoint 2013 it’s downright demanded to be 1 or greater. If the account you’re running the wizard as (in my case sp_install) has permission on the SQL instance to change the MAXDOP setting, it will change it and move out smartly. If not, you get the error message I got above. To remedy this, change the setting and rerun the wizard. Unfortunately this error happens after the SharePoint_Config DB is created but before the Admin_Content_Database is created. To make matters worse, when you rerun the wizard, it can’t reuse the existing SharePoint_Config database, so you need to delete it before you rerun the Config Wizard. You’ll probably need to toggle the “Delete backup…” and “Close existing connections” options when you delete the database.


When the first wizard is finished it fires up the new Central Admin for you. We’ll cover those changes in a later blog post. One thing that is the same is its insistence on asking you to report your errors to the Customer Experience Improvement Program.

Report Errors
For test environments like this and especially with beta products I recommend participating. It’s good to let Microsoft know where the problems are, so they can fix them for you.
After you answer “yes” to you’re brought a screen asking if you want to run the Farm Configuration Wizard. Normally we wouldn’t just answer “no” but “heck no!” However, we’re dealing with beta software here. So I swallowed hard and went ahead and ran the wizard. I gave some money to charity afterwards, so my karma all balanced out.

Welcome Screen
The Farm Configuration Wizard hasn’t changed a lot from SharePoint 2010. The biggest change is the addition and removal of some service applications. Here are our choices:


We see some familiar faces as well as some new friends. I’ll cover these changes in later posts. For now, accept the defaults and click “next.”
When you click next you’ll get this screen:

Loading Screen
There are two things to note about this screen. First is the friendly message, “Sorry to keep you waiting.” No more stuffy messages for us. Only friendly, apologetic ones. Second, this screen has a bug. It will never go away. Well, eventually it will, but it’ll take a power outage or a server crash. To know when everything has been installed, I watched Task Manager. I kept an eye on the W3WP.exe and OWSTIMER.exe processes. They spun up while things are being created, then finally calmed back down. Once they spun down I killed the Internet Explorer window and opened up a new Central Administration window. Mine probably ran for 10 or 15 minutes.
Welcome to your new home:

Your new home
It looks a lot like SharePoint 2010, right down to the red bar telling me I’ve screwed something up.
That’s the end of the installation post. In later posts we’ll go into the configuration steps and some of the changes that show up in SharePoint 2013.
tk
This article was published by Todd Klindt. Check out our resource centre for more SharePoint content from Todd and other SharePoint specialists!