In Part 1 I unveiled my method of applying the Ask in PowerApps property efficiently. As an example I used a simple form with Text input fields. In this Part I will go one step further, using Collections.
I use collections whenever I need to gather groups of items with similar characteristics. For example cars, groceries, Orders, kitchenware..etc..etc..
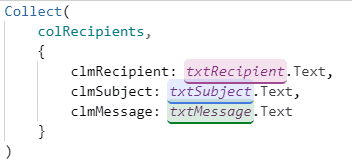
I use the same Form from Part 1. But instead of capturing a single row of data, I store multiple rows of data in a collection named colRecipients.
For the means of this demo I have collected a total of 5 items. So, let’s take a look at our collection. We can preview the collection via the menu bar:

Or to make it easier, we can access the collection via a Data Table control:

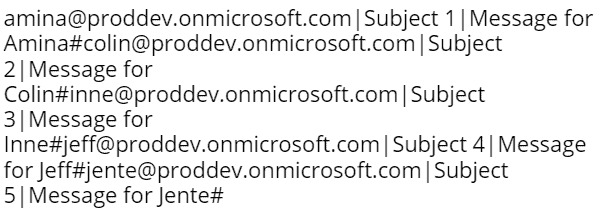
The next step is formatting this collection into a single string, as Flow can only accept string values from PowerApps. Please correct me if I’m wrong. This time I will use 2 delimiters:
- The “|” delimiter to separate the column values
- The “#” delimiter to separate the row values
Before I continue, let’s go over a – in my humble opinion – “Very Bad Practice”. Very often I come across situations, where the ForAll function is combined with a Flow to process the items in a collection. In such scenario we see something that looks like this:

People, people… this is very bad! Let’s say you have a collection of 100 items, the Flow will be called upon from PowerApps 100 times! Instead concatenate the collection in a single string and pass it to Flow for subsequent processing. This translates to just 1 Flow call instead of 100… 😉
Having said that, lets continue to convert the collection to a string. Therefore I use the following formula:

And voila, our collection is “stringed”!
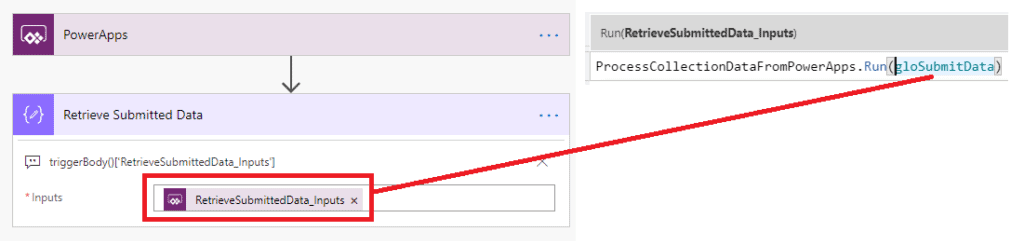
Now I’ll build a Flow that sends a Mail Notification to each of the recipients in the collection. The first step is capturing the data in PowerApps. Just as in Part 1, I set the string to a global variable called gloSubmitData:

Then I capture the data in Flow via a Compose Action. I named the Flow Process Collection Data From PowerApps:
The output results in a string, just as we expected:
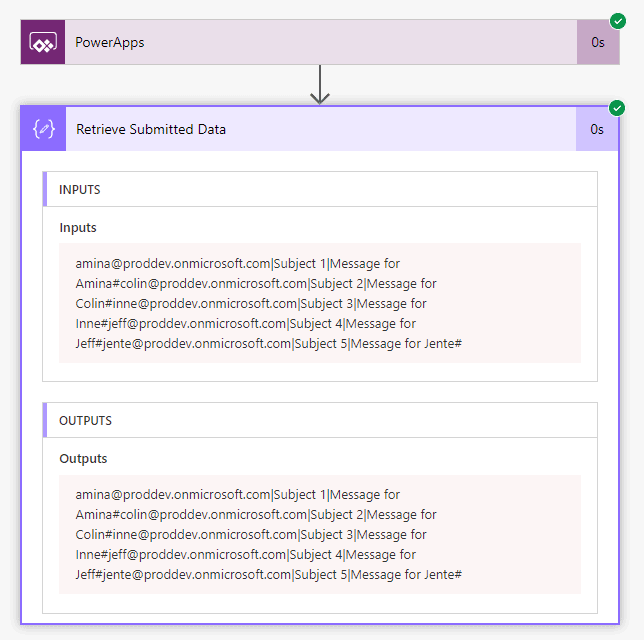
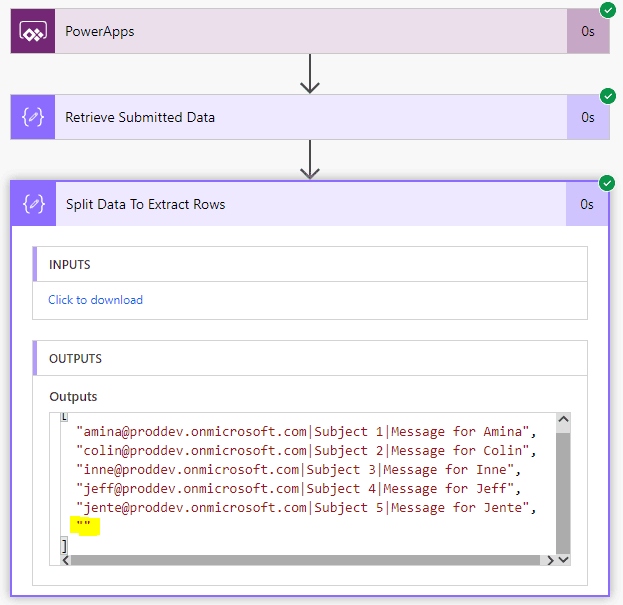
You see, big win here! All the necessary data via a single call into Flow. Now all the data shaping can take place in the Flow itself. First we need to split the output into rows. As stated earlier we use the “#” delimiter to separate the rows.

The previous step results in an Array output including an empty entry at the end (“”) marked Yellow:
We need to clean-up the Array by removing empty rows:
See here, an array with empty values removed:
Now comes a very interesting part. We have an Array of rows and we need to extract the Recipient, Subject and Message. To do this we use the Apply to Each function in combination with the Split function, to convert this Array of Strings to an Array of Objects.


Let’s format the output in such a way, that the Object Properties can be selected in consequent actions. We achieve that by using the Parse JSON action. Copy the output from the previous step and paste it into the sample payload field to build the schema.

Once applied you should have the following result:

Let’s run this and see the output result:

Looking at the output, it seems that it does not differ from the previous Compose output. But wait for it….
If you look at the Dynamic Content you will see something magical appear. The Properties from the Parse JSON output are now available to be used in consequent steps:

Now I want to send a Mail Notification to these 5 recipients. Therefore we can utilize the previous Apply to Each action. It is here that we can utilize the Dynamic properties:

If all steps are followed as outlined, the Flow should look like this:

Now, let’s run this flow!

The end-result: green check marks with a nice Mail Notification sent to the 5 recipients:

Hopefully with this post you now know how to apply the Ask in PowerApps property in your solutions more efficiently.
About the Author:
Clifton is a Microsoft Business Applications Solutions Specialist focused on the Power Platform. In daily life he works as a Functional Solution Consultant and Techno-Functional Lead for the Power Platform at Ordina Group, the largest Independent IT Services Firm in the BeNeLux.. He’s been in IT for over 15 years; mostly in an Infrastructure role. Over the last 5 years he’s shifted his focus focus to the Business Applications realm. And that’s how he ended up being a Board Member and Co-Founder of the Belgium PowerApps & Flow User Group.
Check out his LinkedIn here.
Reference:
Lenne, Clifton. (2019). How I use the “Ask in PowerApps” property efficiently – Part 2. Available at: http://www.yait-c.net/how-i-use-the-ask-in-powerapps-function-efficiently/ [Accessed: 10th April 2020].
Find more great Power Platform content here.