Background
Hi and welcome to the second article that describes how to make a PowerApps-based activity feed based on SharePoint search results. Although I did this as part of a large real-world client project, because of confidentiality considerations I am utilising one of my daughters PowerApps to illustrate the idea. Her CATalogue app which is shown below, has a feature she called the “Mewsfeed” which displays a list of cat-related activity on a SharePoint site collection, in order of recency…
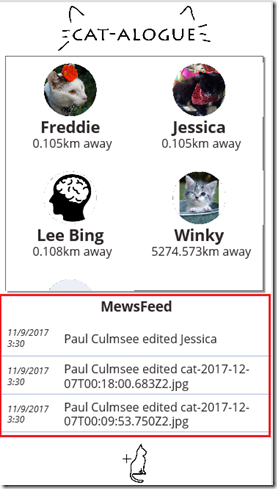
Catalogue
As a reminder, the solution approach is to have PowerApps call an Azure function via a custom connector. The Azure functions runs PnP PowerShell to execute a search against a SharePoint Result Source. You can read the first post if you want to know more about why I utilised this method.
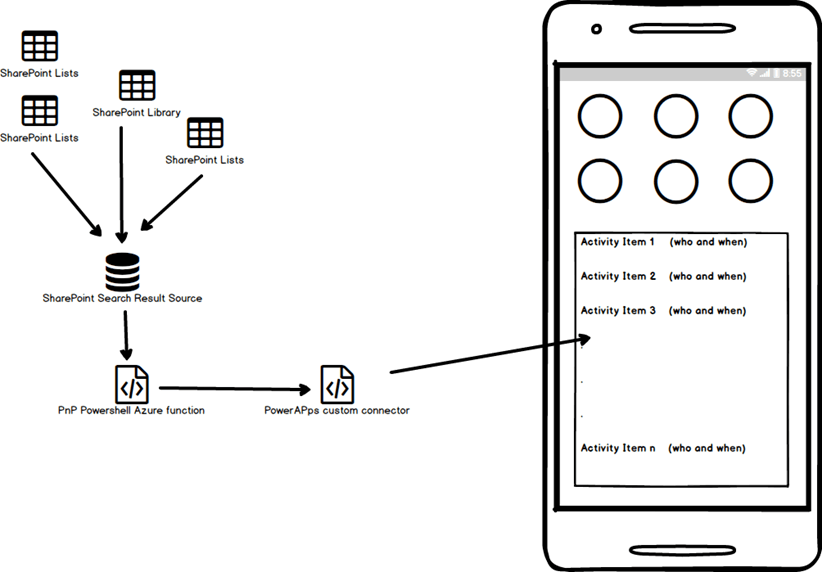
Flow
There are 5 parts to this solution.
- Setting up SharePoint search
- Querying the search index via a PnP PowerShell script
- Creating the Azure function
- Creating the custom connector
- Testing in PowerApps
I covered parts 1 and 2 in the first post where we created a Result Source in SharePoint and and tested a PowerShell script that uses it to bring back the latest 20 search results. Now it is time to do steps 3 and 4. That is, create an Azure function and custom connector so PowerApps can run the script…
3. Creating the Azure function
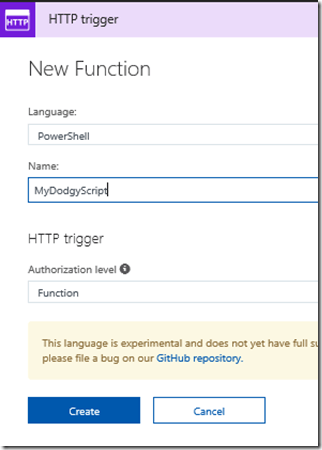
For the uninitiated, Azure Functions allow you to take your dodgy scripts and turn them into web services. In other words, I can set up PowerApps up to run the search script from part 1 and retrieve the results for display. For this to work, we need a user account to connect to SharePoint. Thus, if you do not have a service account to use, go ahead and create one now, making sure you grant it access to your SharePoint site.
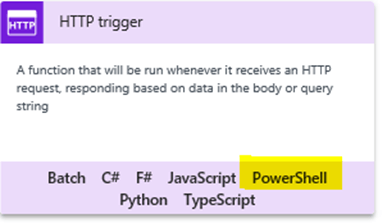
Also, I expect that making an Azure function might be new to some readers. For the sake of brevity, I am not going to exhaustively cover this end-to-end. I will assume you have an Azure subscription, and have created an Azure Function App. The type of function you need is a HTTP trigger running PowerShell as shown below. So give your function an appropriate name and click Create.
HTTP Trigger
In a short time, your function will be provisioned with some skeleton PowerShell code. Take a quick look at this default code because it is useful to understand for the future. Line 2 shows that all of the data posted to this webservice is stored in a variable called $req which is assumed to be Json format. The Get-Content cmdlet reads the content of $req and converts it from Json into a PowerShell object called $requestbody. This is handy knowledge, (despite the fact that for our needs PowerApps will not be sending anything to this function) because it means you can create functions that behave in different ways based on what data you to it send when calling it from PowerApps.
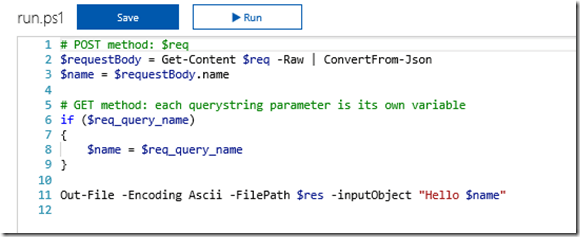
run.ps1
Now that we have seen the default code in a freshly minted function, we have an additional task to complete before we start modifying it. We have to upload the PnP PowerShell cmdlets that among other things, contain the Submit-PnPSearchQuery command that we learnt about in part 1. The easiest way to do this, is to install the PnP PowerShell module to your PC, and then copy the entire installation folder up to your Azure function app. To install PnP PowerShell to your PC or update to the latest build, follow the documented instructions (which usually amounts to typing in “Install-Module SharePointPnPPowerShellOnline” in a PowerShell admin session).
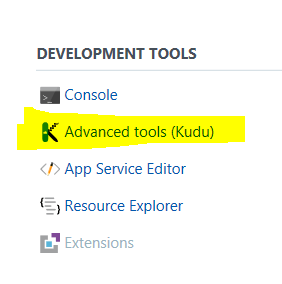
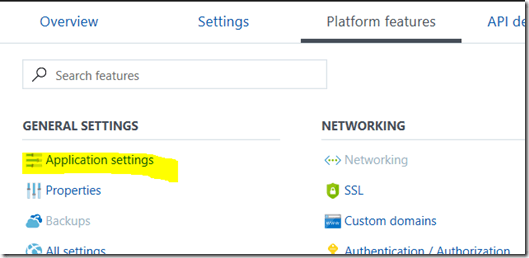
Once PnP PowerShell module are installed to your PC, we need to upload it to the Azure Function App. To do this, I use the Kudu tool that comes built-in to Azure functions. You can find it by clicking on your Azure function app and choosing the Platform Features menu. From here you will find Kudu hiding under the Development Tools section.
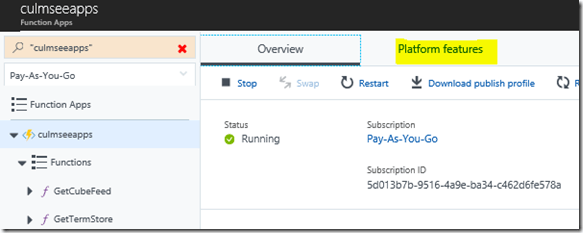
Platform features
Development tools
When the Kudu tab loads, click the Debug console menu and create a CMD or PowerShell console (it doesn’t matter which). We are going to use this console to copy up the PnP PowerShell components we just installed locally. Focusing on the top half of the screen, click on site and then wwwrootfolders. This is the folder where all of your azure functions are stored (you will see a folder matching the name of the function we just made). What we will do is install the PnP modules here, so it can be used for other PowerShell-based functions that you are sure to develop ![]() .
.
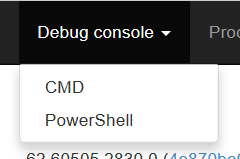
Debug console
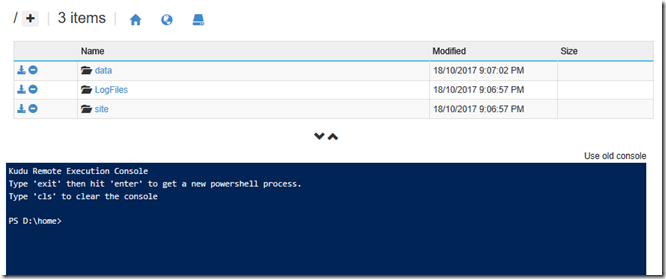
Click the + icon to create a folder here and call it “Modules”. From here, drag and drop the PnP PowerShell install location from your PC to this folder. In my case PnP was installed into C:\Program Files\WindowsPowerShell\Modules\SharePointPnPPowerShellOnline\2.19.1710.1 on my PC. Thus, I copied the 2.19.1710.1 folder and all of its content here.

Modules
Once the copy is done, click the folder to confirm the PnP modules are there…
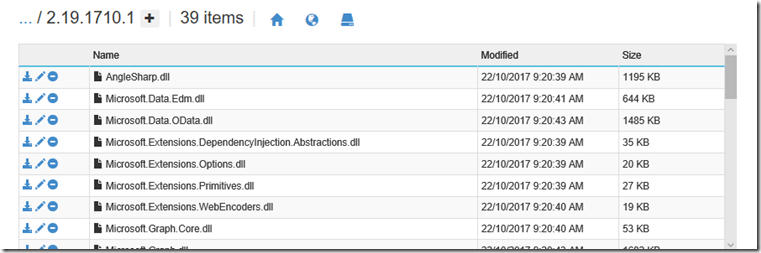
39 items
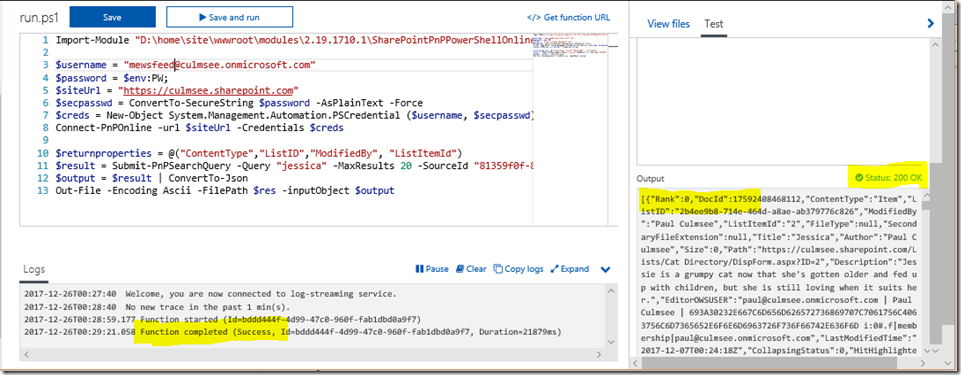
Now let’s turn our attention to the script itself which actually looks like this…
1. Import-Module "D:\home\site\wwwroot\modules\2.19.1710.1\SharePointPnPPowerShellOnline.psd1" -Global
2. $username = mewsfeed@culmsee.onmicrosoft.com
3. $password = $env:PW;
4. $siteUrl = https://culmsee.sharepoint.com
5. $secpasswd = ConvertTo-SecureString $password -AsPlainText –Force
6. $creds = New-Object System.Management.Automation.PSCredential ($username, $secpasswd)
7. Connect-PnPOnline -url $siteUrl -Credentials $creds
8. $returnproperties = @("ContentType","ListID","ModifiedBy", "ListItemId")
9. $result = Submit-PnPSearchQuery -Query "*" -MaxResults 20 -SourceId "81359f0f-8e1d-4b51-8251-1c4f2006e909" -RelevantResults -SortList @{"LastModifiedTime" = "Descending"} -SelectProperties $returnproperties
10. $output = $result | ConvertTo-Json
11. Out-File -Encoding Ascii -FilePath $res -inputObject $output
Notes to the script:
- Line 1, via the Import-Module cmdlet, enables us to use the PnP PowerShell cmdlets we just uploaded.
- Lines 2-7 are about setting up the credential to log into SharePoint online. This uses the service account I mentioned earlier
- Lines 8 and 9 set up and execute the query against the SharePoint Search Result Source created in part 1. Line 8 specifies the fields we want to return in an array which is then specified in line 9 via the “–SelectProperties $returnproperties” parameter. After all, no point wasting bandwidth sending back data to PowerApps that we are not going to use…
- Line 10 and 11 format the results into Json, ready to send back to PowerApps.
Handling passwords
An important consideration here is addressing the issue of passwords. This is where the $env:PWcomes in on line 3 of my code. You see, when you set up Azure Functions application, you can create your own settings that can drive the behaviour of your functions. In this case, we have made an environment variable called PW which we will store the password to access this site collection. This hides clear text passwords from code, but unfortunately it is a security by obscurity scenario, since anyone with access to the Azure function can review the environment variable and retrieve it. Therefore a better (but not foolproof) solution is to use Azure Key Vault via this method described by Darren Robinson, but this will take us too far afield from an already long article.
In any event, you will find the ability to specify an environment variable under the Applications Settings link in the Platform Features tab. Scroll down until you find the “App Settings” section and add your password in as shown in the second image below. Calling the new setting PW is optional – just make sure you update line 3 of the PowerShell code to whatever name you choose.

Slot setting
Right so it’s now time to test our function. Simply click the Save and run button, and if all goes to plan, you will see a “function completed” message in the logs and a status of 200 OK in the Outputs section of the screen, along with a heap of Json. Don’t proceed further until you are seeing this output. If it does not work here, it certainly will not work in PowerApps!
Logs
4. Creating the custom connector
Now we come to the area that is most scary-looking and error-prone, which is to create a file that describes the Azure function in a way that PowerApps can use. In a nutshell, PowerApps needs to be told the type and format of data to expect from our new Azure function.
There are two supported ways to do this. Either generate an OpenAPI file or a Postman Collection. In previous blog posts I have taken the OpenAPI route and used the Open API Spec Generator (specgen) to create the custom connector. This time, for the sake of illustrating the alternative, I will use the Postman method to do it instead. For the uninitiated reading this, Postman is a powerful and versatile tool that helps developers make and debug HTTP requests. Like Fiddler, I recommend anybody that has to work with or debug webservices to keep it handy.
So lets get down to business.. here are the steps to make the collection we need.
1. In your Azure function, find the Get function URL link, click it and copy the URL to clipboard. This is your web service endpoint that PowerApps will talk to.

Note: The structure of an Azure functions URL is important to understand. Take close note of the code parameter as you will need it later when troubleshooting…
https://[appurl].azurewebsites.net/api/[function name]?code=[ a string of characters ]
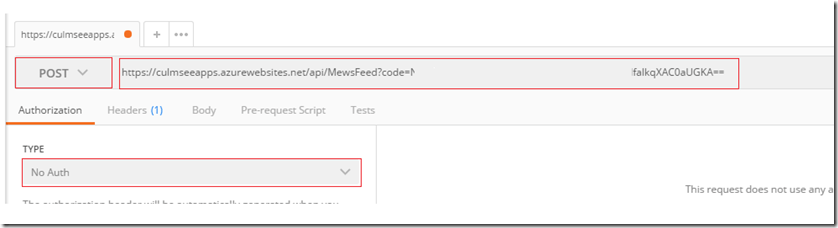
2. Start Postman, and on the Builder tab, select POST for the HTTP method, enter the request copied URL for the function and set Authorization to No Auth. Click the Send button and wait for the reply…
Post
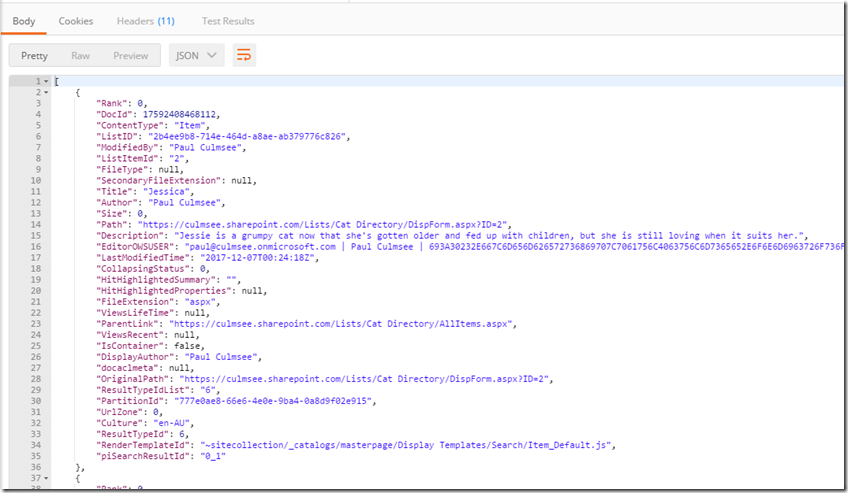
The response field contains the full response from the API. If all goes to plan, you will see the same Json from your successful test of the PowerShell script earlier. If you get an error, go back to the Azure function and check the log screen to see what happened.
Body


Save request
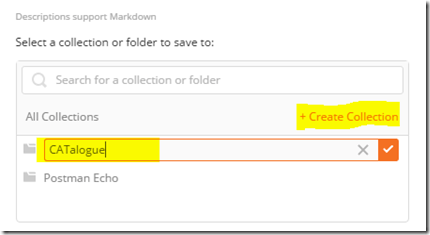
4. Further down the dialog box, click + Create Collection and provide a collection name. Note, also be careful here because the custom connector uses whatever you type here when you call the API. In the example below, I called it “CATalogue”. Click the tickbox and then click the “Save to CATalogue” button (the name of the button obviously depends on your collection name).
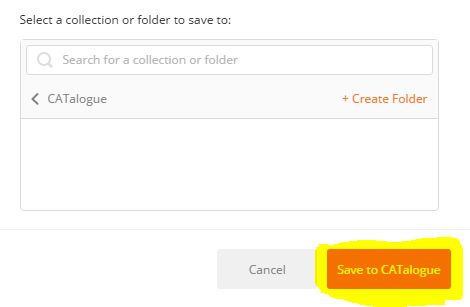
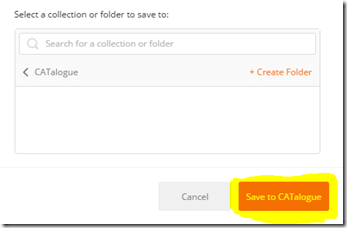 CATalogue
5. Unfortunately we have only saved the HTTP request made to our Azure function so far. This is insufficient, because we need the response with the Json search results so that we can create the custom connector that PowerApps needs. To add the response to the collection, find the Save Response button to the right. Click it, give your response a name and save it (I called mine “GetMewsFeedResponse”).

Save response
6. Next we clear all headers from the collection. Microsoft states that:
“before you export the collection, remove [any] content type and security headers – these were required to make API requests, but they are handled differently in the custom connector.”
Who am I to argue eh? So to to this, find your way back to the API call, rather than the example we just saved. If you are still in the example screen, you will find your API in the navigation above the example name as shown below. Click it to get back to your API call.
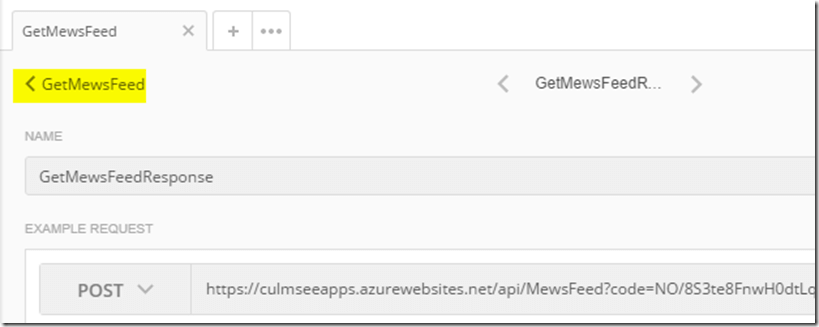
GetMewsFeed
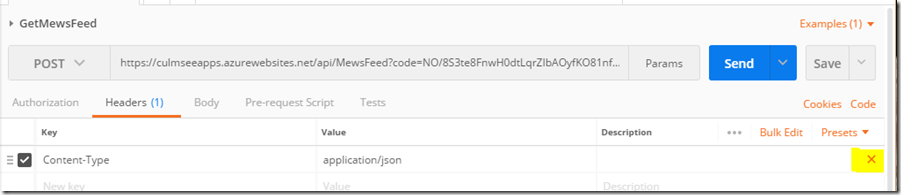
In the Headers tab, hover over each header, and choose the X next to the header to remove it. Choose Save to save the collection again.
GetMewsFeed
7. Now we are ready to export the collection for PowerApps. Choose the ellipsis (. . .) next to the collection, then choose Export. Choose the Collection v1 export format and save the file.
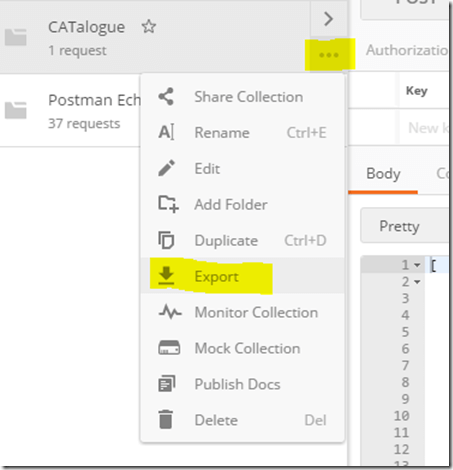
Export
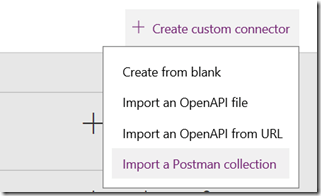
8. Now it is time to import our newly minted Json file into PowerApps to create a custom connector. Sign into PowerApps, navigate to Custom Connectors and click + Create Custom Connector and then choose Import a Postman collection. Choose the file we saved in the previous step, give it an appropriate name and click Continue.


Custom connectors
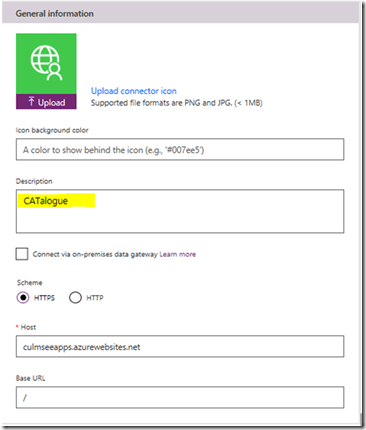
Here you will see the first implication of naming decisions you made in previous steps. You will be presented with a General Information screen, which as can be seen below, shows a description based on the name of the collection that you specified in step 4…
General Info
Create a collection
Click the Continue button and you will be taken to the Security tab. We have nothing to modify here, so click Continue to move to the Definition tab, which is where the important stuff is. What you should notice about this screen is the Summary, Description and Operation ID settings matched what you typed in when exporting from Postman in step 3. You have an opportunity here to modify this if you wish…
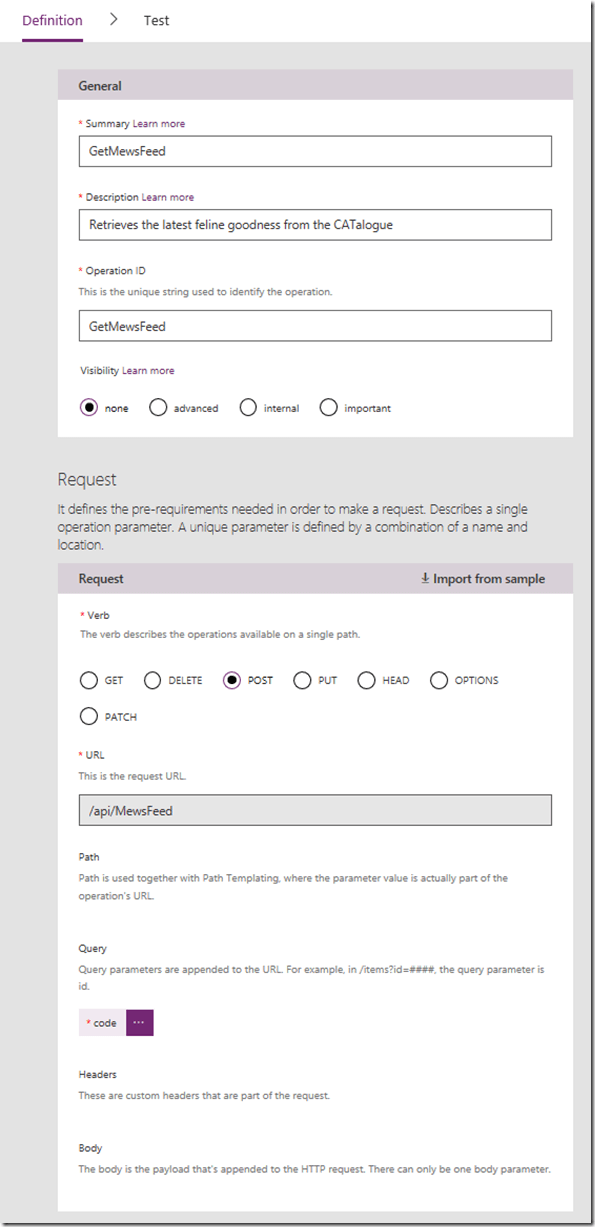
Getmewsfeed
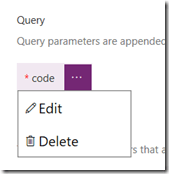
There is a super-important step here! Note how the above image shows a code parameter in the Query section. This has been inferred from the Azure function URL which we examined in step 1. We need to make a change to this configuration, as well as double check things. In my testing, Postman collections do not always capture the code correctly, so click the ellipsis (…) and choose Edit so we can make sure it is right.
Query
Comparing the Default value for code in the custom connector to the URL from the Azure function portal below, we can see a discrepancy. The former seems to have stripped off a couple of characters, so make sure that the code parameter in the custom connector matches the azure function URL exactly.

Default Value
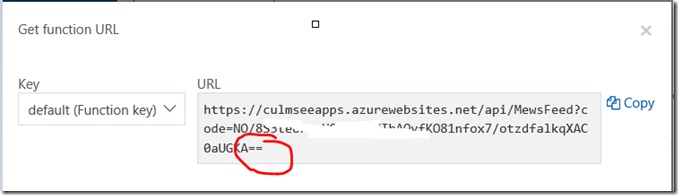
Get function URL
Additionally, change the Visibility section from none to internal. If you do not do this, PowerApps will ask users to add the code when they use this data source. In some enterprise scenarios this is a desirable behaviour, but not in this case…

Learn more
Now that you have made your edits to code, click the Back button. Let’s now verify that we are sending useful data to PowerApps. Find the Response section as shown below and click on the box that containing the number 200.
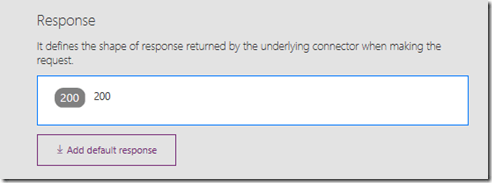
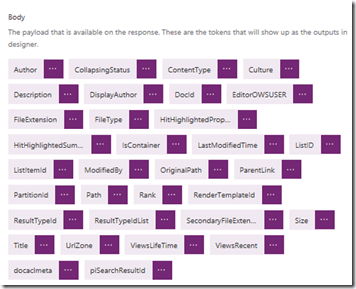
Response
You will now see what has been done with the Postman collection. All of the Json from the search result has been used to create a payload. Each and every piece of search data that is returned by the PowerShell script is shown. Clicking on the ellipsis for any of them allows you to review the settings and change data type if necessary (eg from a integer to a string).


In my case, we are not going to modify the schema that PowerApps has detected. However, there is a possibility that in your case, you might have to if the data types for the parameters have been incorrectly inferred. So let’s go ahead and create our connector by clicking the Create Connector link.

Connector name
Assuming all goes to plan, you have a Shiny new connector!

Shiny new connector
Right! If you have gotten through all that then well done! While all of this might seem a bit foreign and intimidating, rest assured that after doing 1 or 2 of these, the whole process is quite straightforward in terms of building a connector. Most of the hard work is figuring out how to call webservices properly, rather than creating the connector itself.
Phew! I think that is enough for now. In the next and final post, we will test this connector to make sure it works and then add it to a sample PowerApp. Until then, thanks for reading…
Reference:
Culmsee, P. (2018). How to make a PowerApps Activity Feed via SharePoint Search – Part 2. Available at: http://www.cleverworkarounds.com/2017/12/31/how-to-make-a-powerapps-activity-feed-via-sharepoint-search-part-2/ [Accessed 5 December 2018]