Are you already running Workloads in the Azure Cloud? I think that almost everyone in IT nowadays uses Cloud in some other way, whether it’s Office 365, Azure Site Recovery, Azure Compute (IaaS) or when you’re just at the beginning at the drawing table – designing phase. Microsoft Azure is dominating in the number of services, and the Q1, 2018 statistics saying that as well.
Microsoft released Admin Center not so long ago, which was formerly going by the name of Project Honolulu. My personal opinion, after my first hands-on experience with Admin Center is really good, this is a big step forward to Modern Management in a Hybrid Cloud scenario. So I started writing this article and share it with the Microsoft Community!
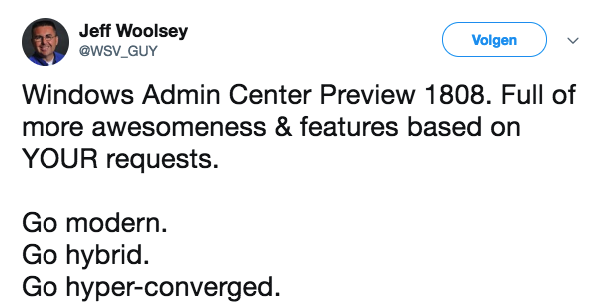
Microsoft just released a new Preview 1808 of Admin Center – see below the Tweet of Jeff Woolsey – Principal Program Manager, Windows Server/Hybrid Cloud at Microsoft. I’m using this latest version in this blog.
Admin Center is, in my opinion, the revolution of how we IT Admins going to manage our Cloud and on-premises workloads in a Hybrid Cloud perspective. We probably all grown up – and (I guess?) still using Microsoft Management Console (MMC) in our daily work. Just for the simple reason – there isn’t a replacement – or better solution yet… That’s is going to change soon, there is a new kid in town with lots of more benefits compared to MMC, and it’s aligning much better with the different Azure Cloud Services and upcoming server 2019 workloads as well!
One significant key improvement of Admin Center Console – it’s entirely HTML5 – web-based. Yes, you hear me correct! Luckily, no Silverlight involved here… think about all the advantages; all the management can take place through from a browser perspective, and won’t require a direct Remote Desktop or MMC “connect to another computer” session anymore to fulfill your management tasks – all combined in one unified pane of glass portal.
One interesting thing to share is that Admin Center doesn’t work on Internet Explorer. Microsoft currently advises Edge (or Google Chrome) for Admin Center.
When you expose applications or web portals to the public internet world in an HA – load balanced manner, always place an Azure Load Balancer, Application Proxy or Azure Traffic Manager – or a combination of both between the Admin Center Virtual Machines and the internet. The Network Security Group on the network interface of the Admin Center server need to have at least HTTPS as open port HTTP as well when u use the new redirection function), therefore know that Admin Center is fully prepared for Azure AD integration, with for instance Azure MFA + Conditional Access – you’re safe and secure in exposing the Admin Center console to the internet.
Microsoft is investing a lot of time in the improvements of Admin Center – and I expect a big bang in new features for Admin Center during the Microsoft Ignite event in September – where Microsoft (hopefully) also releases Server 2019. This new Server OS will have even more integrations and extensions for different Azure and On-Premises services. Looking forward to it, I’ll be there – do I see you there?
See below how the setup of this article looks like in a more architectural picture.
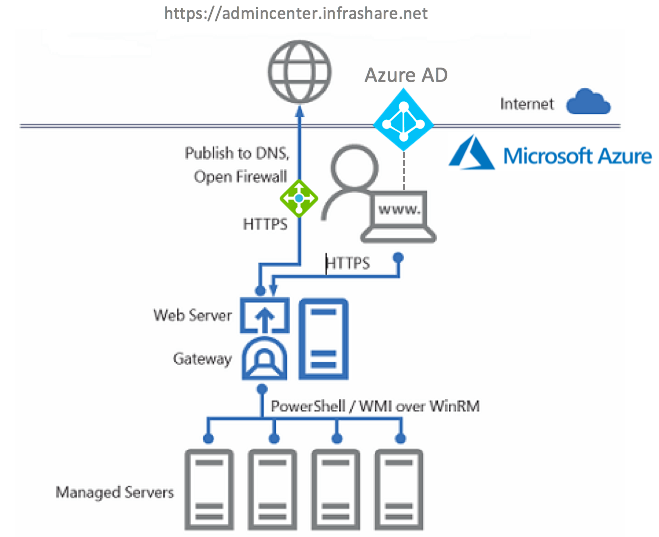
Architectural picture
In this article, I’ll share my insights on Microsoft Admin Center (1808). Show you some of the benefits, and I’ll walk you through the complete installation and configuration process on how you implement Admin Center!
Enjoy reading!
Table of Contents
Click on the title to forward to the subject of content:
- Deploy an Azure Virtual Machine for Admin Center
- Activate Gateway Access for Microsoft Azure and Azure AD
- Configure external access through Azure Load Balancing for the Admin Center Web Portal
Did you know?
- Windows Admin Center Preview 1808 includes a new Apps & Features tool – Apps & Features is a new extension that allows Administrators to remotely manage the components that are installed on their Windows deployments.
- Admin Center is not supported for Internet Explorer – Microsoft advice the use of Edge or Google Chrome!
- It’s a completely browser-based app for managing servers, clusters, hyper-converged infrastructure, and Windows 10 PCs.
- Admin Center Preview 1808 makes it possible to redirect from port 80 to 443 during the installation.
- You can deploy Windows Admin Center in a failover cluster to provide high availability for your Windows Admin Center gateway service. The solution provided is an active-passive solution, where only one instance of Windows Admin Center is active. If one of the nodes in the cluster fails, Windows Admin Center gracefully fails over to another node, letting you continue managing the servers in your environment seamlessly.
- Admin Center now supports Azure Update Management integration from the Server Connect menu
- It comes at no additional cost beyond Windows and is ready to use in production.
- Admin Center is currently only supported for Windows 10 (1709) and Windows Server 2016
- It can be installed on Windows Server with Desktop Experience as well as on the Core version
- Windows Admin Center requires PowerShell features that are not included by default in Windows Server 2012 and 2012 R2. To manage Windows Server 2012 or 2012 R2 with Windows Admin Center, you will need to install WMF version 5.1 or higher on those servers.
- The interaction between server takes place over PowerShell and WMI over WinRM and will be transferred to different IT Administration over a secure SSL connection
- Windows Admin Center is the official product name for “Project Honolulu” and reinforces the vision of an integrated experience for IT admins across a breadth of core administrative and management scenarios.
- Windows Admin Center does not require internet access and does not require Microsoft Azure.
Dashboard Overview screen
See below the standard landing page when you open the Server Manager option for a specific Virtual Machine. The standard CPU, RAM, Network and Disk utilization metrics can be found here as well as resources and power management options. Very useful, but one thing that’s annoying is are all the different frames. The frames are not aligning with the size/resolution of your screen, and cause much more scrolling then needed.
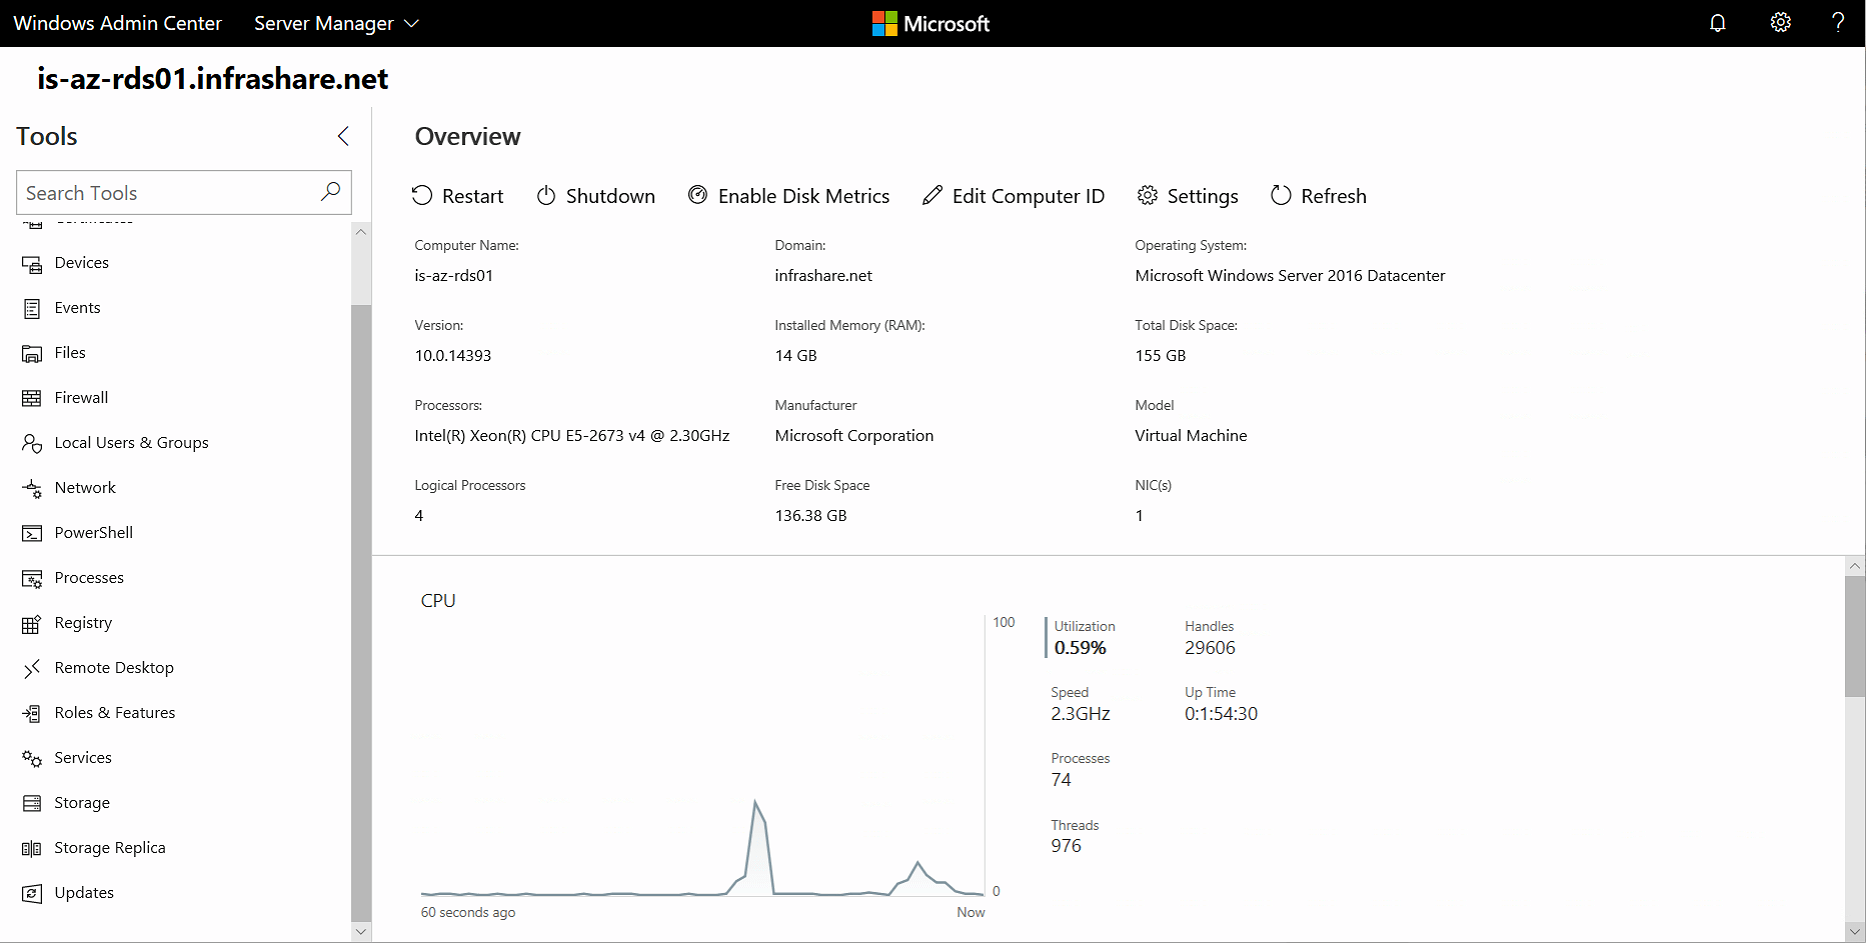
Server Manager
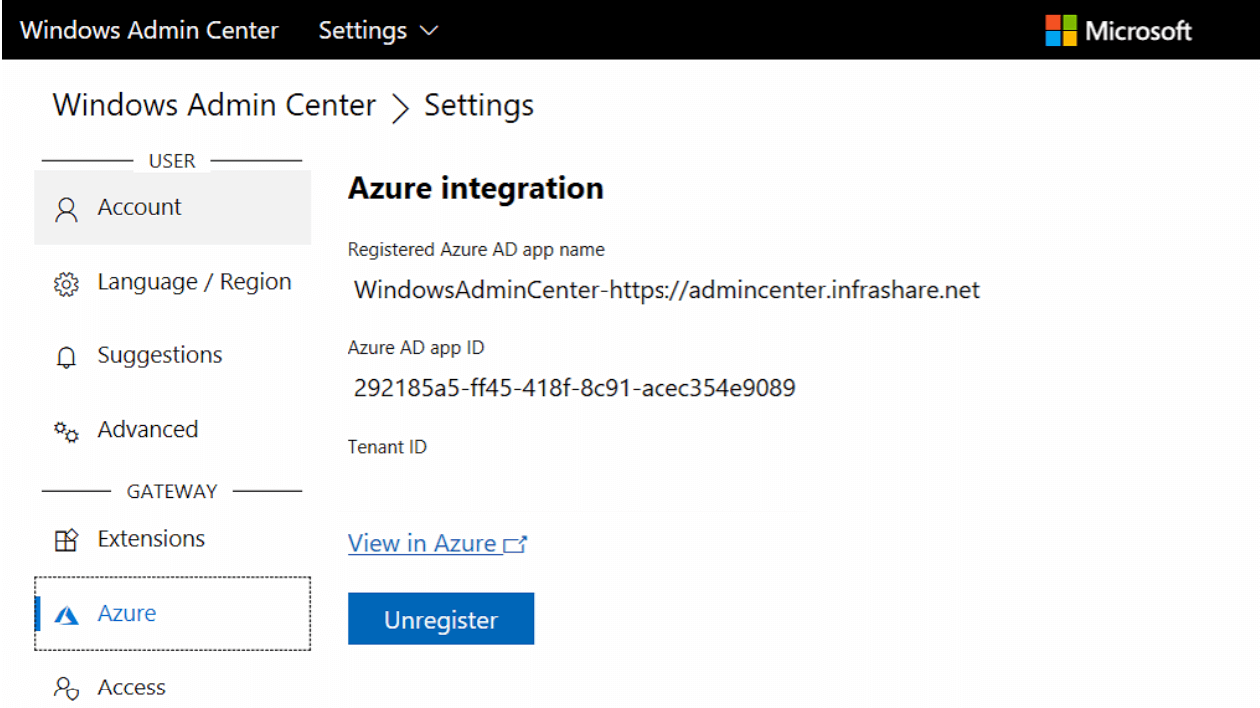
Azure AD integration
This feature is critical when you are already running workloads in Azure, or use Azure AD Connect already. You will need first to register your Windows Admin Center gateway with Azure. You only need to do this once for your Windows Admin Center gateway – the setting is preserved when you update your portal to a newer version.
Another very cool thing is that you can use Conditional Access on the Azure AD authentication level to provide secure access to the Admin Center portal – think about a public scenario – where the gateway is exposed to the internet? You want to have Azure MFA sec. authentication in place, and probably don’t want to require MFA internally? Conditional Access makes that all possible. Very cool/awesome, right?
I’ll describe all the steps of doing this later on in this article!
Azure Integration
Azure Site Recovery Hyper-V support for Azure Virtual Machines

Note: The Virtual Machine and Virtual Switches integration currently only works for Hyper-V server enrolments.
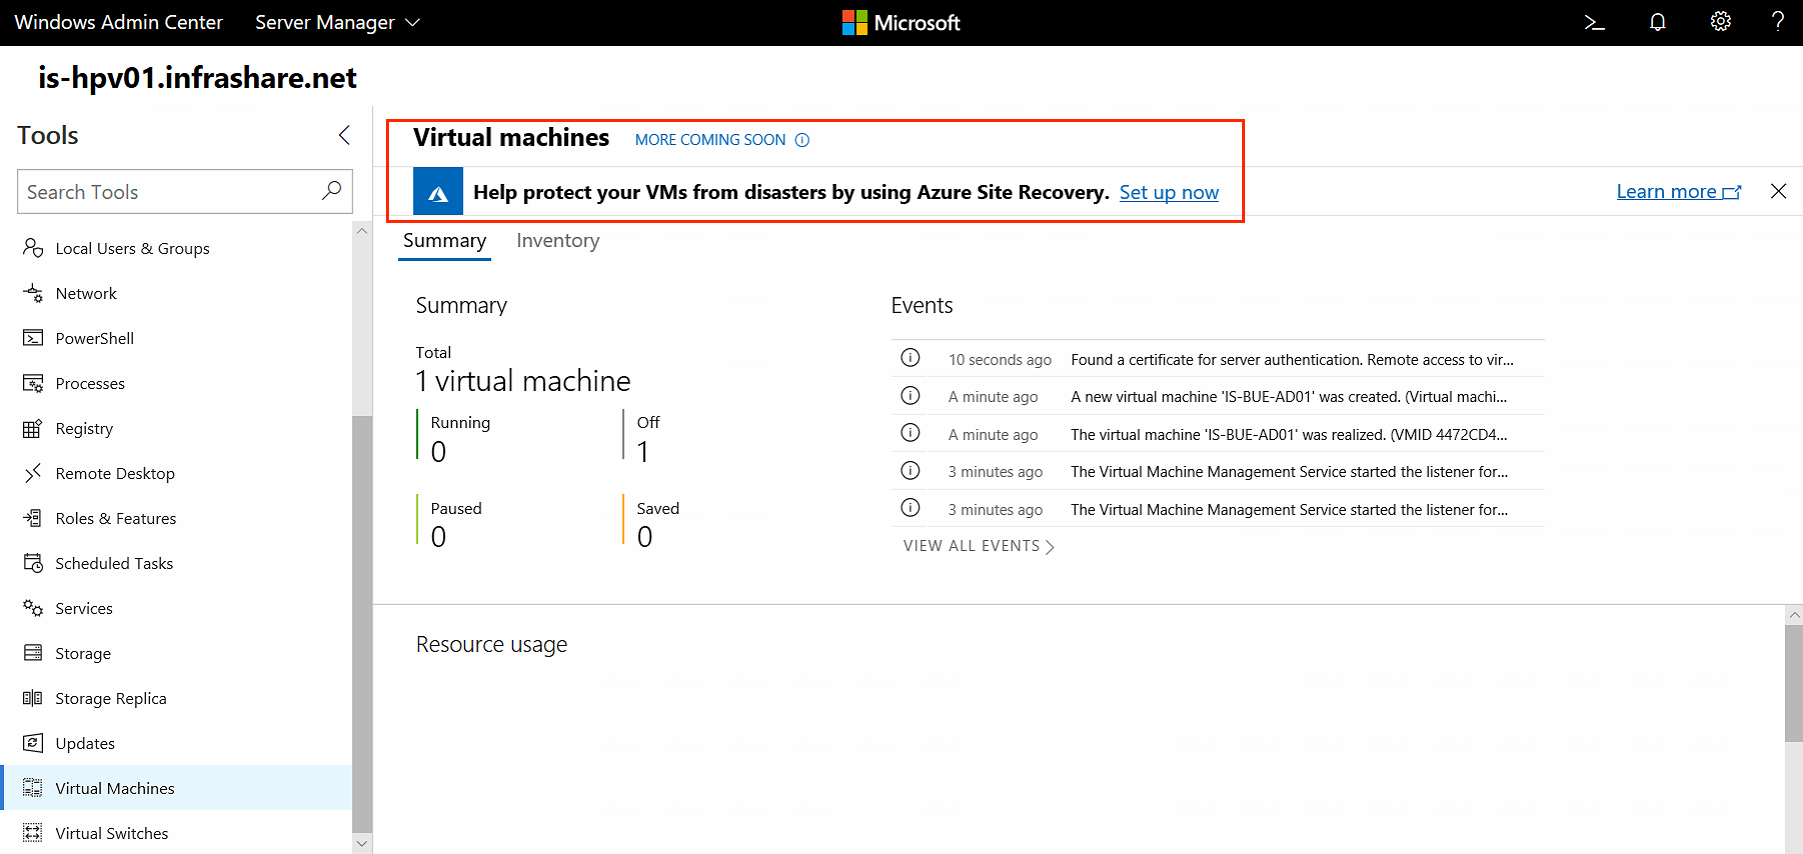
Virtual Machines
Azure Update Management support for Admin Center
Admin Center supports Azure Update Management. Update Management is, in a nutshell, the Cloud version of what Windows Update Services (WSUS) was on-premises.
To activate the Azure Update integration – just open the Server Connection screen in Admin Center. If you aren’t using Azure Update Management yet, please check out this article to get started.
Note: Version Admin Center Preview 1807 or higher is required for the usage of Update Management, and (obviously) requires a gateway connection to your Azure tenant subscription.
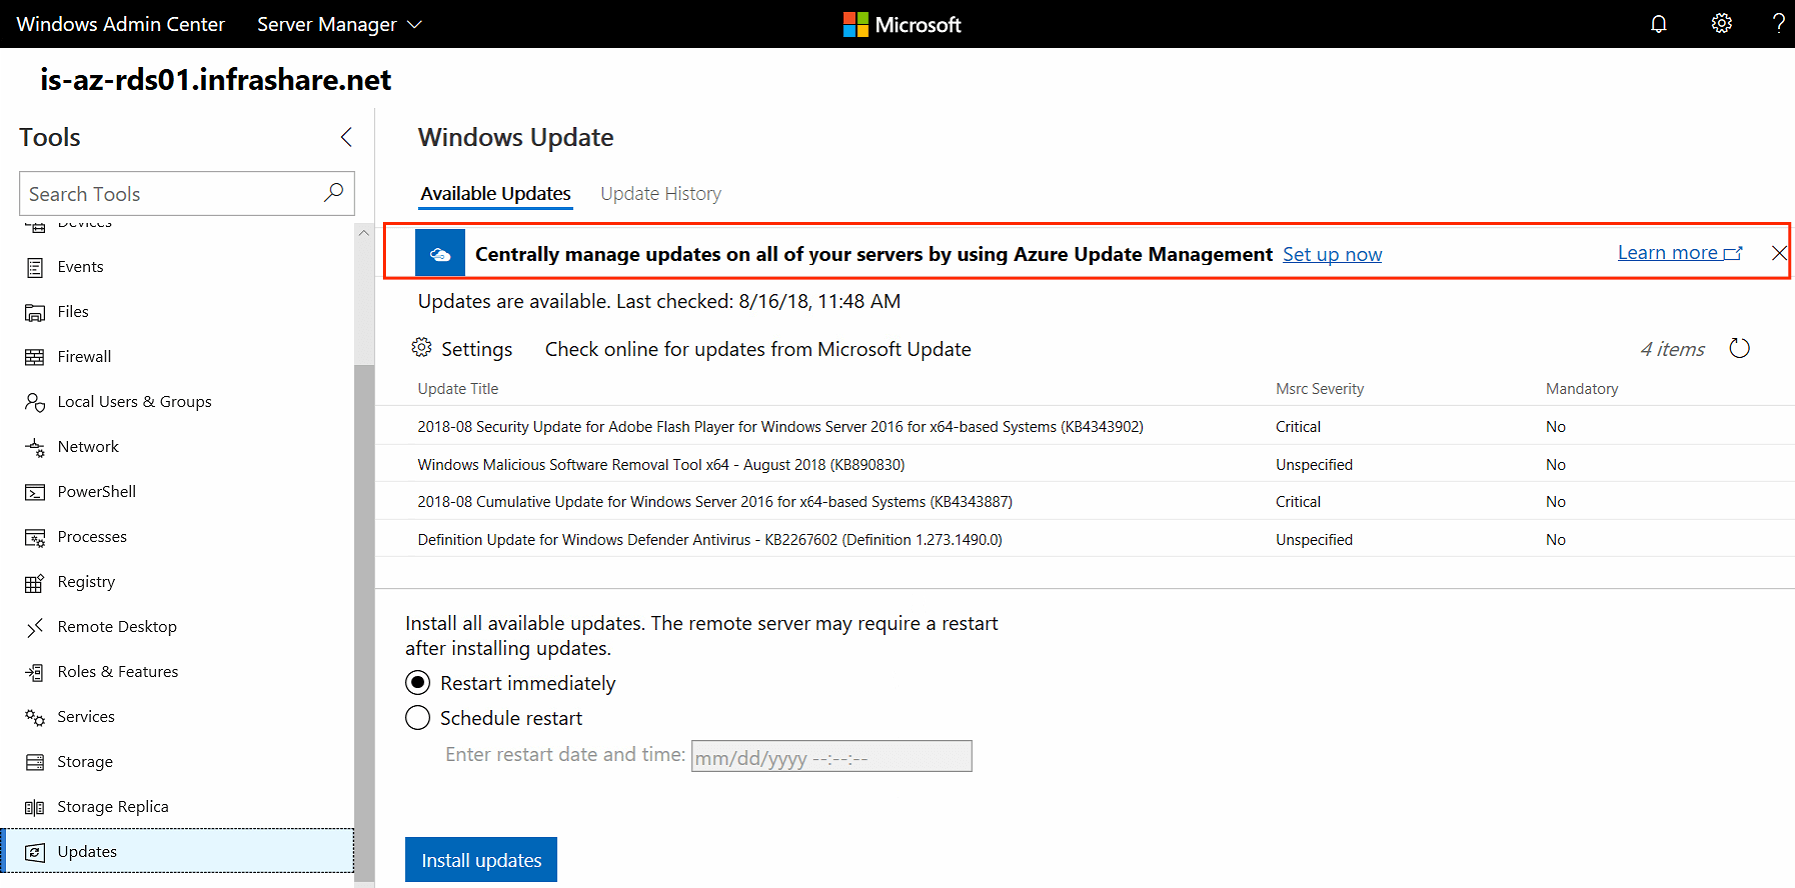
Centrally manage updates on all of your servers by using Azure Update Management
Remote Desktop integration
Say bye to Remote Desktop Management software! Admin Center has it all integrated for free! To use Remote Desktop within Windows Admin Center, you will need to enable Remote Desktop on your Windows Server 2008 R2 server. The frame inside the Admin Center console allows you to manage your Server with Desktop Experience activates!
Note: Are you a Remote Desktops Services – RDS Administrators? RDS now supports HTML and integration with Admin Center as well. Please check out this TechNet articlefor more info!
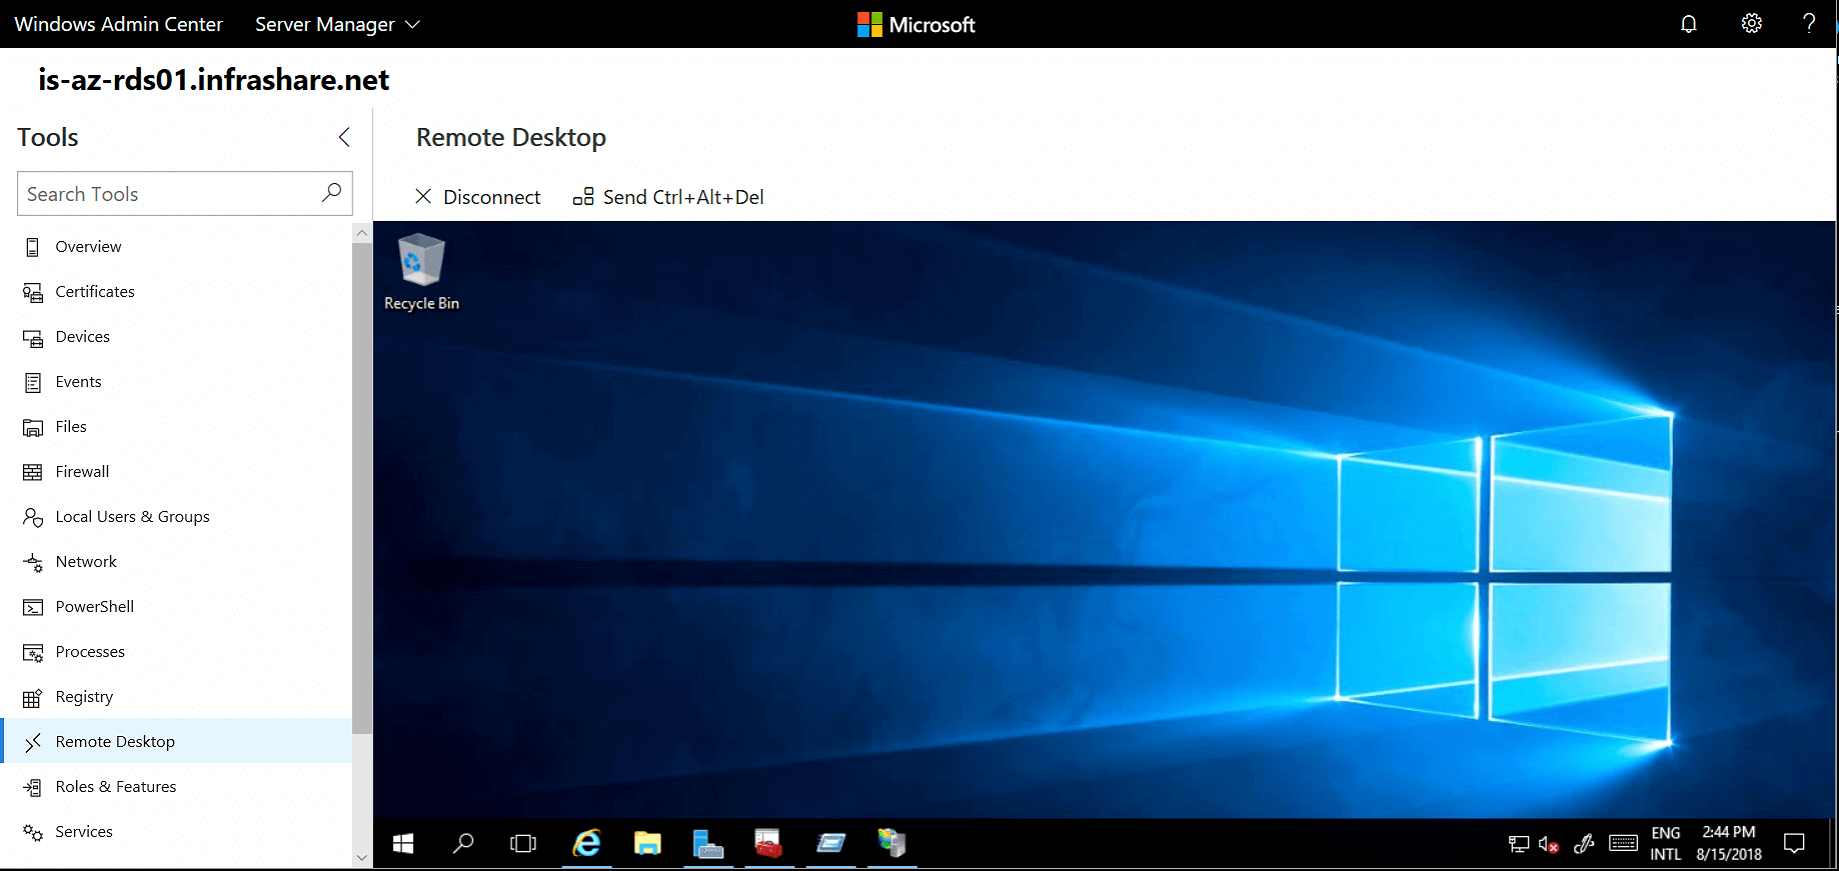
Remote deskop
Extension Manager
The Windows Admin Center SDK is available in public preview. As a platform, growing our ecosystem and enabling partner extensibility has been a critical priority since the beginning. We’ve been working with early-adopter partners to refine the extension development experience of our SDK.
My honest hope is that different vendors, such as Citrix, VMware, Nutanix, and likely others will create customer extensions soon to make the Admin Center more unified and simplified in switching to other consoles for gathering additional information.
Let’s Microsoft and others create one Unified Console to rule them all!
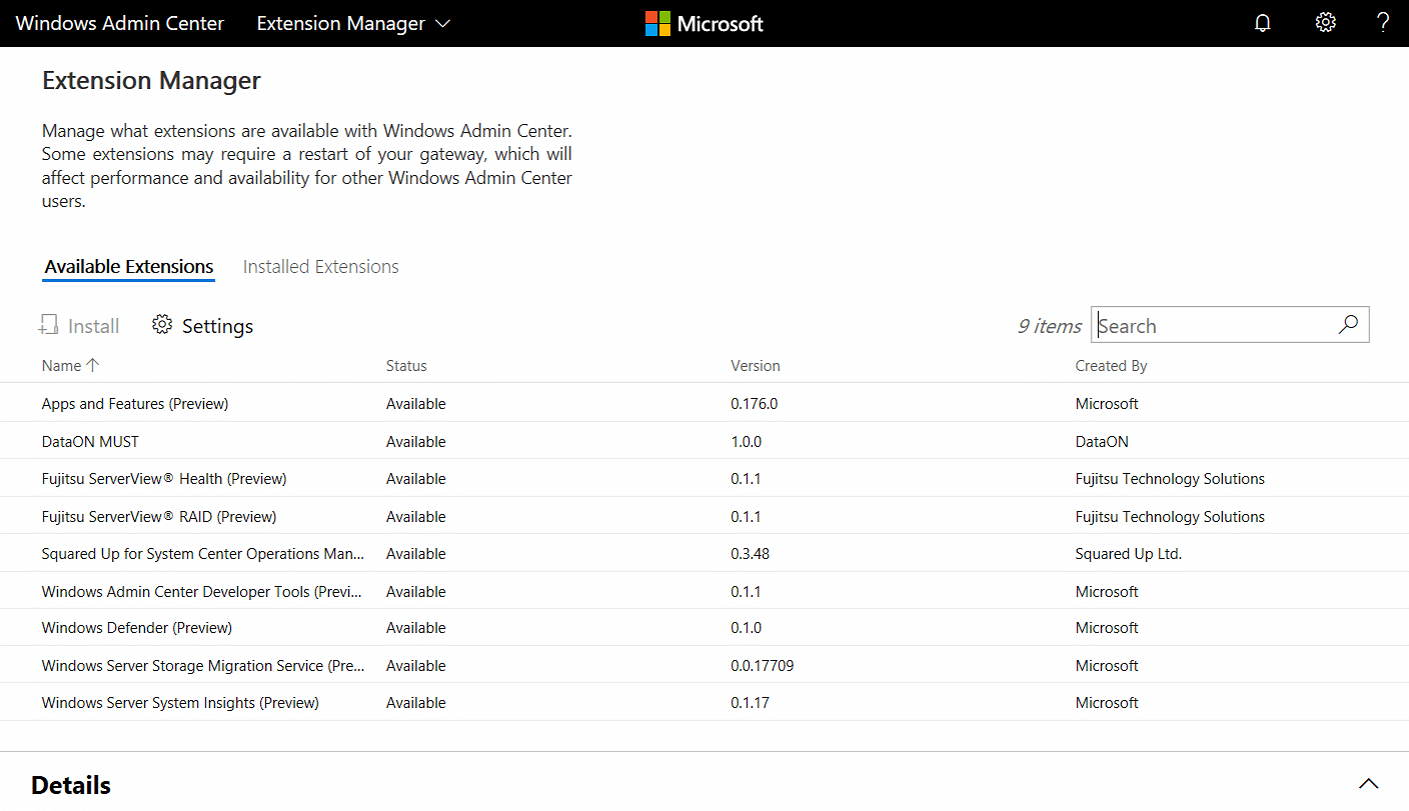
Extension Manager
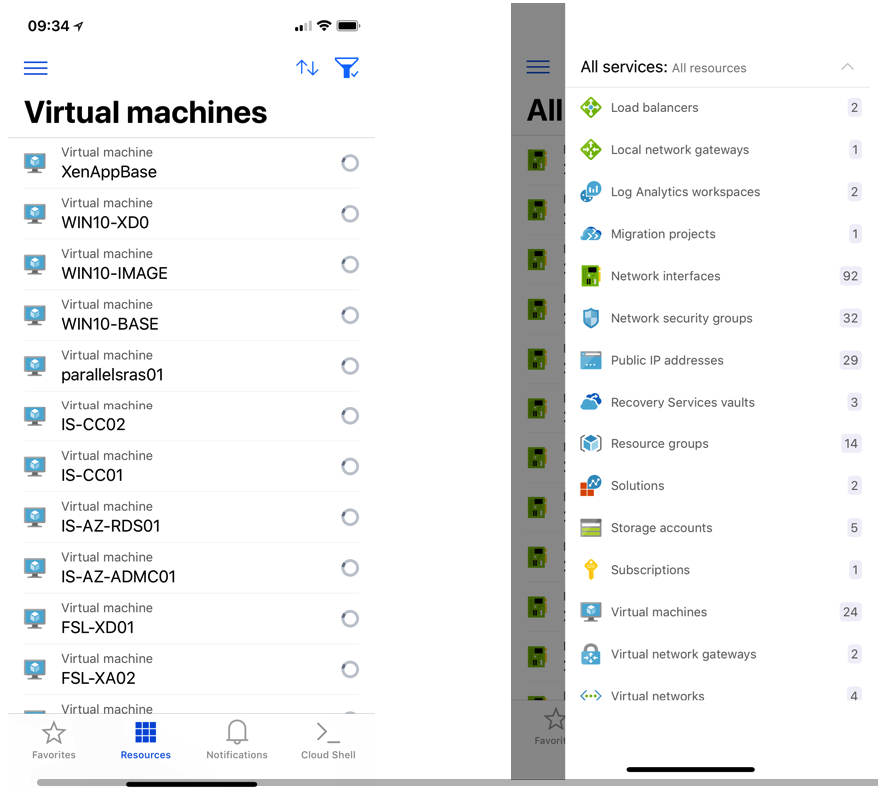
Azure Mobile App
Nothing directly particular to Admin Center, furthermore positively related to management. Microsoft releases a cool Azure Mobile App for Android and iOS where you efficiently can manage your Azure Infrastructure-As-a-Service environment as a snap. Think about scenario’s when you’re on the road and need to change or reboot a Virtual Machine – you can do this all directly from your mobile device – any place, anywhere any time!
Virtual Machines
Deploy an Azure Virtual Machine for Admin Center
For this article, I’ll deploy the Admin Center in Azure Infrastructure-As-a-Service. Of course, you can follow the same steps from the – Download the Admin Center software – section for your on-premises environment as well!
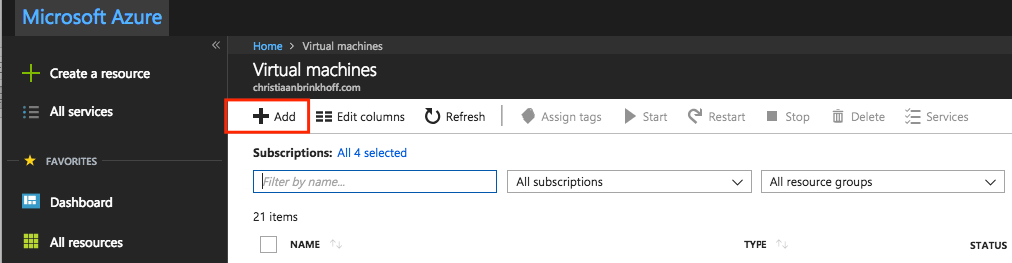
Virtual Machines
Choose for Windows Server 2016 Datacenter

Compute the Virtual Machines
Click on Create
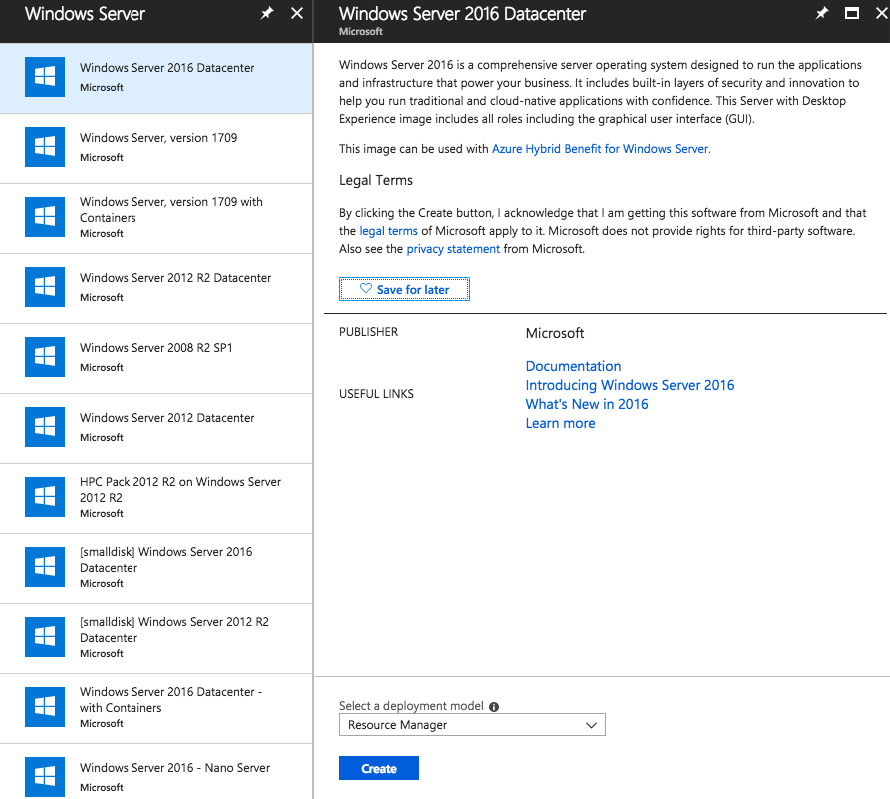
Windows Server 2016 Datacenter
Fill in the required information and click Ok
Extra: Use the HUB program to same resource costs if you have an Enterprise Agreement and Software assurance with Microsoft on Server OS.
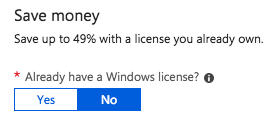
Save money
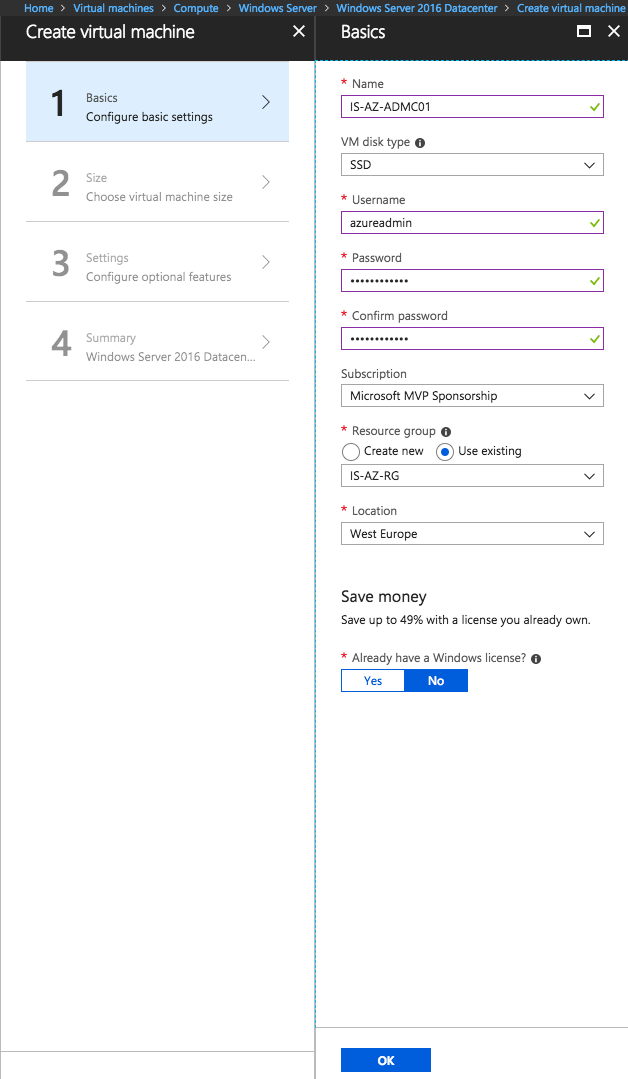
Basics
Choose for a VM size
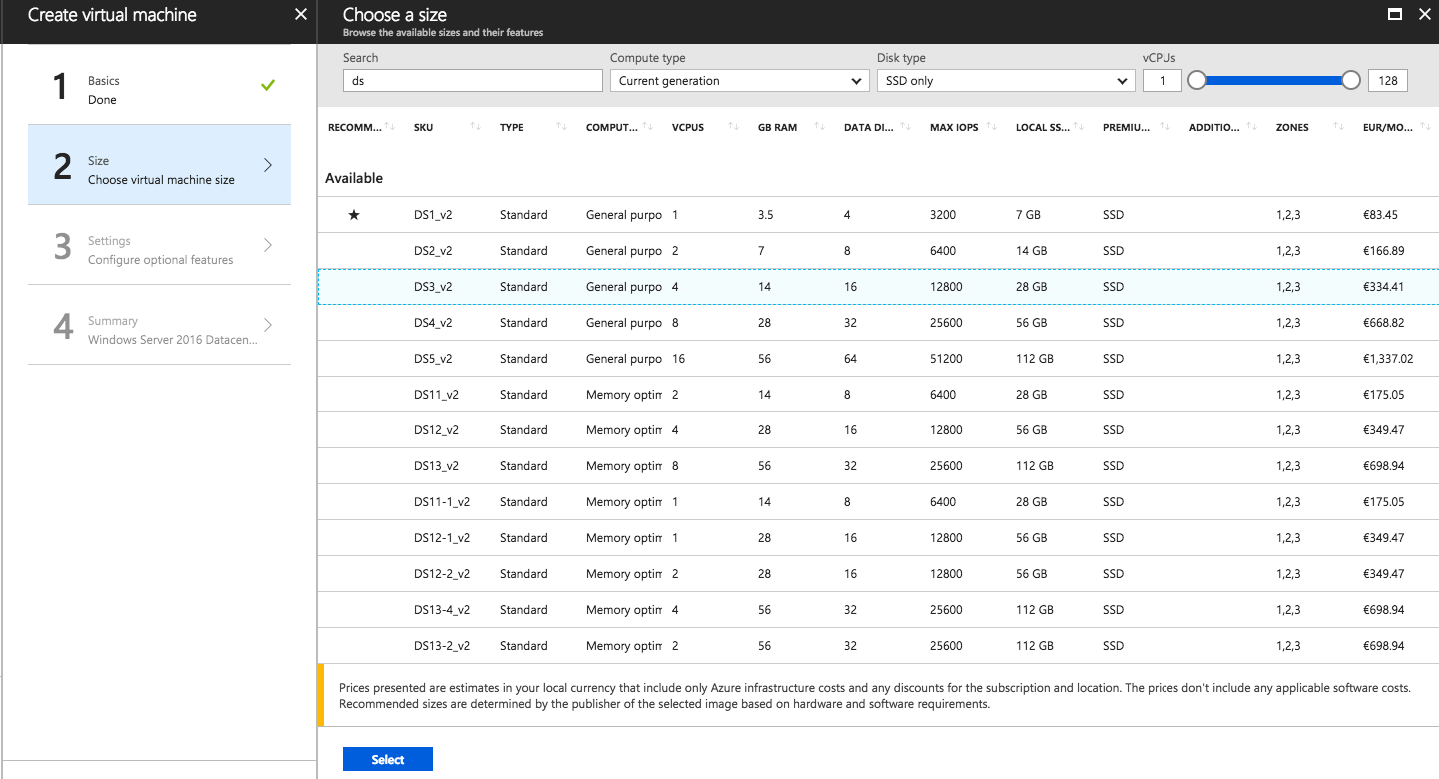
Choose a size
Configure the settings of the Virtual Machine and assign the right Virtual Network.
Click Ok
Note: A public IP is not needed for my customer case, as I’m not exposing my Web Console over the internet directly, but choose to do this over an Azure Load Balancing configuration – whenever you haven’t got a Site-to-Site VPN or ExpressRoute, you’ll need to assign a Public IP and open RDP to provide the Remote Desktop connection for the installation
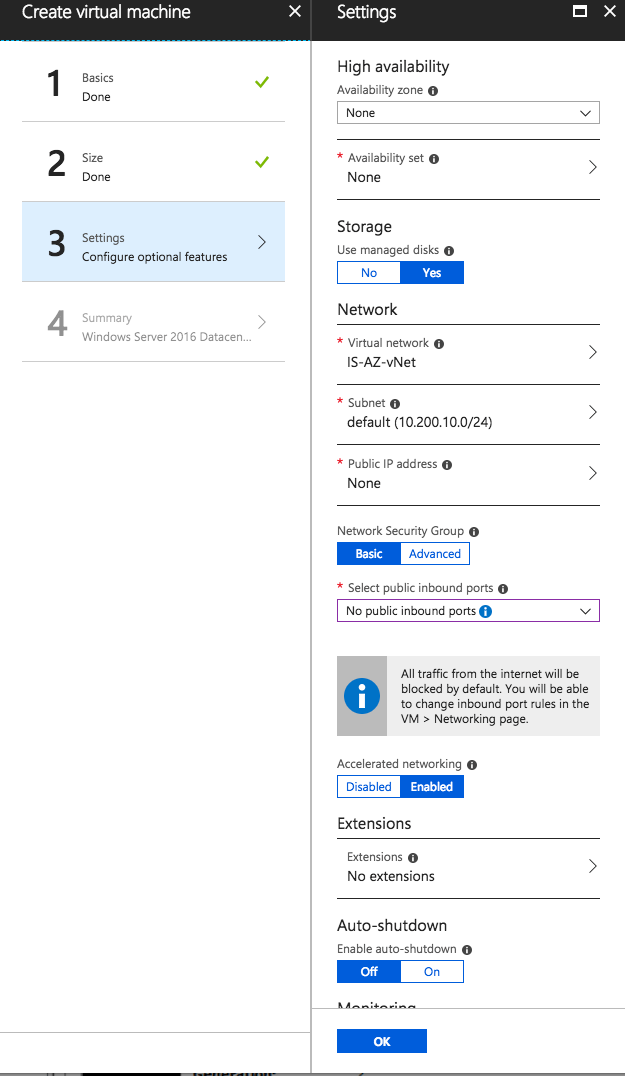
Create a Virtual Machine – Optional settings
Check the summary
Click on Create
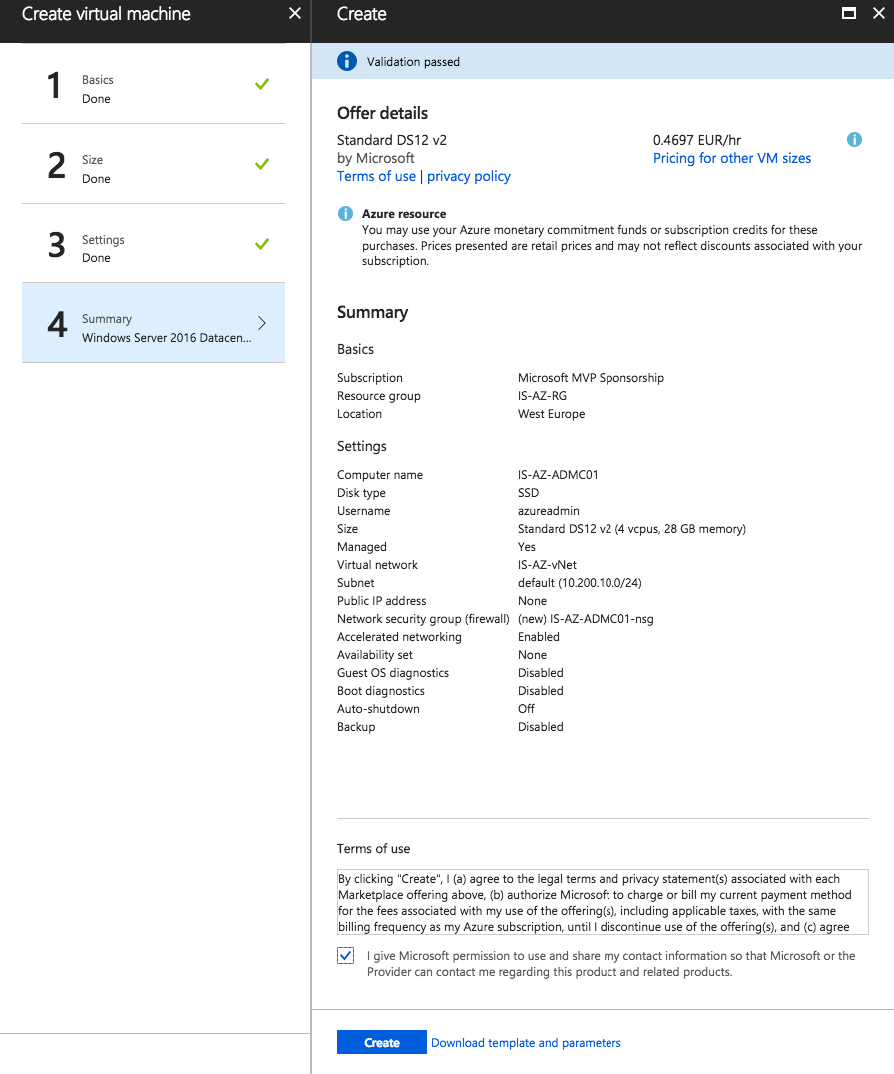
Create a Virtual Machine – Summary
Setup a Remote Desktop Connection to the Virtual Machine and join the machine to the domain.
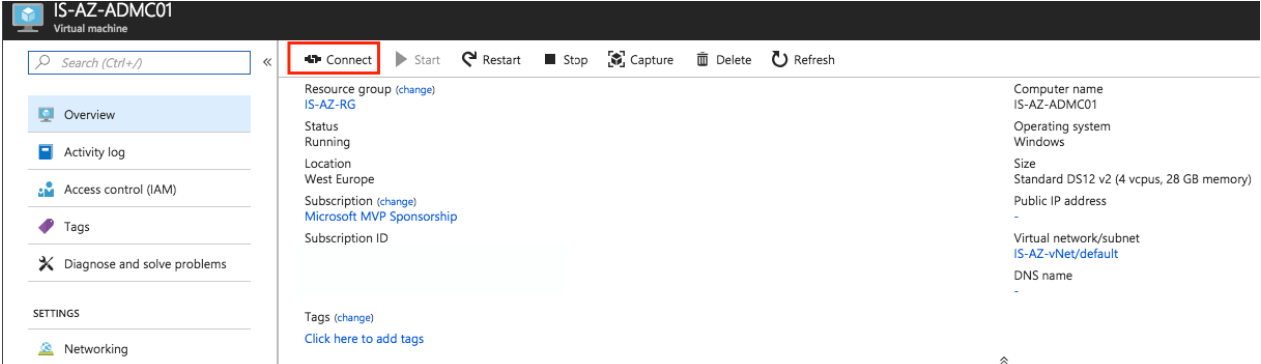
Connect
Request an internal or external SSL certificate
We now need to request an SSL certificate for our Admin Center web portal. I’ll use my own Active Directory Root CA for this purpose – but you can use a Public Certificate Authority, such as GoDaddy as well.
Create a DNS A record for Admin Center

New host
point it to the internal IP Address of the Admin Center server

Networking
Request the Web Server Certificate – based on the DNS record
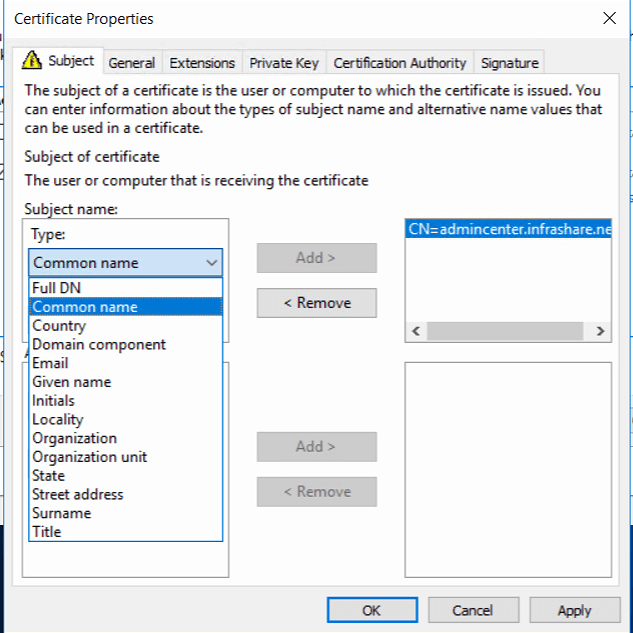
Certificate Properties
RootCA Web Server SSL Enrolment finished
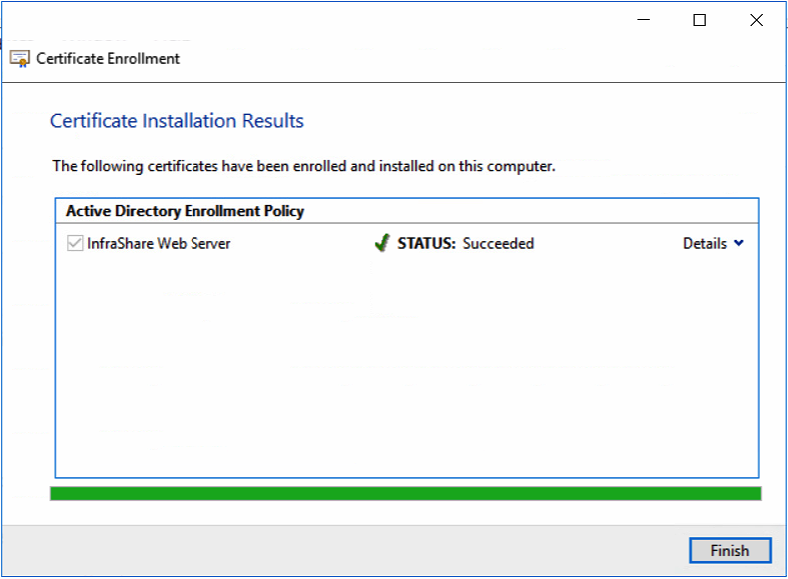
Certificate Enrollment
Or upload the certificate to the Local Computer Certificate Store.
Open the Certificate Properties and Copy the Thumbprint which we need to use in the next steps.
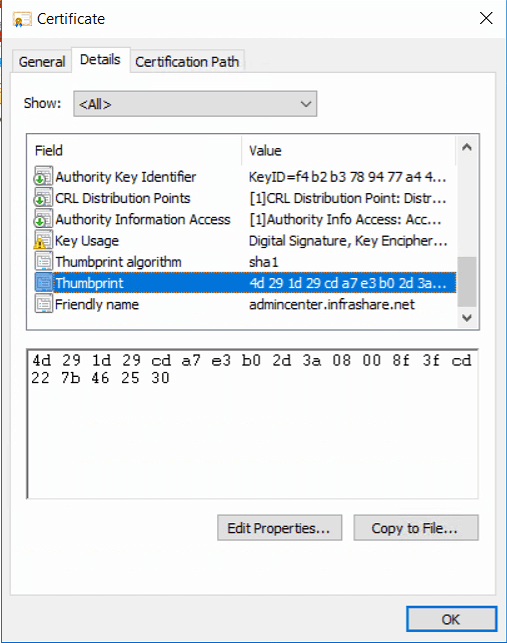
Certificate
Continue with the installation steps
Download and install Microsoft Admin Center
Windows Admin Center Preview 1808 can directly be downloaded from the Windows Server Insider Preview download page, under the Additional Downloads dropdown. If you have not yet registered as an Insider, see Getting Started with Windows Server on the Windows Insiders for Business portal.
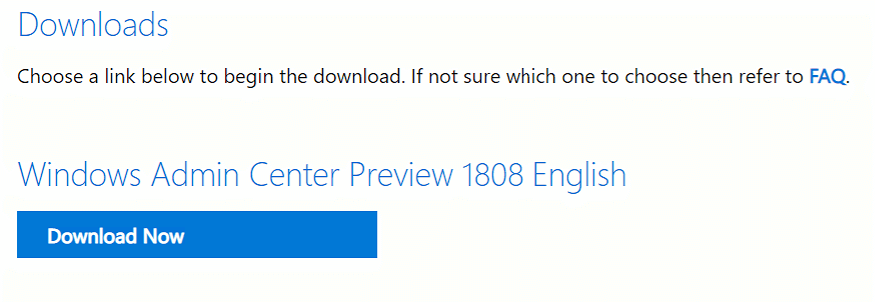
Downloads
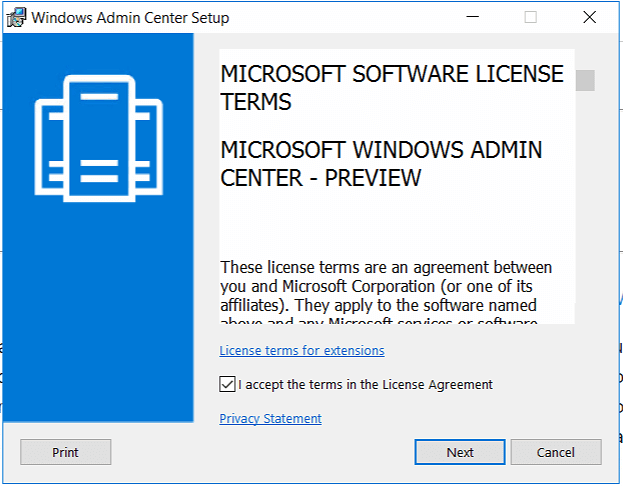
Start the installation by opening the MSI
MI
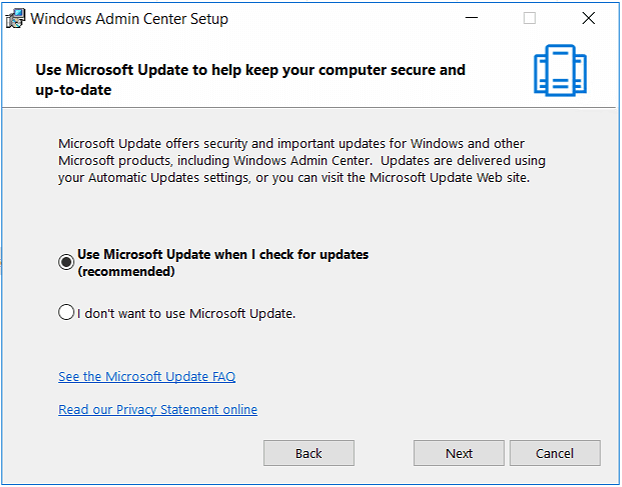
Choose how you want to update Admin Center
Click Next
Windows Admin Center Setup
Make sure the first option is checked (default)
Click Next
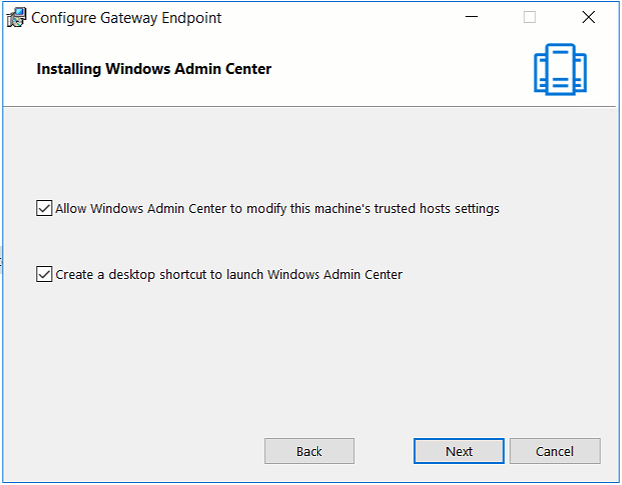
Configure Gateway Endpoint
Paste the Thumbprint of your SSL certificate in the second – use an SSL certificate installed on this computer – section.
Click on Install
Note: Remove the spaces from the Certificate properties copy-paste action
Check out this cool new HTTP > HTTPS redirection option as well – you’ll need to expose port 80 as well when you publish Admin Center to the public internet.

Installing Windows Admin Center
The installation is started, this can take up to 3 – 5 minutes…
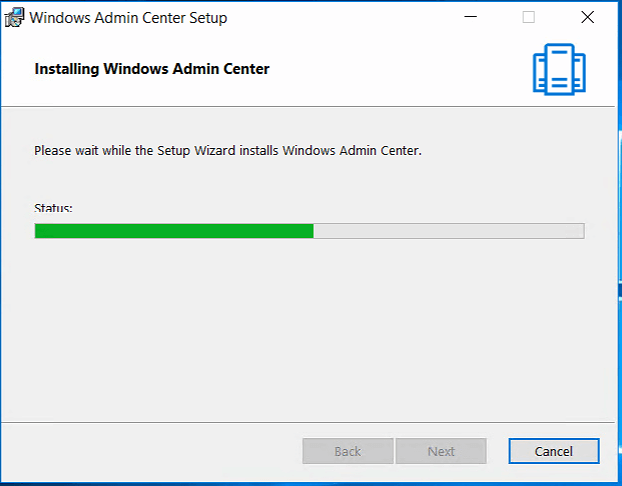
Status Update
The installation is finished

Completed
Open the Admin Center Web Page
Open the shortcut on the Admin Center server – or just open an Edge or Google Chrome Internet Browser in the same network and open put in the DNS name. For example https://admincenter.infrashare.net
Note: Admin Center is not supported for Internet Explorer – Microsoft advice the use of Edge– Google Chrome is having problems as well! Chrome has a bug regarding the websockets protocol and NTLM authentication.
Skip the Tour
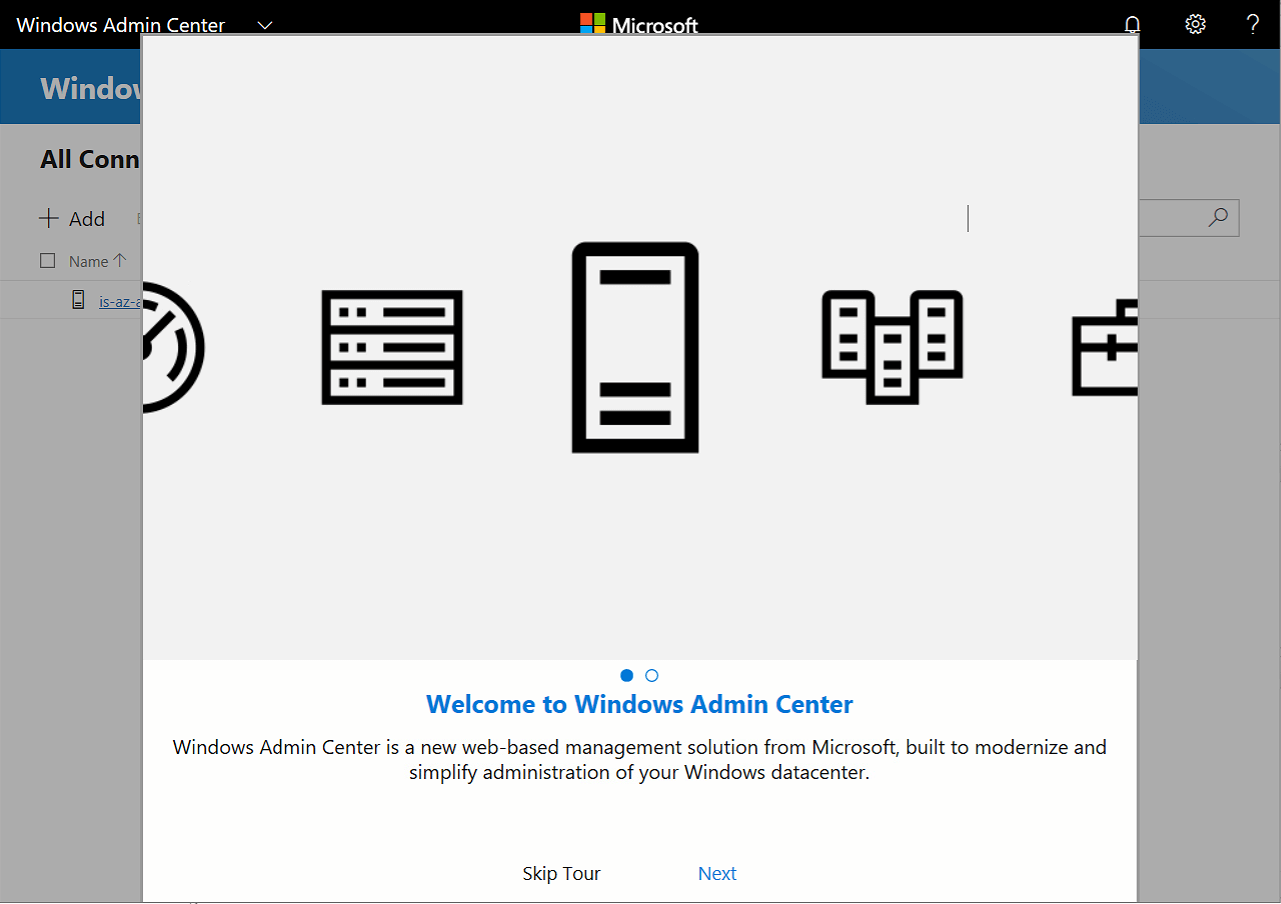
Welcome to Windows Admin Center
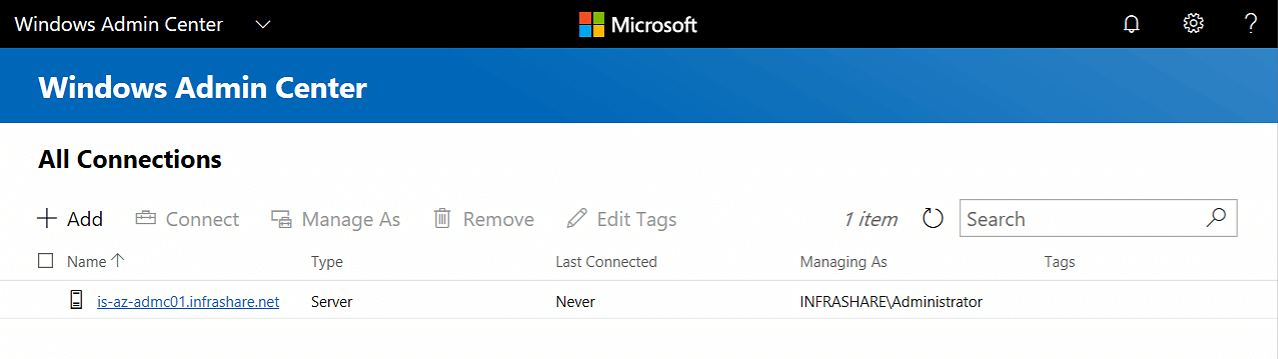
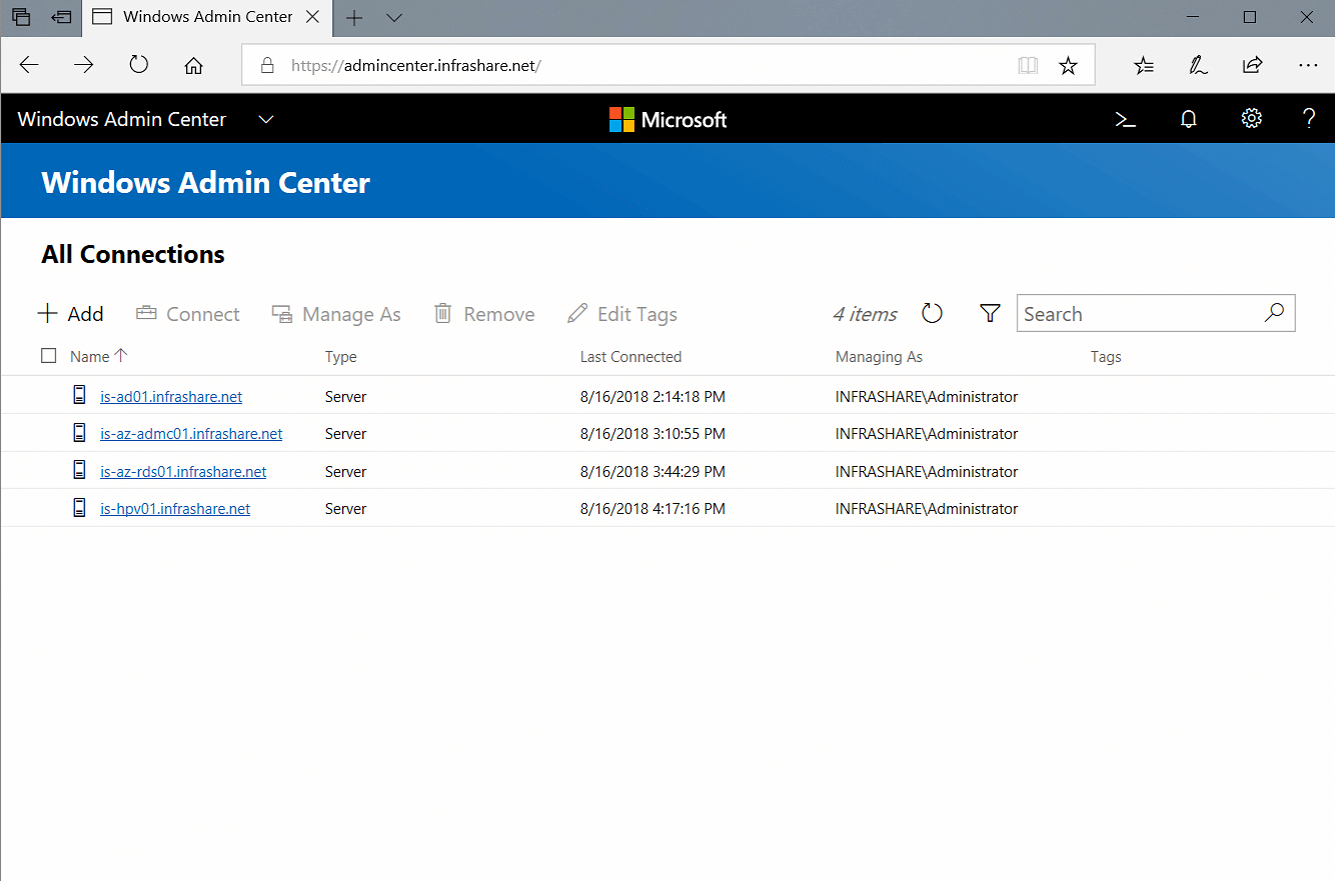
We are now in the landing Windows Admin Center screen where we can find all the active server connections – obviously, only the Admin Center server is listed, and we now need to add our servers to the management portal!
Windows Admin Center
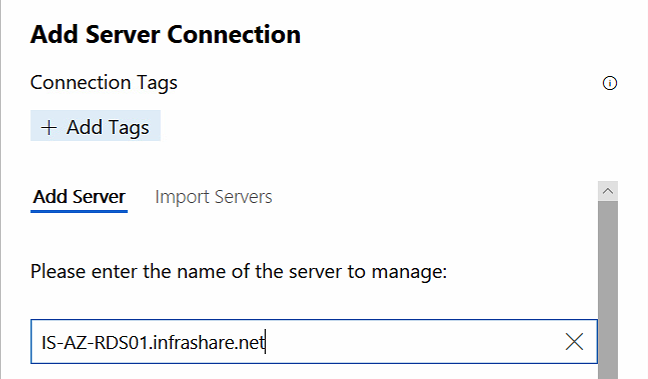
Add the Servers as Connections
Click on Add to add additional servers
Enter the FQDN of your Servers
Add Server Connection
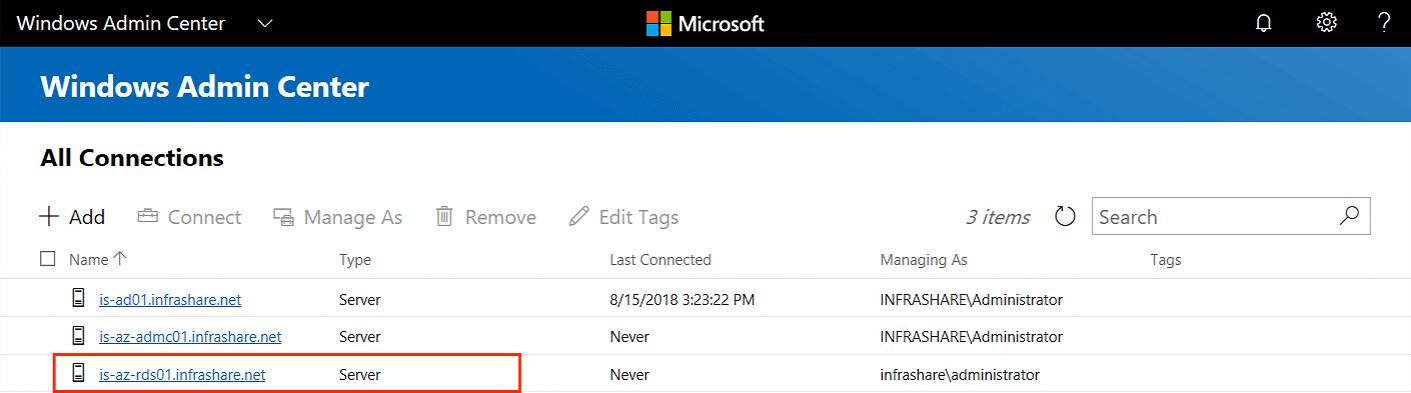
Make sure that the Server(s) are listed
Note: You can use an service account for this purpose as well. Please make sure that the service account has at least Local Administrator right to that specific Virtual Machine!
Windows Admin Center
Add the extra servers you want to manage as well and add to Admin Center
Manage the Server in Admin Center
Click on Connect to open the Management of the Server
You’ll see the first Overview landing page – where you’ll find all the default performance metrics and power management as well.
Server Manager
On the left side of the screen – you’ll see all the default management tasks that can be performed by default for Windows Operating Servers in your environment.
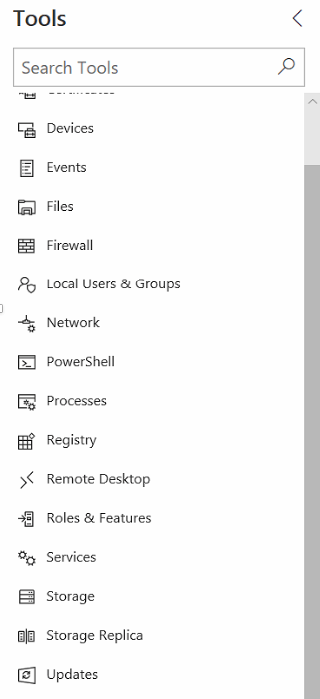
Tools
Remote PowerShell Access
One of the other cool integrations are the PowerShell box that pops-out from the menu to use as Remote PowerShell console servers. Very handy and easy for different use cases, such as Core servers or any other Security or Delegation reasons.
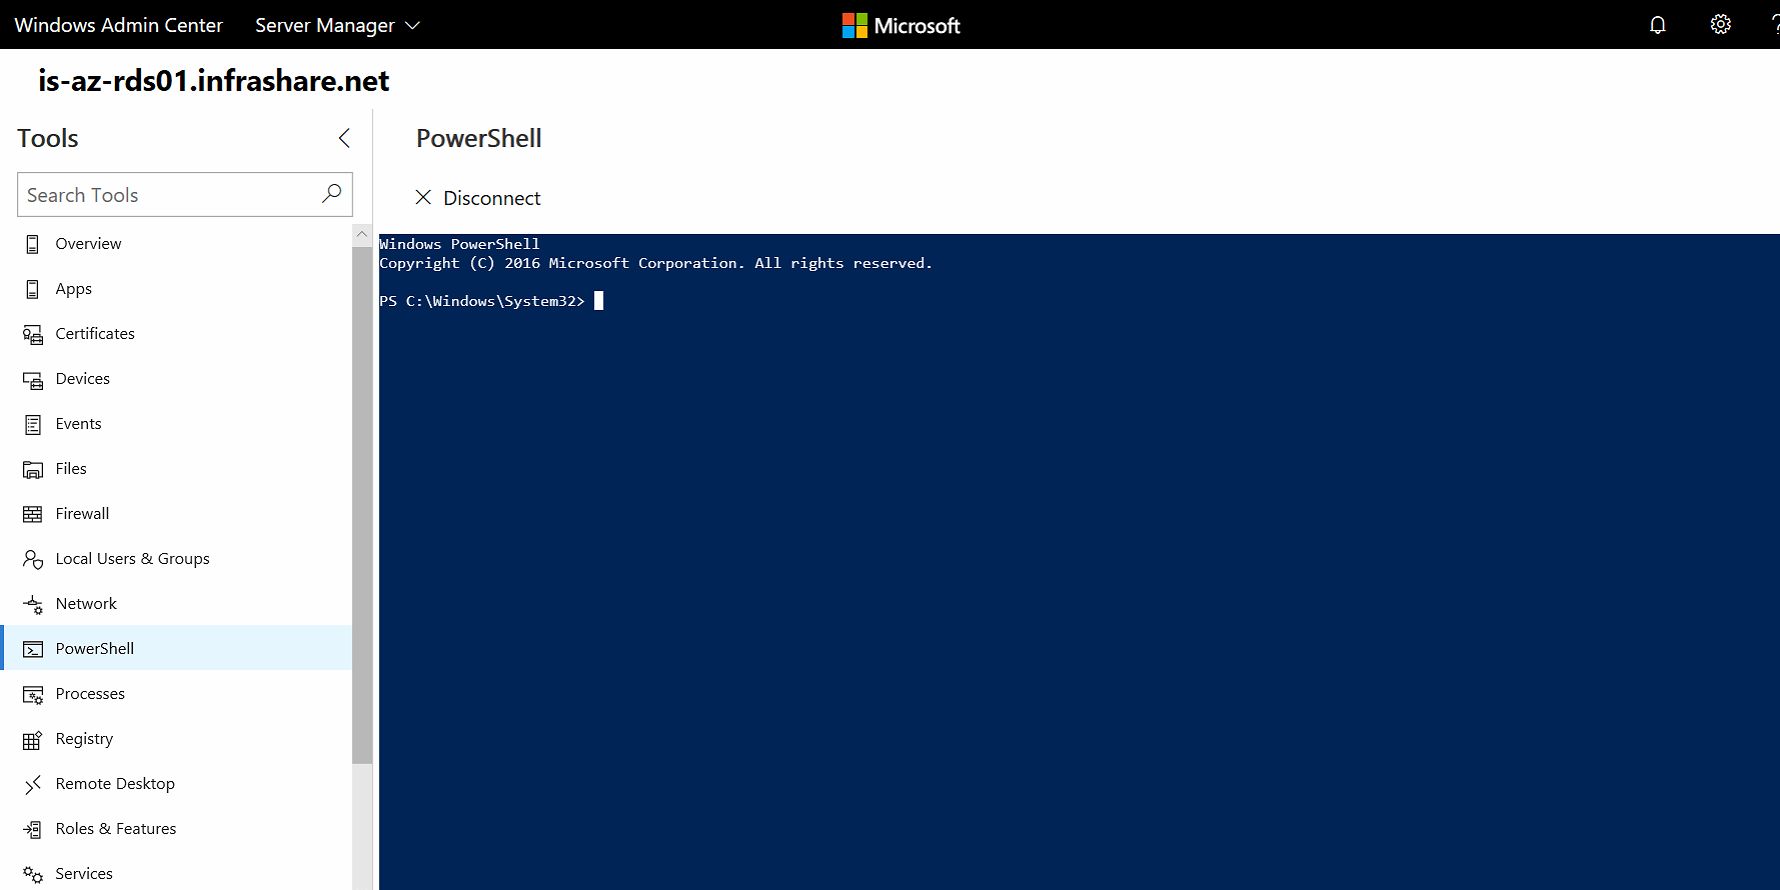
PowerShell
Roles & Features
Install and Remove Roles and Features easily from the menu as well.
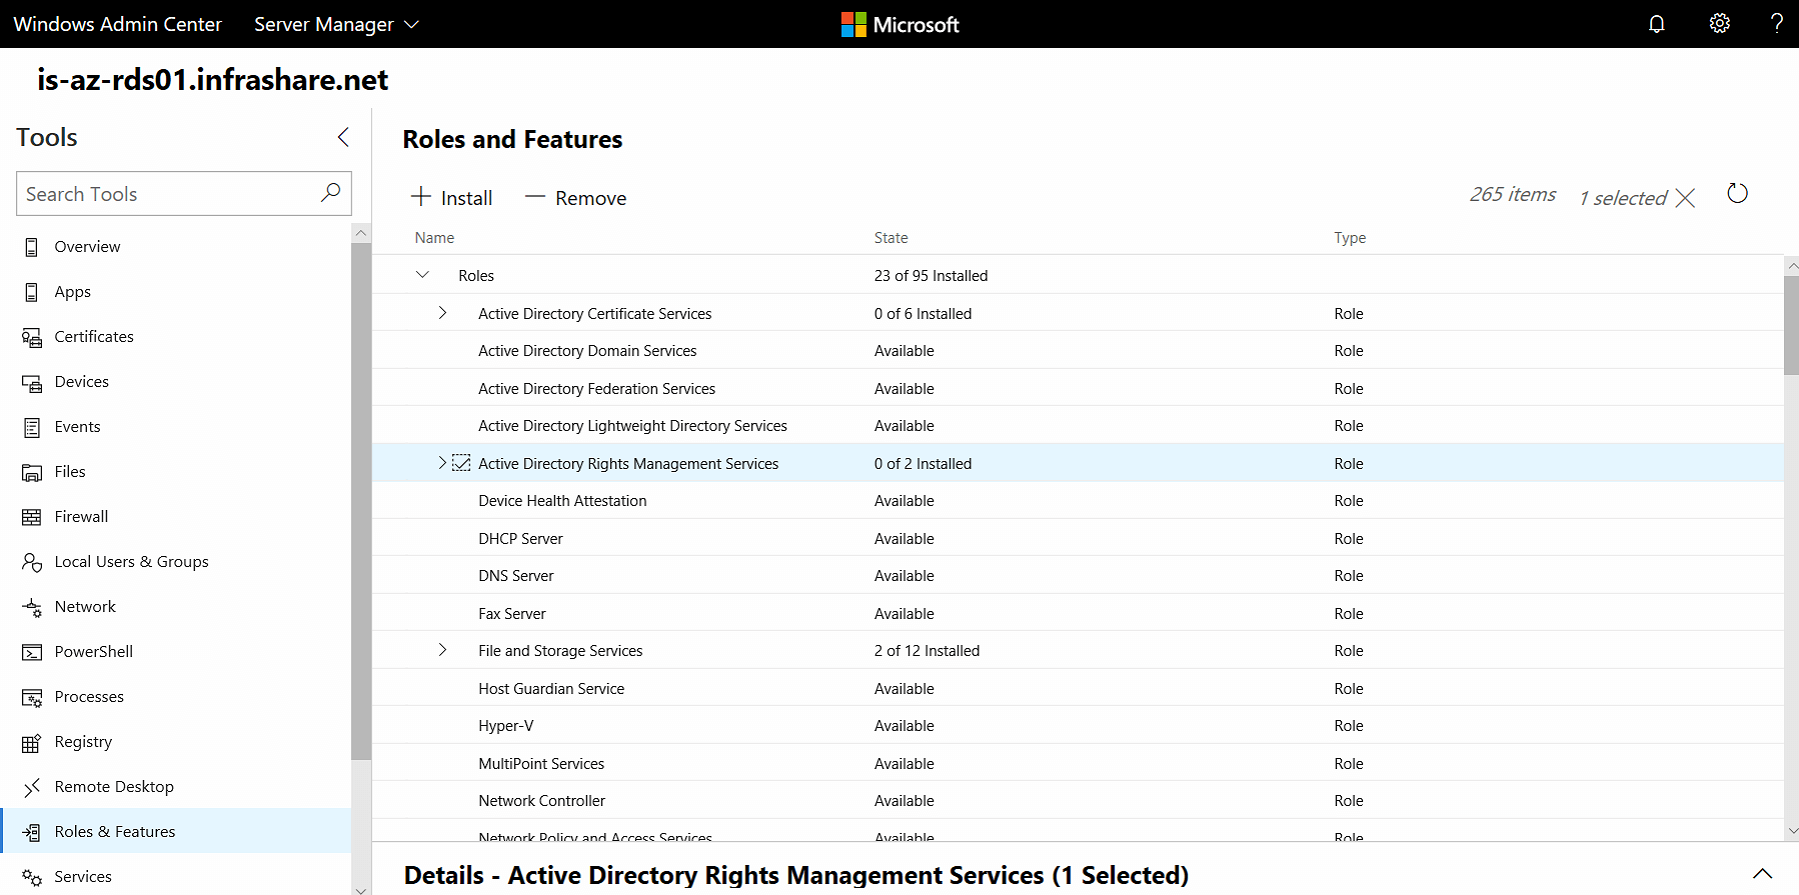
Roles and Features
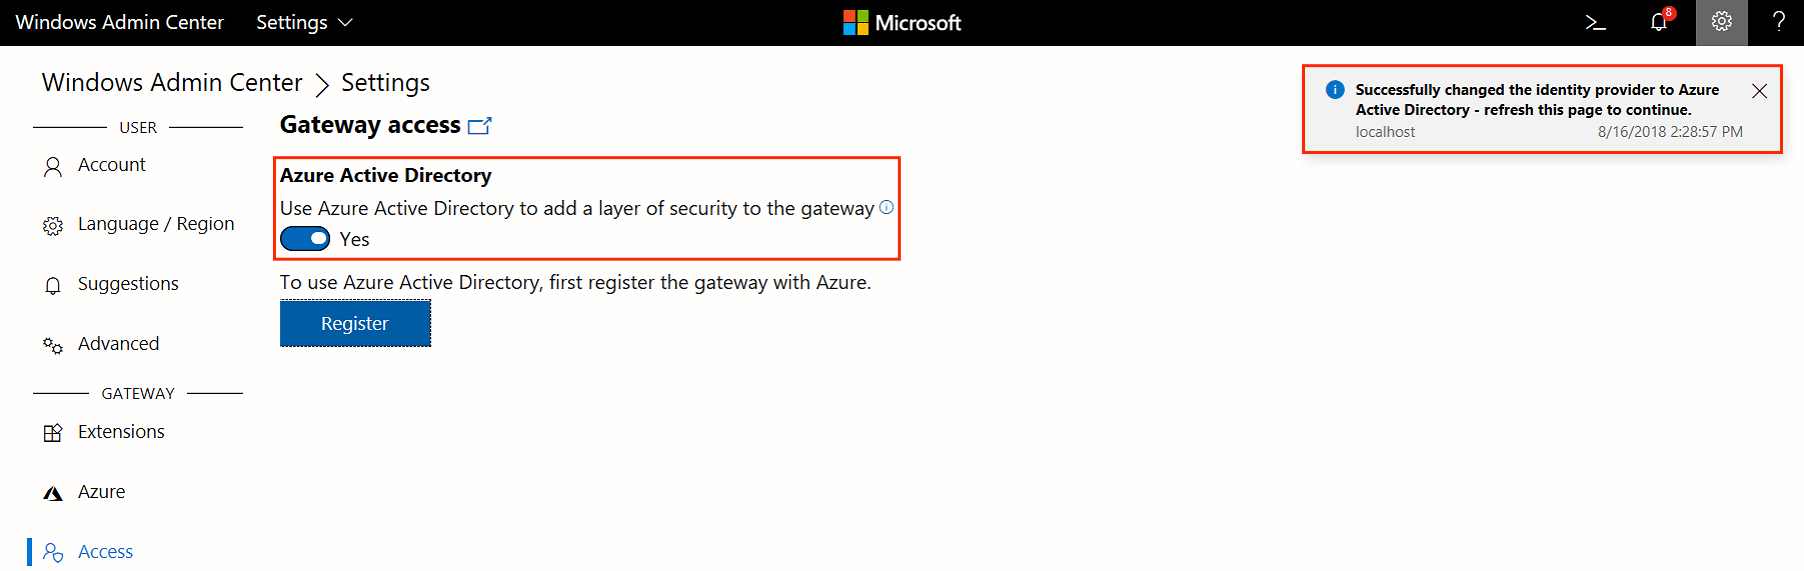
Activate Gateway Access for Microsoft Azure and Azure AD
So what about external access and Azure? You’ll need to activate Gateway Access to set up the connection with your Azure tenant and Azure AD subscription. I’ll explain all the technical steps in this section…
Note: The previous versions of Admin Center was a pain in the *** when talking about activating Azure AD. This is all history and they simplified the setup in a very positive way!
Open the Settings menu and go to Access
Set Azure Active Directory to Yes
Click on Register
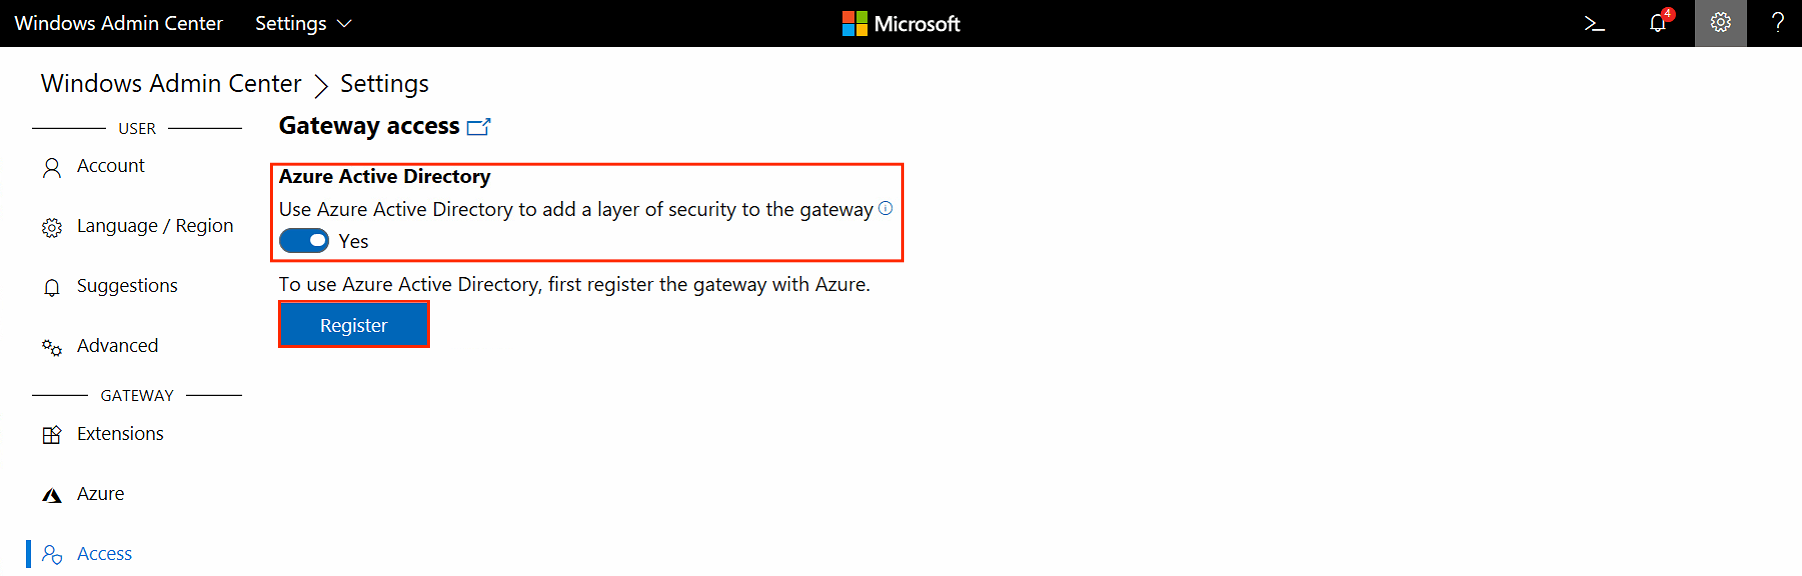
Azure Active Directory
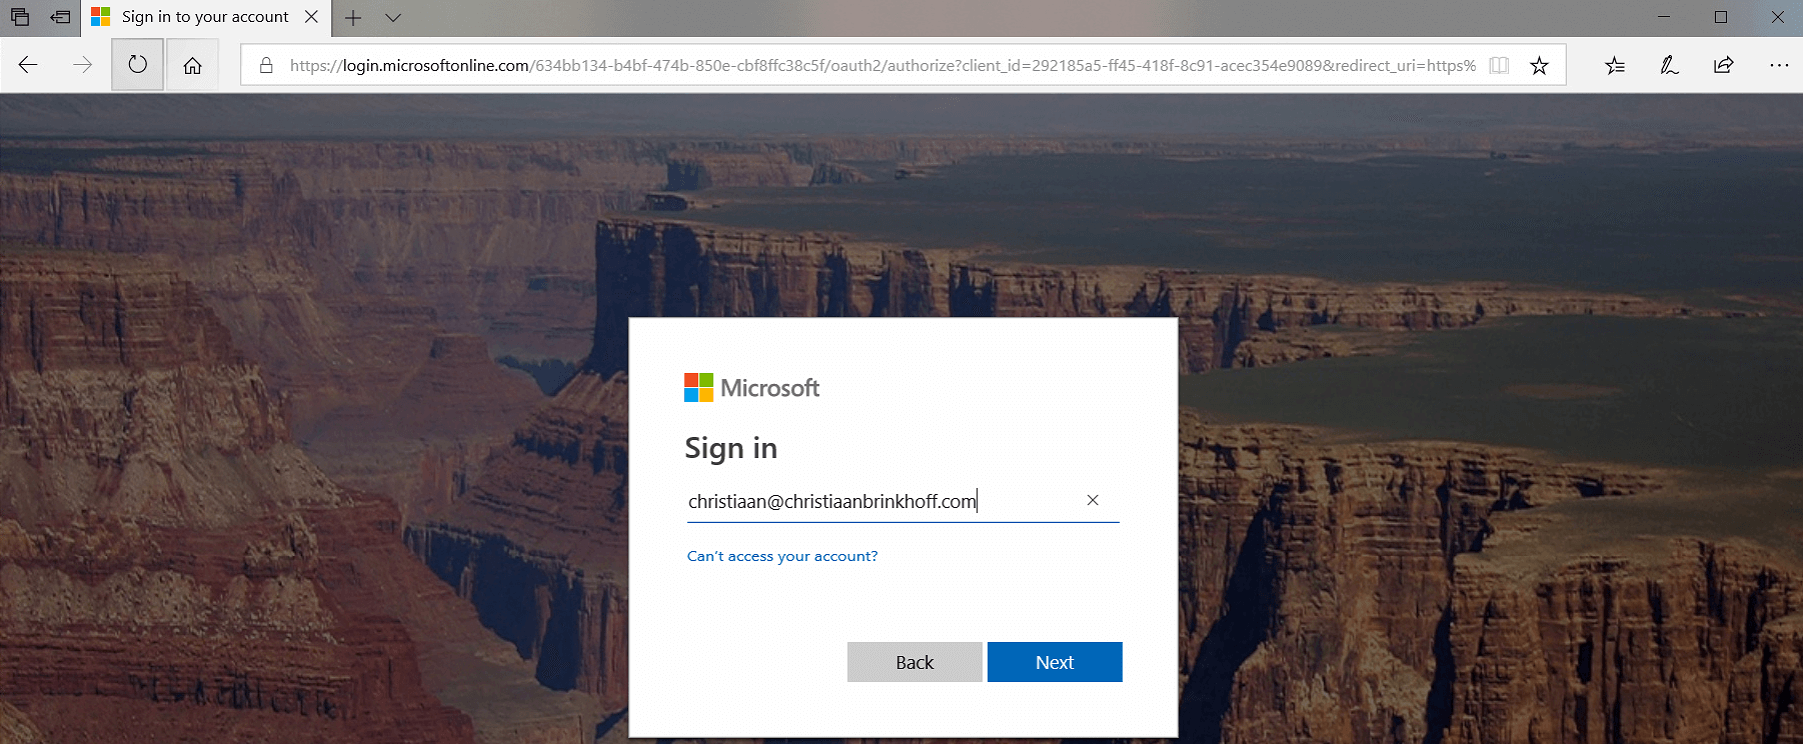
Copy the Code and click on Device Login
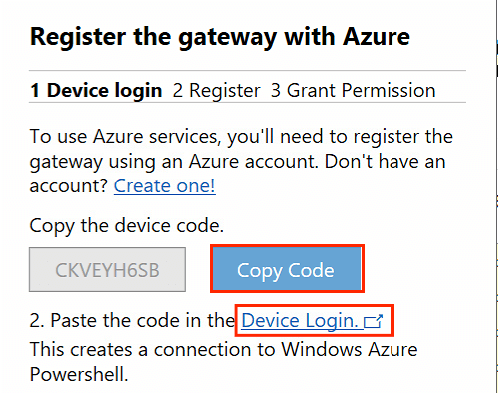
Register the gateway with Azure
Paste the code in the text field
Click on Continue
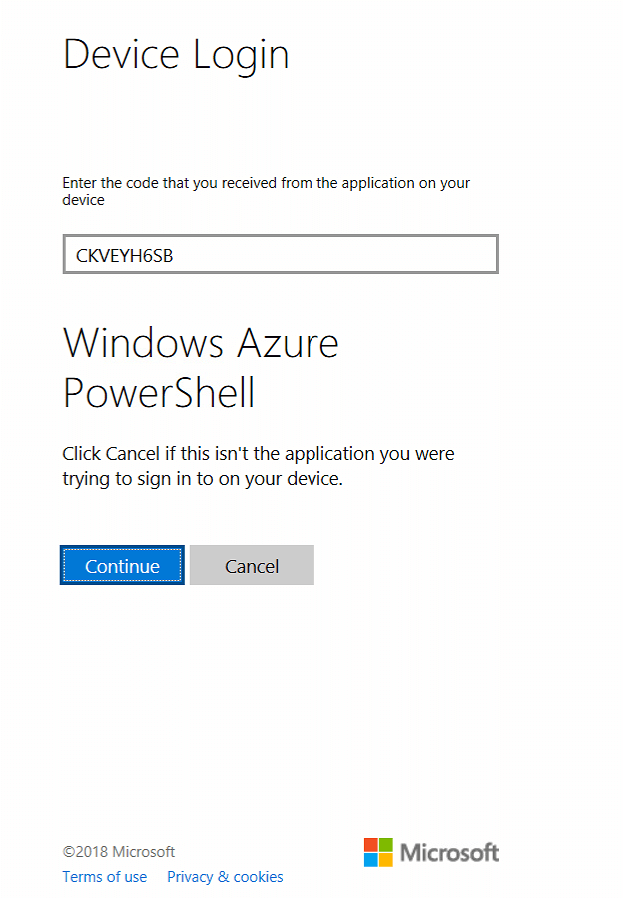
Device Login
Logon with your Azure AD Global Administrator account
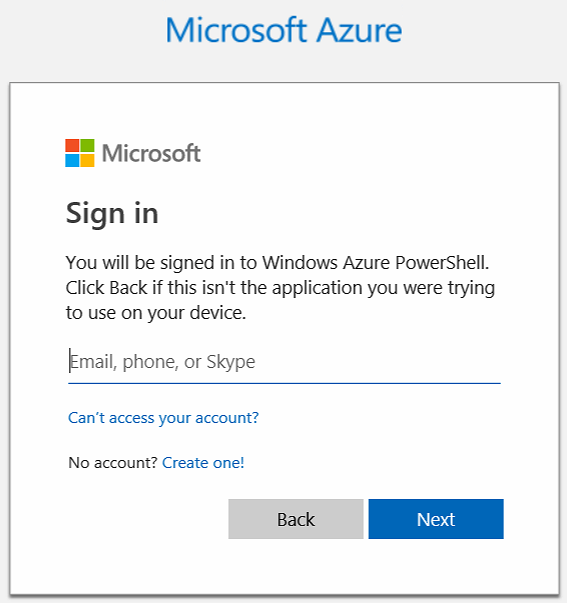
Sign In
The connection has been made successful – close the screen…
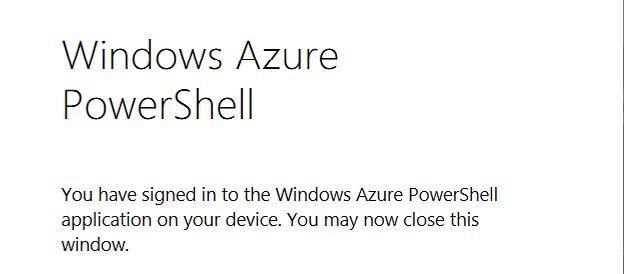
Windows Azure PowerShell
Switch back to the Admin Center Portal and select your Azure AD tenant
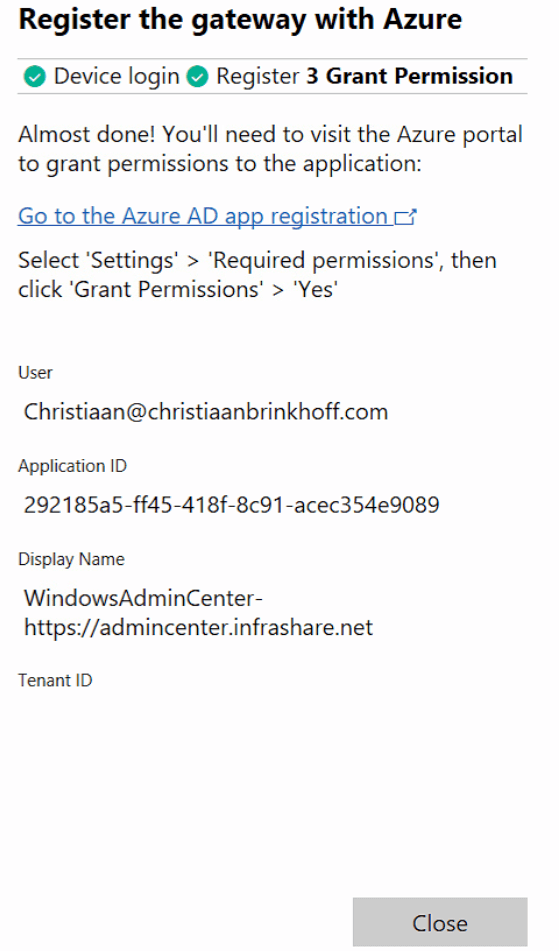
Click on Register
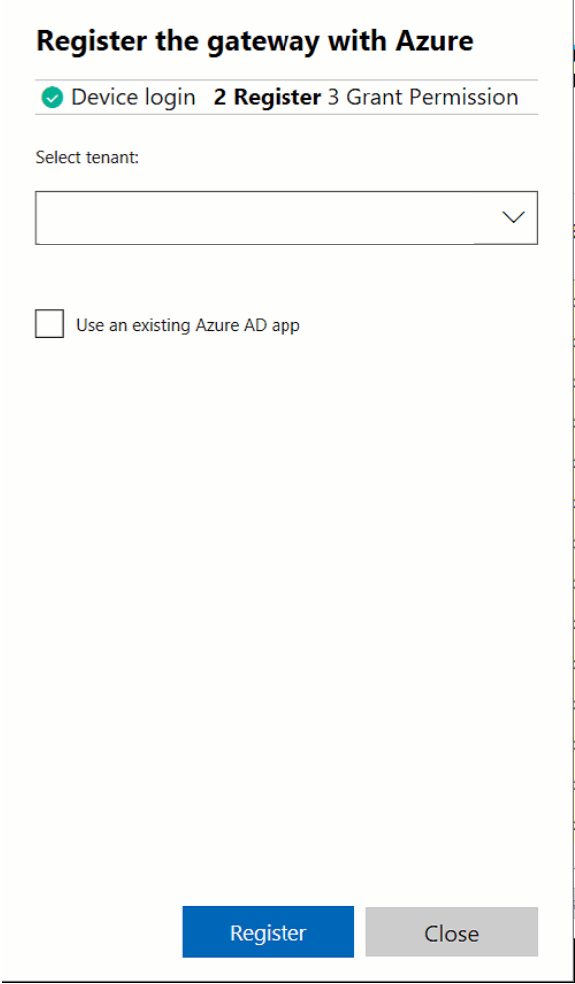
Register the gateway with Azure
Almost Done.
Go to the Azure Portal
Open the Azure AD Application and go to settings > Required permissions and set the Grant Permissions to Yes
Grant permission
Click on the new WAC App Registration
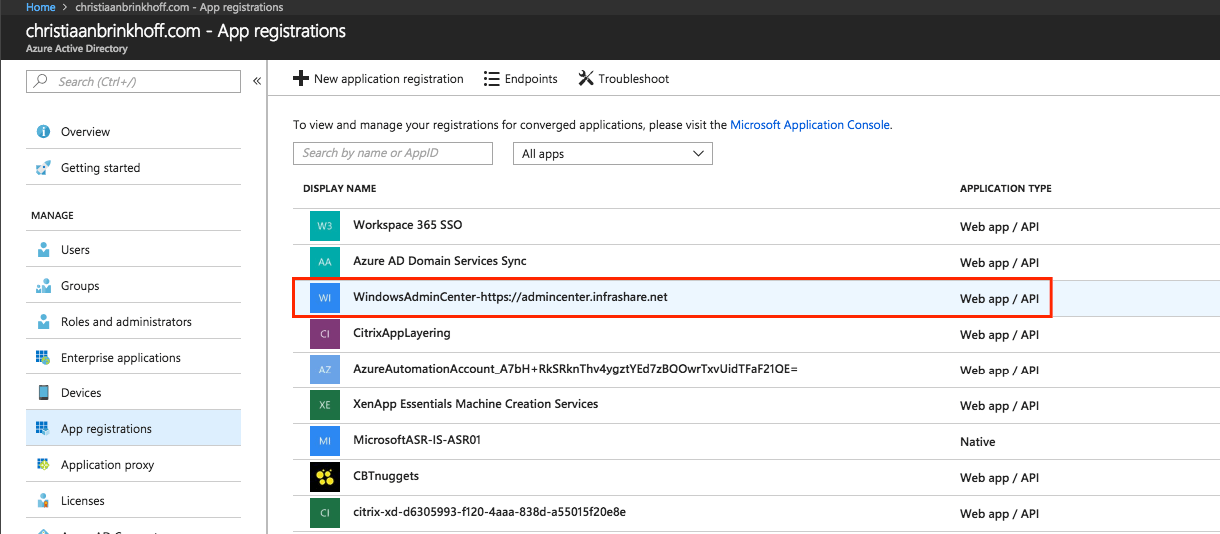
App Registrations
Click on Required Permissions
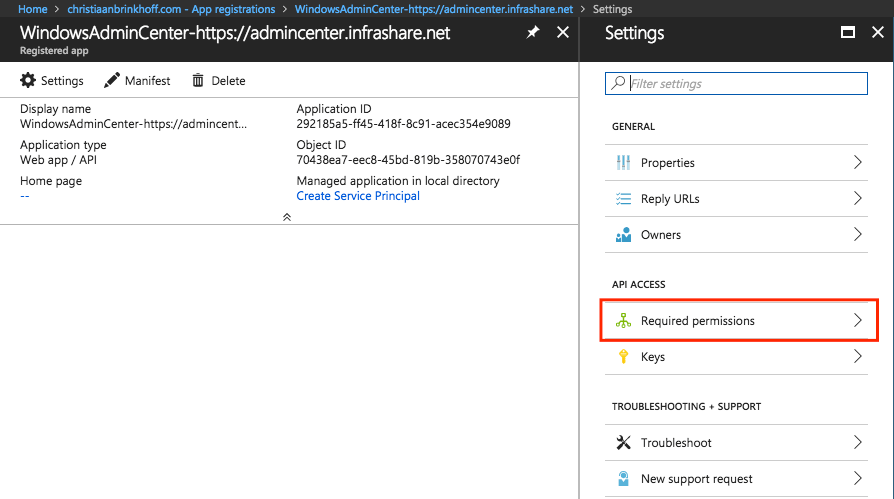
Required permissions
Click on Grant permissions

Grant permissions
Click on Yes
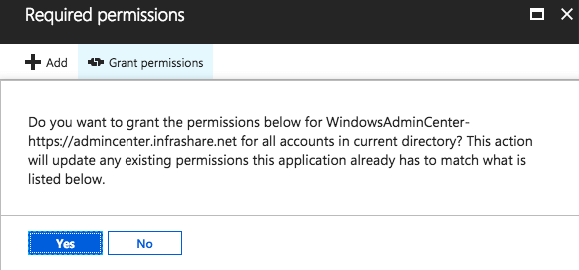
Grant permissions
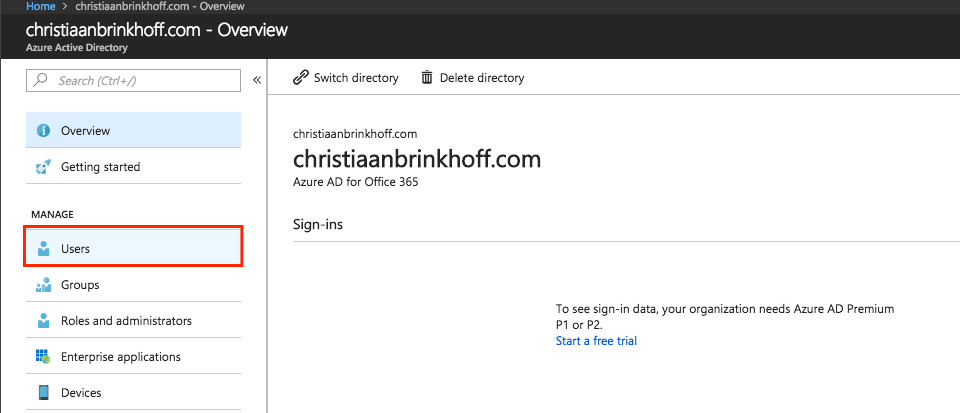
Open the Users and Groups tab, select Add user, and then assign a role to each user or group you add which require to have access to Admin Center.
We’re now done with the Azure AD Application registration process. In the Admin Center console – Gateway Access must now stand on Azure Active Directory!
Azure Active Directory
When you now enter your Admin Center URL again in Edge – you’ll be redirected to the Azure AD authentication portal.
Sign in
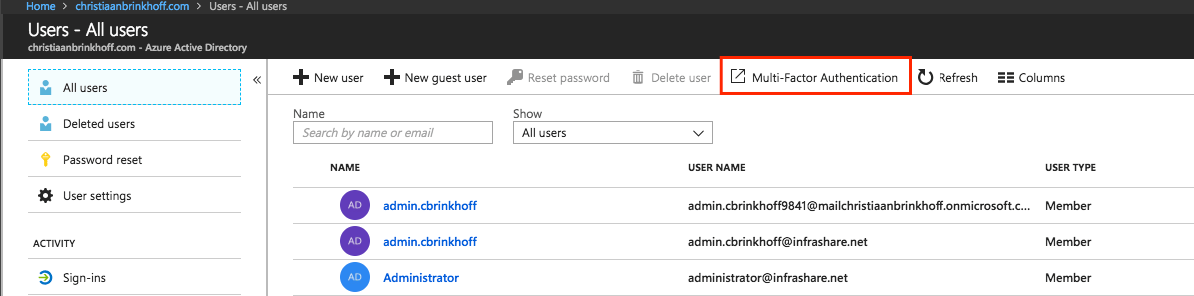
Activate Azure AD Multi-Factor Authentication (MFA)
Note: You’ll need to have Azure AD Premium – Enterprise E5 + Security or lossless Azure MFA license activated and assigned to your users before you can continue with these steps!
Go to the Azure AD menu in the Azure portal
Go to Users
Users
Go to Multi-Factor Authentication
Multi-factor Authentication
Enable the MFA setting for your Administrators
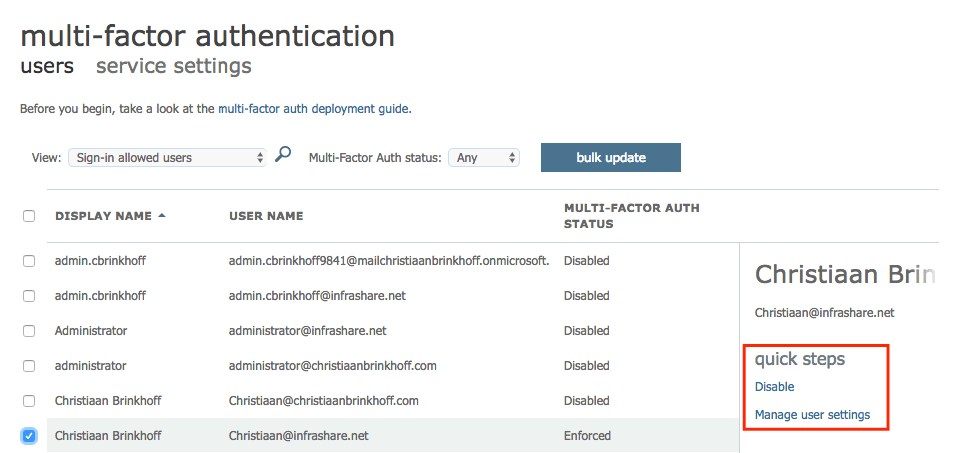
Quick steps
Click on – Enable multi-factor auth
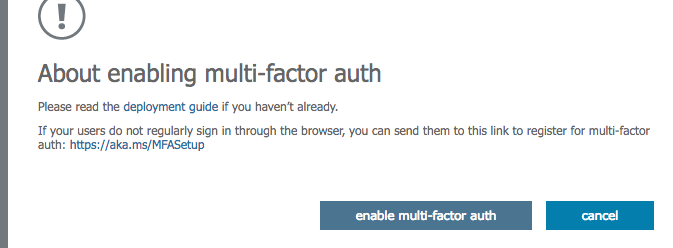
Enable multi-factor auth
Your Administrators will now require to setup a Mobile Device App, Phone Number or SMS Code the first time they require access to the Admin Center Portal.
Note: If this is the first time, they’re asked to choose which kind of secondary auth. the method they want to use as MFA.
Configure Azure AD Conditional Access – MFA IP Whitelisting
As mentioned at the beginning of this article, Conditional Access can increase your authentication to Azure AD authenticated applications massive, such as Windows Admin Center now supports.
You can provide access to Admin Center based on different conditions, such as Client IP, Antivirus, Location, User and Groups and more.
Note: Conditional Access required an Azure AD Premium license or Enterprise Mobility E5 + Security for every user. You can request and use the trial version as well for this article.
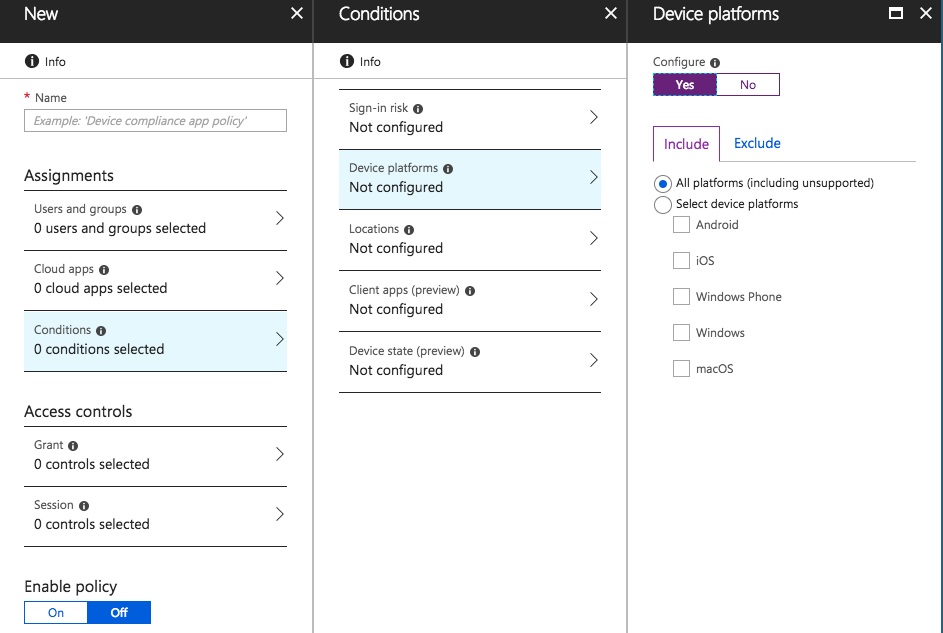
See below an example of the Condition based on Device Platform
Device platforms
Open the Azure AD menu in the Azure portal
Click on Conditional Access followed by Named Locations
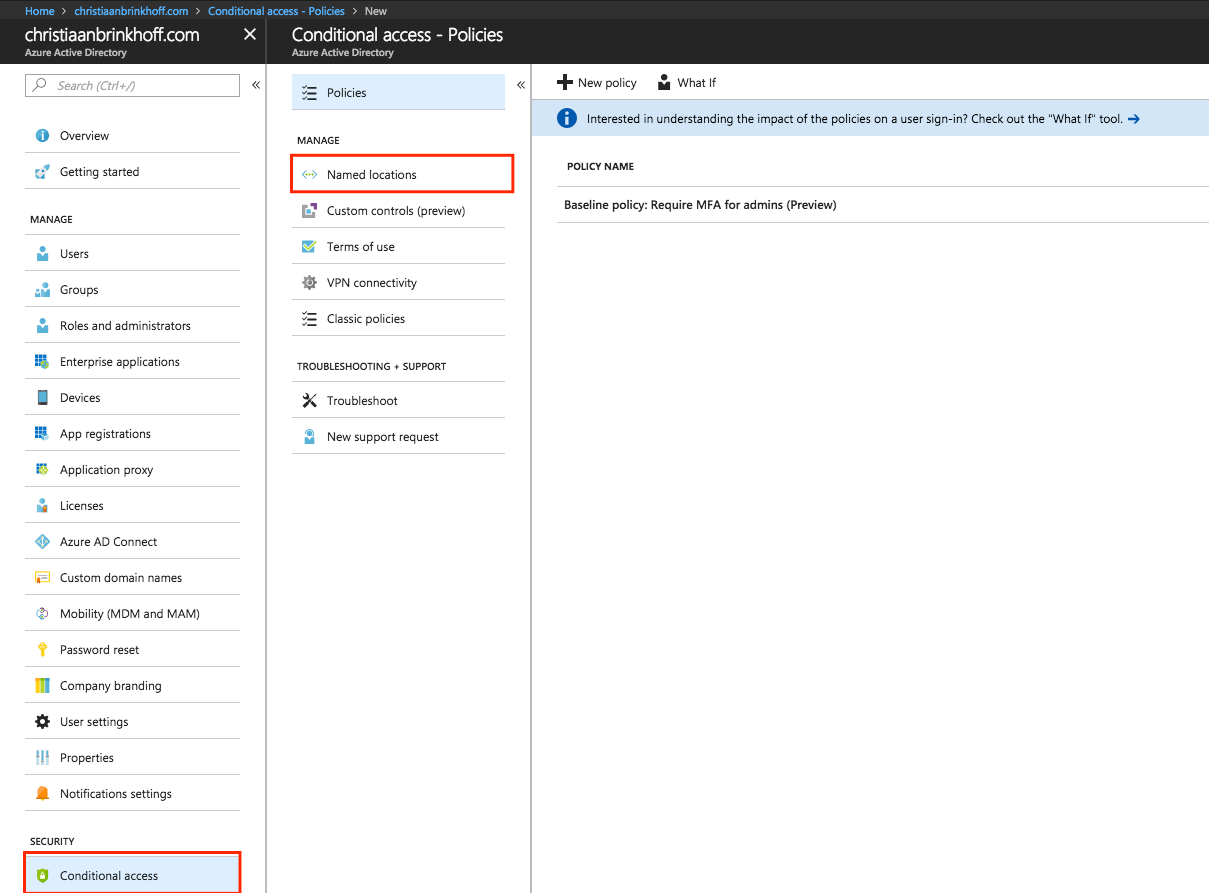
Named locations
Click on Configure MFA trusted IPs
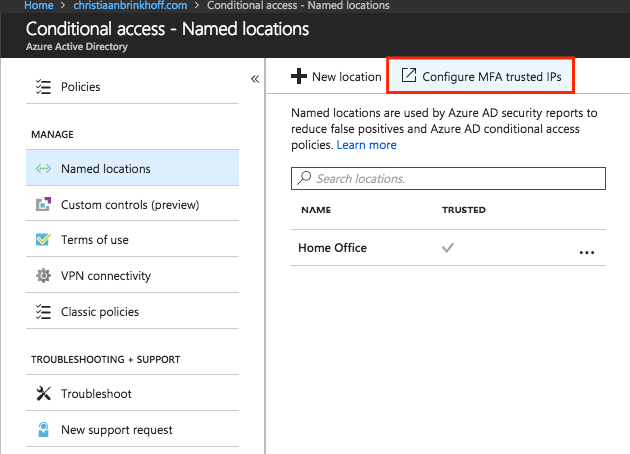
Configure MFA trusted IPs
Add all the external IPs that you want to whitelist from the Azure MFA requirement when using Admin Center.
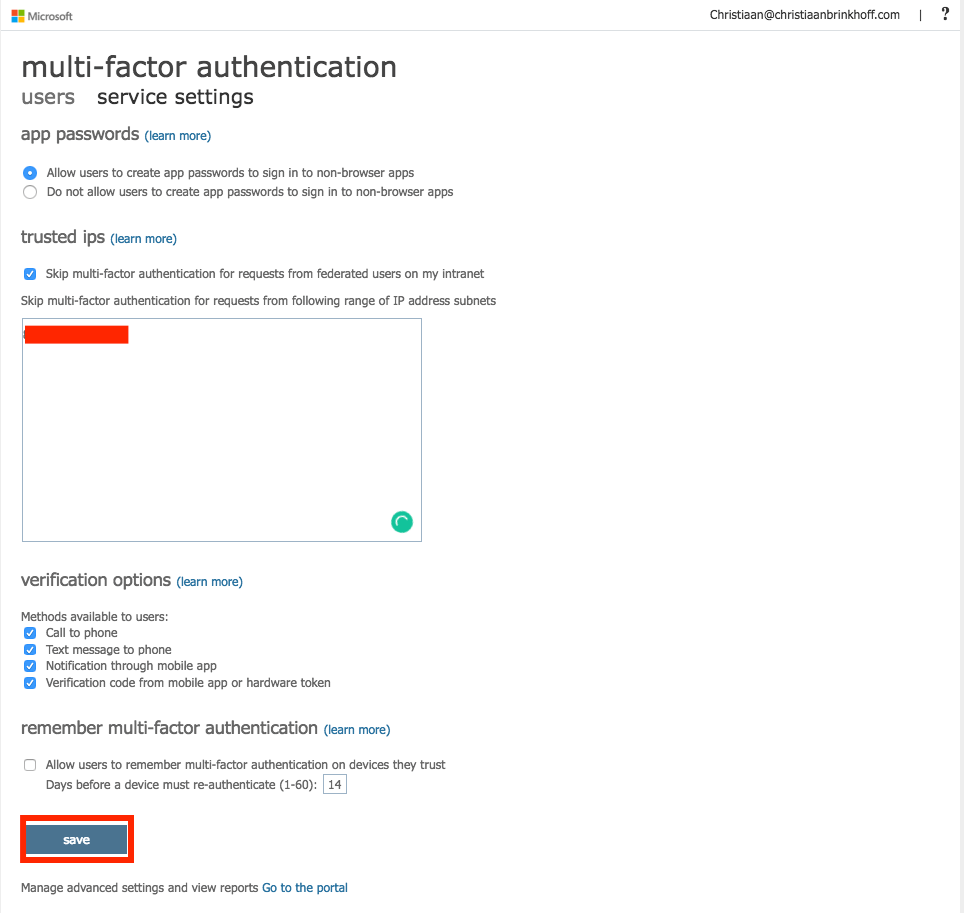
Multi-factor authentication
MFA is now no longer required within your network!
Looking for more in-depth configuration stuff around Azure AD and Conditional Access? I highly recommend reading the blogs of fellow Microsoft MVP – Per Larsen!
How to get started with Conditional Access
https://osddeployment.dk/2018/07/01/how-to-get-started-with-conditional-access/
Configure external access through Azure Load Balancing for the Admin Center Web Portal
If you’re using Admin Center publicly – and need to expose it to the internet. Please follow the next steps.
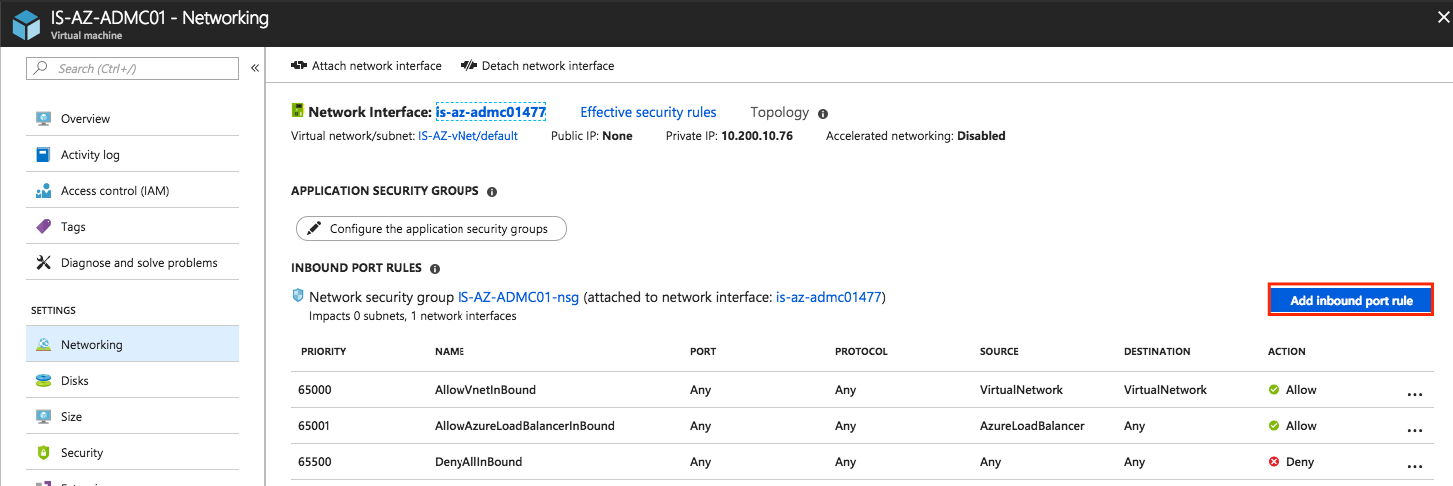
Open inbound port 443 on the Network Security Group (NSG) of the AdminCenter Virtual Machine
Open the Network Interface
Click on Add inbound port Rule
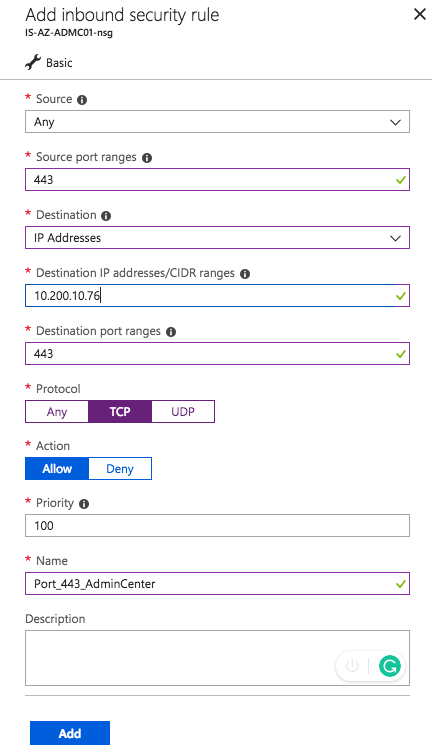
Networking
Enter the required information
Click on Add
Add inbound security rule
Open the Load balancers Service

Microsoft Azure
Click on Add

Load balancers
Enter in a name for the Load Balancer and fill in the required information, such as the Public IP and type external. A name for the Public IP – make the Public IP Static to avoid changing the DNS records in the future.
Click on Create
Create load balancer
Open the Load Balancer
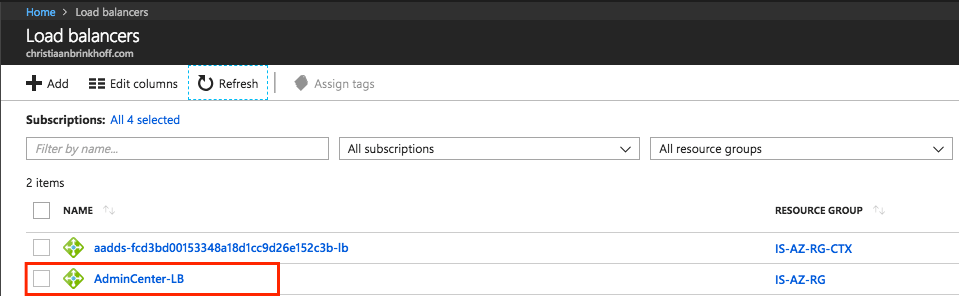
Load balancers
Create a Public DNS record at your ISP Portal – and place it to the Public IP address, which you’ll find at the Overview screen
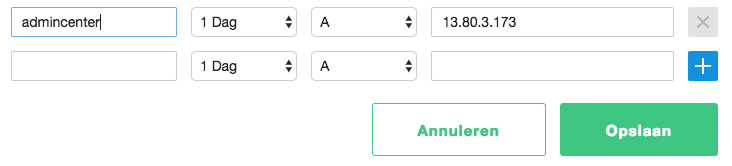
Overview screen
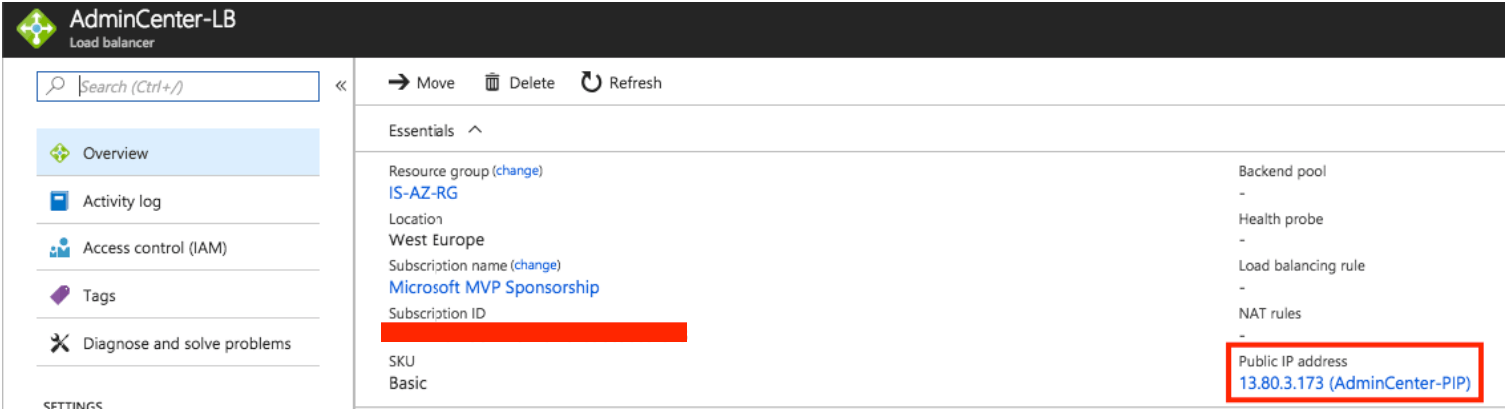
Admin Center
Create a NAT rule for HTTPS traffic from the outside to the AdminCenter Virtual Machine
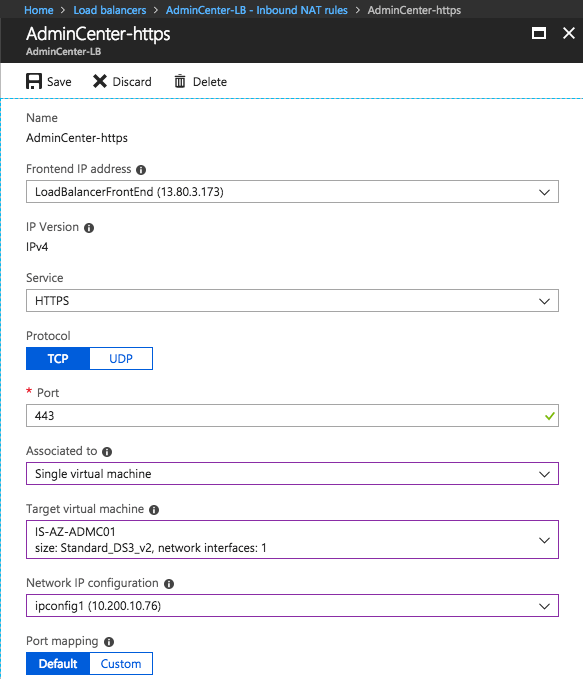
NAT rule
If you’re load balancing multiple Admin Center servers for High Availability purposes – please replace the NAT rule for the Health Probe and Load Balancing Pool and Rules. See below the steps to provide that as well.
Create a Probe for 443 – SSL traffic

Add
Give in the 443 port and name of the probe
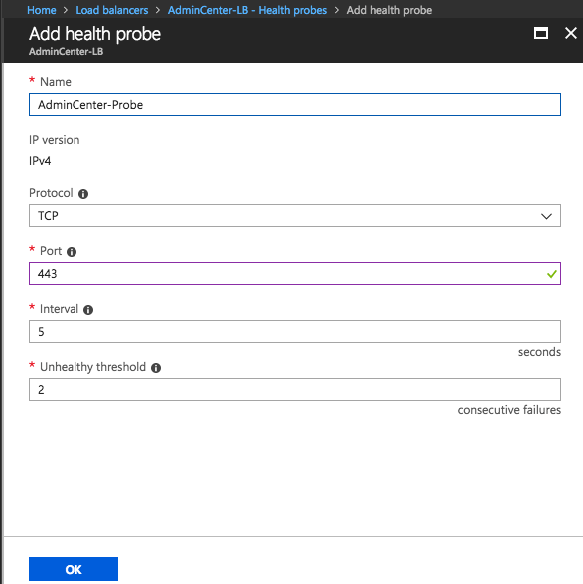
Name the probe
Create a Backend-Pool
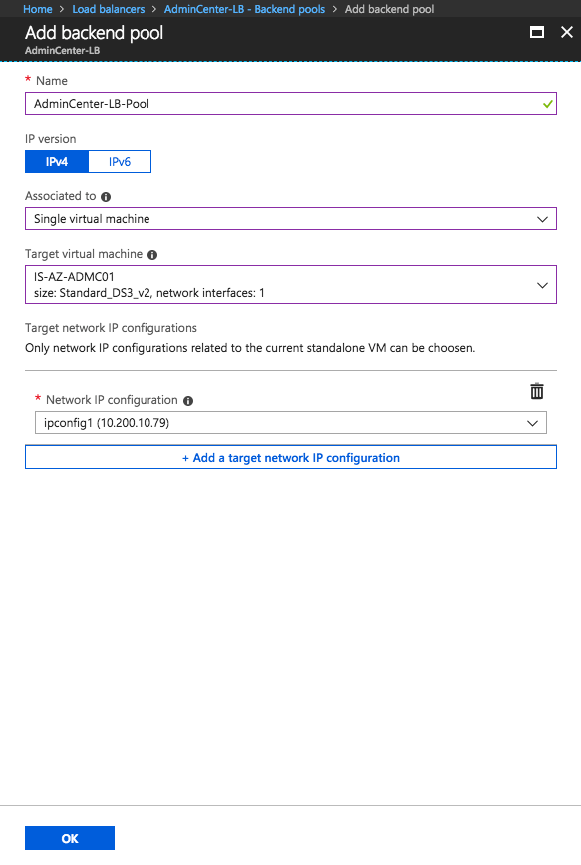
Add backend pool
Repeat the same steps for port 80 – HTTP to activate the HTTP > HTTPS redirection as well for external purposes
And the final step – create a load Balancing Rule

Load balancing rules
Test the external Connection
Windows Admin Center
You’ve now an external active Admin Center with the highest level of security through Azure AD and Conditional Access!
That’s it again – hope this helps, and thanks for stopping by.
Cheers,
Christiaan Brinkhoff
About the Author:
Christiaan Brinkhoff works as a Cloud Architect and Evangelist for FSLogix and owns his own consulting firm, Brinkhoff ICT Consulting. Where he focuses mainly on Public Cloud infrastructures and End-User Computing environments for the larger multinational enterprise customers.
In addition to his work, he also shares his knowledge by speaking at large international conferences, such as Citrix Synergy, E2E – PubForum, local user groups (Dutch, Irish, Swedish and Denmark User Group), and provides webinars and writes articles for IT vendors, as well as his website, christiaanbrinkhoff.com – to share his passion for Cloud innovation. He has three vendor awards, such as Microsoft Valuable Professional (MVP) for Microsoft Azure, Citrix Technology Professional (CTP), and VMware vExpert. There are currently only five people in the world that have all these titles combined. The titles give him the privilege to interact with product management and development teams within Microsoft, Citrix and VMware for problem-solving and future roadmap discussions.
Christiaan is also an MCSE: Microsoft Azure Cloud Platform and infrastructure, Specialist and MCSA Windows 7, 8 – 10 and Office 365.
Reference: Brinkhoff, C (2018). Manage your Azure Hybrid Cloud modern infrastructures with Microsoft Admin Center and Azure AD. Available at: https://christiaanbrinkhoff.com/2018/08/22/manage-your-azure-hybrid-cloud-modern-infrastructures-with-microsoft-admin-center-and-azure-ad [Accessed: 25 September 2018]