Have you ever wished that you had a monorepo (*1 ) containing all of your dev.to posts on GitHub and once you merge an update into the master branch they would just automatically be updated on dev.to?
1) or multiple repositories, it doesn’t matter 😃
Then you’ll be pleased with what’s coming, otherwise I’ll let you know why you might want that in the next section.
Why would I want to put all my blog posts on a git repo?
- Don’t be afraid of messing up one of your articles while editing it
- Same good practices as when you’re developing (format, make commits, have a history of your changes, compare when editing, etc)
- Use prettier to format the markdown and all the code snippets
- Let people contribute to your article by creating a PR against it (tired of comments going sideways because of some typos? Just let people know they can make a PR at the end of your blog post)
- Create code examples close to your blog post and make sure they’re correct thanks to Embedme (*1)
*1: Embedme allows you to write code in actual files rather than into a Markdown file and then will inject the code for you where needed.
If you prefer not to use Prettier or Embedme, you can do so by simply removing them but I think it’s a nice thing to have!
Is it long to setup?
No more than a few minutes. Probably 3 to 5 minutes top, from scratch to automatically deploying an update on one of your blog posts on dev.to using this new setup 🔥!
Show me how to set it up!
You can choose whether you want to integrate this workflow into an existing repository or using a template I’ve made to simplify the process of starting from scratch.
In this blog post we will focus on getting started using the template but reading this you’ll realise how easy it would be to integrate in your own worklow.
Main steps:
- 1. Copy the template
- 2. Create a dev.to token
- 3. Pass that token to Travis CI
- 4. Put your blog post(s) into your new repository
1. Copy the template
Go to https://github.com/maxime1992/dev.to and copy the template:

Set the name of the repository as you wish and the description too:

(note: if you want to use the free instance of Travis to continuously deploy your blog posts, the repository has to be public)
Once your repository has been generated, you should see something like the following:
2. Create a dev.to token
Go to https://dev.to/settings/account and give a name to the token so you can remember where you’re using it:

Keep the page open for now.
3. Pass that token to Travis
Go to https://travis-ci.org/account/repositories
As the GitHub repository has just been created, Travis may not see the repo yet. If that’s the case, click on the left on the “Sync account” button to force the refresh of your repositories.
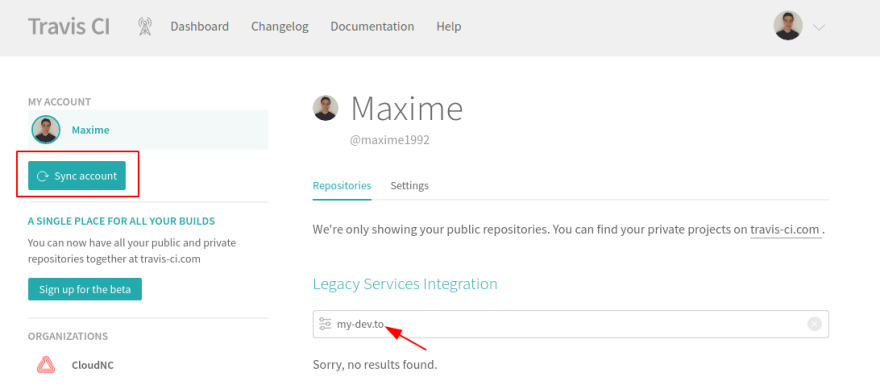
Once that’s done you should be able to find your project and you’ll need to click on the toggle button on the right to activate it:
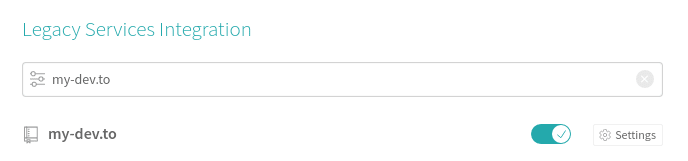
You can now click on “settings”.
We now need to pass the dev.to token to Travis. Within the “environment variables” section, define a new one called DEV_TO_GIT_TOKEN. Go back to the dev.to tab where you’ve generated the token, copy it and paste it into the “value” input.


4. Put your blog post(s) into your new repository
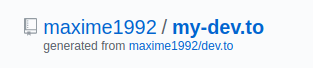
First thing that you need to do is make sure that your package.json defines a property repository.url. It should look like this one: https://github.com/maxime1992/my-dev.to.git with your own username/repository name. It will be used to retrieve your article images from there.
Then, notice that there’s a dev-to-git.json at the root of the project. This is where we will be managing the blog posts we want to publish.
That json file should contain an array, and every entry should have 2 fields: id and relativePathToArticle.
Example:
[
  {
    "id": 133785,
    "relativePathToArticle": "./blog-posts/manage-dev-to-blog-posts-with-continuous-deployment/manage-dev-to-blog-posts-with-continuous-deployment.md"
  }
]
There’s no easy way to manage the creation of an article (yet?) but it’s a quick / one time thing. Go to https://dev.to and click at the top on the “write a post” button. Write a title (that can be updated later) and press the “save changes” button. This way the article is not published yet and only available to you.
As dev.to doesn’t display the ID of a blog post on the page itself, I’ve made a small query to find it into the page. Open your browser console on the dev.to page of your article and paste the following:
+$('div[data-article-id]').getAttribute('data-article-id');
This will give you the ID of the post to put into dev-to-git.json.
Your blog post should have a “front matter” header. For example, the one of the blog post I’m currently writing is:
---
published: false
title: "Manage your dev.to blog posts from a GIT repo and use continuous deployment to auto publish/update them"
cover_image: "https://raw.githubusercontent.com/maxime1992/my-dev.to/master/blog-posts/manage-dev-to-blog-posts-with-continuous-deployment/assets/github-travis-dev-to.png"
description: "tags: devto, publication, blogpost, continuousdeployment, github, travis"
series:
canonical_url:
---
This means that you can manage all of those attributes directly from your blog post written in Markdown. How cool is that?
Finally, all the local images links are rewritten to become remote ones that points to the files on GitHub. Yes, even your images can be part of your versioning process 🙌!
Thanks for reading
Don’t be shy, let me know what you think of this project in the comments ☺️. Do you like it? Will you consider using it? If not, I’d love to know what’s missing to make it work better for you, with your workflow.
I work at CloudNC in central London and we are recruiting!

We have a hackday every first Friday of the month and it’s during the last one that I decided to work on this project. I’ve open sourced an npm module called dev-to-git that handles most of the heavy work to read and publish on dev.to (which is used by the template repository).
Found a typo?
If you’ve found a typo, a sentence that could be improved or anything else that should be updated on this blog post, you can access it through a git repository and make a pull request. Instead of posting a comment, please go directly to https://github.com/maxime1992/my-dev.to and open a new pull request with your changes.
About the Author:
I’m Maxime Robert, a frontend engineer working at CloudNC in London. I’m passionate about Angular, Typescript, RxJs and about web development in general. Since a few weeks, I try to share more about my discoveries through blogging and you can follow me on dev.to for more: https://dev.to/maxime1992
Reference:
Robert, M. (2019). Manage your dev.to blog posts from a GIT repo and use continuous deployment to auto publish/update them. Available at:
https://dev.to/maxime1992/manage-your-dev-to-blog-posts-from-a-git-repo-and-use-continuous-deployment-to-auto-publish-update-them-143j [Accessed at: 21st August 2019].