Mixed Reality in Power Apps has just been released in Public Preview last month (May 2020) during the Microsoft Business Application Summit.
I wanted to share the news about this release and its feature and I had the privilege to do so in the ASEAN Microsoft BizApps UG – Women in Tech online meetup where women across the globe connect and share inspiring stories and industry experiences.
87% of businesses are currently exploring, piloting, and deploying Mixed Reality improving their productivity and customer satisfaction (Source: Harvard Business Review Analytic Services Survey, March 2018).
With Mixed Reality in Power Apps, we can take measurements, view 3D/2D objects, view shapes, and of course, mixed reality.
In using Mixed Reality in Power Apps, we need to enable the features in each of the apps that you need first and then you can add Mixed Reality components in the canvas app after.
REQUIREMENTS
- To test your application you need to have an AR-enabled device on iOS and Android
- The supported 3D file format is .GLB file
ENABLE MIXED REALITY:
- 1. Create Canvas App or Edit an app.
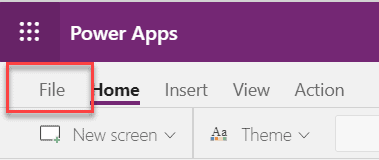
- 2. Select the File tab
- 3. From Settings, select Advanced Settings. Scroll down until Under Experimental Features then enable the Mixed Reality features.

4. Then select Return to continue editing your app. If you are going to select the Insert tab in the left navigation or the ribbon, you will see the Mixed Reality components.

VIEW 3D OBJECT
If you have a 3D object that you want to view in your Power Apps, here are the steps:
- 1. From the Insert Tab, select Media, scroll down and select View 3D object

- 2. In Source (Src) properties, change it to the location of your 3D object. It could be from Github, SharePoint, or in OneDrive for Business.

This will then your 3D object using this component.

GETTING MEASUREMENT USING MEASURE IN MR COMPONENT
Measure in MR helps you take measurements by Area, Volume, and Distance of the location where you will put the 3D objects like a piece of furniture or an industrial machine. This helps you visualize the imaginary object in that location through the measurements that you based upon in your application.
To add the Measure in Mixed Reality component:
- 1. From the Insert tab or in the left navigation, select Mixed Reality >> Measure in MR


- 2. Select the “Measure in MR” button, and from the properties, you can choose the display type of the button, unit of measurements, and measurement type. For this blog we are going to use the following properties:
- Display type: Icon
- Unit of measurement: Centimetres
- Measurement type: Area

- 3. From the Advanced Properties, under OnChange, add this code:
CREATE SHAPES USING VIEW SHAPE IN MR COMPONENTS
We can place a cube or certain types of shape by using the View Shape in MR. The properties of the shape’s length, width, and depth can be used to measure the shape of an object which we can visualize in the real world.
- 1. From the Insert tab or in the left navigation, select Mixed Reality >> View shape in MR


- 2. Select the ViewShapeInMR3 button and from the properties, you will see the display type, shape width, shape height, shape depth, and unit of the measurements.

3. In the Shape width, height, and depth properties, we are going to use a variable to store the value that we get from the input text field. Insert three input text fields and rename it to the following: txtDepth, txtHeight, txtWidth.


Save your application, publish it and view your app in an AR-enabled capability device.

GETTING SCREENSHOT FROM THE MIXED REALITY
You can take a screenshot with your 3D Model in Mixed Reality with the real world by clicking the camera button. You can use this image for your approval process to check if the measurement is correct or the visualization of the product is okay.
To take a screenshot and save it to the Gallery:
- 1. Insert a Gallery in your app. In the property of the Gallery, select the 2 columns Gallery in the Layout properties.
- 2. In the Place a cube button, under Advanced Properties, type in this code under OnChange
If(
!IsBlankOrError(ViewShapeInMR3.Photos),
Collect(
photos,
ViewShapeInMR3.Photos
)
)

- 3. Select the Gallery and change the Items properties to photos

- 4. Under the Image in the Gallery, change the Image property to ThisItem.ImageURI

REFERENCE:
If you want to learn more, you can read these links below for your reference.
• Power Apps Canvas Mixed Reality
If you have some ideas that you want to add in Mixed Reality in Power Apps, add your ideas here below:
About the Author:
My name is Mary Angiela Cerbolles. You can call me “Anj.” My Microsoft journey started back in 2012, when my Manager told me to start learning SharePoint. I began to learn how to build a SharePoint server, build forms, and give tech solutions from blogs, tutorials, and the tech community. Everything changed when Microsoft 365 has released. After that, my field of expertise widened. I am now working as an Application Analyst focus in SharePoint, Power Platform (Power Apps, and Power Automate), Microsoft Teams, and Azure.
Reference:
Cerbolles, A. (2020). Mixed Reality in Power Apps. Available at: https://anjcerbolles.net/2020/06/23/mixed-reality-in-power-apps/ [Accessed: 7th March 2021].
Find more great Power Platform content here.