Let’s assume we need to create an Intranet portal for an
enterprise based on SharePoint 2013 and this portal should be based
on several different site collections. Each site collection has its
own subsites and they built the navigation items for this site
collection. And that’s the challenge: although each site collection
as its own navigation (and does not include the navigation of other
site collections) the portal should have an integrated navigation –
based on the navigation of all included site collections. What we need to
achieve is this: the portal should have an
integrated navigation – although it uses several site collections.
The best way to do that is to use Managed Metadata
Navigation.
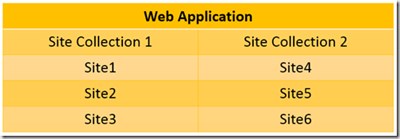
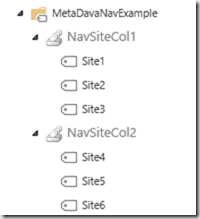
Let’s make an example: the portal is based on a web application
with two site collections. Each site collection contains three
sites. Site collection 1 has these sites (site1, site2, site3) and
site collection 2 has these sites (site4, site5, site6).
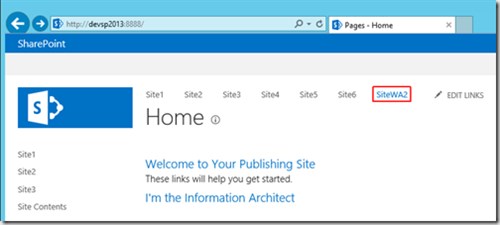
This is how my demo portal looks like:
The questions now is: how can we setup an integrated navigation –
or in other words: how can we achieve, that the sites 4, 5 and 6
are also used as navigation elements in Site Collection 1 –
although they exist in Site Collection 2 only? And how can we
achieve that the sites 1, 2 and 3 are also used as navigation
elements in Site Collection 2?
That’s where Managed Metadata Navigation comes into play.
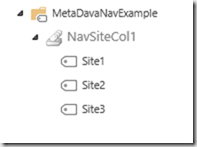
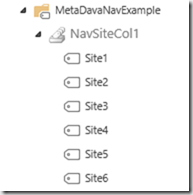
First I need to create the Managed Metadata Navigation for Site
Collection 1:
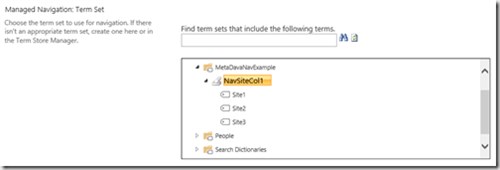
After that I change the navigation settings for Site Collection 1
this way:
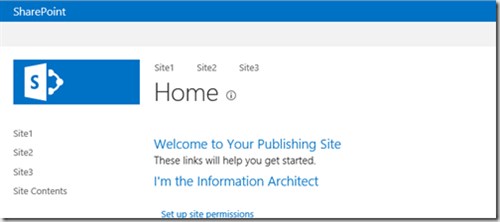
With these settings my site collection now looks like this:
Now I need to added the sites from Site Collection 2 to the
navigation for Site Collection 1:
Because Site4, Site5 and Site6 are members of another site
collection (Site Collection 2) I need to provide links like
this:

Now the Metadata Navigation for Site Collection 1 is configured
and the site collection looks like this:
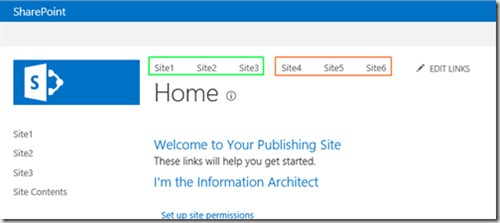
Site Collection 1 now uses navigation items that are based on
different site collections.
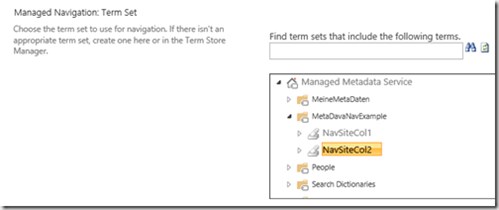
But how about Site Collection 2? I could create another Term Set
(e.g. NavSiteCol2) and create all items again manually – but there
is another way!
Instead of completely doubling a term set with all terms I only
create another term set (NavSiteCol2) without any terms … and I
want to ‘reuse’ the navigation items from NavSiteCol1 here. To do
this I open the context menu of newly created NavSiteCol2 and
choose ‘Pin Term With Children’ …

In the next dialog I need to select the terms from NavSiteCol1
that should be reused in NavSiteCol2:

Unfortunately I need to do this six times 🙁 After some clicking
and clicking and clicking … the Metadata Navigation now looks like
this:

Now I’m ready to setup the navigation for Site Collection 2:

First I open Site Collection 1 and click each navigation item one
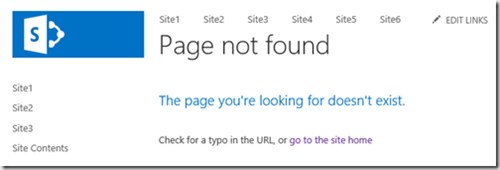
by one – everything works as expected. Now I open Site Collection 2
and click on the first navigation item ‘Site1’ … and this is what
happens:
Why that? When checking Site Collection 1 all navigation items
worked without errors? And the navigation items of Site Collection
2 have been ‘cloned’ in Central Administration … so why is there a
problem in Site Collection 2, but not in Site Collection 1?
To answer that, we need to go back to Central Administration and
have a look on the items Site1, Site2 and Site 3. if you compare
their settings wit h the settings of for example Site4 you might
notice the difference. Site1, Site2 and Site3 don’t have an
assigned a URL – and that’s the problem. For Site Collection 2
these items (Site1, Site2 and Site3) are ‘foreign’ items – or in
other words: they are part of another site collection. And they
need to have an URL like Site4, Site5 and Site6 to be accessible
from outside of Site Collection 1!
After assigning an URL to all navigation terms in Central
Administration the integral portal navigation works as expected! By
the way: sometimes you need to open the site collections navigation
settings after changing settings in central administration to
ensure that the changes have been taken over! But that might only
be an issue of my development environment (or maybe I run out of
patience to soon).
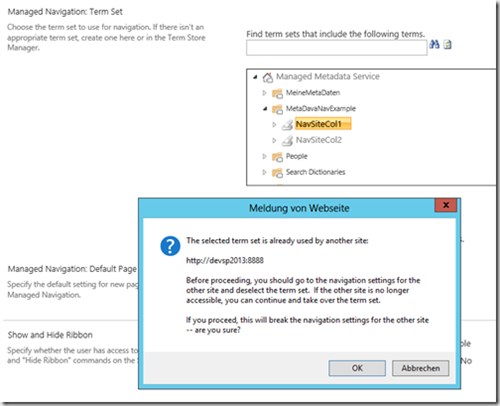
There might be one question left: why do I need to create an
identical clone of NavSiteCol1 to be used as Managed Metadata
Navigation items for Site Collection 2? Why can’t I use NavSiteCol1
as Managed Metadata Navigation items for Site Collection 2
too?
OK – let’s try this:
When I try to use NavSiteCol1 for Site Collection 2 too – this is
what happens:
You don’t have to create one complete Metadata Navigation and
‘clone’ it completely – as I have done in the first example. In
real world scenarios you create a Managed Metadata Navigation Term
Set for each Site Collection with only the local navigation items –
like this:
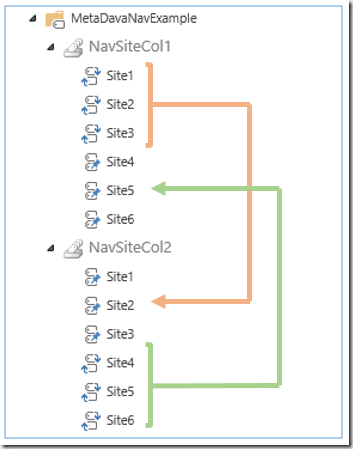
After that Site1, Site2 and Site3 get pinned to NavSiteCol2 – and
Site4, Site5 and Site6 get pinned to NavSiteCol1 – like this:
I have been asked if that kind of Managed Metadata Navigation can
be used for one Web Application only? (Unfortunately I deleted this
comment by mistake). Let’s check this 🙂
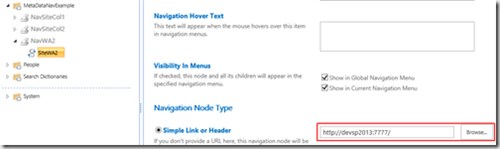
I added another item to my metadata items targeting a site in
another Web Application:
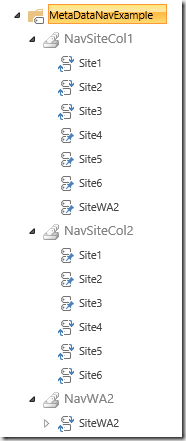
The sites Site1 to Site6 are all belonging to Web Application 1
(http://devsp2013:8888/). The new item SiteWA2 belongs to another
Web Application (http://devsp2013:7777/). As you can see in the
above screenshot I already pinned the newly created item (SiteWA2)
to the existing metadata navigation items.
And this is how this looks like in the browser:
When I click on SiteWA2 the root site of the newly created Web
Application is opened.
There is just one thing you need to be aware of: When you want to
create a metadata navigation for more than one Web Application,
don’t use local or relative links (like I have done in the sixth
screenshot) – you need to use absolute URLs:
If you have any feedback or questions for Oliver please leave a
comment below.
Oliver Wirkus is speaking at ESPC14 –
check out his session ‘Moving Mountains With SharePoint!‘. For more
expert advice on on Document Management check out Oliver’s ESPC13
conference presentation on ‘Document Management with SharePoint 2013 Made
Easy‘. Download Now>>