A client contacted me the other day about some help with printing a picture library. I found a simple way to do this, and I wanted to share to hopefully save someone some grief.
If you search the interwebs for “print sharepoint list” you get articles that are either a fancy ribbon button for printing lists/libraries form codeplex, or doing javascript or similar to call the print dialog from a modal. That works, and I started down that path.
My DUH Moment
Then it hit me. I guess I had assumed the client did this and determined it wasn’t good enough, but since I didn’t ask, I figured I’d give it a quick try. In your browser go File -> Print from your picture library and see the results:

Not too shabby, that almost works! Why I didn’t try this earlier? However, a few of the SharePoint site elements are visible like the site logo, page breadcrumb and the photo library toolbar, but overall, not bad. Just using the IE print preview, we can clean it up a bit to get more on a page, shrink the page zoom to 70% and decreased margins to .25″ all around. Now we have this:

Nice! In case you were wondering, this is SharePoint 2010 with default branding. Depending on your branding and desired printed output, this might suffice. But, I wanted to get a cleaner view that just had the pictures on it. You could do this a couple ways, but the easiest in my mind is to use CSS only with another view. I couldn’t use the ribbon button because a picture library doesn’t load the default ribbon, but loads a different toolbar so you would have to change the XML of the feature to load on a different toolbar. Anyway, too much work than I wanted, so let’s see how I used simple CSS to get it done.
The CSS Way
The key here is media:print. This tag is only called when you try and print the page, so we just need to add some CSS to picture library view page to hide the elements we don’t want. This is what I did, but of course this might changed based on your images. The default view only showed a few images to keep load times fast, but for printing we needed a view that had everything. Let’s go:
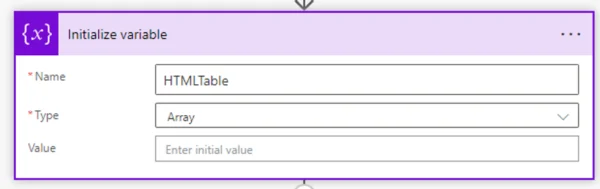
1. In the picture library, create a new view based on your current view, but on the totals, make sure the Item Limit is set to load all the items (this can also be set in SP Designer).

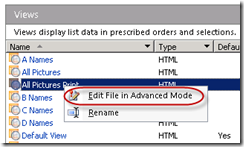
3. Open SharePoint Designer, open the site then go to the library. Open in advanced edit the view page.
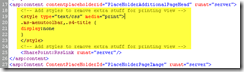
4. Look for the line: <asp:content contentplaceholderid=”PlaceHolderAdditionalPageHead” runat=”server”>. Insert the following:
<!– Add styles to remove extra stuff for printing view –>
<style type=”text/css” media=”print”>
.ms-menutoolbar,.s4-title {
display:none
}
</style>
<!– Add styles to remove extra stuff for printing view ->
What we’re doing here is we’re saying when the media type is print, apply the following CSS. The first element is the picture toolbar, and then I hide the entire s4-title, which includes the site logo and page breadcrumb. It’s basically the entire table row. When you’re done, here’s what it should look like in SharePoint Designer (I highlighted my change):
5. Go back to your library and load your All Print view. Again, click File -> Print and see the new results:
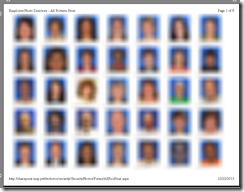
This gives just the images with no other SharePoint elements on the page. My apologies for the blur on the images, but I think you can get the idea.
For more information on C5 Insight or this blog entry, please leave a comment below.
Check out this free eBook by Yaroslav Pentsarskyy’s on Rapid SharePoint 2013 Collaboration Solution Development and Deployment Ch. 3 Applying Branding to the Collaboration Components. Download Now>>