While writing this post, I discover an issue while migrating blog content to SharePoint Online. The issue was pictures associated with blog posts published using Live Writer (and so stored as attachments on SharePoint) were not migrated. This issue is not really a product bug as this way of blog posting is using specific SharePoint API’s. I’m really impressed by the quality and the responsiveness of AvePoint Support team. Only a week was needed to have confirmation of repro, details about the issue and get a fix. Whaou!!!
Following my previous post (http://blog.hametbenoit.info/Lists/Posts/Post.aspx?ID=365) related to the migration tool installation, now it’s time to start the migration to SharePoint Online.
Launch DocAve control either directly from the server using the shortcut created on the Dektop/Start menu or using your web browser from your workstation (URL to use has been defined during the Control service installation – default is https://<servername>:14000)
This will launch a Silverlight console; off course, the first you have to do is to login onto the DocAve site (default login is admin/admin – it’s recommended off course to change it immediately after the first login).

Configure the connection to Office 365
As we will migrate from On Premises to Office 365, the first thing is to configure the connection to your Office 365 tenant. To do this, you have to define an agent group (which contains SharePoint servers) and then the connection to SharePoint Online.
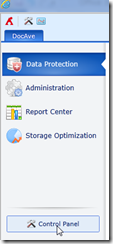
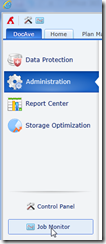
Go to the the Control Panel shown on the left part.
Click on Agent Groups

You already have a default agent group created but it’s not usable in our migration context, so create a new one.

To select SharePoint servers which must be part of this agent group, you have to select to related SharePoint farm thanks to the Farm drop down menu.

You can close the Agent Group configuration.
Then click on Office 365 Instance Manager.

If you have already connections defined, it will be shown here; if not, click on the Create button.

You have to define few settings such as domain name – which is your SharePoint Online URL without the HTTP or HTTPS (looks like <your Office 365 tenant>.sharepoint.com) – and then select the agent group you want to use.

At this time, there is NO connection with your SharePoint Online.
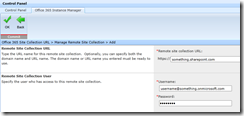
You have to define a user account to use for SharePoint Online authentication and connection; click on the Manage Remote Site Collection and then on the Add button


Type the site collection URL – default is set to the URL you define at the previous step, and the username/password to use. It is off course recommended to define a specific user account (equivalent to service account for SharePoint On Premise) with a complex and never expire password.
Then you should be able to manage your SharePoint Online site collection remotely.
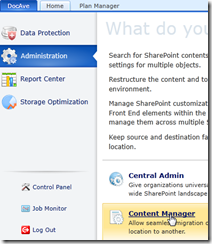
To check if the communication with SharePoint Online is working fine, close the Control Panel window and go to Content Manager at the Administration section.
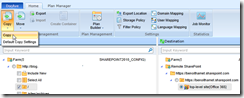
On this window, there are 2 section:
> on the left part, you will see all of your SharePoint On Premise farm managed with AvePoint
> on the right side, you will see the same AS WELL AS your SharePoint Online (below Remote SharePoint tree)
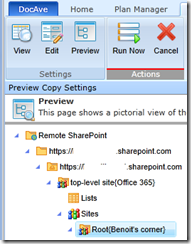
If you open the sub tree below Remote SharePoint, you should see all site collection content.


Migrate the content
Then, to migrate your content from your On Premise farm to SharePoint Online, you have to select the content from the left part and then choose to Copy or Move the content to SharePoint Online.
An action summary is displayed. At this stage you can still edit the operation, preview the actions or execute the migration.
If you edit the operation, you change few settings such as apply some content filter, backup the destination before, copy the security…

If you preview the operation, the system is emulating the migration to show you the structure at the destination side.
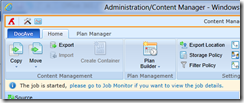
Once you are happy, run the migration job by hitting the Run Now button.
The migration job will copy/move the content and automatically enable SharePoint features used at the SharePoint site source.
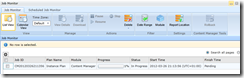
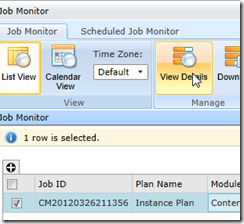
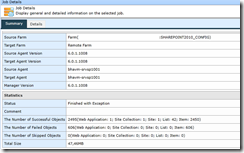
A job has been created and you can access it by clicking on the link provided; note job monitor can be accessed through the Job Monitor from the home page.
You will be able to see the progression.
Content Migrated
For this post I created a dedicated SharePoint Online site collection based on default Team Site template.
The content migrated from SharePoint On Premise is based on Blog template; I choose to copy my blog onto SharePoint Online for this purpose.
This will show you the migration will be able to overwrite existing content.
The good point is your destination site is already accessible while the content is migrated.
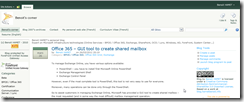
SharePoint On Premise
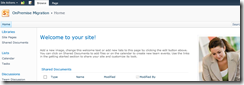
SharePoint Online before migration
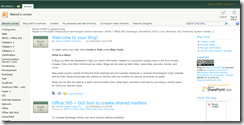
SharePoint Online after migration
For information, it took a little bit more than 45 min to migrate all my blog content (about 51 Mo composed by 341 posts, 33 categories and 53 comments with an outbound bandwidth of 1 Mbps).
Once the migration job has finished, you can see logs by clicking View Details button.
On my next post, we will see how to synchronize content between Online and On Premise sites.
Stay tuned for more SharePoint content by joining our community or by following us on twitter or facebook.