SQL 2012 brings some great capabilities to the table for an “Always-On” environment. In this post we will configure our SQL 2012 environment to be ready for SharePoint. To begin with my environment is made up of the following:
1.2 x SQL 2012 Servers
2.1 x SharePoint Server
3.1 x AD Server
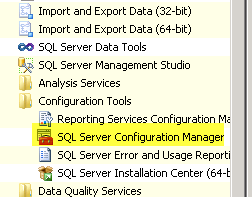
Of course in the real world I would have more servers than this, especially from the SharePoint side. Firstly you will need to install SQL 2012 which I am not going to cover here as it is just like installing any other version. Once installed you will need to access the “SQL Server Configuration Manager“.
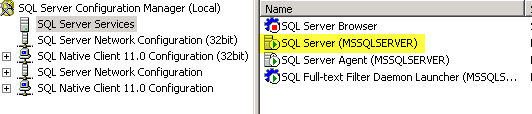
Once opened select the “SQL Services” and then “SQL Server (YOUR INSTANCE NAME)“.
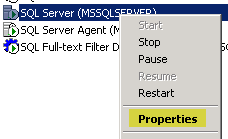
Right click your instance and select “Properties”
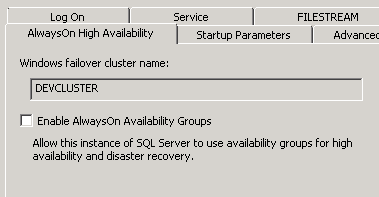
Before we can do anything we need to have made sure that we are running a base Windows Cluster, for details on this you can visit TechNet. Once this enabled you should be able to select the “AlwaysOn High Availability” and it should display your windows cluster name and a checkbox to enable the “AlwaysOn Availability Groups” feature.
Check to enable the “AlwaysOn Availability Groups”
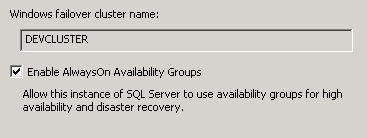
Click to apply the changes, you will then be told that you need to restart the services for it to take effect. Don’t do that yet.

Now we need to enable named pipes communication for the SQL instance. Navigate to the “SQL Server Network Configuration” node then select “Named Pipes“, and choose to “Enable” it.

As before you will be warned about the service needing restarting.

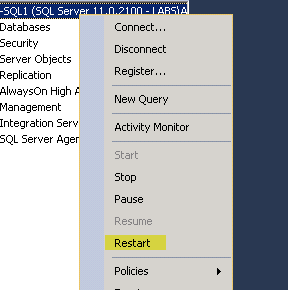
This time you can either restart the services from the configuration window or access the SQL management studio and right click the server and choose “restart“.
Now we have the basic configuration completed; now we need to create a test database to use for setting up the always on configuration. I created one called “TestAvailabilityDB“.
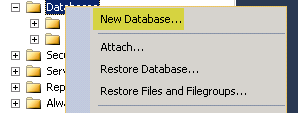

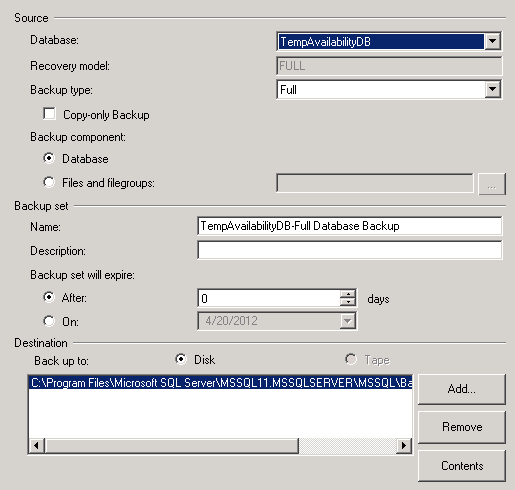
Once it is created you “MUST” back it up, this is a pre-requisite for the always on configuration.
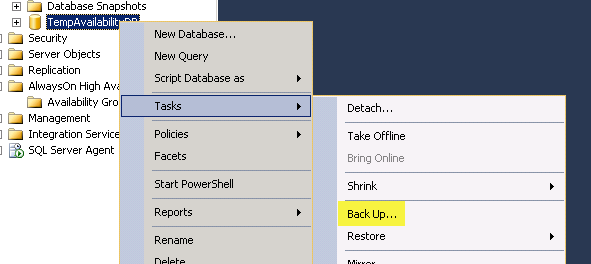

Once you have backed up the database, you then need to navigate within SQL management studio to the “AlwaysOn High Availability” node and right click and choose “New Availability Group Wizard”
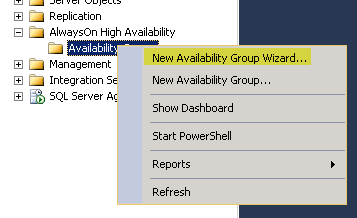
As with most Microsoft products now we are given a great wizard to run through to create what we need.
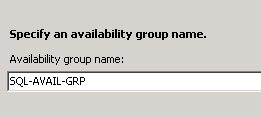
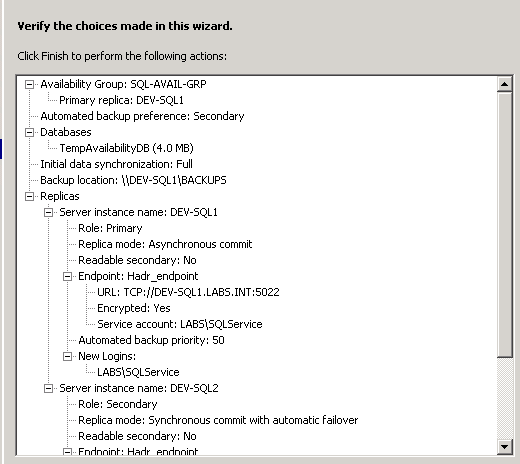
First we need to name the group, for me I called it “SQL-AVAIL-GRP”
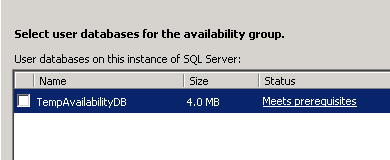
Next we need to select the database we want to use, this will be the test one we created, and notice the status says it meets the prerequisites if the database was not backed up it would not allow you to select this database.

Select the test database.
When we press next we are presented with various options, the first setting is to add the replica servers for the “AlwaysOn” configuration. The primary server is already list; this is the current server you are running the wizard on.
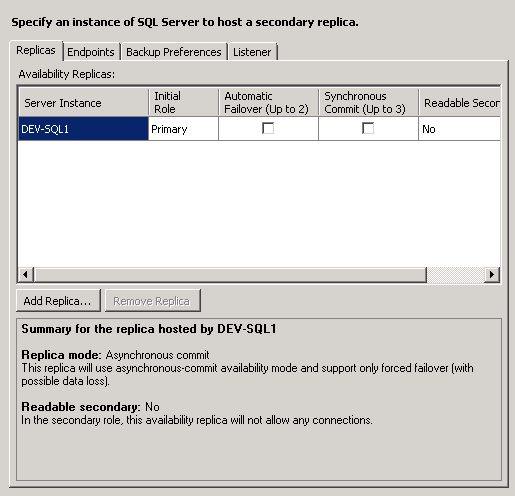
Click the “Add Replica” button.

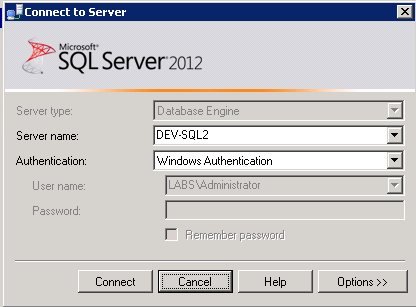
It will then allow you to connect to the server you wish to use; in my case it is called “DEV-SQL2“.
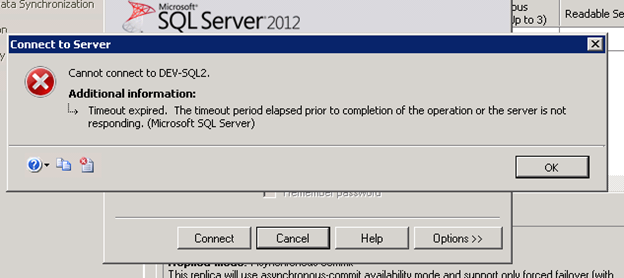
If you happen to get this error, it could be credentials, security or even network issues.

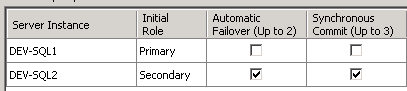
Once the connection is made, you will now see the secondary server listed. By default the “Automatic Failover” and “Synchronous Commit” options are selected.
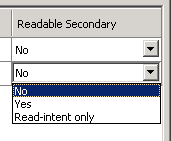
You also have the ability to define if the secondary is readable at all, for this example we will use the default of “No“. Further documentation can be found on TechNet about the logic behind these options.
Once set you then need to check the endpoints and you can modify them but I kept them with the default values.

Now we need to specify where the backups should occur, for me I changed this to the “Primary“.
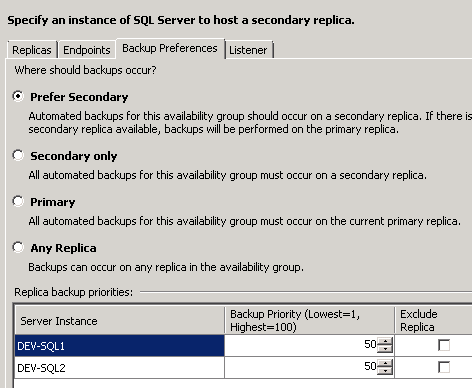
I then specified the path to use, which in the real world would not be on the SQL server but a shared path that all the SQL servers can see.
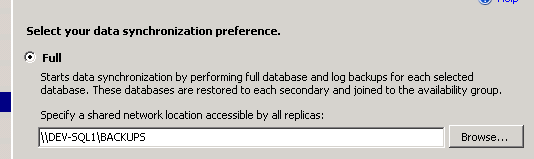
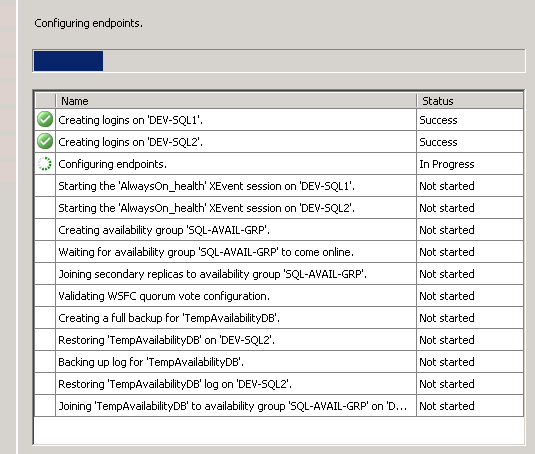
Next apply the changes. Ass you can see the listener piece failed, that is because I wanted to run through the process manually.
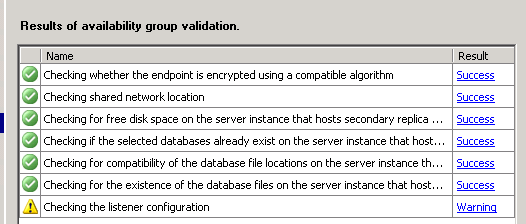
Ignore the error and continue.
Once this has completed successfully now we need to create the listener. Navigate the “AlwaysOn High Availability“; go down to the “Availability Group Listeners” section.
Right click and choose “Add Listener”

We need to add a name (this will be created in DNS), a port to use and a static or dynamic IP. Best practice would dictate a static IP address. My details are as below:

Once done we need to open up the “Windows Failover Cluster Manager“.

Once the application opens expand our cluster, and then expand the “Services and Applications” section. Right click the availability group called “SQL-AVAIL-GRP” or whatever you called your group. Select the “Add Resource > Client Access Point” link.

Assign a name for the client access point and an IP address to use.

Apply the changes as shown below.

Once created successfully navigate to the same place and choose the “Bring this service or application online“.

The following status screen should now be displayed, showing everything is now online ready for use.

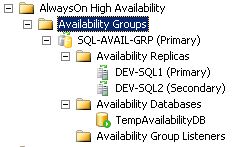
Now we have it all setup you should see the following when you expand the “AlwaysOn High Availability” node within SQL Management Studio.

When accessing the second SQL Server you should also see the database initially set in “Synchronizing Mode“.

Until the database has synchronized, the availability dashboard will display the following:

When running in this mode, if we were to initiate a manual failover we will get the following message:

Check out more interesting blogs by Liam Cleary by clicking here>>
Why not keep up to date with his amazing work by joining our community or by following us on twitter or Facebook!