How many times you have tried to find the correct document among your emails? Here’s an easy way to organize your email attachments. You just need a Microsoft Outlook account and a SharePoint Site. The configuration process is simple:
- Configure a rule in Microsoft Outlook
- Configure a Document Library in SharePoint
- Create a flow with Microsoft Flow
1 Configure a rule in Microsoft Outlook
One of the best ways to manage your email messages is using rules. Microsoft Outlook has many options available. In this case the rules will be used to move messages with specific words in the title to a folder. However, applications are countless. You can use rules to move email of a particular sender, for example your legal advisor or your accountant (more information here).
Using this approach, you can organize your email account by topic or by sender. Follow these steps to configure a rule:
- Create a new Folder or use an existing one. In Figure 1, the “Project Charter” folder was created. The goal is to redirect messages that meet particular criteria to this newly created Folder.
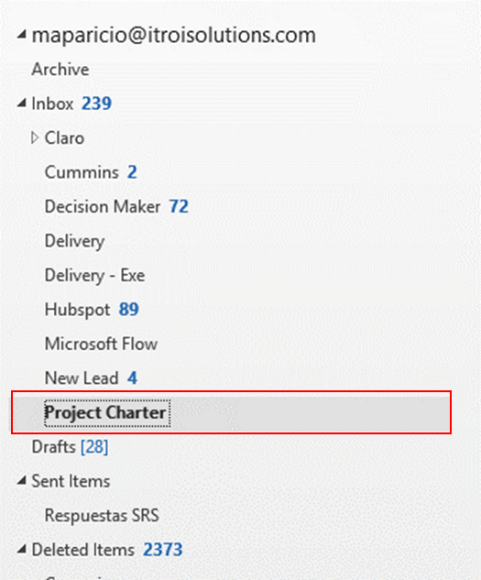
Figure 1: New Folder – Microsoft Outlook
- Follow the steps shown in Figure 2 to create a rule.
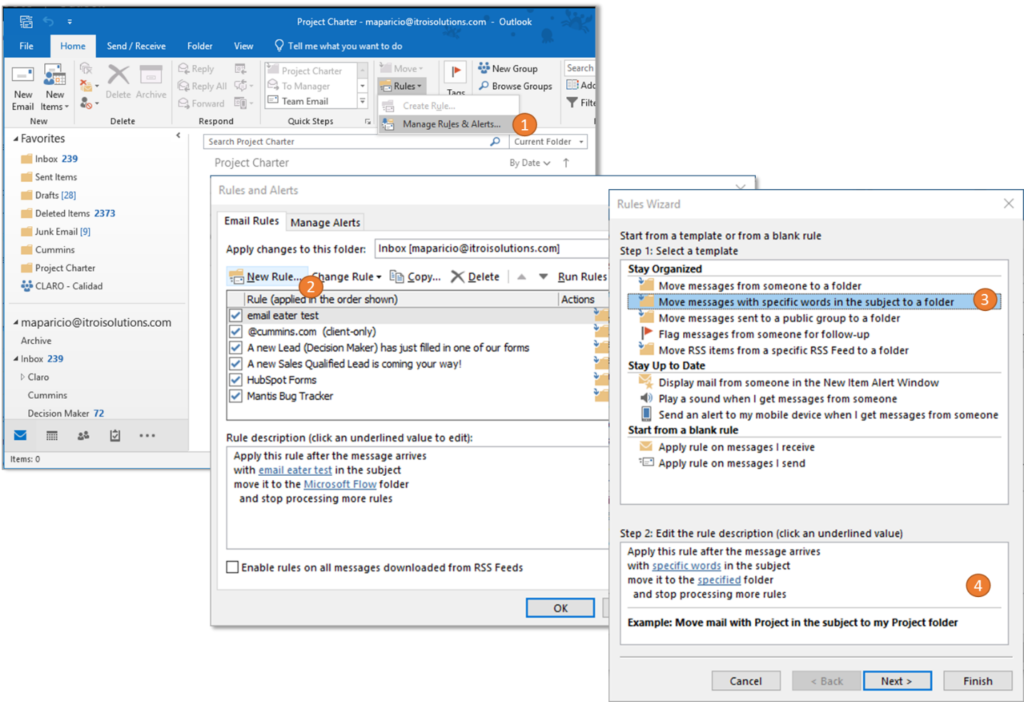
Figure 2: Create a new rule – Microsoft Outlook
In this case, every message containing the “project charter” phrase within subject will be moved to the “Project Charter” folder (Figure 3).
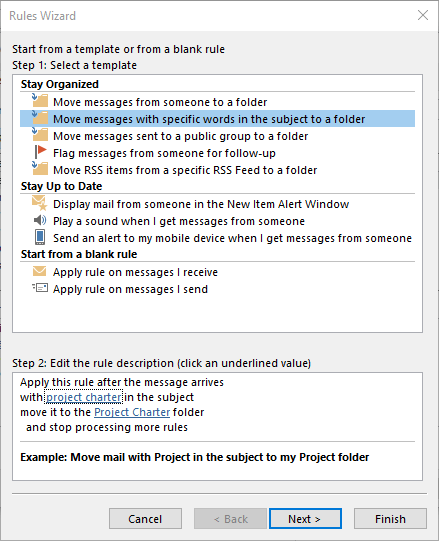
Figure 3: Rules Wizard – Microsoft Outlook
2 Configure a Document Library in SharePoint
Now, let’s create a Document Library in our SharePoint Site. This will be the target library for our documents. To do it, go to “Site Contents” and “add an app” (Figure 4)
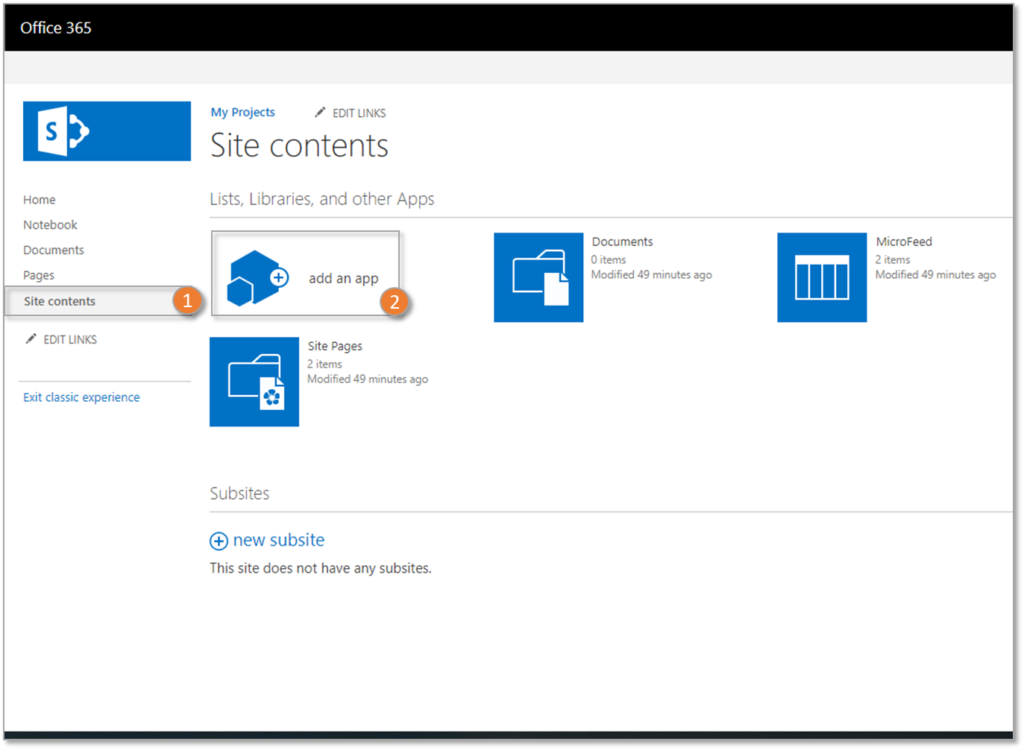
Figure 4: Add an app – Microsoft SharePoint
Then select the “Document Library” app and pick a name for it. In this example, we have chosen “My Project Charters” as the library name (Figure 5).Figure 5: Creating a Document Library – Microsoft SharePoint.
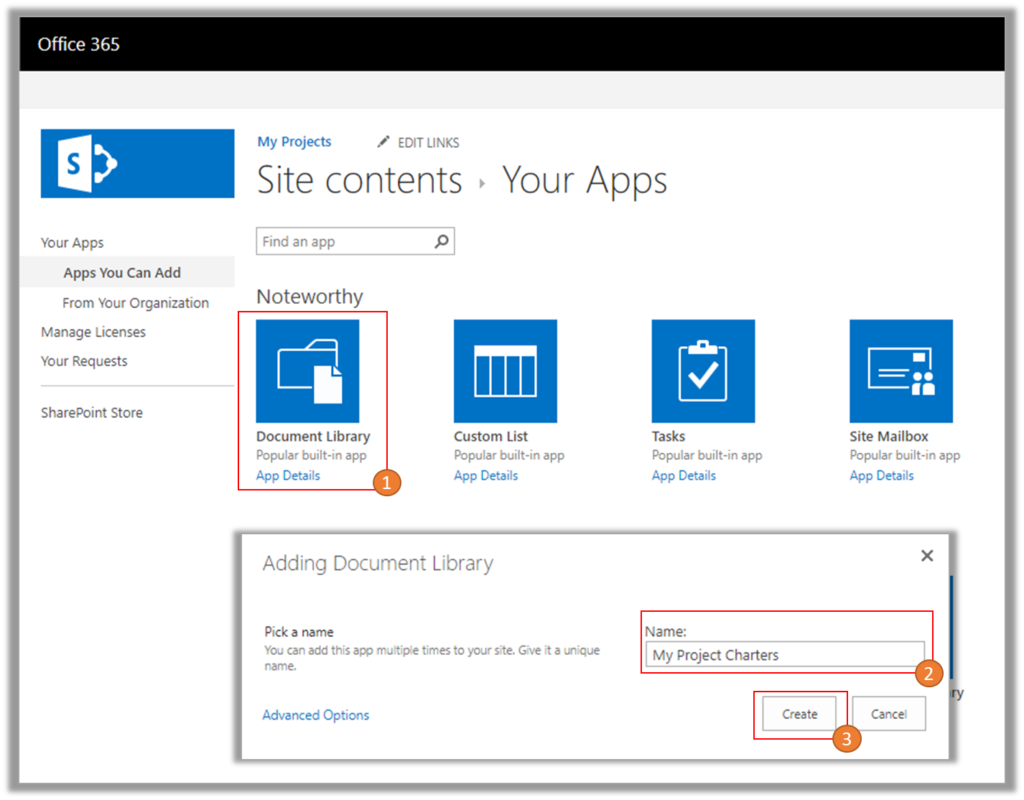
Figure 5: Creating a Document Library – Microsoft SharePoint.
The goal is to use this Document Library as a centralized repository to store our email attachments.
3 Create a flow with Microsoft Flow

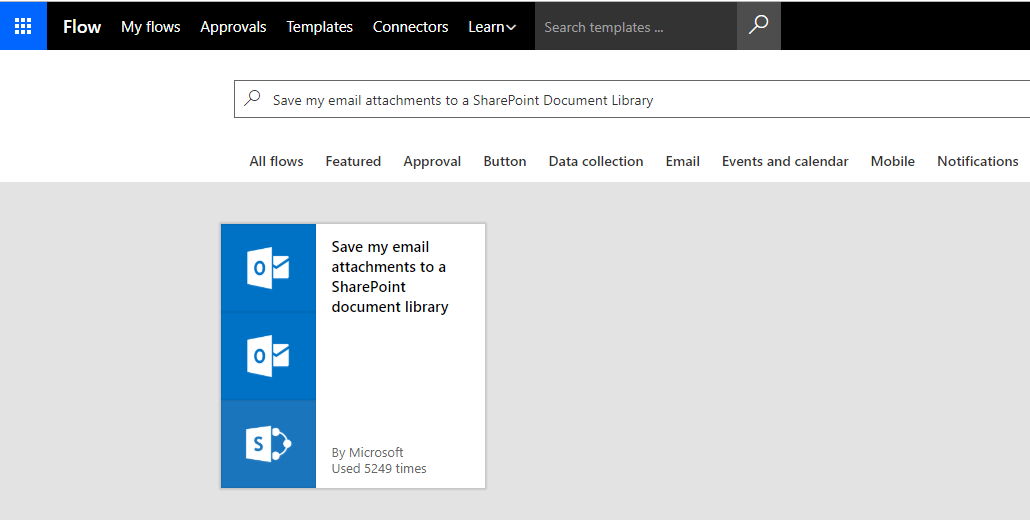
Figure 6: Finding a Flow – Microsoft Flow.
Clicking on the flow, Microsoft automatically will validate your account permissions for both Outlook and SharePoint. However, you must make sure to have enough permissions over the Site where the Document Library was created (Figure 7).
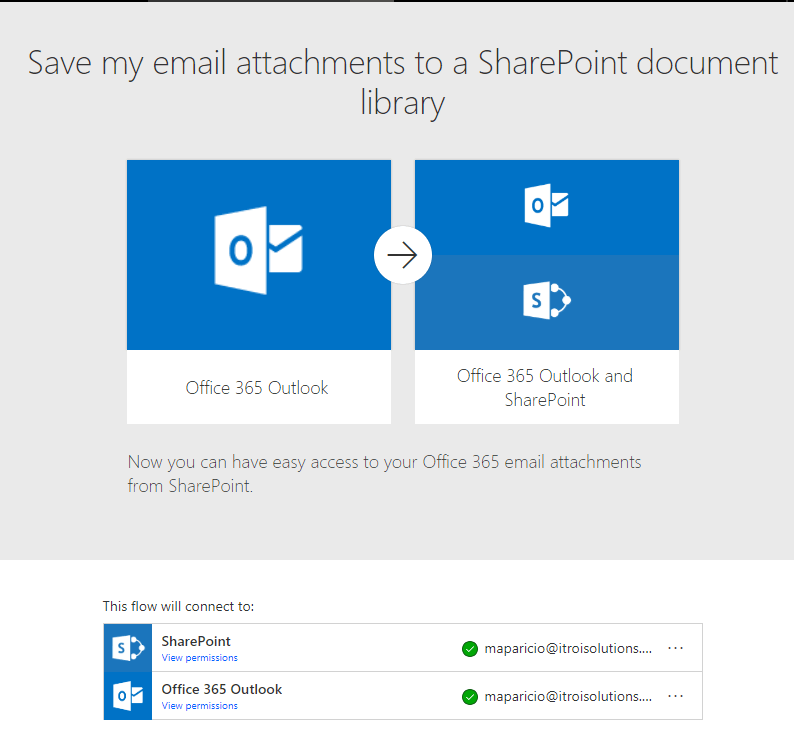
Figure 7: Automatic permissions validation – Microsoft Flow
Then, a form will appear with the following fields (Figure 8):
- Folder: Type the folder’s name created before in Outlook. In this example: “Project Charter”
- Site Address: Specify the Site URL where the Document Library was added.
- Folder Path: Type the Document Library name previously created in SharePoint. In this example: “My Project Charters”
To finish, save the changes.
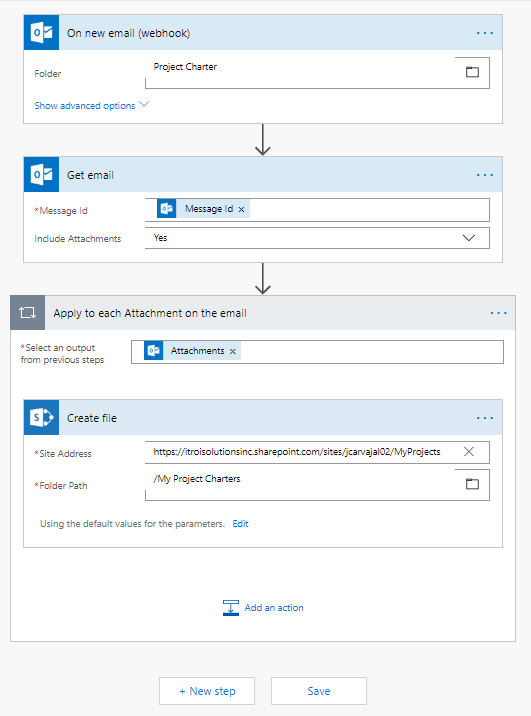
Figure 8: Configuring the flow – Microsoft Flow
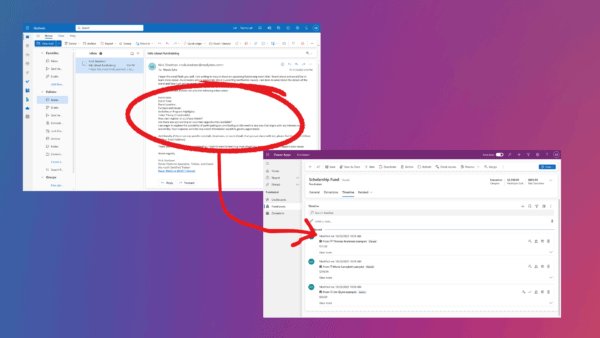
Now, every time you receive a message with the words “Project Charter” on the subject, their attachments will be saved into the SharePoint Document Library we created, helping you to keep your repository organized and up to date (Figure 9).
More complex flows can be created by developing customized processes. At IT-ROI SOLUTIONS we are experts to integrate Enterprise Applications with SharePoint environments.
Figure 9: Attachment saved into SharePoint Document Library.
About the author: IT ROI SOLUTIONS is a solution provider with a clear mission – to make Enterprise Software easier to use. We maximize visibility, productivity and performance of your organization’s enterprise applications with three areas of expertise:
- SharePoint integrated solutions to collaborate and connect Enterprise Applications.
- Enterprise Application integration tools and connectors.
- Application Management Services (AMS)