A couple of weeks ago, I was tasked to implement authentication between the services we have in our Azure landscape. I knew this can be done by using the Managed Identity, as we were doing this on a project I was involved with in the past.
However, I had never actually done this myself. Most of the time the System Administrators were configuring everything and I just had to copy-paste some Guids in a configuration file. After doing some digging into the matter, it was a bit harder to set this up as I had expected at the start.
Lucky for me, Joonas Westlin has some excellent posts on the matter which have helped me enormously. He was also able to help me out on Stack Overflow when I was stuck and couldn’t find out why the authentication wasn’t working correctly.
Much of what I’ll be writing down here will be similar to Joonas his posts on the matter. I’ll be using some different wording.
The posts I’ve used to learn this stuff were:
- Azure AD Authentication in ASP.NET Core APIs part 1
- Calling your APIs with Azure AD Managed Service Identity using application permissions
- Defining permission scopes and roles offered by an app in Azure AD
So, if you’re interested in the original content with some more in-depth information, check out his posts!
Creating your Managed Identity
If you’re in an environment where you want to use authentication between services, you’re probably doing something in a professional environment. This also means you’re probably using ARM templates or something similar.
Well, to create a Managed Identity when using ARM templates is rather easy. You should add the following piece of JSON to the App Service resource and everything will be handled for you.
"identity": {
    "type": "SystemAssigned"
}
After the deployment of this template, a new identity will have been created inside your Azure Active Directory. You can read some more on this in an earlier post of me or the Microsoft documentation.
Your application is now able to use the AzureServiceTokenProvider in order to get an access token. An implementation will look pretty similar to the following code block.
var azureServiceTokenProvider = new AzureServiceTokenProvider();
string accessToken = await azureServiceTokenProvider.GetAccessTokenAsync("[Application ID URI]");

this.AccessToken = accessToken;

_httpClient.DefaultRequestHeaders.Authorization = new AuthenticationHeaderValue("Bearer", accessToken);
var response = await _httpClient.GetAsync("https://aadauthenticationapione.azurewebsites.net/api/data");
var body = await response.Content.ReadAsStringAsync();
As you can see, I’m creating a new access token and use this value in the Authorization header as the bearer token. The contents of this token will look pretty similar to this.
{
  "aud": "905ceb2e-8bde-48ca-bcbd-937b0ed30e67",
  "iss": "https://sts.windows.net/b1f8cb55-7d7a-4e8d-9641-51372b423357/",
  "iat": 1574427342,
  "nbf": 1574427342,
  "exp": 1574456442,
  "aio": "42VgYHjp+2hqNdcyiVLGhlfLNFomAAA=",
  "appid": "a4e07406-b556-4c4d-9525-5f410fd21fe7",
  "appidacr": "2",
  "idp": "https://sts.windows.net/b1f8cb55-7d7a-4e8d-9641-51372b423357/",
  "oid": "bf00c7e8-b14b-4fe5-b768-da255026ff17",
  "sub": "bf00c7e8-b14b-4fe5-b768-da255026ff17",
  "tid": "b1f8cb55-7d7a-4e8d-9641-51372b423357",
  "uti": "FrqIC0box0imFrEVC1ZHAA",
  "ver": "1.0"
}
You might get distracted by the placeholder [Application ID URI] in the above snippet. This is an important piece as it specifies which resource you want access to. How to get this value will be explained in the next section.
Setting up your API with authentication
This is the hardest part or at least the part where you can mess up the most (like I did).
Creating new applications in Azure Active Directory
To do some authentication in an application you need to have a proper App Registration within Azure Active Directory. It’s too bad you can’t use a Managed Identity for this as it’s not a ‘real’ App Registration/Enterprise Application.
So the first thing you need to do is create a new App Registration.
You can name it whatever you like. I like to give it a name that matches the name of the App Service with a postfix for the environment, something like AADAuthenticationAPIOne - DEV. It’s a good idea to create different applications for every environment you have, like Test, Production, etc. This way you can configure different security rules for every application.
You can skip the Redirect URIs for now as we won’t be using it for this authentication flow. To my knowledge, this redirect URI is only used when an actual user is trying to log in.
Configuring your App Registration
Now that you have this new application registered inside Azure Active Directory it still needs to be configured properly.

Application ID URI (which was mentioned earlier in this post)
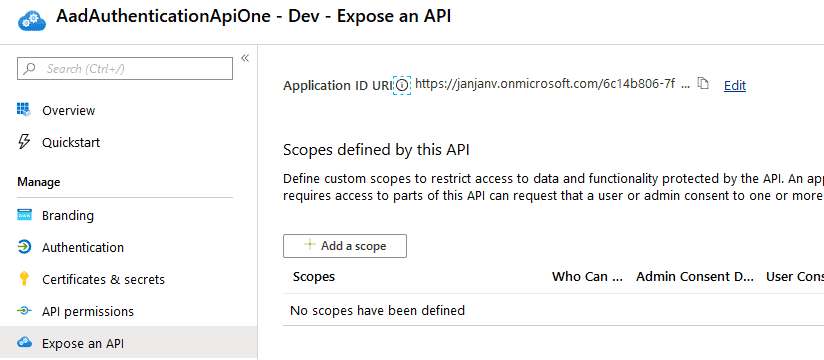
This is a unique identifier used to identify your application. You can fill out whatever you like, a convention I see a lot is https://[tenantName]/[guid]. But feel free to use whatever you like, just make sure it’s unique.
Configuring your .NET Core application
You can start by filling out the correct Application ID URI in your calling application as this URI is now known.
The next thing, which is kind of important, is to add authentication to the actual API.
The first step, add the desired settings to your appsettings.json file.
{
  "Authentication": {
    "Authority": "https://login.microsoftonline.com/[tenantId]",
    "ClientId": "[theApplicationIdOfTheApplicationRegistration]",
    "AppIdUri": "[theApplicationIDURI]"
  },
 ...
}
The second step is adding the following code to the ConfigureServices.
services.AddAuthorization(o =>
{
    // Only tokens with a valid scope should be authorized.
    // Every identity in the tenant has this, so don't use this for authorization.
    o.AddPolicy("default", policy =>
    {
        policy.RequireClaim(Constants.ScopeClaimType, "user_impersonation");
    });
});

services
    .AddAuthentication(o =>
    {
        o.DefaultScheme = JwtBearerDefaults.AuthenticationScheme;
    })
    .AddJwtBearer(o =>
    {
        o.Authority = Configuration["Authentication:Authority"];
        o.TokenValidationParameters = new Microsoft.IdentityModel.Tokens.TokenValidationParameters
        {
            ValidAudiences = new List<string>
            {
                Configuration["Authentication:AppIdUri"],
                Configuration["Authentication:ClientId"]
            }
        };
    });

public static class Constants
{
    public const string ScopeClaimType = "https://schemas.microsoft.com/identity/claims/scope";
}

// And of course, add this to the `Configure` method
app.UseAuthentication();
The above code will make sure the configured App Registration will be used to authorize requests with a valid JWT in the header.
To conclude
Quite a few steps have to be taken to get the authorization in place. However, once you know all of this it’s easy to do.
In Joonas his original posts he also adds authorization based on the Roles of an application. This is a nice addition and something I recommend doing (or using Groups). If you’re interested in this, check out the posts I mentioned at the start of this post and the rest of his blog.
About the Author:
My name is Jan de Vries.
I’m a Microsoft MVP working at 4DotNet, a Microsoft oriented consulting company in the Netherlands.
Most of the stuff I write over here will have some relation to the Microsoft products I’m using.
Reference:
de Vries, J. (2020). Using an Azure Managed Identity to authenticate on a different App Service. Available at: https://jan-v.nl/post/using-an-azure-managed-identity-to-authenticate-on-a-different-app-service/ [Accessed: 20th May 2020].
Check out more great Azure content here