Within SharePoint Online it is possible to activate a page approval process. In this article I will show you how to use a security group for the approvers group and include change history in that Power Automate flow.
What does the template offer?
When a new page is submitted for approval everyone on the approvers list will receive an email. Any one on the approvers list can approve the page. When approved, the page will be published for all readers and the approval status of the page will be Approved.
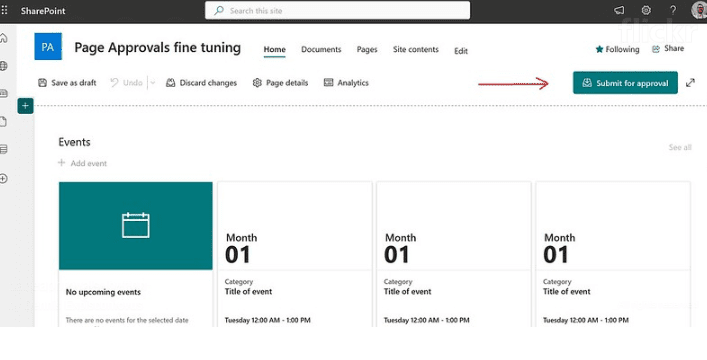
You can configure Page approvals in the settings of the Site Pages library of your site. Microsoft has a Configure page approval using Power Automate support article for this.
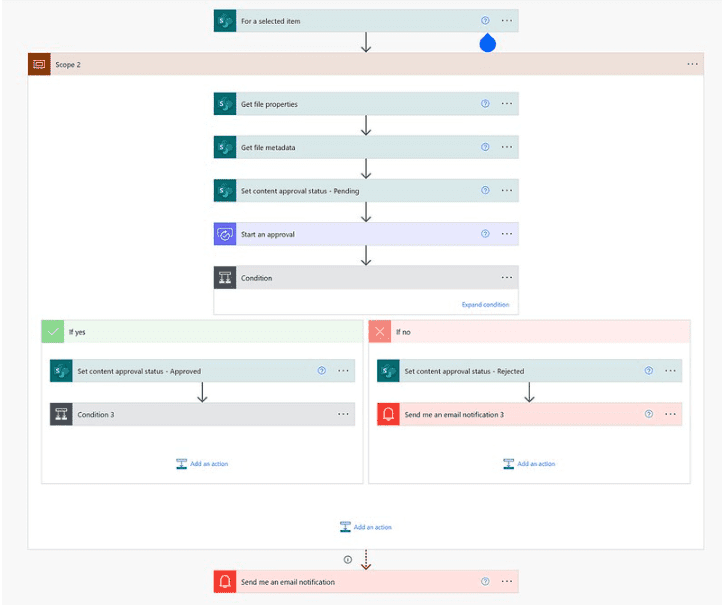
When you follow the steps from that support article you will get a cloud flow based on a Microsoft template which will includes steps like:
– Setting the content approval status for the selected page
– Starting a first to respond type of approval task for the approvers
– Handling the outcome of the approval task and either approve or reject the changes for the page
This is a pretty cool out of the box template. However, in some areas I wanted to change it a bit. In this blog I will share the what, why and how of these changes.
Members of a Group
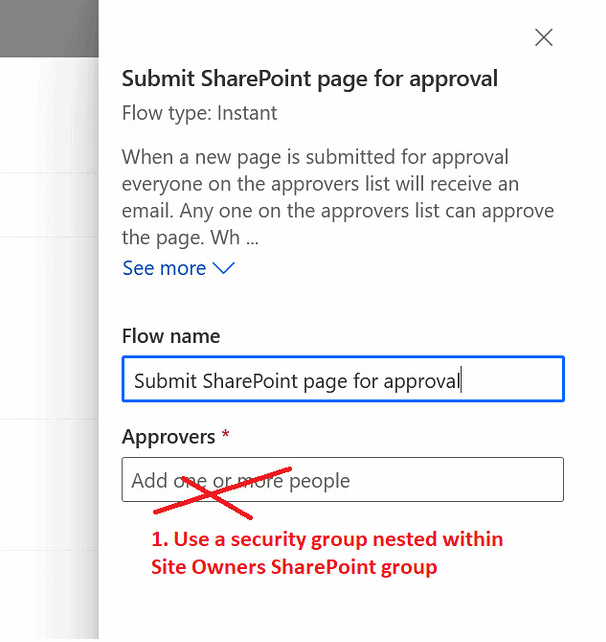
The first thing which I wanted to improve was the list of approvers. I didn’t want to use individual users and configure them in the Start an approval task.

The aim was to use a security group nested within a SharePoint group (site owners).
Highlighted changes
The second part which I wanted to improve was the link in the approval task. The link description says ‘Click here to review the page changes’. But what it actually does is that it directs you the page itself.
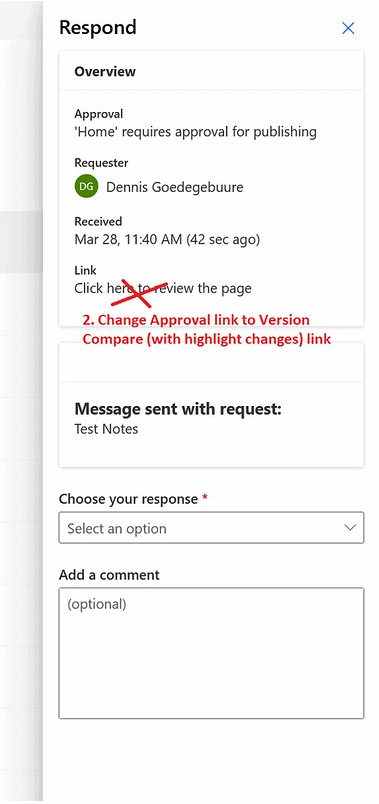
I thought it would be more useful to actually link to the version history of the page and highlight what has changed compared to the previous version. This makes reviewing the page for approval a bit easier.
Flow Setup
This sample assumes you have already configured the Page approvals for the site.
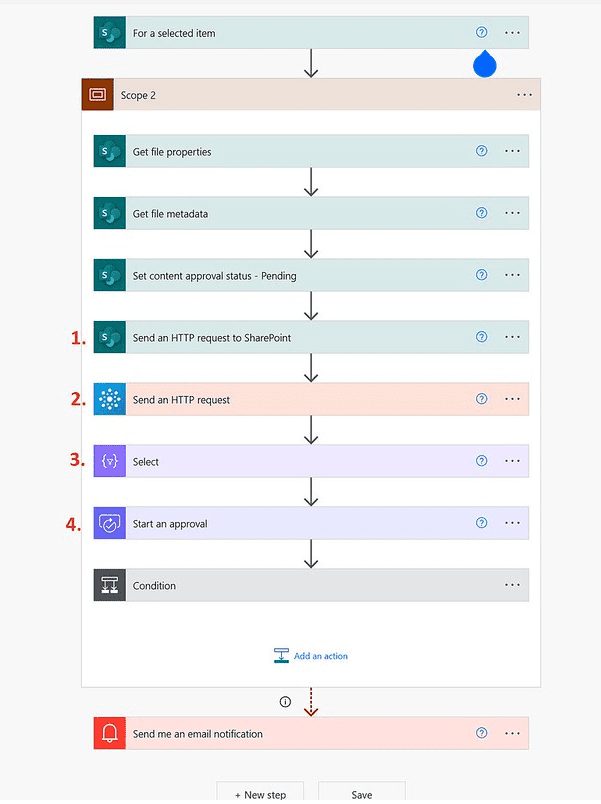
1. Add a Send an HTTP request action
This action is to retrieve the LoginName of the Security Groups nested within the Site Owners SharePoint Group of a site. Normally the Site Owners Group has an ID of 3 (double check this, just in case). This action is placed directly after the Set content approval status – Pending action and before the Start an approval action.
a. Select your preferred site in the Site Address
b. Use the GET method
c. Use the URI from the code snippet below
_api/web/sitegroups(3)/users?$filter=PrincipalType eq 4&$select=LoginName
d. Use the Headers from the code snippet below
{
  "Accept": "application/json;odata=nometadata",
  "Content-Type": "application/json;odata=nometadata"
}
2. Add a Send an HTTP request action.
This action is using the loginName value of the first found security group from the previous action. It uses slice, add & indexOf functions to find and retrieve the id of the security group from that loginName value. The List group members method of the Graph API is used to retrieve the members of the group. A microsoft.graph.user OData cast is used to only retrieve members of that group which are of type user (members of type group aka nested groups are excluded)
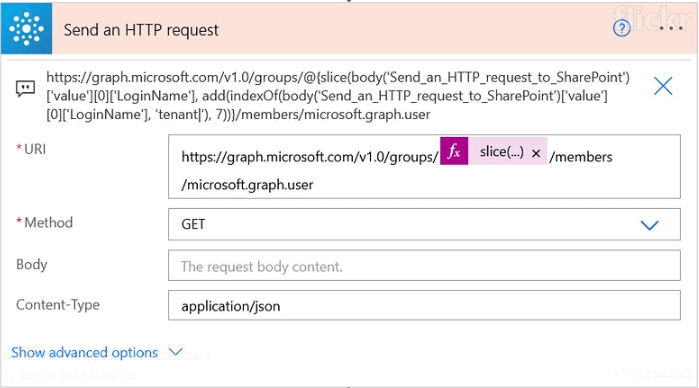
a. Use the URI from the code snippet below
https://graph.microsoft.com/v1.0/groups/@{slice(body('Send_an_HTTP_request_to_SharePoint')['value'][0]['LoginName'], add(indexOf(body('Send_an_HTTP_request_to_SharePoint')['value'][0]['LoginName'], 'tenant|'), 7))}/members/microsoft.graph.user

8-12 May 203 is SharePoint Week.
3. Add a Select action.
This action is used to only select the e-mail addresses values of the returned members.
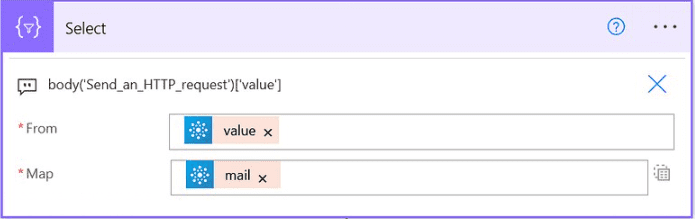
a. Use the body/value from the Send an HTTP request action of step 2 in the From field (via the Expression tab)
body('Send_an_HTTP_request')?['value']
b. Switch the Map field to text mode
c. Add the code snippet below in the Map field
item()?['mail']
4. Update the Start an Approval action.
Only the Assigned To and and Item Link fields will be updated in this action. The expression in the Assigned To field uses a join function to turn the array into a semi colon separated string value. In the Item link field concat, formatnumber, sub & float functions are used to generate a ?versionCompare hyperlink. The syntax of that link is:
NameOfPage.aspx?versionCompareFrom=2.0&versionCompareTo=2.1
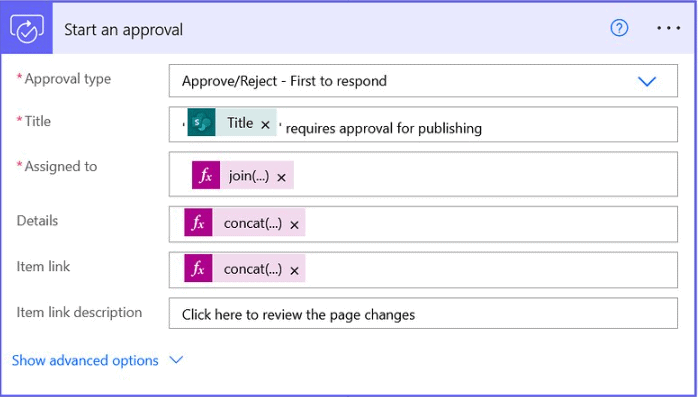
a. Use the code snippet below for the Assigned To field
join(body('Select'), ';')
b. Use the code snippet below for the Item Link field
concat(body('Get_file_properties')?['{Link}'], '?versionCompareFrom=', formatnumber(sub(float(body('Get_file_properties')?['{VersionNumber}']), float('0.1')), 'F1'), '&versionCompareTo=', body('Get_file_properties')?['{VersionNumber}'])
That is it for changing the template setup.
Happy testing!
About the Author
My name is Dennis. I am Dutch and I live and work in the UK as an IT consultant. Currently I work a lot with SharePoint online, Microsoft Teams and all the other products of the Office 365 platform. I also like my share of Dynamics 365 and Azure. I try to blog about everything I come across in my daily job. All the content in my blogs are my personal views and experiences.
Reference
Dennis, 2023, Page approval with changes, Expiscornovus, Available at:https://www.expiscornovus.com/2023/03/30/page-approval-with-changes/ [Accessed on 3 May 2023]