Building business solutions using PowerApps forms on modern SharePoint lists is an important and powerful way to modify SharePoint Online sites without expertise in JavaScript coding or CSS styling. Here are three tips that you should know if you want to build successful PowerApps Forms!
So, you probably already know that you can use PowerApps to modify SharePoint list experience by customizing the forms. If you have played around with the integration, you might already know one or two of these tips, but I doubt you know them all. These are all quite essential, and I’m saving the best one for last.
Tip 1: You can use Managed Metadata fields with PowerApps
That is right, for a long while PowerApps didn’t support complex fields in SharePoint Forms, but it does now, and you might have missed that essential piece of information. Managed Metadata fields are maybe the most versatile and widely used complex SharePoint field type. They use what is called hierarchical set of terms, allowing you to create what ever taxonomical classification needed to describe your data. Term store management includes features like additional labels or synonyms for different terms, support for different languages, as well as moving, copying and deprecating terms.
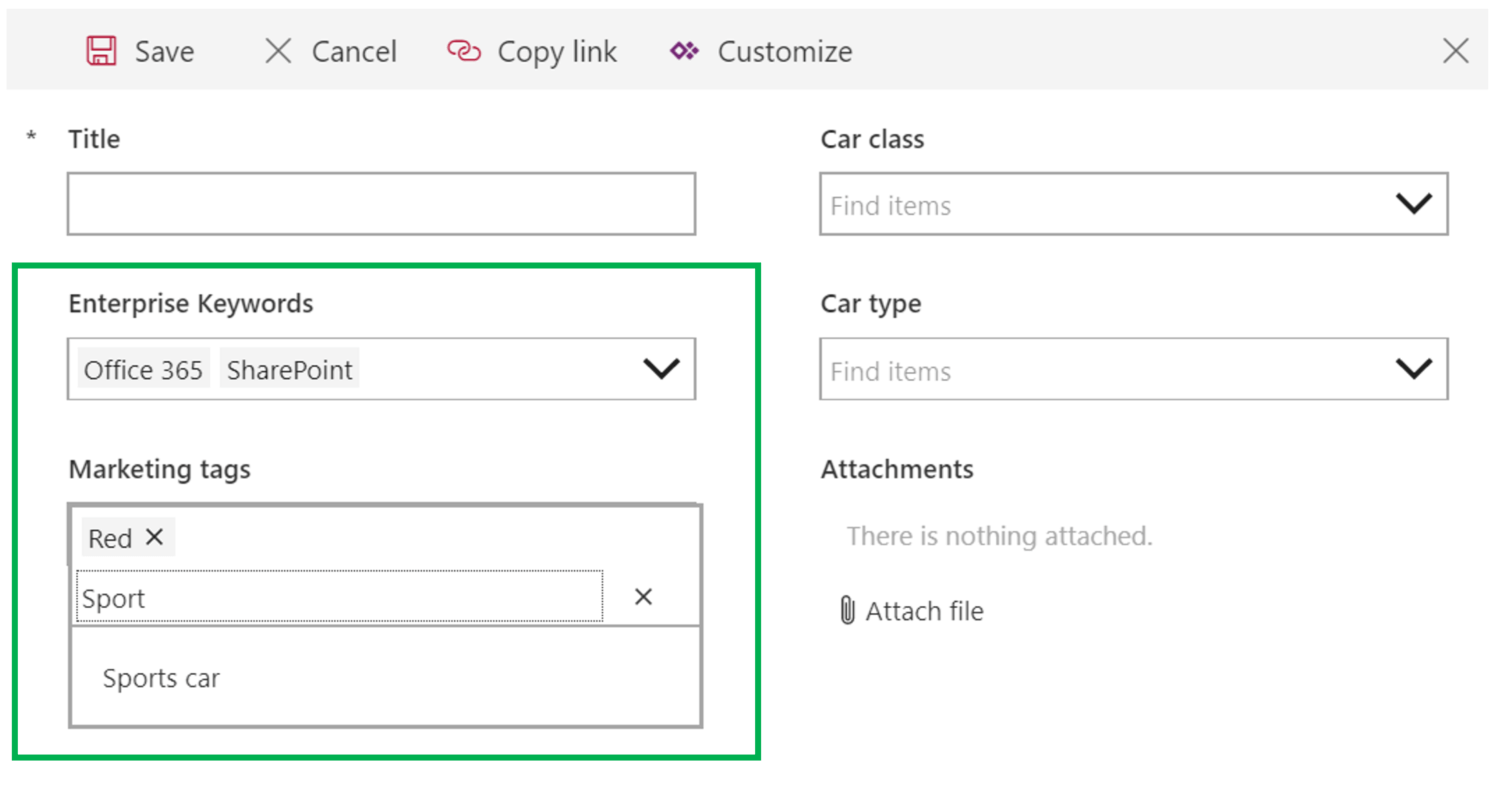
Managed metadata fields on PowerApps forms for SharePoint
Currently PowerApps forms supports both single and multi-choice Managed Metadata fields. It supports regular Managed Metadata fields as well as the Enterprise Keywords. The only thing I find missing at this point is support for so called open submission policy of a term set, where users can add their own values straight when filling metadata.
Tip 2: Lookup fields and filtering
Another very useful field type in SharePoint business forms is Lookup field. The possible values are populated from another SharePoint list, instead of term store or static choice values. This allows you to do some interesting things such as having a one list for orders and another list for order rows, and when you are editing an order row, you could select a product from products list, and so forth.

Filtering a lookup field based on the value of another lookup field
In the example above, I use value of Car class field to filter Car type field choices with relatively simply PowerApps formula. Both Car classes and Car types are separate SharePoint lists on the same site.
Tip 3: Setting the correct permissions for SharePoint lists with PowerApps integration
I said I saved the best one for last, but you feel that this is not a hot tip but something boring instead. Well, this is essential because it is something you might want to do every time when you build a SharePoint form using PowerApps. In a modern team site, out-of-the-box, every person is either owner or member. If it is a public team site, then everyone in your organization will be a member. The problem is, members have Edit permission. With Edit permission a member can add and modify lists, and basically build or modify existing PowerApps.
Usually you build PowerApps for business solutions using a specific business logic. You don’t want that every member of the site is able to override your business logic! So, what you need to do is to make a few modifications to the permissions at least at the list level, but you might just go a head and do it at the site level as well as instructed on the following steps.
Step 1: Change members to visitors at site permissions

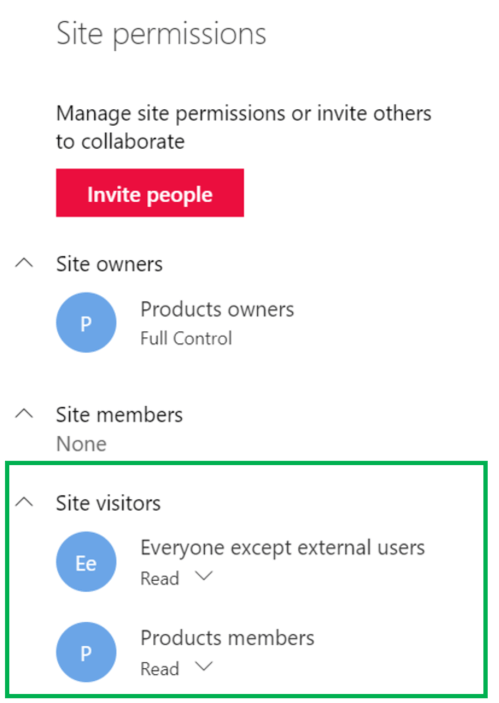
Demoting site members to site visitors
Step 2: Granting Contribute permission to Site visitors
Next, on every list or library on which you want these groups to contribute into, open the list settings and make the following modifications. Under Permissions and management click Permissions for this list. Click Stop inheriting permissions. Select Site visitor group and click Edit user permissions. Change the permission to contribute. Contribute permission gives users the ability to add and modify items without the permission to edit the list and the PowerApps form.
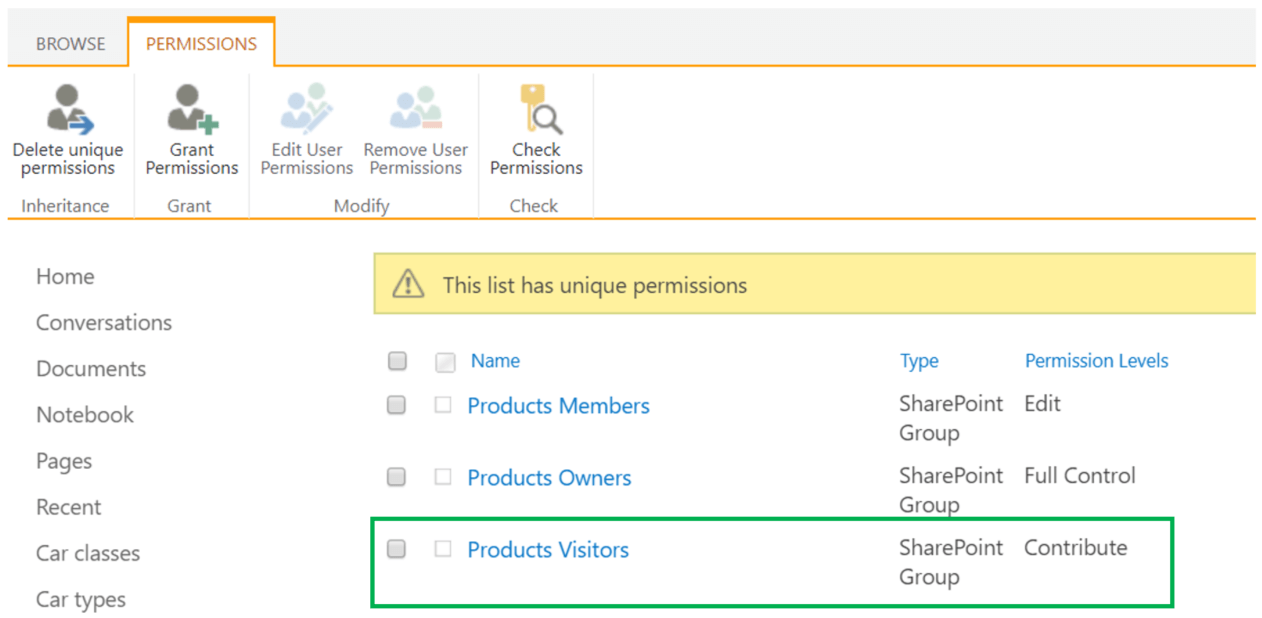
Adding contribute permission for site visitors
While at this, if your business case requires item level permissions, also click Advanced settings under General settings header on the list settings. This configuration view allows you to modify permissions even further. With the following settings, users can only see their own list items on the list, while owners can still see all list items from all users.
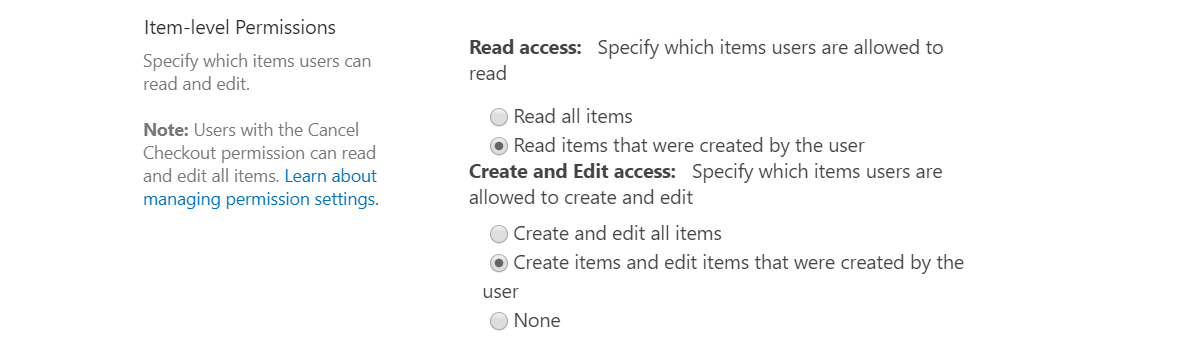
Setting item-level permission on a SharePoint list
There you have it, three PowerApps form tips you need to know if you want to build business solutions with SharePoint lists. Let me know what you think!
About the Author: Olli Jääskeläinen is building digital workplace with Office 365 and Azure technologies. He is Microsoft MVP for Office Development, Microsoft Certified Master (MCM) for SharePoint and Microsoft Certified Trainer (MCT) and works as Lead Architect (Collaboration & AI) at www.sulava.com in Finland.
Follow him on Twitter: https://twitter.com/_opax
Latest blogs:
- ESPC Inspire Awards 2025: A Moment of Celebration at ESPC25
- Tailoring your content strategy for European or US markets
- How to Build Branching Logic in SharePoint Online List Forms: A Step-by-Step Guide
- Microsoft News: Everything You Need to Know from Ignite 2025
- Thinking about Lambda Architectures in Microsoft Fabric