This is the continuation of a series on combining Custom Pages and Custom APIs, but also using the Creator Kit and a bit of TypeScript in the process.
In the previous blogpost we have learned how to create a Custom Page using the Creator Kit templates and its ready to use components.
With this first step the UI is already covered, but let’s remember that we need to create multiple Payment Allocation records in Dataverse and also update the selected Quote products with the split %.
So now we are faced with the question “How can I execute this logic to meet the business scenario?”
Well here we have multiple options, we can run this logic within the Custom Page using Power FX applying a patch function to create the records and update the others.
Or we can call a cloud flow sending the corresponding information to it, so the cloud flow can create and update the records.
But let me give you another important point to consider for this type of requirement. How many users are going to use this functionality and it would be nice to have an average of how many Payment Allocation records are going to be created per day. In the end, it is more than likely that several users will be using this
feature at the same time.
So it is important to understand that if we are talking about many users, maybe running that kind of logic within the Custom Page is not the best idea. For example, let me give you the numbers for my business case:
I have 200 users on this project, and all of them are using this feature, the average number of users working at the same time is 80 and the average number of quotes created per day is 50. So even assuming low numbers like each quote only has two products, that would be 100 quote products and assuming each quote product
only has two Payment Allocation records, then we need to create 200 records and update another 100 records as well.
That said, I think we should delegate this logic and its number of records to be created and updated to something else. And don’t get me wrong, I still believe Power FX or a cloud flow could handle these numbers, but I also believe there is a better option in terms of performance to handle these numbers much faster.
That option is the Custom API, at the end we can send the corresponding information to the Custom API and we can even create and update all the records in a single call to Dataverse, and if something goes wrong we can do a rollback and not create or update anything, how cool is that?
And another point in favor of Custom APIs is that it creates a new message that can be invoked through the Web API or the Organization Service SDK like any other operation, so we can call our logic from wherever we want, for instance from JavaScript, Cloud Flow, classic workflow, Plugin or even a custom connector
using the Web API.
Is worth to mention that when we want to create a custom API, we’ll need three components:
- The plugin
- The custom API and parameters records (we can create these using make.powerapps.com)
- A way to call the custom API, as the options I mentioned before.
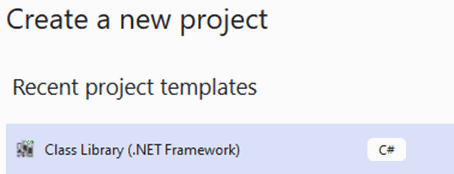
So without further introduction, let’s start creating these components. We will start with the code so let’s prepare or solution and projects in Visual Studio.
Create a Core and a Main project
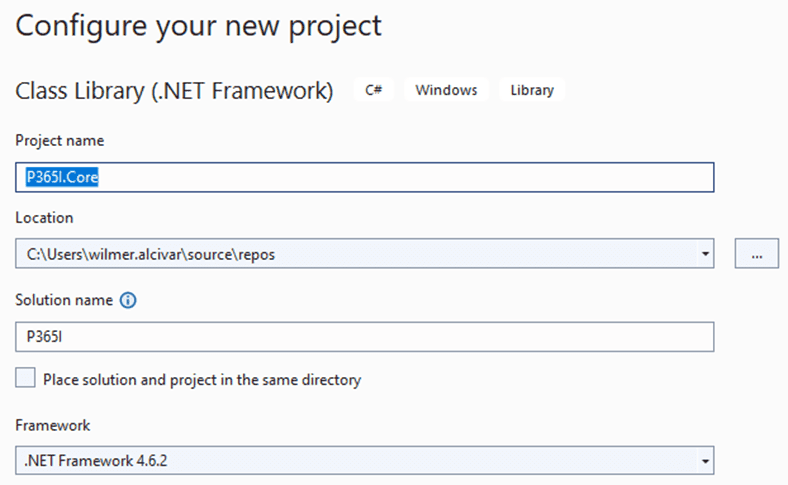
I would to start explaining that I like to separate the server side logic in different projects, the Main project contains the Custom API or even other plugins separated in a different folder of the same project.
And the Core project contains all the handlers classes that will be in charge of the heavy work like validate something or performing CRUD operations.
So, open your last version of Visual Studio, and create a Class library .NET Framework project:
In my case I like to give a more general name to the solution and a more specific name to each project, but in the end you can create it as you feel more comfortable, this first project will be the Core one:
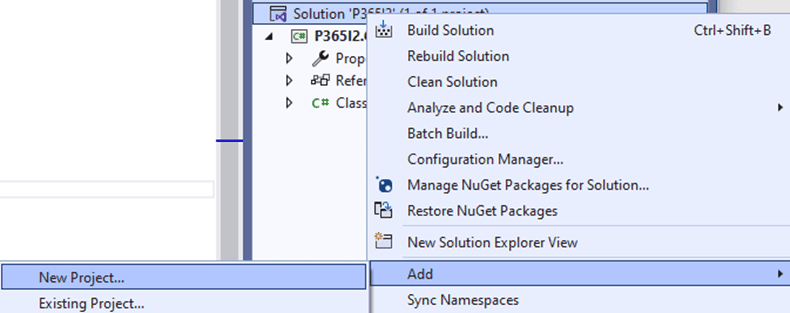
Now let’s create the Main project by adding a new project to the solution:

Select the same Class library .NET Framework project, but this time give a different name to the project:
Now under the Main project let’s add a new folder to store there all the Custom APIs, in this case is just one but maybe in your project you’ll to create more than one:
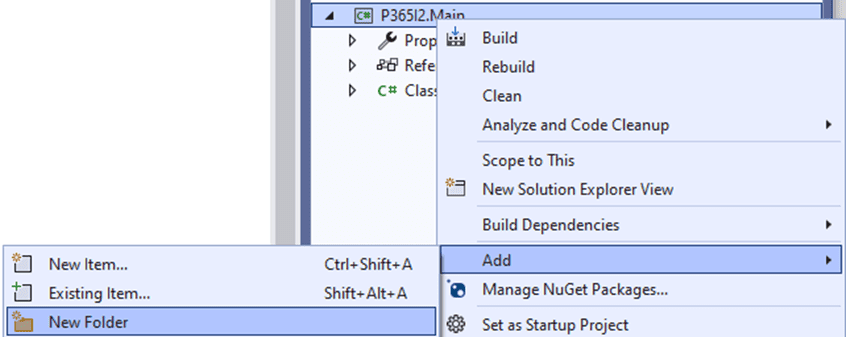
Then name of the folder is “Custom API”, and under that folder finally let’s create our Custom API:

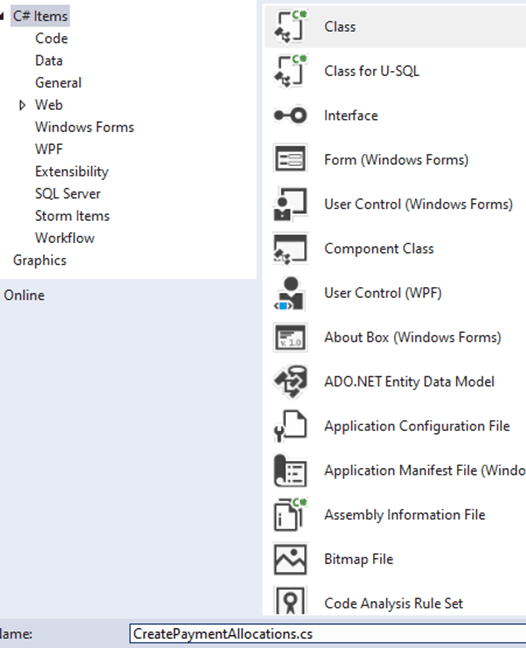
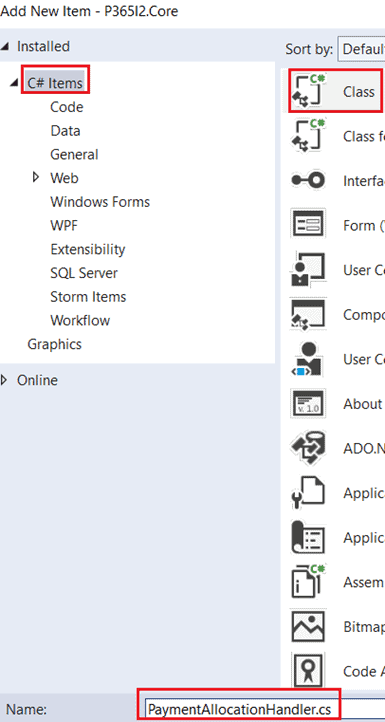
Select a C# Class and give the name “CreatePaymentAllocations.cs”:
Now we can start developing
Create the Plugin
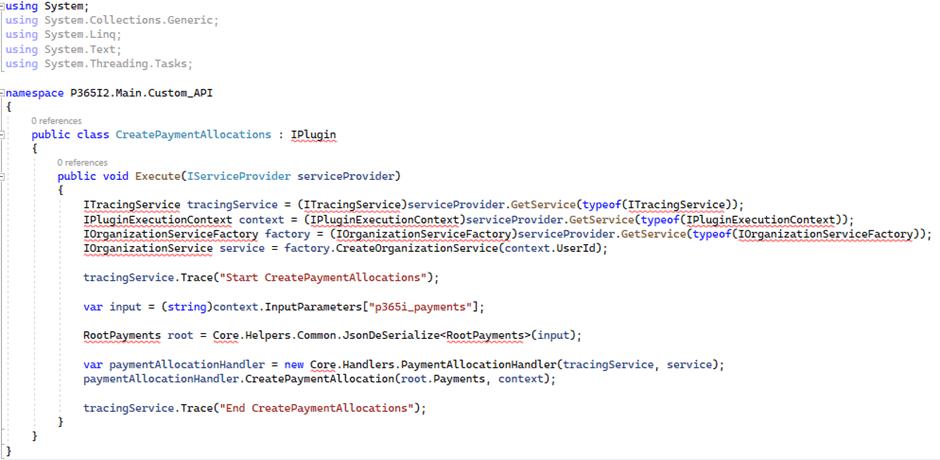
After creating the CreatePaymentAllocations.cs, you have to add the following code:
public class CreatePaymentAllocations : IPlugin

{

    public void Execute(IServiceProvider serviceProvider)

    {

        ITracingService tracingService = (ITracingService)serviceProvider.GetService(typeof(ITracingService));

        IPluginExecutionContext context = (IPluginExecutionContext)serviceProvider.GetService(typeof(IPluginExecutionContext));

        IOrganizationServiceFactory factory = (IOrganizationServiceFactory)serviceProvider.GetService(typeof(IOrganizationServiceFactory));

        IOrganizationService service = factory.CreateOrganizationService(context.UserId);


        tracingService.Trace(“Start CreatePaymentAllocations”);


        var input = (string)context.InputParameters[“p365i_payments”];


        RootPayments root = Core.Helpers.Common.JsonDeSerialize<RootPayments>(input);


        var paymentAllocationHandler = new Core.Handlers.PaymentAllocationHandler(tracingService, service);

        paymentAllocationHandler.CreatePaymentAllocation(root.Payments, context);


        tracingService.Trace(“End CreatePaymentAllocations”);

    }

}
Now your code should have multiple errors but don’t worry because we are just getting started:
Next step is to solve this errors step by step.
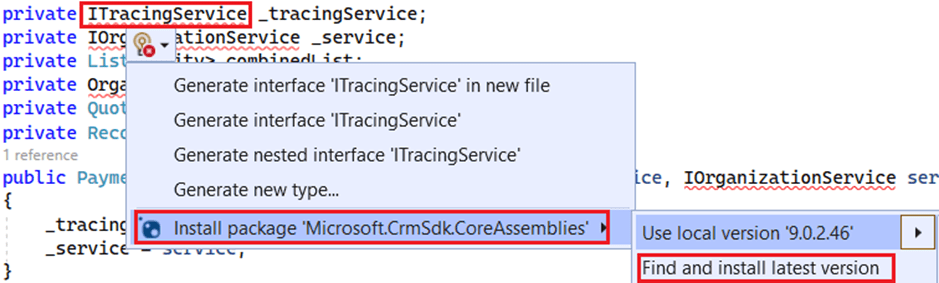
First position your mouse over ITracingService object, select show potential fixes and then select “Install package Microsoft.CrmSdk.CoreAssemblies” and then select “find and install latest version”:

After a few seconds all the dependencies are installed and almost all errors are gone.
Create a Model class
Now the only error you should have is the line that is responsible for converting the information received in JSON format in a helper object that will allow you to manage more easily the information received, which is the Payment Allocations records to be created.

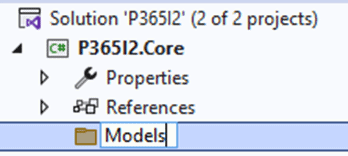
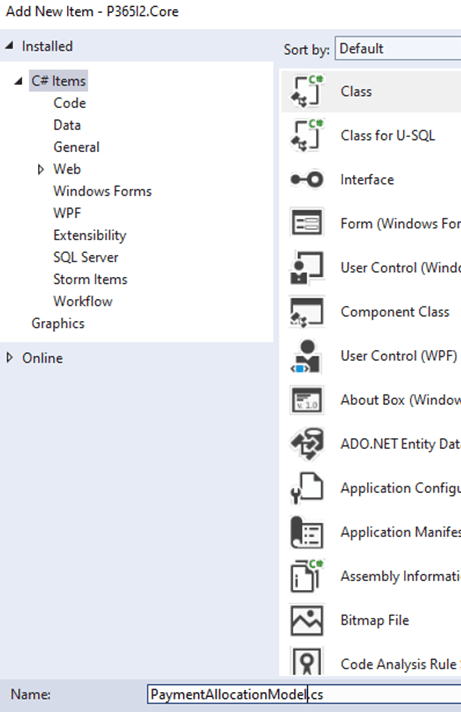
In order to solve this problem, you need to create a class that contains the Payment Allocation model in the Core Project, so let’s create a new Folder under the Core project and call it Models:
Under that folder, add new item, select a C# class and call it “PaymentAllocationModel.cs”:
Here is the code of that file:
public class PaymentAllocationModel

{

    [JsonProperty(“PaymentMethodid”)]

    public string PaymentMethodid { get; set; }

    [JsonProperty(“RecordProductId”)]

    public string RecordProductId { get; set; }

    [JsonProperty(“cre19_amount”)]

    public double cre19_amount { get; set; }

    [JsonProperty(“cre19_fundingtype”)]

    public int? cre19_fundingtype { get; set; }

    [JsonProperty(“InternalId”)]

    public string InternalId { get; set; }

    [JsonProperty(“cre19_startdate”)]

    public DateTime cre19_startdate { get; set; }

    [JsonProperty(“cre19_enddate”)]

    public DateTime cre19_enddate { get; set; }

    [JsonProperty(“cre19_name”)]

    public string cre19_name { get; set; }

    [JsonProperty(“cre19_percentage”)]

    public int cre19_percentage { get; set; }

    [JsonProperty(“AccountId”)]

    public string AccountId { get; set; }

    [JsonProperty(“ContactId”)]

    public string ContactId { get; set; }

}


public class RootPayments

{

    public List<PaymentAllocationModel> Payments { get; set; }

}

public class RecordProductName

{

    public string quotedetailname { get; set; }

}

public class RecordLineNameList

{

    public List<RecordProductName> RecordProductNames { get; set; }

}

public class QuoteProductId

{

    public string quotedetailid { get; set; }

}

public class QuoteProductIdList

{

    public List<QuoteProductId> QuoteProductIds { get; set; }

}
Now you should have the issue with JsonProperty expression, let’s solve it by installing the last version of Newtonsoft.Json:
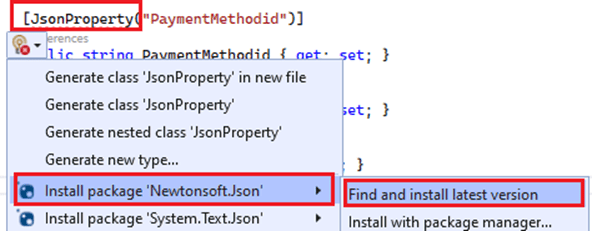
After a few seconds all the dependencies are installed and all errors are gone.
Here’s a quick tip, let’s say you are in other project and you need to create a similar class to store the structure model of an object, then you just need an example of the information as you will receive it in the Custom API (JSON format).
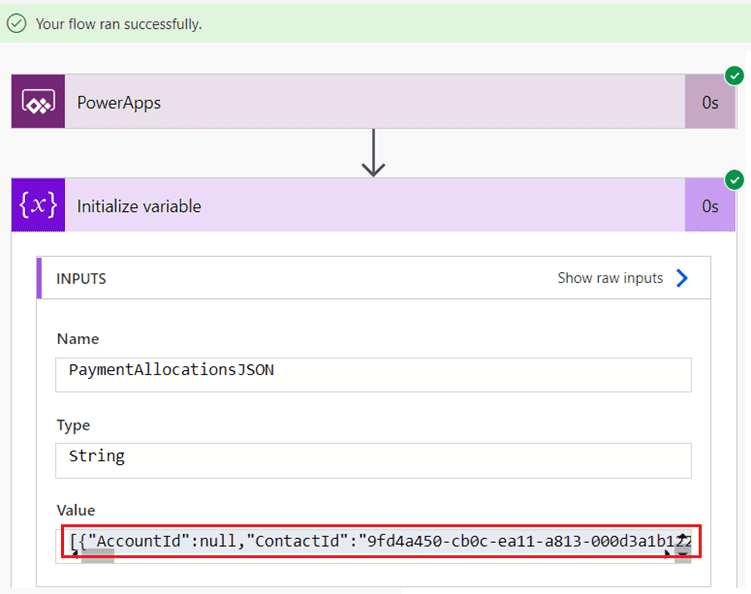
For this you can create a temporal Cloud flow and call it from the Custom Page, remember that in the previous blogpost the confirm button calls a cloud flow and send the Payment Allocation collection in JSON format.
Therefore after you create that temporal cloud flow, test it from the Custom Page sending the Payment Allocation collection in JSON format, go to the Cloud flow execution log, copy that JSON example:
Then go to https://json2csharp.com/ and paste the JSON in there, then click in Convert button:

There you go, a quick conversion from JSON into C# model class, now you are ready to convert the information received in the Custom API to a C# object to handle in a better way the create and update operations in Dataverse.
Create a Handler class
The next step is to create the handler class which is in charge of all the heavy logic, therefore let’s create a folder under Core project and call it “handlers”:
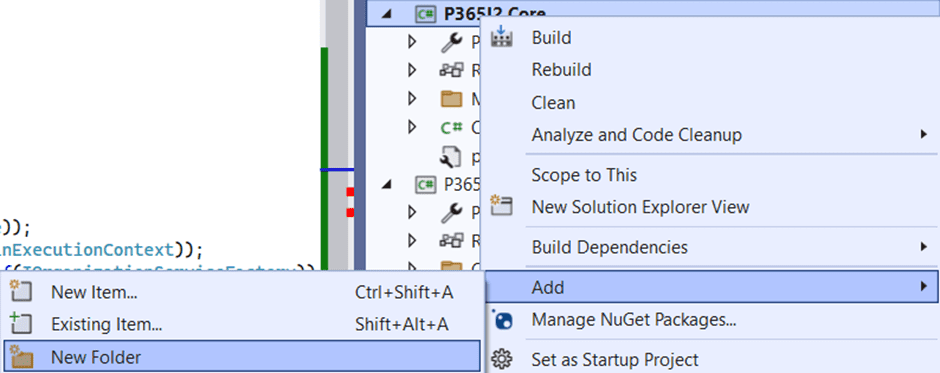
Under that folder add a new item:

Select a C# class and call it “PaymentAllocationHandler.cs”:
Here is the code of this handler class:
public class PaymentAllocationHandler

{

    private ITracingService _tracingService;

    private IOrganizationService _service;

    private List<Entity> combinedList;

    private OrganizationRequestCollection requestCollection;

    private QuoteProductIdList QuoteProductIds;

    private RecordLineNameList RecordProductNames;

    public PaymentAllocationHandler(ITracingService tracingService, IOrganizationService service)

    {

        _tracingService = tracingService;

        _service = service;

    }


    public void CreatePaymentAllocation(List<PaymentAllocationModel> payments, IPluginExecutionContext context)

    {

        _tracingService.Trace(“Start PaymentAllocationHandler CreatePaymentAllocation”);


        requestCollection = new OrganizationRequestCollection();

        EntityCollection paymentsFromDataverse = GetPayments(payments);

        combinedList = paymentsFromDataverse.Entities.ToList();

        int totalPercentage = 0;

        foreach (PaymentAllocationModel payment in payments)

        {

            RecordProductNames = Helpers.Common.JsonDeSerialize<RecordLineNameList>(payment.cre19_name);

            QuoteProductIds = Helpers.Common.JsonDeSerialize<QuoteProductIdList>(payment.RecordProductId);

            PreparePayments(payment, RecordProductNames, QuoteProductIds);


            totalPercentage = totalPercentage + payment.cre19_percentage;

        }


        foreach (PaymentAllocationModel paymentTwo in payments)

        {

            QuoteProductIds = Helpers.Common.JsonDeSerialize<QuoteProductIdList>(paymentTwo.RecordProductId);

            for (int i = 0; i < QuoteProductIds.QuoteProductIds.Count; i++)

            {

                Entity quoteProductRecord = new Entity(“quotedetail”, new Guid(QuoteProductIds.QuoteProductIds[i].quotedetailid));

                quoteProductRecord.Attributes.Add(“cre19_allocationpercentage”, totalPercentage);

                requestCollection.Add(new UpdateRequest() { Target = quoteProductRecord });

            }

        }


        Helpers.Common.ExecuteBatchRequest(_service, _tracingService, requestCollection);

        context.OutputParameters[“p365i_resultPayments”] = “Payments created”;


        _tracingService.Trace(“End PaymentAllocationHandler CreatePaymentAllocation”);

    }


    public EntityCollection GetPayments(List<PaymentAllocationModel> payments)

    {

        _tracingService.Trace(“Start PaymentAllocationHandler GetPayments”);


        string fetchXML = $@”<fetch version=’1.0′ output-format=’xml-platform’ mapping=’logical’ distinct=’false’>

                                <entity name=’cre19_paymentallocation’>

                                <attribute name=’cre19_paymentallocationid’ />

                                <attribute name=’cre19_name’ />

                                <attribute name=’createdon’ />

                                <order attribute=’cre19_name’ descending=’false’ />

                                <filter type=’and’>”;

        foreach (var payment in payments)

        {

            fetchXML = fetchXML + $@”<filter type=’or’>”;

            QuoteProductIdList quoteLinesId = Helpers.Common.JsonDeSerialize<QuoteProductIdList>(payment.RecordProductId);

            foreach (var quoteProductId in quoteLinesId.QuoteProductIds)

            {

                fetchXML = fetchXML + $@”<condition attribute=’cre19_quoteproduct’ uitype=’quotedetail’ operator=’eq’ value='{quoteProductId.quotedetailid}’ />”;

            }

            fetchXML = fetchXML + $@”</filter>”;

            if (payment.AccountId != “” && payment.AccountId != null)

                fetchXML = fetchXML + $@”<condition attribute = ‘cre19_customer’ operator= ‘eq’ uitype = ‘account’ value = ‘{payment.AccountId}’ />”;

            else

                fetchXML = fetchXML + $@”<condition attribute = ‘cre19_customer’ operator= ‘eq’ uitype = ‘contact’ value = ‘{payment.ContactId}’ />”;

        }


        fetchXML = fetchXML + $@”</filter></entity></fetch>”;


        _tracingService.Trace(“End PaymentAllocationHandler GetPayments”);


        return Helpers.Common.getDatabyFetchXML(_service, fetchXML);

    }

    public void PreparePayments(PaymentAllocationModel payment, RecordLineNameList recordLinesNames, QuoteProductIdList quoteProductsId)

    {

        _tracingService.Trace(“Start PaymentAllocationHandler PreparePayments”);


        var paymentFromList = combinedList.FirstOrDefault(item => item.GetAttributeValue<string>(“cre19_name”) == payment.cre19_name);

        Entity paymentRecord = new Entity();

        if (paymentFromList == null)

        {

            for (int i = 0; i < recordLinesNames.RecordProductNames.Count; i++)

            {

                Guid paymentId = Guid.NewGuid();

                paymentRecord = new Entity(“cre19_paymentallocation”, paymentId);

                paymentRecord.Attributes.Add(“cre19_percentage”, payment.cre19_percentage);

                paymentRecord.Attributes.Add(“cre19_amount”, new Money((decimal)payment.cre19_amount));

                if (payment.cre19_startdate != null)

                    paymentRecord.Attributes.Add(“cre19_startdate”, payment.cre19_startdate);

                if (payment.cre19_enddate != null)

                    paymentRecord.Attributes.Add(“cre19_enddate”, payment.cre19_enddate);

                if (payment.PaymentMethodid != null)

                    paymentRecord.Attributes.Add(“cre19_paymentmethod”, new EntityReference(“cre19_paymentmethod”, new Guid(payment.PaymentMethodid)));

                if (payment.cre19_fundingtype != null)

                    paymentRecord.Attributes.Add(“cre19_fundingtype”, new OptionSetValue((int)payment.cre19_fundingtype));


                paymentRecord.Attributes.Add(“cre19_name”, recordLinesNames.RecordProductNames[i].quotedetailname);

                paymentRecord.Attributes.Add(“cre19_quoteproduct”, new EntityReference(“quotedetail”, new Guid(quoteProductsId.QuoteProductIds[i].quotedetailid)));


                requestCollection.Add(new CreateRequest() { Target = paymentRecord });

            }

        }

        _tracingService.Trace(“End PaymentAllocationHandler PreparePayments”);

    }

}
And as always we need to solve references problems, this time we need to do the same for the Core project, so position your mouse over ITracingService object, select show potential fixes and then select “Install package Microsoft.CrmSdk.CoreAssemblies” and then select “find and install latest version”:
Before go further remember we are trying to create a Custom API to creates and updates records all in just one call to Dataverse, so that is why you can see in this handler class the OrganizationRequestCollection object because this object will contains all the Update and Create requests, like this:
requestCollection.Add(new CreateRequest() { Target = paymentRecord });
requestCollection.Add(new UpdateRequest() { Target = quoteProductRecord });
And after all the logic has been applied, then this line has to be executed:
Helpers.Common.ExecuteBatchRequest(_service, _tracingService, requestCollection);

The next step is to create a common class which will contain general functions like getDatabyFetchXML and ExecuteBatchRequest.
Create a Common class
After a few seconds a lot of errors are gone, now we need to create another folder under the Core project, the name of this folder is Helpers, then add a new item, select a C# and call it “Common.cs”, here is the code of this new class:
public class Common

{

    public static EntityCollection getDatabyFetchXML(IOrganizationService service, String fetchXml)

    {

        EntityCollection resultCollection = new EntityCollection();

        var conversionRequest = new FetchXmlToQueryExpressionRequest

        {

            FetchXml = fetchXml

        };

        var conversionResponse = (FetchXmlToQueryExpressionResponse)service.Execute(conversionRequest);

        QueryExpression query = conversionResponse.Query;

        var pageNumber = 1;

        var pageSize = 250;

        string pagingCookie = null;

        while (true)

        {

            query.PageInfo = new PagingInfo()

            {

                Count = pageSize,

                PageNumber = pageNumber,

                PagingCookie = pagingCookie

            };

            var retrieveMultipleResponse = service.RetrieveMultiple(query);

            if (retrieveMultipleResponse.Entities.Count > 0)

            {

                resultCollection.Entities.AddRange(retrieveMultipleResponse.Entities);

            }

            if (retrieveMultipleResponse.MoreRecords)

            {

                pageNumber++;

                pagingCookie = retrieveMultipleResponse.PagingCookie;

            }

            else

            {

                break;

            }

        }

        return resultCollection;

    }


    public static void ExecuteBatchRequest(IOrganizationService service, ITracingService tracingService, OrganizationRequestCollection requestCollection, int split = 50)

    {

        String exceptionMessage = String.Empty;

        List<List<OrganizationRequest>> splittedLists = requestCollection.ToList().ChunkBy(split);

        tracingService.Trace($”Splitted {requestCollection.Count} into {splittedLists.Count} List with split setting of {split}”);

        int i = 1;

        foreach (List<OrganizationRequest> listRequests in splittedLists)

        {

            OrganizationRequestCollection newRequestCollection = new OrganizationRequestCollection();

            newRequestCollection.AddRange(listRequests);

            ExecuteMultipleRequest execRequest = new ExecuteMultipleRequest()

            {

                Settings = new ExecuteMultipleSettings()

                {

                    ReturnResponses = true,

                    ContinueOnError = false

                },

                Requests = newRequestCollection

            };

            try

            {

                tracingService.Trace($”Execute Multiple Request {i} of {splittedLists.Count}”);

                ExecuteMultipleResponse responseWithResults = (ExecuteMultipleResponse)service.Execute(execRequest);

                tracingService.Trace($”Multiple Request Executed. Is faulted : {responseWithResults.IsFaulted}”);

                i++;

            }

            catch (Exception ex)

            {

                tracingService.Trace($”Error {ex}”);

                exceptionMessage += ex.Message;

            }

            finally

            {

                if (!String.IsNullOrEmpty(exceptionMessage))

                {

                    tracingService.Trace($”Exception: {exceptionMessage}”);

                }

            }

        }

    }


    public static T JsonDeSerialize<T>(String JSON)

    {

        return JsonConvert.DeserializeObject<T>(JSON,

        new JsonSerializerSettings()

        {

            NullValueHandling = NullValueHandling.Ignore,

            DateFormatHandling = DateFormatHandling.IsoDateFormat,

            DefaultValueHandling = DefaultValueHandling.Ignore,

        }

        );

    }

}
Finally we need to create a last folder, so repeat the process, the name of the folder is Extensions and then under that folder add a new C# class and call it “List.cs”
Create an Extension class
Here is the code of this class:
public static class List

{

    public static List<List<T>> ChunkBy<T>(this List<T> source, int chunkSize)

    {

        //Usage: List<List<Entity>> splittedLists = updateEntities.ChunkBy<Entity>(50);

        return source

        .Select((x, i) => new { Index = i, Value = x })

        .GroupBy(x => x.Index / chunkSize)

        .Select(x => x.Select(v => v.Value).ToList())

        .ToList();

    }

}
Now you have to go back to Common.cs class and resolve the last dependency error, so position your mouse over ChunckBy click in “Show potential fixes” and select using P365I.Core.Extensions:

Finish set up both projects
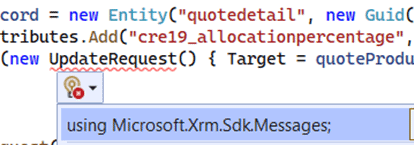
Now we have to go back to PaymentAllocationHandler.cs class and you will see that almost all error now are gone.
You have to solve last two dependency errors by adding using Microsoft.Xrm.Sdk.Messages:
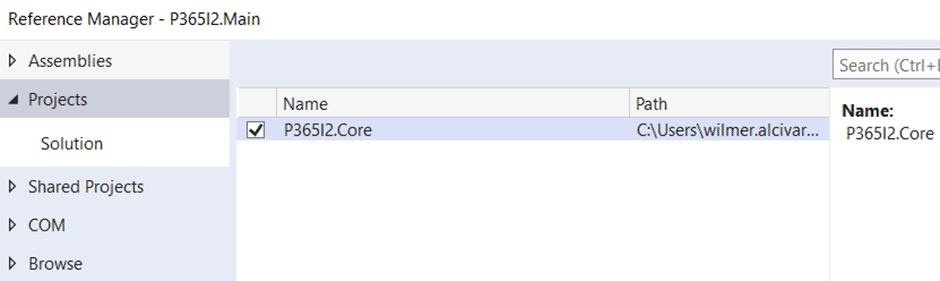
The next step is to add the Core project as a reference into the Main project:
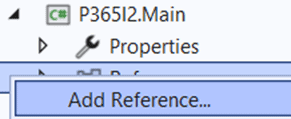
Click in Projects option and then check Core project:
Then go to the Custom API class and position your mouse over RootPayments, click in “Show potential fixes” and select using P365I.Core.Models:

And finally all error on all classes are gone.
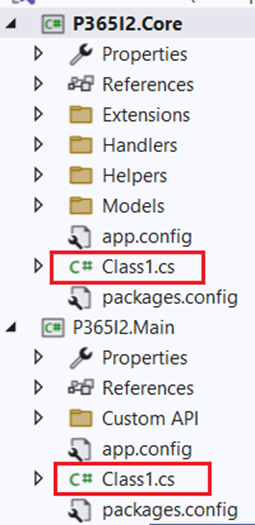
Before go further, if you have not yet deleted both Class1.cs files, please delete them:
Please be aware that we have two projects (Core and Main), so we need to merge them in order to get just one assembly.
Here we have two options you can use either the new experience to add dependent assemblies in a plugin:
Which is still in preview by the date I’m publishing this blogpost (14/12/2022). So please before use it be aware this is not recommended for production environments.
Or you can use the classic and beloved IlMerge, I’m a fan of this way because until today it’s a reliable way to merge assemblies and always works like a charm.
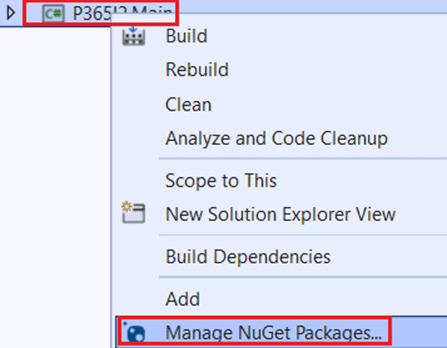
Therefore under Main project, select Manage NugetPackages:
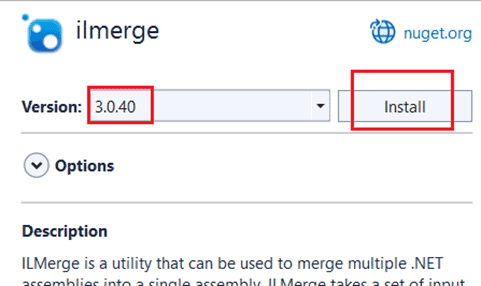
A new window is opened, click in Browse, then write ilmerge on the search box and select ilmerge package:
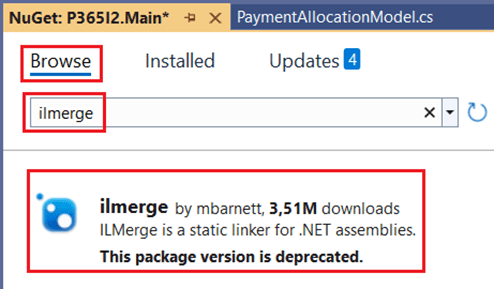
Select 3.0.40 version and then click in Install button:
Accept the license and after a few seconds, you have to install the MSBuild.ILMerge.Task package (1.1.3 version):

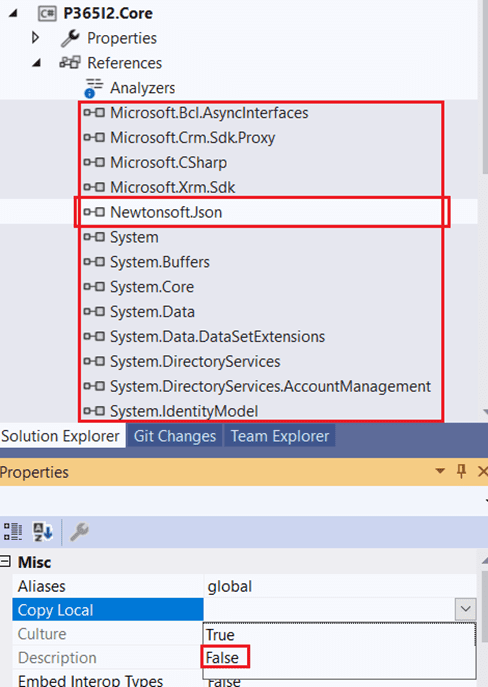
One last step before compile, in the Core project you need to select all references (except Newton.Json) and set Copy Local to false in the property window:
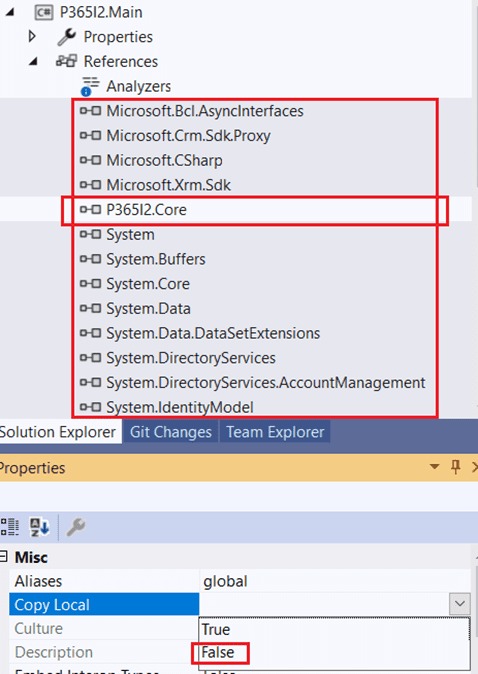
Do the same for the Main project, select all references (Except P365I.Core) and set Copy Local to false:
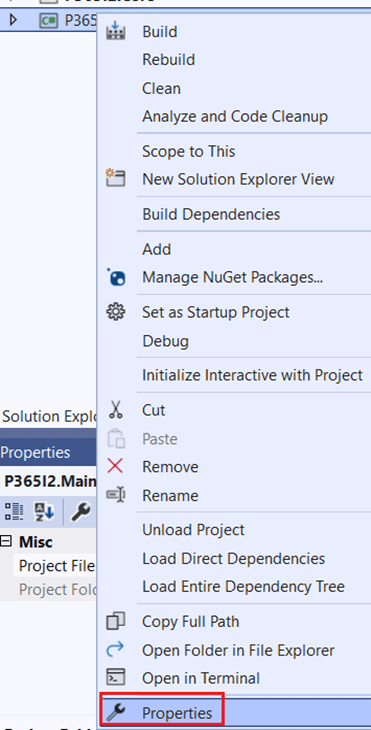
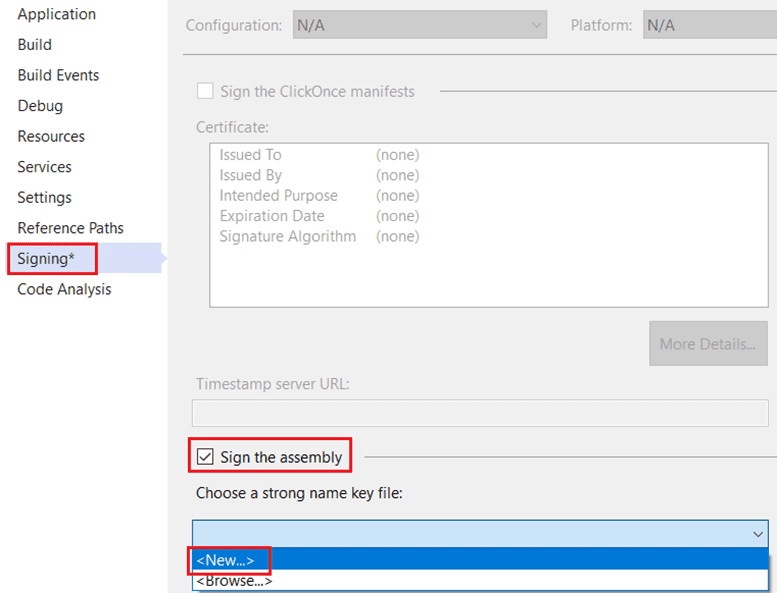
Next step is to sign the Main project, right click on it and select Properties:
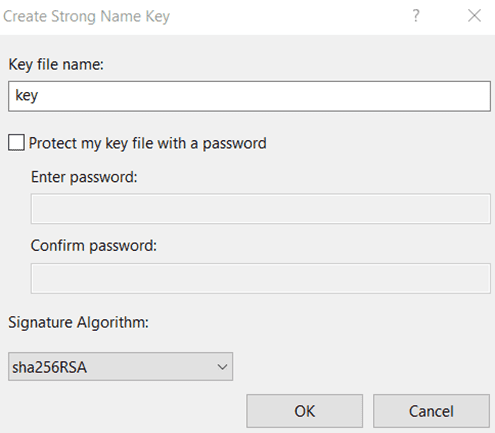
Go to signing option, check “Sign the assembly” option and then choose new Option:
Build and upload the assembly
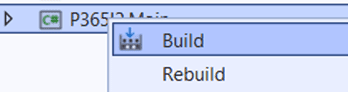
Finally we can build both projects, right click and select ReBuild:

Now you can go to Main project folder path, then go to bin folder then go to Release folder:
You’ll notice it’s only one assembly.
Next step is to upload it using the Plugin Registration Tool. Be aware that you don’t have to register a new step because we are creating a Custom API not a normal plugin.
Create Custom API and its parameters
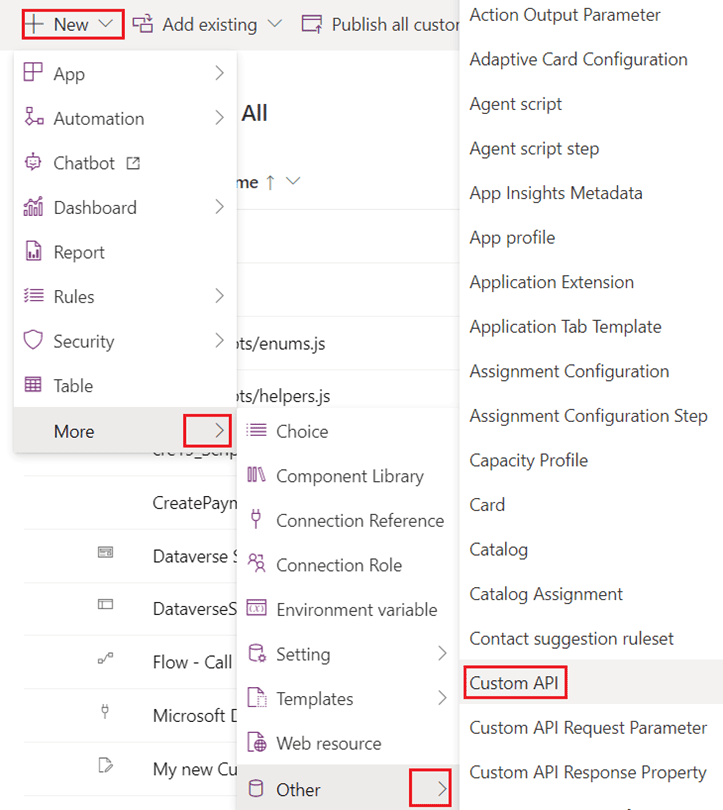
So the next step is to go back to our solution and create a new Custom API:
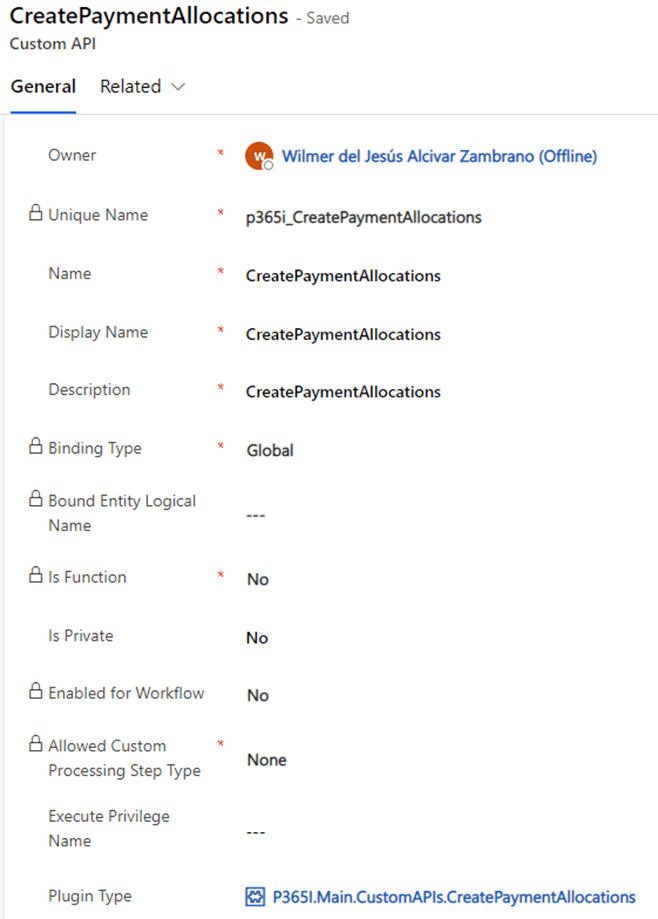
You have to give a unique name, set it as a Global Custom API so is not bounded to any table and you have to select the assembly that you just uploaded using the plugin registration tool:
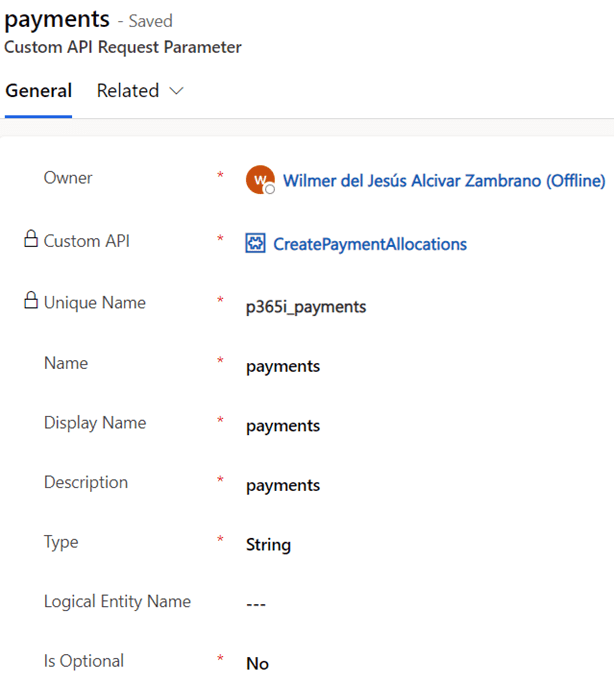
Now you have to create the Custom API request parameter which is in charge to receive all the information in JSON format:
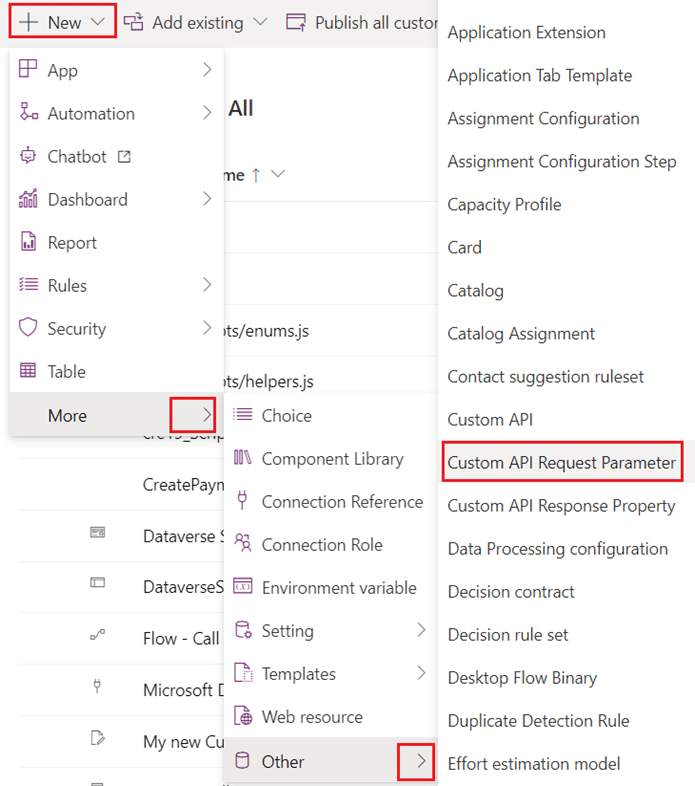
You have to give it the same unique name as you put it in the code, so the unique name would be p365i_payments:
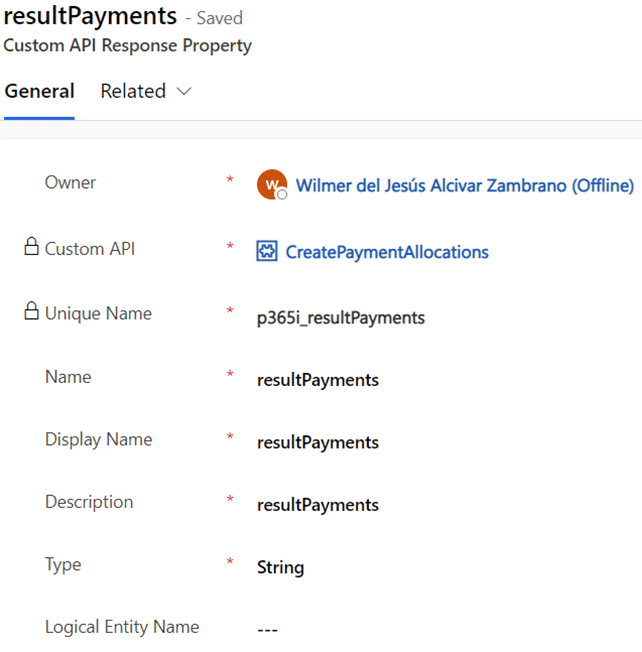
Do the same for the Custom API response parameter, using the same unique name as you put it in the code:
And that’s it, now you have a Custom API which you can call it from anywhere you want
Conclusion
- Custom API indeed is the new and advanced way of registering the Custom Actions on Dynamics 365 / Dataverse with the code approach.
- It is also important to mention that we have to pay attention to our server-side code. because The custom API is a plugin and we have to make it as performant as possible, not only because of the 2 minute execution limit, but also because is a good practice to make a server-side code performant. That’s why in the server side code I have used a fast and efficient way to create multiple records in a single request.
- With this approach you enable other third party systems to call and interact with data from Dataverse by using your Custom API.
- Keep in mind that if you have a business scenario where you have to execute the same logic from different parts, then a Custom API should be a good way to go because you can call it from wherever we want, for instance from JavaScript, Cloud Flow, classic workflow, Plugin or even a custom connector using the Web API.
- Custom API has the same two-minute execution timeout, so if the logic on the server side need more than 2 minutes, then you need to use other approach, such as Azure function.
The next blogpost is the last in this series, so I’m going to demonstrate how we can combine a Custom Page and a Custom API, using a cloud flow and a bit of TypeScript.
PD: I would like to thank my colleagues Niels Minnee and Victor Sijtsma who helped me apply this cool feature to solve the business requirement in the best way possible.
Find more great blogs at Power Platform Week.
About the Author:
My name is Wilmer Alcivar, originally from Ecuador, I started in the CRM world in 2012. I’m a big Juventus fan and like to spend time with my girlfriend, try all kinds of beers, play video games and try my best to keep up with new features of the Power Platform.
But let’s rewind the clock a bit. In my early days, I started out as a PHP developer. That’s why my CRM journey started with Sugar CRM, however, in 2013 I moved to the light side of the force with the Microsoft Dynamics CRM, or at least that’s what it was called at the time.
My first version was Dynamics CRM 2011 On-Premise, and boy it was a great version. I remember it with much appreciation because my first project was for a Peruvian Bank. This meant often traveling to clients’ offices – and yeah let me tell you I picked up quite a taste for Peruvian food.
At the time, I also had other projects in the 2013 version. It’s no secret that everyone disliked the 2013 version (including me). Things started to turn around again with the 2015 version. The same year I moved to Uruguay in order to improve my technical knowledge.
I enjoyed my time in Uruguay getting to know a new culture, they are passionate about football and I had the opportunity to learn a lot about Dynamics 365 at the same time. I carry Uruguay in my heart because it was there where I met my girlfriend Viviana.
After some time, we decided together to move again, this time to Spain looking for new challenges in our professional life. Read more.
Reference:
Alcivar, W. (2022). Create a Custom API using bulk request. Available at: https://wilmeralcivar.com/create-a-custom-api-using-bulk-request/ [Accessed: 20th January 2023].