

This post will explain how you can set the icon for a Microsoft Dataverse custom table (entity icon) in the Power Apps maker portal.
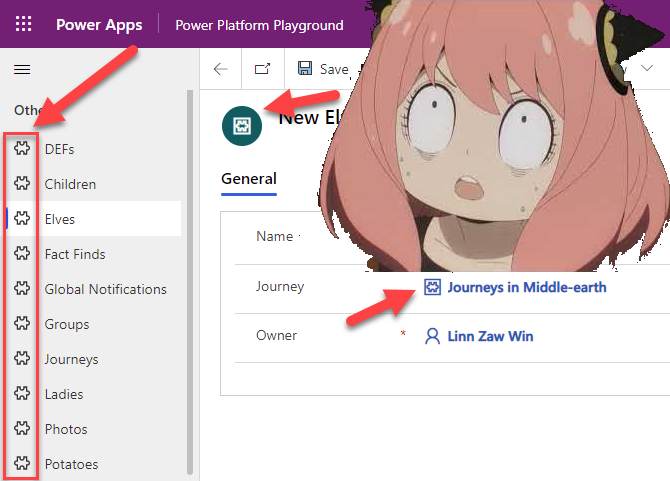
When the custom tables are created for Dynamics 365 and model-driven app projects, updating the icon of the table is important because it is automatically assigned a puzzle piece 🧩 icon by default. The icon of the table will be displayed in the sitemap, as the lookup value icon and in the primary image area for the Create form before the data is saved for the very first time. If the table does not have a child relationship (will never be used as a lookup), the table is not added to the sitemap and there is no primary image column, setting the icon is optional because the user will not see the default puzzle piece 🧩 icon or the custom icon anyway.
Microsoft Documentation has the instructions on how to change model-driven app custom table icons but the documentation was last updated on 16 Feb 2022 and the steps are all about “Switch to classic” and updating the icon in the classic solution explorer
(the Docs has been updated on 20 Jul 2022 and the steps on updating the icon on the maker portal). Going to the classic solution explorer could be confusing for the user because the Web Client icons (16×16 and 32×32) are no longer valid since the deprecation of the legacy web client and all we need to set is the .svg icon for the Unified Interface.
Here are the steps to set the icon for a table in the Power Apps maker portal.
1. Open Solution
From the Power Apps maker portal, open the unmanaged solution with the tables where icons need to be set (or the solution where the new table will be created).
2a. Table Properties (New Table)
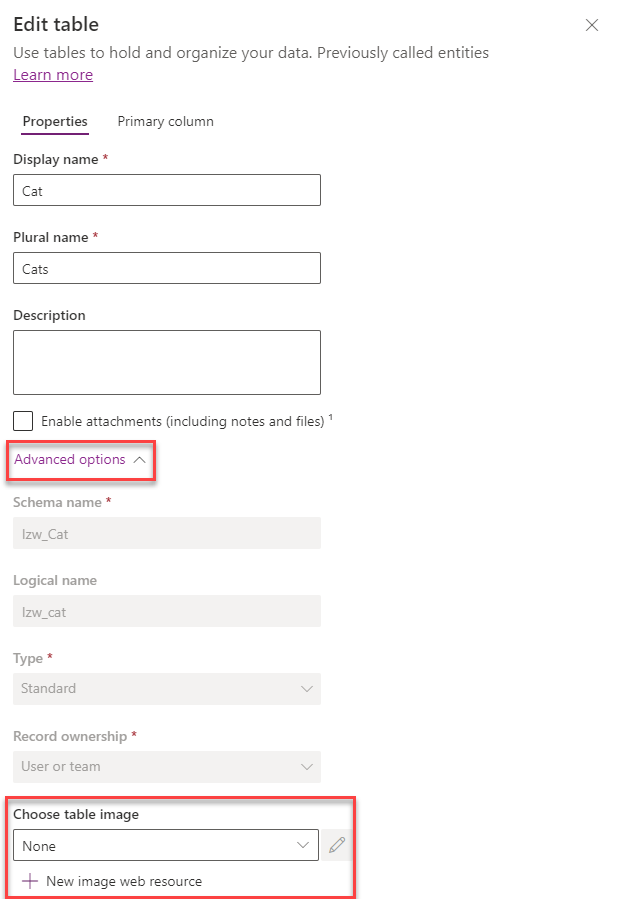
For a new table, expand the “Advanced options” before clicking Save to Choose table image.

2b. Table Properties (Existing Table)
For an existing table, click on the Properties on the table page to open the Properties panel.

(Note: If you are still seeing the old table UI in your maker portal in your region and not as the screenshot above, click on Settings from the top menu)

The table properties panel is the same as the one for a new table. You can expand the “Advanced options” and Choose table image.
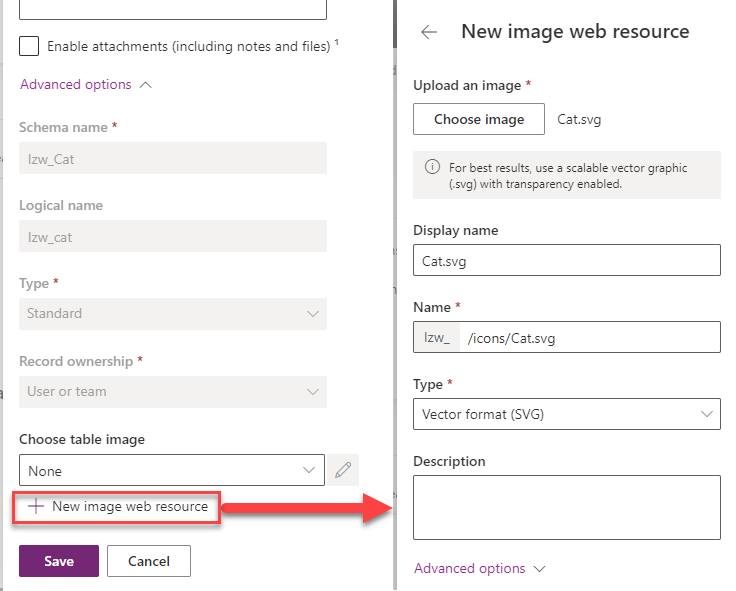
3a. Choose Table Image (New web resource)
If the icon image does not exist in the environment, a new web resource can be uploaded by clicking on the “New image web resource” button. Once the new image web resource is uploaded, the table image will be poulated with the newly uploaded image web resource.
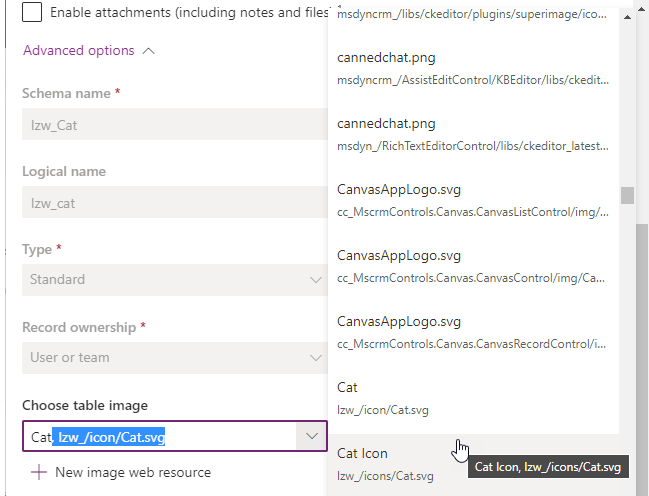
3b. Choose Table Image (Existing web resource)
If the icon image is already existing in the environment, the web resource can be searched by the Display Name or selected from the list.
Once the table is saved after selecting the table image, the new icon will be visible in the sitemap, lookup value, primary image, etc.

Tools
This is an XrmToolBox tool that allows you to update the table image. The tool also allows the maker to upload the new image web resources. The tool is handy when the table image needs to be set for multiple tables.
- Add Image(s) functionality allows the maker to bulk upload the images and add them to the solution.
- Load Entities and Images from solution functionality will only show the image web resources from the selected solution which makes it easier to search than scrolling through the whole web resources list.
- The preview images are shown so that it is easier for the maker to find and select the right icon
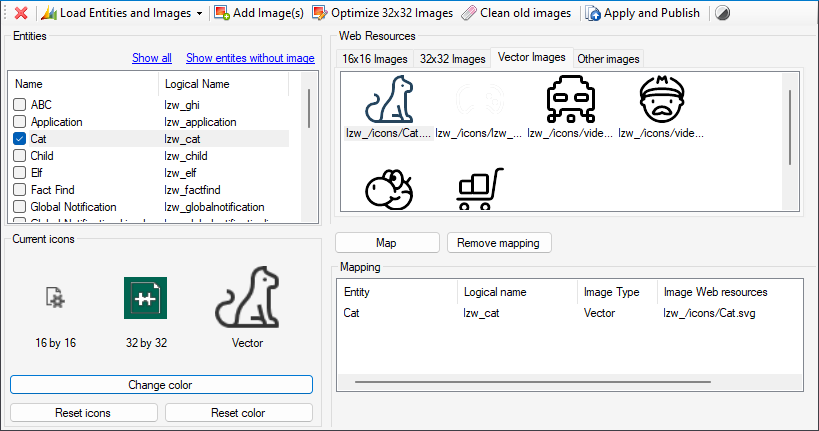
The only drawback of this tool is not being able to specify the folder path for the web resource when the new images are added. For that case, use the WebResources Manager tool to upload the images into a particular folder path and use the Iconator to select the table images.


Download Icons
Here are a few places where you can generate/download .svg icons.
Icon Menu Builder for Power Apps v2
This is a Power Apps canvas app (available to be downloaded as a managed solution) which allows you to search over 45K free icons from multiple icon sets. You can change the foreground and background colours before downloading it as an .svg file.

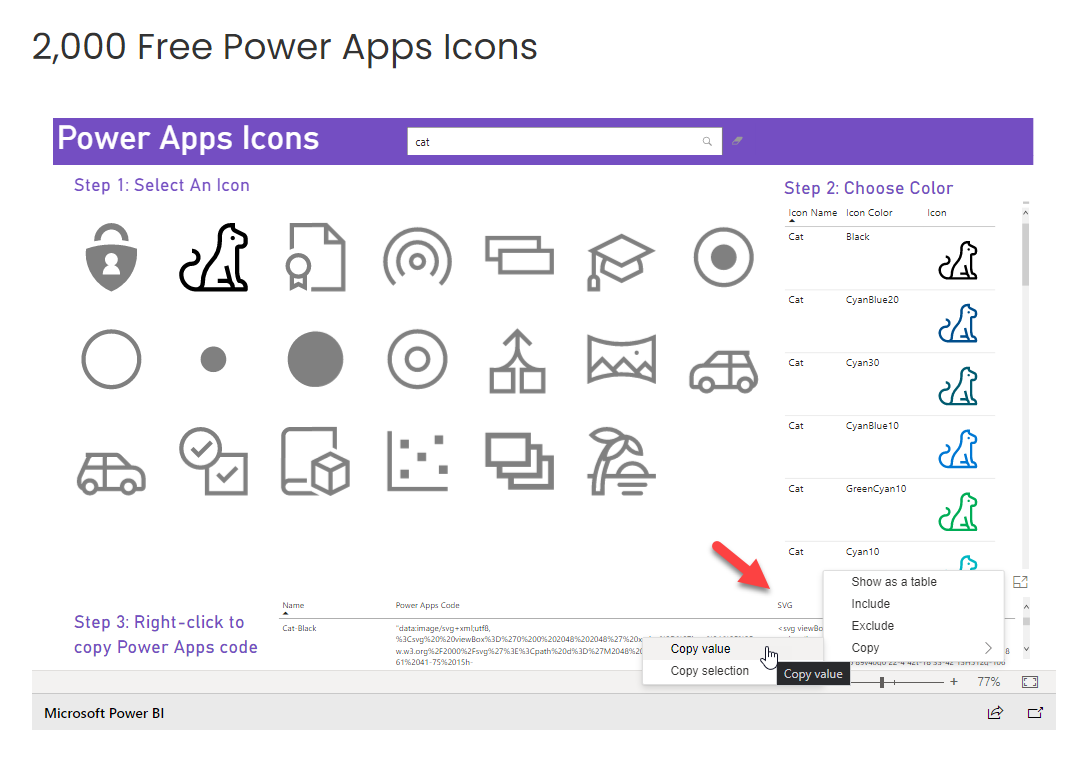
Fluent UI Icon Power BI Dashboard
This Power BI Dashboard by Matthew Devaney allows you to search from 2,000 free Power Apps icons in over 30 different colours from the free icon set provided by Microsoft as part of the Fluent UI system. After selecting the icon and the colour, the SVG code can be copied into any of the text editing applications (Notepad++, etc.) and saved as an .svg file.
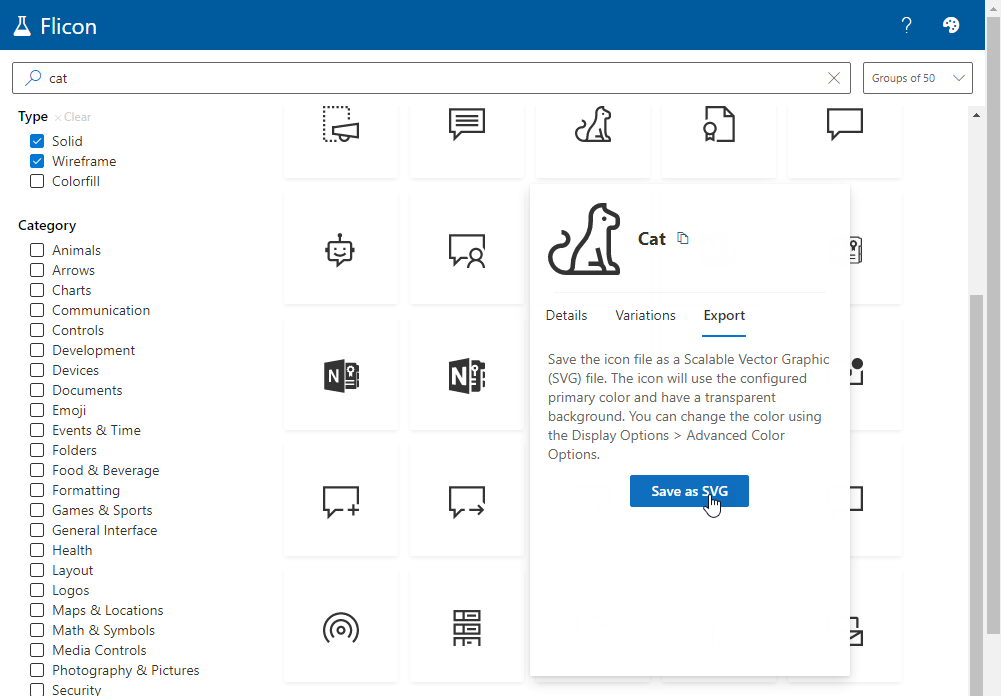
This tool has a collection of over 7,000 flat and wireframe icon templates that can be easily customised to create thousands of unique icons. It also supports creating custom icon font packages from selected sets of icons

This site allows you to search from Microsoft Office and Fabric Icons and download them as .svg files.
This site offers both Free and Premium icons. For free icons, just make sure you read the licence agreement of the icon and credit the icon designer when necessary.

Premium Icon Sites
The following icon sites allow the premium members (with a monthly or yearly subscription) to download the unlimited icons in .svg format.
Microsoft PowerPoint has an option to select an image object, select “Save as Picture” from the menu and there is an option to save it as an .svg file. You need to be careful to ensure the combined shapes are roughly square. (Thanks to Alex for the tip)

About the Author
Microsoft Business Applications MVP and Senior Technical Consultant who has been working with Dynamics for over 10 years starting with CRM 4.0
Reference
Win, L. W., 2022, HOW TO SET MODEL-DRIVEN APP CUSTOM TABLE ICONS IN DATAVERSE, Available at: How to Set Model-driven App Custom Table Icons in Dataverse (linnzawwin.blogspot.com) [Accessed on 11 January 2023]


