While developing an app for inventory items for a non-profit, we decided to develop functionality with Power Apps Canvas. This low-code platform saved time on development and allowed you to start using the application in a few days.
In this article, I want to share information about the inventory solution, some elements are universal, so you can find them useful for canvas applications for other purposes.
Let’s start with the data scheme. Main table – Products. The main fields are Name and Barcode. There are also fields to define the category.
The following table is the Inventory. It has a lookout for Product, a field for determining the unit of measurement – Unit, the number of available items and the number of reserved.
Inventory is divided into two parts – to work with products with a barcode and without.
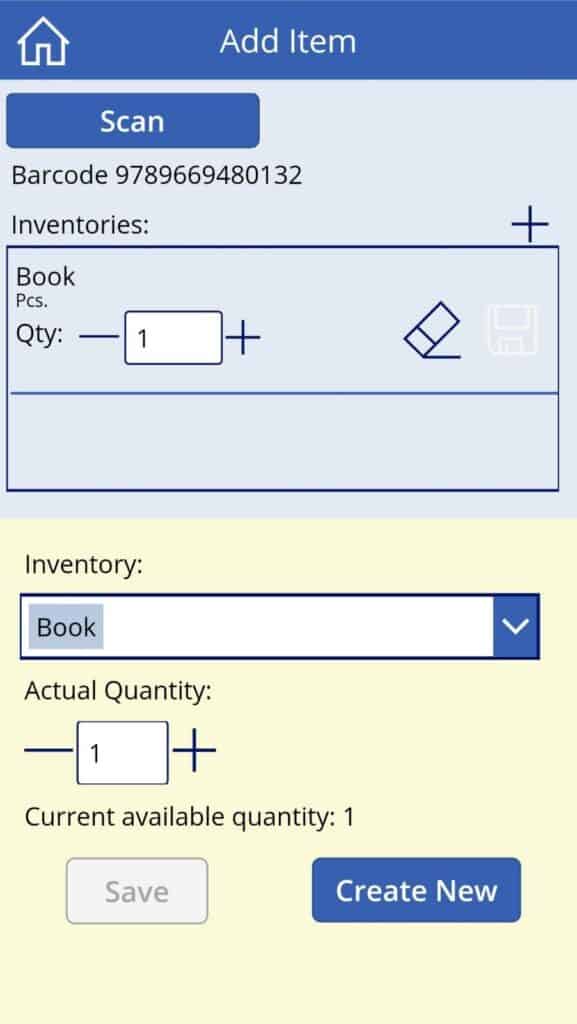
Let’s have a look at the barcode part.
I have added the Barcode Scanner element. When pressed, the camera window opens and you can read the barcode. The resulting value can be obtained using the Value attribute:
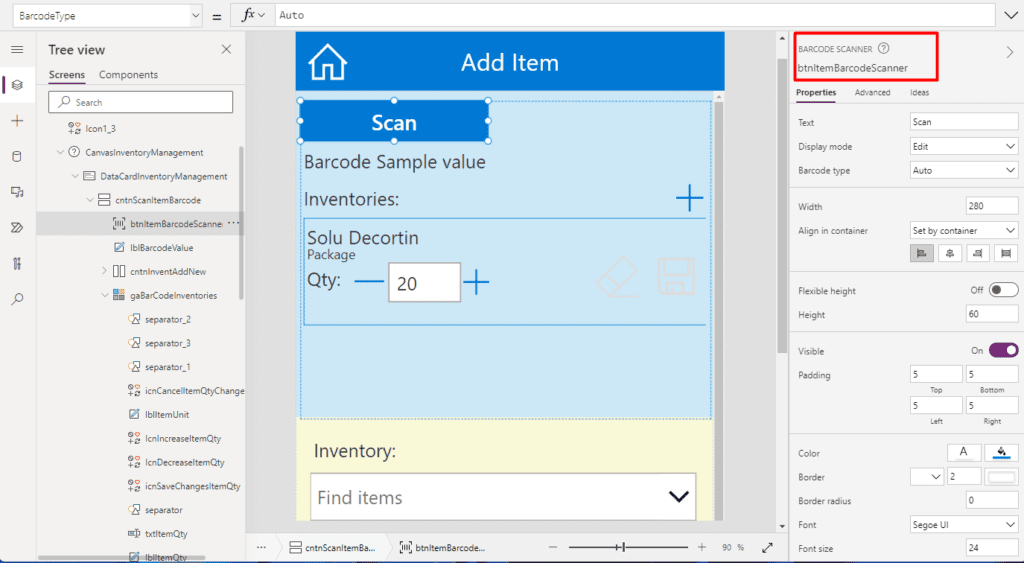
btnItemBarcodeScanner.Value
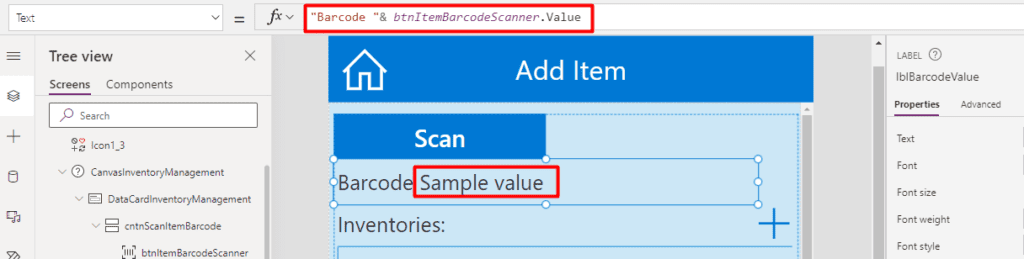
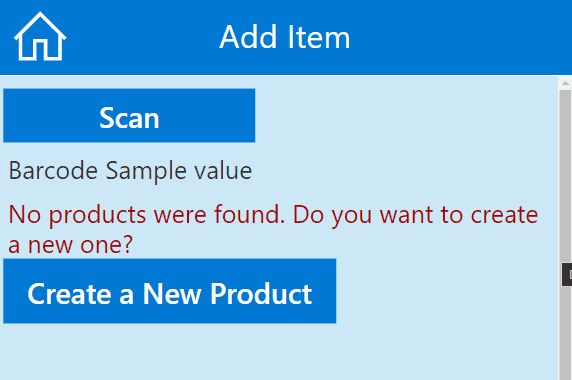
After scanning, you can see the value of the barcode in the label on the screenshot. Next, you need to understand whether a product with such a barcode was found. To do this, the user displays either a message that such a product does not exist, or displays a list of related records from the Inventory table, where you can see the units of measurement and the available number of variants of this product.
The OnScan parameter is configured on the scan button:
If(
    !IsEmpty(Filter(Products,Barcode=btnItemBarcodeScanner.Value)),

    UpdateContext({
        isProductFound: true,
        productRecord: First(Filter(Products,Barcode=btnItemBarcodeScanner.Value))
    });
    ClearCollect(InventoryByBarcodeCollection, Filter(Inventories, Product.Barcode=btnItemBarcodeScanner.Value)),

    UpdateContext({
        isProductFound: false,
        productRecord:Blank()
    });
    Clear(InventoryByBarcodeCollection)
);
The local variable isProductFound is used to display a message that a product has not been found if there is no such product in the Product table. Or to hide this message and show the Inventory records, if any.
The local variable productRecord is required to display a list of these Inventory records.
The InventoryByBarcodeCollection is required to edit the available number of items in the Inventory table with the possibility of cancelling these edits (in case of erroneous actions).
So, below is a gallery consisting of rows of this collection:

For each line of the collection – we have two labels to display the name of the inventory and units (units): ThisItem.Name and ThisItem.Unit:
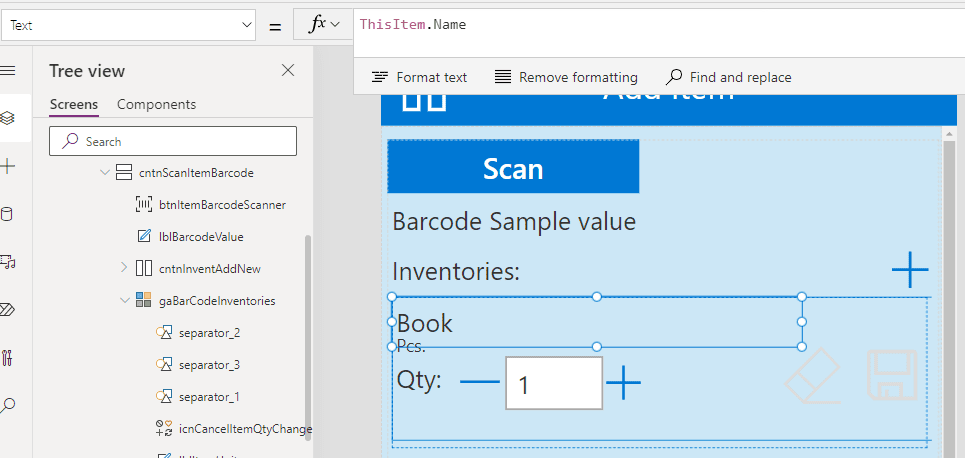
Next is an interesting part to work with the number of goods. When scanning, if the product is found – each record inventory displays the currently available quantity of the product. To do this, the Default setting is set to display ThisItem.’Available Qty ’. But to increase and decrease the number of items, you need to properly configure the process of updating records, so that changes in one inventory do not overwrite the changes in another.

UpdateIf(InventoryByBarcodeCollection, Inventory=ThisItem.Inventory,
{
    'Available Qty':ThisItem.'Available Qty'+1
})
;
The first parameter of the UpdateIf function is a collection in which you need to find a string using the filter in the second parameter. Well, the changes themselves are made by analogy with the Patch function in the third parameter.
If changes are made by directly writing a new value, you must specify the behaviour via the OnChange attribute:
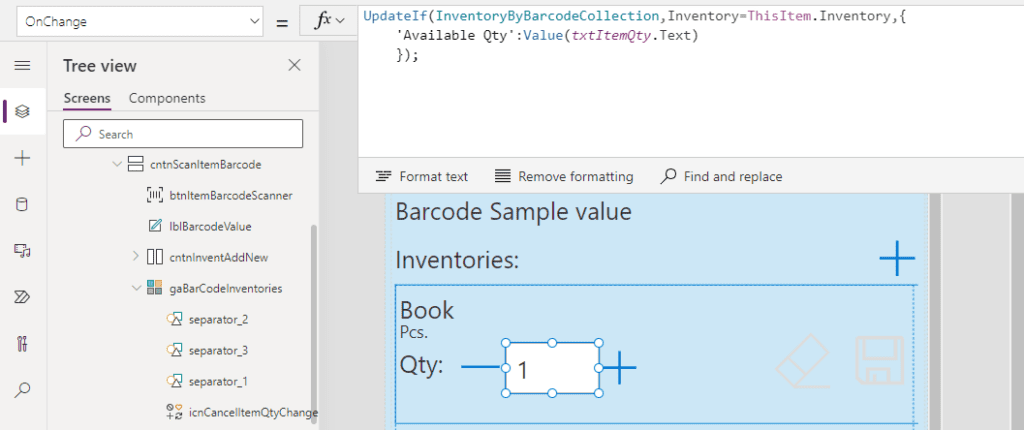
All these changes are made in the collection, not directly in the table. Therefore, to save changes to the table – you need to configure the save changes button. I do this using the Patch feature:
Patch(Inventories, LookUp(Inventories,Inventory=ThisItem.Inventory),{'Available Qty':ThisItem.'Available Qty'})
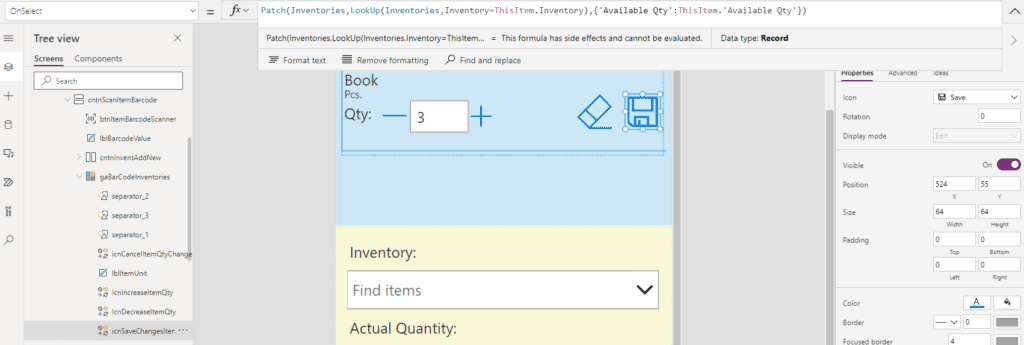
And configure DisplayMode so that the button is available only if changes are made:

The same DisplayMode setting for the undo button. It is necessary to add OnSelect for the button of mashing of changes:

In this case, the difference with the save button is that it uses the UpdateIf collection, the database changes do not go. And for the Save button changes are saved at once in the table of the dataverse.
UpdateIf(InventoryByBarcodeCollection, Inventory=ThisItem.Inventory, {'Available Qty':LookUp(Inventories,Inventory=ThisItem.Inventory,'Available Qty')})
Short demo 🙂
So, we looked at working with a scanner, processing a collection, editing it, and writing data to a spreadsheet using the example of an inventory application.
About the Author
Hello! I’m Elizabeth and I’m a Power Platform Developer.
I’ve worked with a lot of Microsoft technologies. I love what I do and love sharing my knowledge.
In this blog, I write about interesting cases in Power Platform development, technology reviews, news and events in the world of Dynamics 365 for Customer Engagement apps.
Reference
Elizabeth, 2022, Inventory Management in PowerApps Canvas. Barcode scanner, Available at: Inventory Management in PowerApps Canvas. Barcode scanner – Elizabeth’s 365 blog (elizabeths365blog.com) [Accessed on 16 January 2023]