
Popular Posts

Jul 19 2024
Running Ollama on Azure Kubernetes Service

Jul 19 2024
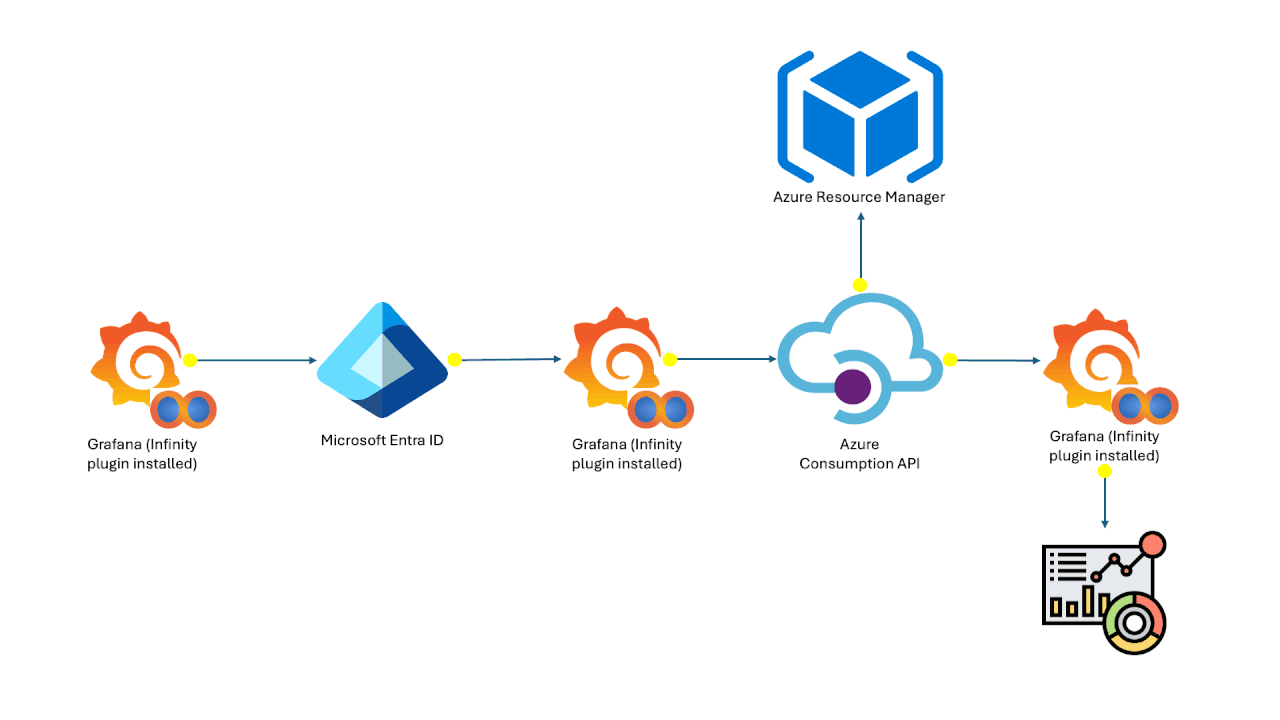
Azure Cost Analysis Dashboards on Grafana

