As I said in my post yesterday, I’ve not played with column formats much since they first came out. I liked what you could do and could see where Microsoft were going, but at the time they lacked the power of JSLink display templates and I just didn’t really have anything that I couldn’t do in JSLink. Especially as a lot of my clients were resisting moving to the modern list and library experience. Over the last 6-10 months I’ve seen that reticence drop off and most of my clients are now building in the modern experience. Whereas some time ago they were asking “Why do we have to use this modern experience?”, I’m now hearing questions like “Why haven’t they updated document sets to modern yet?” or “Why do I have to keep switching back to classic to do X?”
I think this shows that modern is certainly gaining more traction and whilst we still can’t (and for some things won’t) be able to do all that we could in a JSLink Display Template in classic, the feature parity between the two experiences is getting ever closer. Just recently I was working with a client on a PMO solution using modern lists and libraries using calculated columns for measuring Risk Priority based on a simple calculation of Risk Likelihood multiplied by Risk Impact. This was score as a simple 5 * 5 matrix, with a threshold of values for priority.
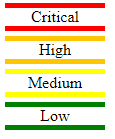
- Scores 1-7: Low Priority
- Scores 8-14: Medium Priority
- Scores 15-21: High Priority
- Scores 22-25: Critical Priority
This number was used in the PowerBI reports which dictated the need for a numerical value even though the Project Managers were used to seeing the text of Low to Critical in their highlight reports. In order to make this easier for the PMs to consume in their project dashboards, the client wanted the numeric value replacing with a simple banner showing the priority, along with a coloured strip denoting the level.
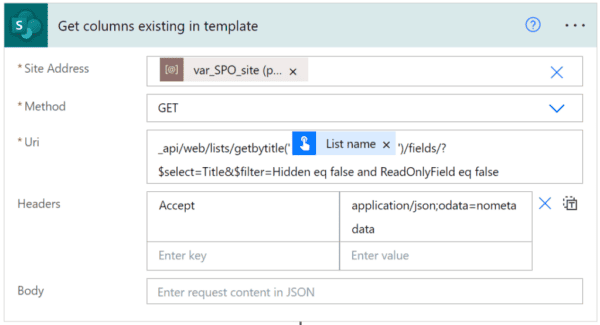
In JSLink, this would have been a fairly simple switch statement to achieve the required HTML, but the Column Format equivalent needed a little bit of thought and some of the new Excel Expressions. With this in mind it’s time to configure a quick custom list for testing, add a little bit of data and setup a static column format to achieve the layout that we wanted.
{
    "$schema": "https://developer.microsoft.com/json-schemas/sp/column-formatting.schema.json",
    "elmType": "div",
    "style": {
        "width":"100%",
        "display":"block"
    },
    "children": [
        {
            "elmType": "div",
            "style":{
                "height": "5px",
                "background-color":"red",
                "width":"100%"
            }
        },
        {
        "elmType": "div",
        "txtContent": "Priority",
        "style": {
            "text-align":"center",
            "width":"100%"
            }
        },
        {
            "elmType": "div",
            "style":{
                "height": "5px",
                "background-color":"red",
                "width":"100%"
            }
        }
    ]
  }
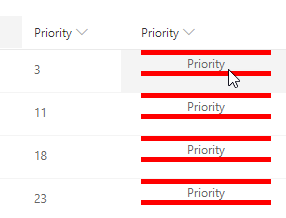
The basic code above set out the initial layout which is basically a DIV wrapping around 3 other DIVs to create the colour header, text value and footer. You’ll notice that the first DIV has had it’s layout style set to Block, something that you wouldn’t normally need to do as the DIV is a block style element, however the custom formatting engine wraps your HTML in it’s own which resets the DIV display styles which you have to then set back yourself.
With the static layout in place, I first wanted to focus on changing the colour of the bars in line with the numeric value and we achieve this using a nested IF statement as the expression for the background colour. The DIV statement for BOTH of our colour header divs is changed to the following:
            "elmType": "div",
            "style":{
                "height": "5px",
                "background-color":"=if(@currentField <= 7,'green',if(@currentField >7 && @currentField <= 14, 'yellow',if(@currentField >14 && @currentField <= 21,'#ffc500','red' )))",
                "width":"100%"
            }
This is one area where it would be nice to have the ability to use a reference variable to save having to recreate the logic in multiple places, especially on more complex layouts as we would have done in a JSLink display template. A word of warning on the troubleshooting here.. if the entire view fails to render when you test this, check that your JSON is valid (you should be editing these in Visual Studio Code which includes validation!).. if just the value fails to render or style, then check your nested IF statements, paying particular attention to the brackets!.
If you’re finding that IF statement hard to read, here’s a quick reminder from yesterdays post…the IF statement looks like this:
IF (valueToTest <operator> valueToCompare, outputIfTrue, outputIfFalse)
If we want to nest a second if statement, we replace the outputIfFalse with the second IF statement and so on…
IF(valueToTest <operator> valueToCompare, outputIfTrue, IF (valueToTest <operator> valueToCompare, outputIfTrue, outputIfFalse))

        {
        "elmType": "div",
        "txtContent": "=if(@currentField <= 7,'Low',if(@currentField >7 && @currentField <= 14, 'Medium',if(@currentField >14 && @currentField <= 21,'High','Critical' )))",
        "style": {
            "text-align":"center",
            "width":"100%"
            }
        },
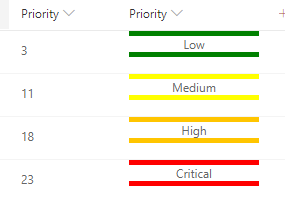
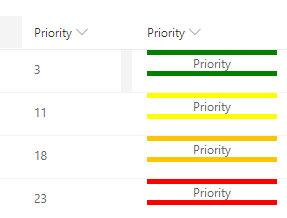
And there we go, a quick visualisation with text and colour indicators based against an arbitrary score which would be difficult for users to remember the ranges for. Hopefully that’s proved useful and I’ll get this added to the PNP samples in github soon, in the meantime you can view the completed JSON file here.
About the Author:
So, Who am I?
I’m Paul Hunt, Ex SharePoint Admin/Developer turned Architect, working for Trustmarque Solutions (part of Capita PLC). I’m officially home based, but I work all over the UK as needed. I’ve been a member of the SharePoint community in the UK since 2007 and for a good number of years now have been an active speaker on the community circuit, presenting at SharePoint Saturdays all over Europe, the Best Practices and Evolutions Conferences in London and the European Collaboration Summit across Croatia and Germany.
I’m responsible for the O365 side of the house in the combined SQL and SharePoint Saturday Cambridge event where we try to provide a total of 9 tracks of content across the Data Platform and Office 365 interest groups.
I was granted MVP status for the first time in 2016 in recognition of my community input and I’ve been re-awarded each year since. You can find me on Twitter using the handle @cimares
Reference:
Hunt, P. (2019). Injecting text using Custom column formats in SharePoint Online. Available at:
http://www.myfatblog.co.uk/index.php/2019/01/injecting-text-using-custom-column-formats-in-sharepoint-online/ [Accessed 14th May 2019].