Introduction
In this article, we will delve into the utilization of Microsoft Fabric through a case study, focusing particularly on its distinctive features, ways to read data from Azure Blobs/S3, use of shortcuts, and so forth. Additionally, we will employ pipeline activities within Fabric’s data engineering module and notebooks within Fabric’s data science module to develop a simple LangChain application. Below is the overview of this blog post:
- We will first use the Notebooks feature in the Data Science Module of Fabric to scrape content from Microsoft Fabric blogs published during Build 2023.
- Subsequently, we will transfer the text file to the Azure Blob Storage, programmatically, using the Notebooks functionality in the Data Science module of Fabric.
- After the data is stored in Blob storage, we will shift our attention to the Data Engineering module of Fabric. Here, we will create a pipeline activity to load this data into One Lake and create both a Lakehouse and a Warehouse (Not required for this tutorial but for the later blogs).
- Finally, once the data is loaded into One Lake, we will revisit the Data Science module. Here, we will create a simple prompt system powered by LangChain, designed to work on the textual content extracted from the blogs. Here we will explore Azure OpenAI (OAI) deployments in Azure OAI studio.
So let’s get started.
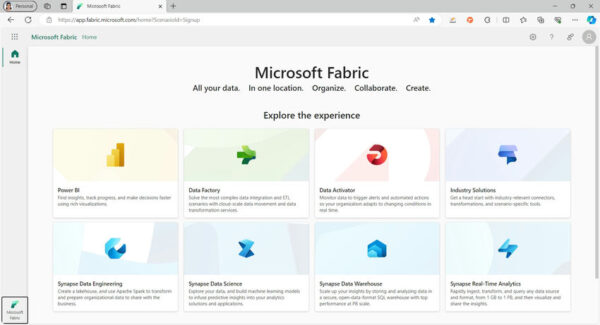
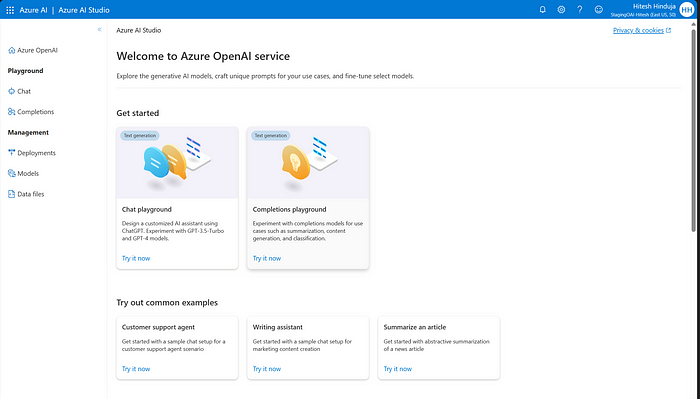
Go to this link to get started with Microsoft Fabric and follow the instructions mentioned in the link.
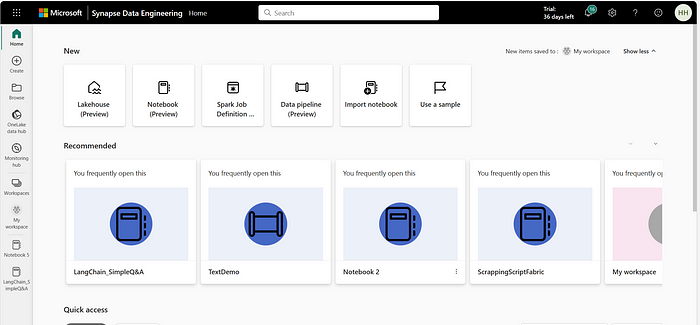
Your UI will be as shown below:
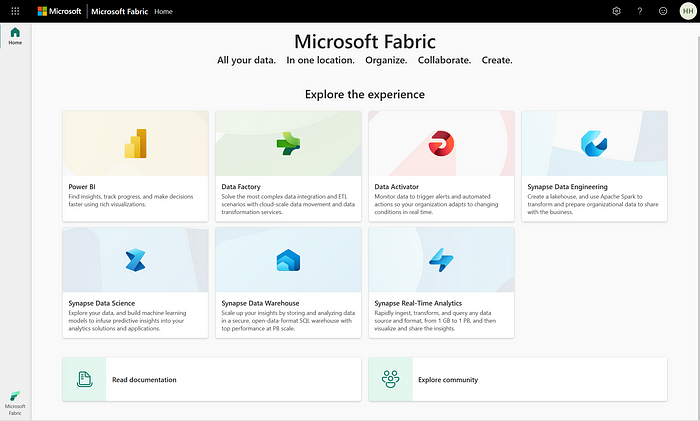
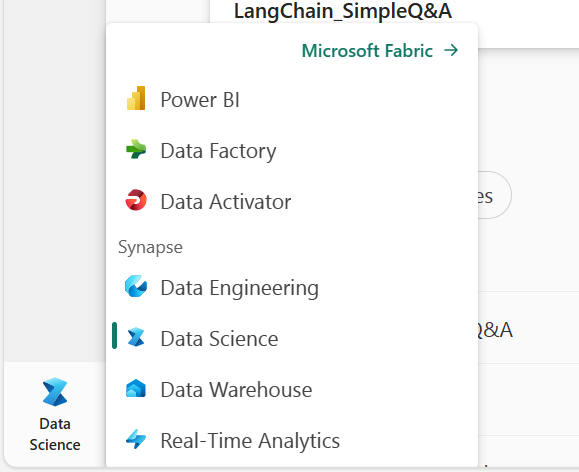
Next, on the extreme left-bottom corner, select Data Science Module as shown in the figure below. You can also select “Synapse Data Science” on the above screen.
Head to the Data Science Module and click “Notebooks”. Your screen would be something like this below:
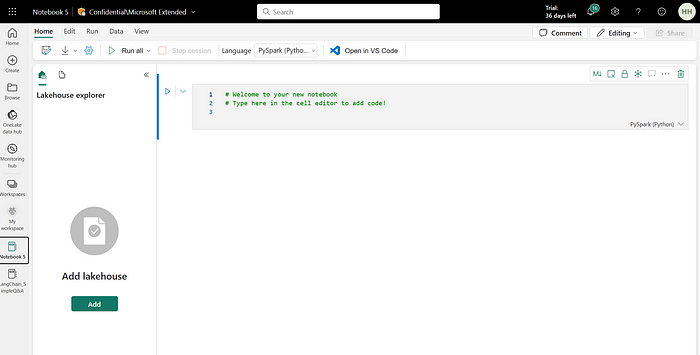
Next, rename your notebook accordingly and “Add Lakehouse” on your left. You have 2 options. Either you create a new lakehouse or use an existing one. For this activity, create a new lakehouse.
Once you have completed the above steps, let’s start writing your code in the notebook. Now, let’s follow the below steps one by one to scrape the textual data of Microsoft Fabric blogs from the Build 2023 release.
Step-1: Import all the necessary libraries in the notebook. We will be using the BeautifulSoup library for web scrapping.
from pyspark.sql.functions import udf
from pyspark.sql.types import StringType
from bs4 import BeautifulSoup
import re
from azure.storage.blob import BlobServiceClient, BlobClient, ContainerClient
import requests
import os
Step-2: Define a function and provide URLs to scrape the data. I have used two URLs in this blog. url-1 & url-2.
def scrape_website(url):
    response = requests.get(url)
    soup = BeautifulSoup(response.text, 'html.parser')
    return soup.get_text()

urls = ['https://azure.microsoft.com/en-us/blog/introducing-microsoft-fabric-data-analytics-for-the-era-of-ai/', 'https://blog.fabric.microsoft.com/en-us/blog/microsoft-onelake-in-fabric-the-onedrive-for-data/']

# Get the scraped data
data = [scrape_website(url) for url in urls]
Step-3: Once the data is scrapped, let’s push this data to Azure Blob Storage. You can push this data to any object storage of your choice (Amazon S3, Azure Blobs, GCS, etc). Let’s do this through our notebook instead of the Azure portal.
# Retrieve the connection string for use with the application.
connect_str = 'Enter your connection string here'
# Create the BlobServiceClient object which will be used to create a container client
blob_service_client = BlobServiceClient.from_connection_string(connect_str)
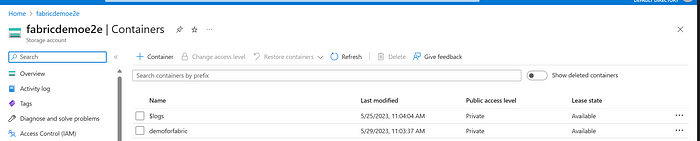
# Create a unique name for the container
container_name = "demoforfabric"
# Create the container
container_client = blob_service_client.create_container(container_name)
data = '\n'.join(data)In the above code, enter your “connection string” from the Azure portal. You can find this in the Azure portal under your Storage Account -> Settings -> Access keys -> Connection string. (Assuming you already have a storage account, else need to create one for this activity).
(Note: We used this “data = ‘\n’.join(data)” in the last line of our code above. Else you will get an error message saying you are passing a list to blob_client.upload_blob(data), but it is expecting a data type it can write directly to the blob-like a string, bytes, or a file-like object. Hence we are converting it to string type).
Next, let’s upload the data that we had scrapped from the blogs to the container “demoforfabric”.
# Create a blob client using the local file name as the name for the blob
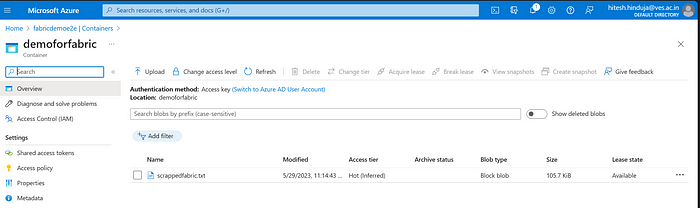
blob_client = blob_service_client.get_blob_client(container=container_name, blob="scrappedfabric.txt")
print("\nUploading to Azure Storage as blob:\n\t" + "scrappedfabric.txt")
blob_client.upload_blob(data)
print("\nListing blobs...")
# List the blobs in the container
blob_list = container_client.list_blobs()
for blob in blob_list:
print("\t" + blob.name)Here you will see that the .txt file has been uploaded successfully to Azure Blobs.
Now, let’s move to the next part of our activity, which is creating a pipeline in the Data Engineering Module of Microsoft Fabric to copy data to One Lake.
Go back to the Microsoft Fabric main screen and on the extreme left corner, head to Data Engineering Module. You can also navigate directly to the data engineering module from your extreme left (without going to the Fabric main screen). You would land at the UI below:
Next, select “Data pipeline”(Preview) in your UI and select “Copy Data”. You will see the UI below:
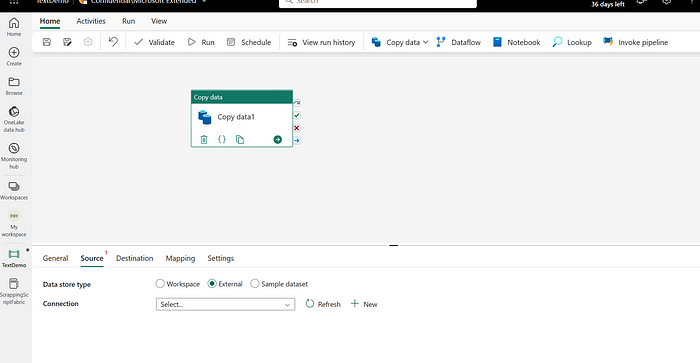
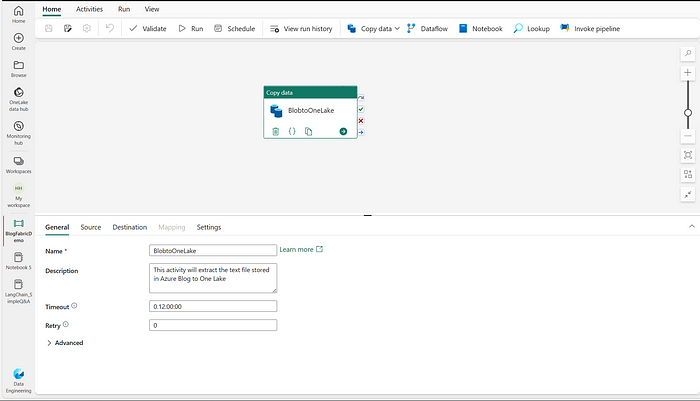
Go to the “General” tab and add the following details:
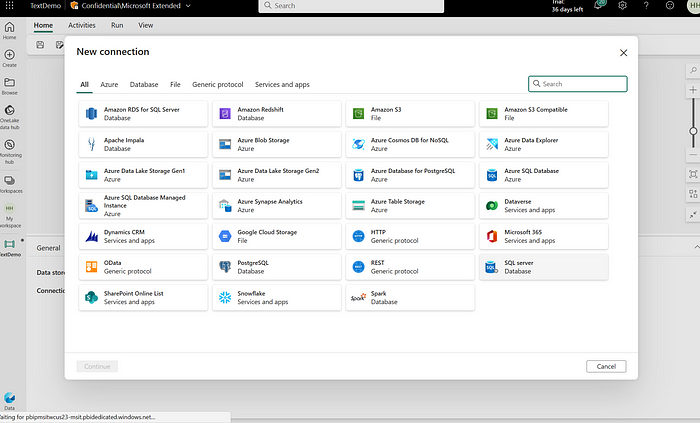
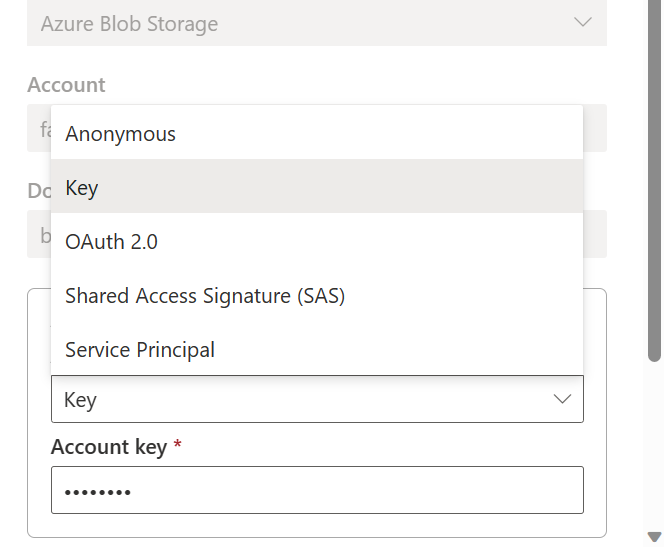
Next, go to the source tab and establish a connection with Azure Blobs. Select “New Connection” and select “Azure Blob Storage” as shown below. You can use “keys”, “Service Principal” or any of the below authentication methods as shown below:
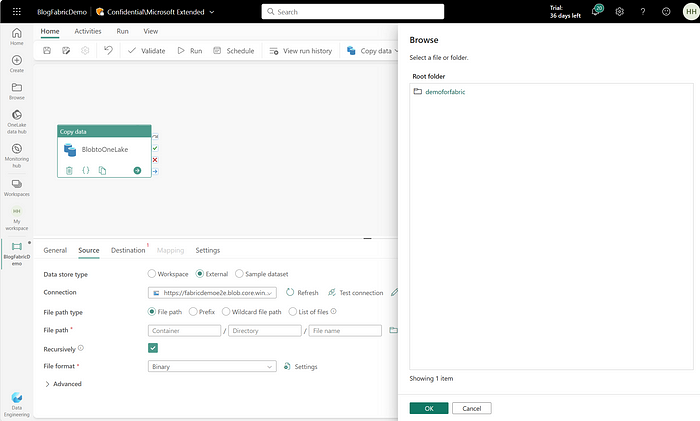
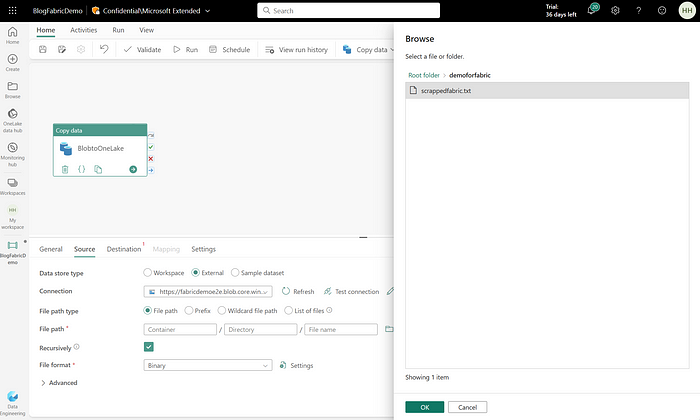
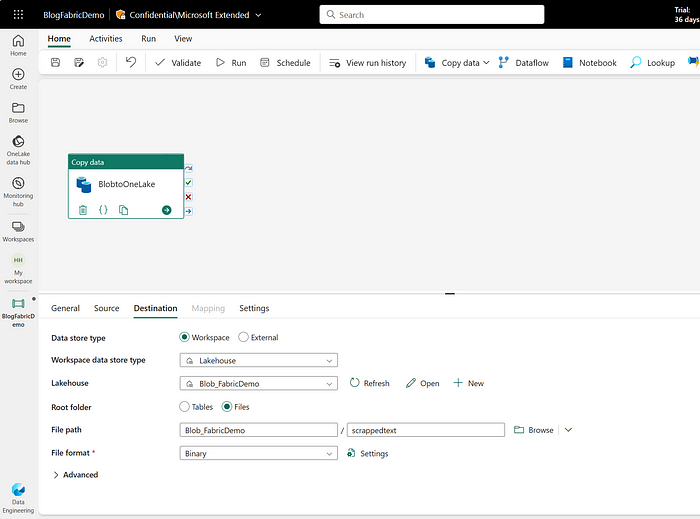
Once, you have added “Source Details”, move to the “Destination” tab and enter all the details as shown below. Attach the existing Lakehouse that we had created in the Data Science Module
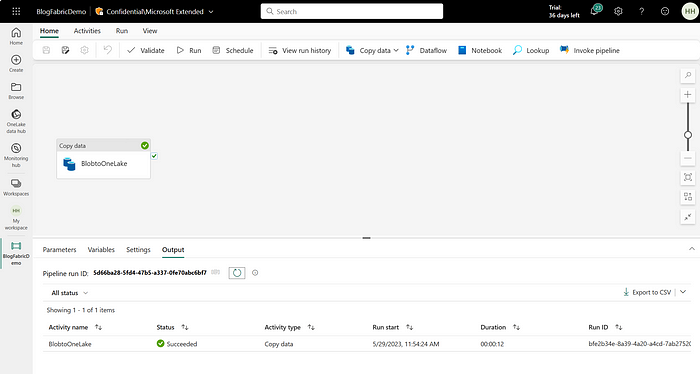
Test the connection and run the pipeline activity. If the pipeline is successful, proceed ahead to the next steps. Below is the screenshot once the pipeline gets successfully submitted.
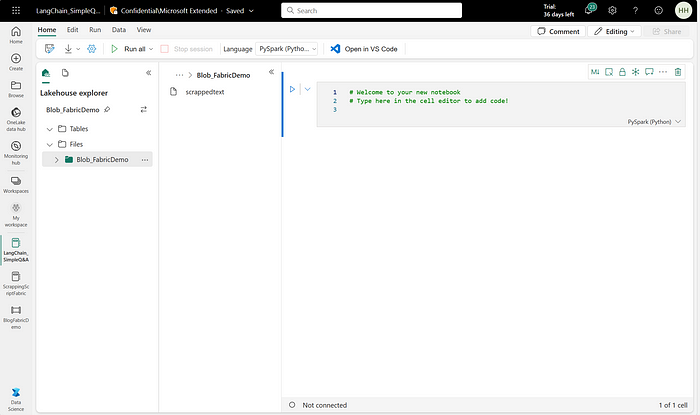
Now, let’s go back to our Data Science module of Microsoft Fabric, and let’s dive into some spark code to perform loading, aggregations, and transformations of our textual data that has been loaded into One Lake. Below is the UI after loading the data:
Let’s load the data in the notebook. But before that, we need to install the necessary libraries for building our simple LangChain application.
Step 1 — Install the necessary libraries and import them into our notebook.
pip install langchain openaifrom langchain.llms import AzureOpenAI
from langchain import PromptTemplate
from langchain.chat_models import ChatOpenAI
from langchain.chains import LLMChainStep 2— Read the text file and load it to a data frame using Spark. Copy the path by selecting three dots beside the file in the lakehouse explorer and replace it with the path below.
# Read the text file as a DataFrame
text_df = spark.read.text("Files/Blob_FabricDemo/scrappedtext")
Step 3- Let’s perform some cleaning of our text file to make it look better.
from pyspark.sql import functions as F
from pyspark.ml.feature import Tokenizer, StopWordsRemover
# 1. Lowercase the text
df = text_df.withColumn('value', F.lower(F.col('value')))
# 2. Remove punctuation
df = df.withColumn('value', F.regexp_replace(F.col('value'), '[^\w\s]', ''))# 3. Remove extra whitespaces
df = df.withColumn('value', F.regexp_replace(F.col('value'), ' +', ' '))
df = df.withColumn('value', F.trim(F.col('value')))# Tokenize text
tokenizer = Tokenizer(inputCol="value", outputCol="words")
df = tokenizer.transform(df)# Bring the words back to a single string
df = df.withColumn('value', F.concat_ws(" ", 'value'))Step 4- This is the most important step. As we know that LLM models have a token limit, hence we need to define a function to limit the length of tokens. Here I have created a UDF in Pyspark to limit the token length. You can play around with your token length accordingly. Do not forget to convert this to a list by using “data_list = df.collect()” for further code in this notebook.
We can do the same activity with helper functions in LangChain. For spark purposes, I am using UDFs. You also have options for other Spark MLlib libraries like Spacy, NLTK, etc.
from pyspark.sql import functions as F
from pyspark.sql.types import StringType
# Define the UDF
def limit_token_length(text, max_length):
tokens = text.split()
if len(tokens) > max_length:
tokens = tokens[:max_length]
return ' '.join(tokens)# Register the UDF
limit_token_length_udf = F.udf(limit_token_length, StringType())max_token_length = 7500 # Adjust this value as neededdf = df.withColumn('limited_text', limit_token_length_udf(F.col('value'), F.lit(max_token_length)))data_list = df.collect()Step 5- I would personally not like to do this in the notebook for any of my applications in the future. Here we will set Azure OpenAI environment variables for our LangChain application. This is not the best practice at all and we should use Azure Key Vaults for any kind of secrets. I will show you a quick glimpse of how you can do that by yourself. (Be careful, do not share your secrets easily with people 😂)
import os
os.environ["OPENAI_API_TYPE"] = "azure"
os.environ["OPENAI_API_BASE"] = "put your base url here"
os.environ["OPENAI_API_VERSION"] = "2022-12-01"
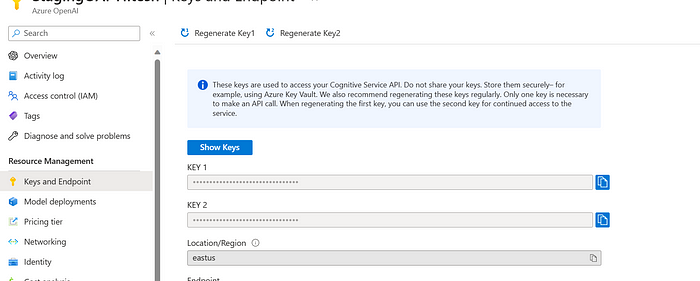
os.environ["OPENAI_API_KEY"] = "your api-key goes here"You can find the above keys by going to your Azure OpenAI deployment -> Resource Management -> Keys and Endpoint. Take a glimpse below (Please do not share these keys with anyone)
(Deviating a bit to show how you can do this using Azure Key Vault)
Create an Azure Key Vault:
- Go to the Azure portal.
- Select “Create a resource”.
- Search for “Key Vault” and select “Create”.
- Fill in the necessary details and click “Create”.
Add a Secret to the Key Vault:
- Once your Key Vault is ready, go inside the vault and select “Secrets” in the left-hand menu.
- Click “Generate/Import”.
- Give your secret a name, like
OPENAI-API-KEY, and paste your API key in the “Value” field. (Underscores won’t work, so be careful) - Click “Create”.
Access the Secret from Azure Notebooks:from azure.identity import DefaultAzureCredential
from azure.keyvault.secrets import SecretClient
credential = DefaultAzureCredential()
key_vault_name = 'put your keyvault name here'
KVUri = f"https://{key_vault_name}.vault.azure.net"
client = SecretClient(vault_url=KVUri, credential=credential)api_key = client.get_secret('OPENAI-API-KEY')print(api_key.value)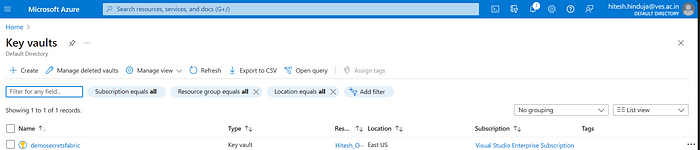
In this way, you will avoid exposing your secrets directly in the notebook. There are several ways to secretly access and set environment variables. However, in the context of this blog, I limit this understanding till here 🙂
Next
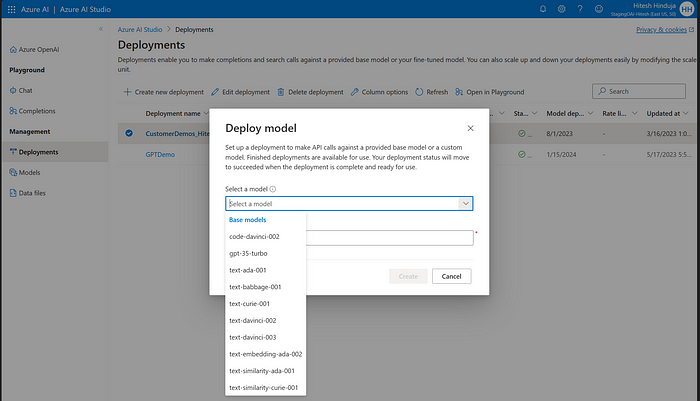
But before building this application, you need to make sure that you have access to the Azure OpenAI portal. If not, please head to this link and raise the request. Once the request has been granted, go to Azure OpenAI studio and follow the steps below:
Next, go to the Deployments tab on the left side and create a new deployment with the model of your choice as shown below:
Step 6 — Building a simple LangChain-based prompt application. In future blogs, we will build interesting applications using LangChain. For the sake of simplicity of this blog, let’s keep it simple!
Run the below code and see the output below:information = data_list
if __name__ == '__main__':
print("Hello LangChain!")
summary_template = """
given the information {information} about a the product I want you to create:
1. Can you summarise One Lake in 2-3 sentences maximum.
2. Also summarise in 2-3 sentences on what are shortcuts in One Lake
"""summary_prompt_template = PromptTemplate(
input_variables=["information"], template=summary_template
)
llm = AzureOpenAI(temperature=0, engine="CustomerDemos_Hitesh", model_name="gpt-35-turbo")
chain = LLMChain(llm=llm, prompt=summary_prompt_template)
print(chain.run(information=information))Here the “engine” parameter is the name of your deployment in the Azure AI portal and the “model_name” is the model you have selected in the deployment window shown previously.
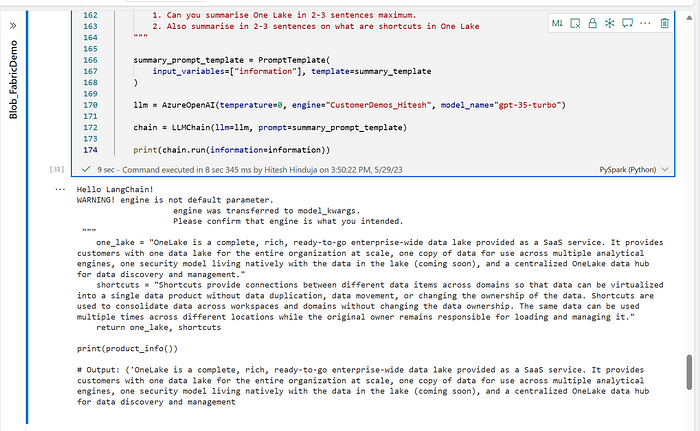
Here you see that we asked the LLM model to summarise the product that was found in the blog. We asked the GPT-3.5 model of Azure OpenAI to give us the output basis of the prompt given in the prompt template. Feel free to play around with the prompts and see some interesting answers.
Congratulations, if you’ve made it this far, give yourself a pat on the back! We have successfully scraped data from the Fabric blogs, transferred it to Blob Storage, loaded it into One Lake, utilized Spark to clean the data, and finally, built a simple LangChain application to query that data in the Microsoft Fabric Ecosystem!

Hitesh Hinduja is an ardent Artificial Intelligence(AI) and Data Platforms enthusiast currently working as Senior Manager in Data Platforms and AI at Microsoft. He worked as a Senior Manager in AI at Ola Electric, where he lead a team of 30+ people in the areas of machine learning, statistics, computer vision, deep learning, natural language processing, and reinforcement learning. He has filed 14+ patents in India, the US and has numerous research publications(17+) under his name. Hitesh had been associated in Research roles at India’s top B-schools-Indian School of Business, Hyderabad, and the Indian Institute of Management, Ahmedabad. He is also actively involved in training and mentoring and has been invited as a Guest speaker by various corporates and associations across the globe
Avid Learner and enjoys reading books in his free time. For more details about him, please refer to his website
https://hitesh-hinduja.mystrikingly.com/
Reference:
Hinduja, H. (2024). Exploring Microsoft Fabric, Fabric Spark, Azure OpenAI, and LangChain: A Hands-on case-study. Available at: https://medium.com/@hitesh.hinduja/exploring-microsoft-fabric-fabric-spark-azure-openai-and-langchain-a-hands-on-case-study-26ae949f5977 [Accessed: 22nd February 2024].