It is finally here… the Dialog API! If you have ever built an Office add-in and dealt with authentication, pickers or something of that sort; I’m sure you will understand how great this is. But it’s not just for authentication, with the new Dialog API – we can build some pretty brilliant experiences. This is great from a user experience standpoint – as we now have another surface area to work with, within the development space of Office add-ins.
In this post, I will introduce you to this brand new API with a simple example. Our goal is bring up a dialog, communicate data from the dialog back to the Office add-in, and lastly close it. Remember when we had to do this using web sockets and other tricks? No more!

If you want to follow along, make sure to get Visual Studio 2015 (https://www.visualstudio.com/en-us/downloads/download-visual-studio-vs.aspx) and the new Office Developer Tools (https://www.visualstudio.com/en-us/features/office-tools-vs.aspx). The new developer tools feature updated project templates that use Office UI Fabric – which makes your Office add-ins look great right from the start. Learn more about Office UI Fabric here: http://dev.office.com/fabric
Short of time and just want the final sample? Clone the repository (git clone https://github.com/simonjaeger/DialogAPIWordWebAddIn.git) and open the solution file:DialogAPIWordWebAddIn.sln.
File -> New
Let’s begin by creating a new Word add-in with the new Office UI Fabric template.
- Open Visual Studio 2015.
- Choose File, New Project and locate the Word Add-in template. You’ll find it within Visual C#, included in theOffice/SharePoint section.
- Name the project anything that you would like and complete the wizard.
- Run the project with the {F5} shortcut, or click Start Debugging in the Debug menu.
- Word will start and launch your shiny new Word add-in.
Build the dialog
Before we can display anything in a dialog, we need to create the view for it. This is simply an HTML page that you can reference from the Office add-in and request Office to display it within a dialog. We also need to make sure that the dialog content sets the Office initialization function, as with any Office add-in. This will enable us to communicate with the Office add-in via the Dialog API.
- Right click on your web project and choose Add and then New Item…
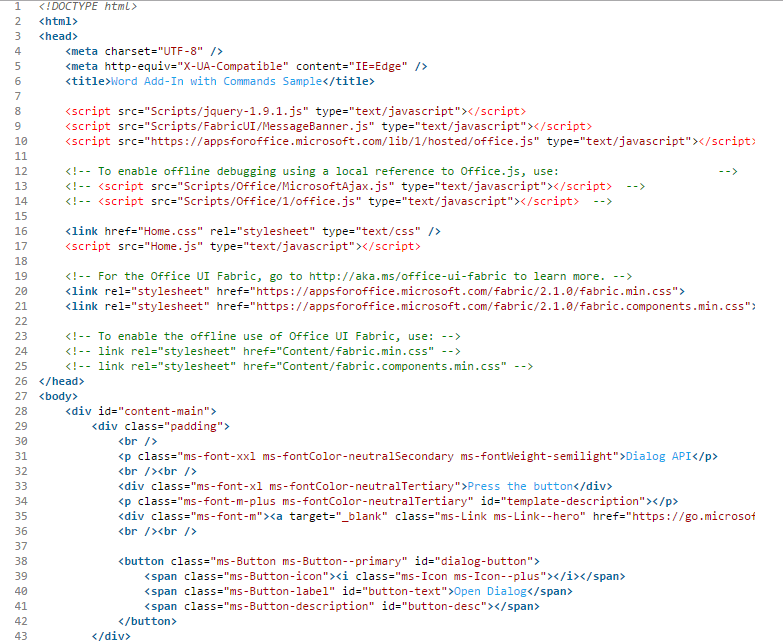
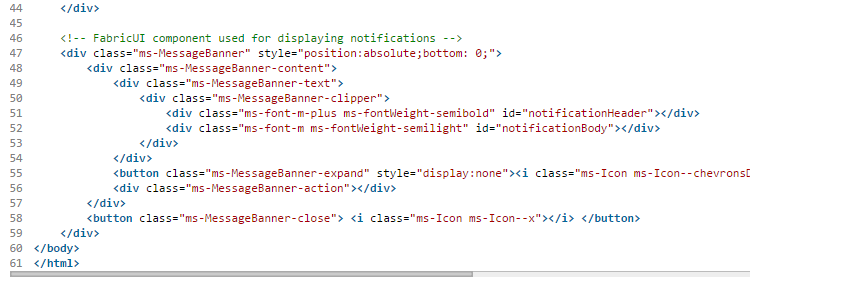
- Select Web and pick HTML Page. Name it “Form.html”.
- Right click on your web project and choose Add and then New Item…
- Select Web and pick JavaScript File. Name it “Form.js”.
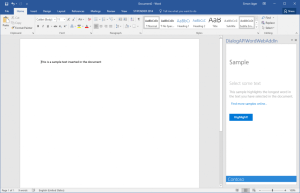
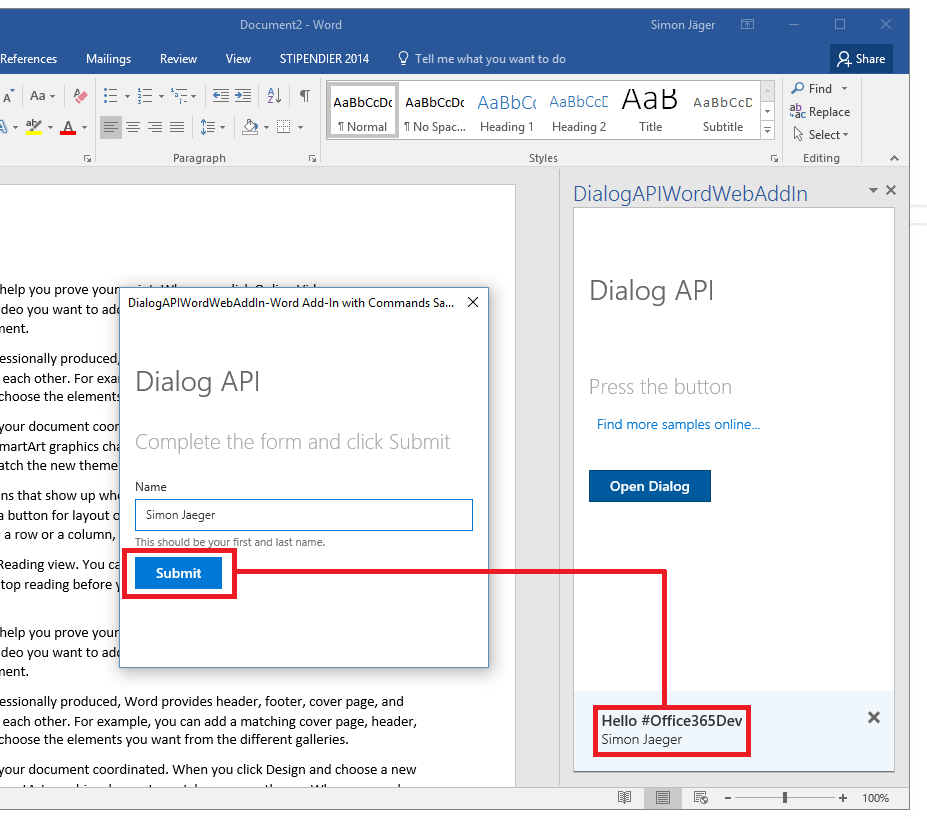
I decided to make a very simple form containing some text, an input field and a submit button. This is my completed Form.html file.
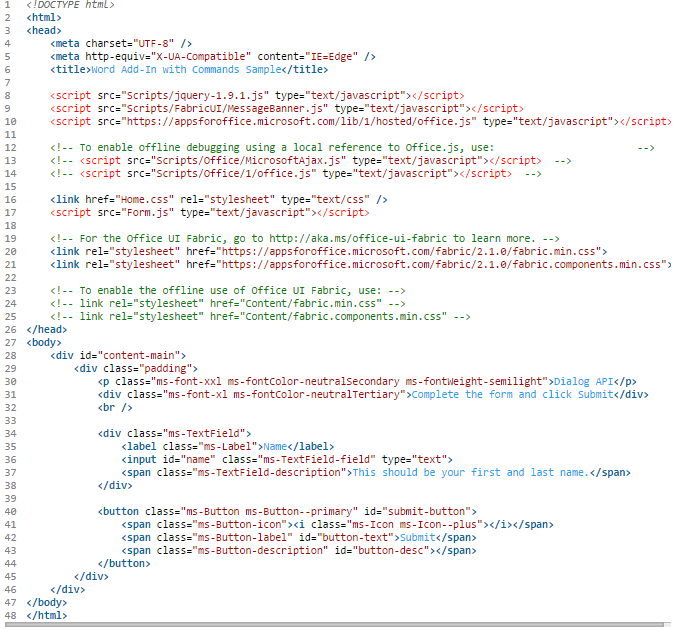
In addition to the HTML page, we have to make sure to initialize the Office context. This is done by setting the Office.initialize function. Notice that the HTML page also references the Office.js library in the head. This is why we created the JavaScript file (which is also references in the head of the HTML page). This my completed Form.jsfile.
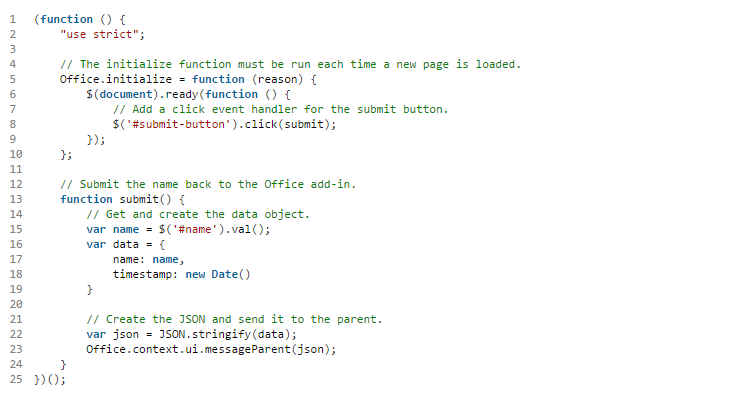
In the submit function, which will be called when the button is pressed, we have to do a few things. First we gather the data that we want to communicate back to the Office add-in. We then have to serialize the data into a string, this is because we send our messages using that data type.
Finally, we can call the Office.context.ui.messageParent function with the string (containing JSON in this case). If the parent (the Office add-in) is listening to any incoming messages, it will receive the data.
Update the Office add-in
Let’s make a few updates to the existing Office add-in. There’s some functionality that comes with the project template, I encourage you to check it out – but for now, we will remove it. Update your files accordingly.
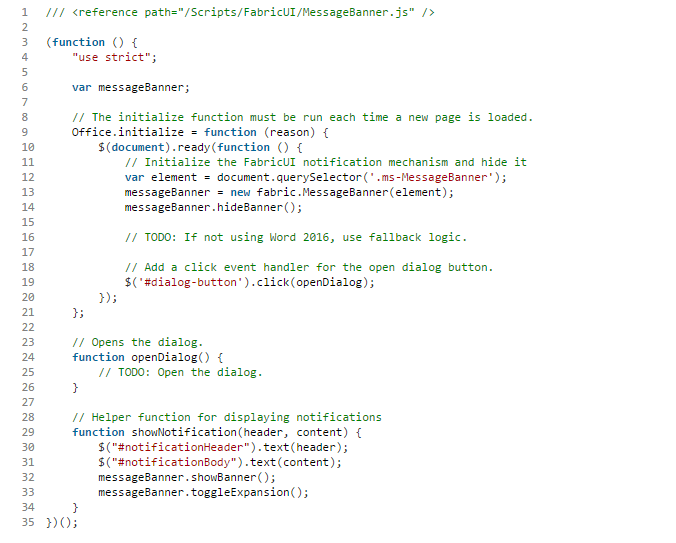
This is the Home.html file.
This is the Home.js file.
Display the Dialog
In the Home.js file, locate the openDialog function and add the following snippet inside of it.


- Grab the public URL of the Form.html file.
- Use the Office.context.ui.displayDialogAsync function and pass in the URL of the Form.html file along with a couple of options. The size options (width and height) are percentage values of the screen. This function is asynchronous, so this means we have to pass in a callback as well for when the dialog has been displayed.
- In the callback, we grab a reference to the dialog, contained in the asyncResult.value variable.
- Using the dialog reference, we can register an event handler for the DialogMessageReceived event.
- The event listener will receive any incoming messages from the dialog, parse it and finally show it using theshowNotification function (which came from the project template).
Run the code and try it out!
So with that, you now have a sophisticated way of showing a dialog from your Office add-in. In addition, there’s is a great video introducing the Dialog API on Channel 9 by @richdizz: https://channel9.msdn.com/Shows/Office-Dev-Show/Office-Dev-Show-Episode-26-Using-the-Dialog-API-in-Office-Add-ins – watch it!
Don’t forget to check out the Office Dev Center for a ton of more resources: http://dev.office.com/
About the Author

Simon Jäger
Simon will be speaking at ESPC16 in Vienna: Take a look at his session here: One Endpoint to Rule Them All – Microsoft Graph