Azure AD Lifecycle Workflows is a next gen Identity Governance service that enables organizations to manage User lifecycle process by automating JML (Joiner-Mover-Leaver) Process.
By understanding and implementing these workflows, you can improve security, simplify management, and streamline your cloud operations.
This feature is currently in preview, and require Azure AD Premium P2 license for the administrator to create these workflow.
Before we dive deep in, let’s understand what does workflows mean and what does it contains?
When triggered by execution conditions, workflows automate some aspects of lifecycle management with tasks ( built-in or custom ) which are integrated with Azure Logic apps.
Now let’s explore creating a custom workflow where a new hire from IT Dept is automatically onboarded to Azure AD groups and granted Temporary access password to login into Azure Portal notified via an email.
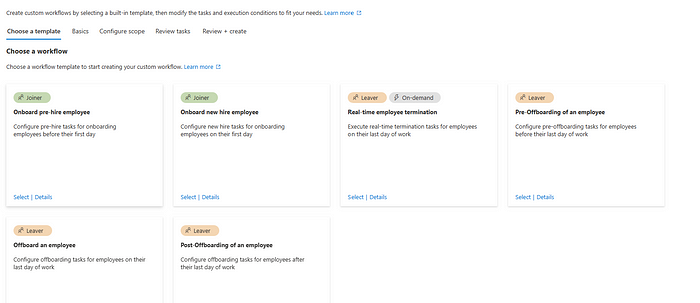
Traverse to below path in Azure AD and create a new workflow from the default template where you can customize the task(action) later.
I’ve selected On-board new hire template with Rule based Scope and selected the execution rule to department to “IT” with 2 tasks:
- Add User to Azure AD Groups
- Run a Custom Task to generate email with TAP for the user.
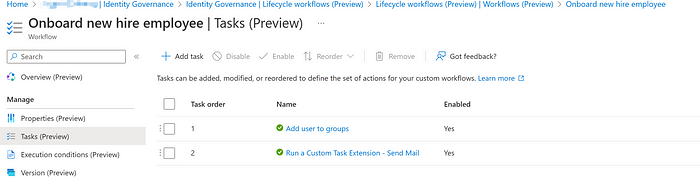
Once workflow is created, access the existing workflow here:

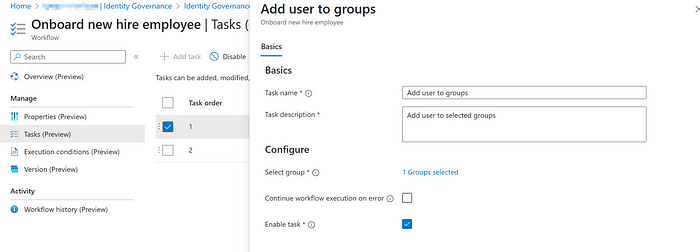
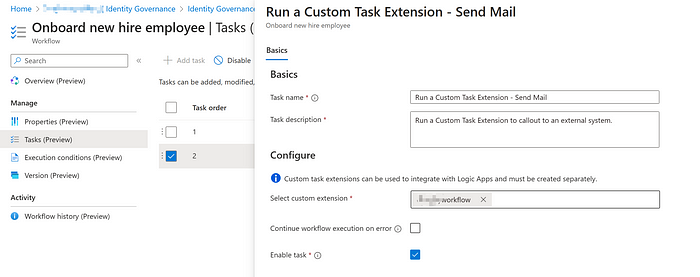
Here’s 2 tasks that are part of the AD Lifecycle workflow:
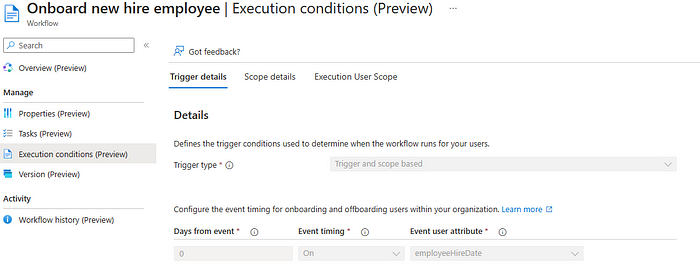
Execution conditions are Scope based trigger which means an user with a tag Dept IT is selected for the workflow run.
Now, first task is enabled by selecting the right Azure AD group to be triggered.
For the second task, all the activities are custom hence I’ve selected the Logic app workflow which will perform the remaining actions.
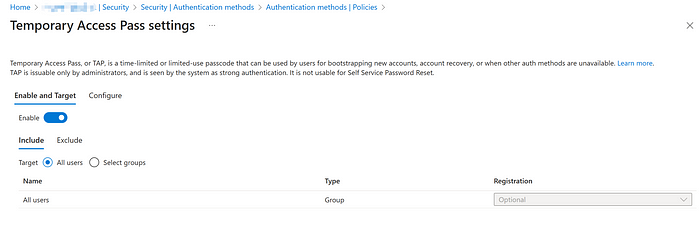
As, I’m going to create TAP for the user on their initial onboarding let’s enable the TAP as an authentication method for my Azure AD user to login. Go to the below tab, click enable for all users, and I’ve left the TAP configuration settings to be default but you can also customize how long the TAP is valid from the configure tab shown in the screenshot.
Let’s go to Logic App selected in the workflow task, and customize the actions from the logic app designer.

First, I’ve HTTP trigger task which means when the API trigger from workflow is received via Lifecycle workflow with the given fields mentioned below in the JSON:
{
“properties”: {
“data”: {
“properties”: {
“callbackUriPath”: {
“description”: “CallbackUriPath used for Resume Action”,
“title”: “Data.CallbackUriPath”,
“type”: “string”
},
“subject”: {
“properties”: {
“displayName”: {
“description”: “DisplayName of the Subject”,
“title”: “Subject.DisplayName”,
“type”: “string”
},
“email”: {
“description”: “Email of the Subject”,
“title”: “Subject.Email”,
“type”: “string”
},
“id”: {
“description”: “Id of the Subject”,
“title”: “Subject.Id”,
“type”: “string”
},
“manager”: {
“properties”: {
“displayName”: {
“description”: “DisplayName parameter for Manager”,
“title”: “Manager.DisplayName”,
“type”: “string”
},
“email”: {
“description”: “Mail parameter for Manager”,
“title”: “Manager.Mail”,
“type”: “string”
},
“id”: {
“description”: “Id parameter for Manager”,
“title”: “Manager.Id”,
“type”: “string”
}
},
“type”: “object”
},
“userPrincipalName”: {
“description”: “UserPrincipalName of the Subject”,
“title”: “Subject.UserPrincipalName”,
“type”: “string”
}
},
“type”: “object”
},
“task”: {
“properties”: {
“displayName”: {
“description”: “DisplayName for Task Object”,
“title”: “Task.DisplayName”,
“type”: “string”
},
“id”: {
“description”: “Id for Task Object”,
“title”: “Task.Id”,
“type”: “string”
}
},
“type”: “object”
},
“taskProcessingResult”: {
“properties”: {
“createdDateTime”: {
“description”: “CreatedDateTime for TaskProcessingResult Object”,
“title”: “TaskProcessingResult.CreatedDateTime”,
“type”: “string”
},
“id”: {
“description”: “Id for TaskProcessingResult Object”,
“title”: “TaskProcessingResult.Id”,
“type”: “string”
}
},
“type”: “object”
},
“workflow”: {
“properties”: {
“displayName”: {
“description”: “DisplayName for Workflow Object”,
“title”: “Workflow.DisplayName”,
“type”: “string”
},
“id”: {
“description”: “Id for Workflow Object”,
“title”: “Workflow.Id”,
“type”: “string”
},
“workflowVerson”: {
“description”: “WorkflowVersion for Workflow Object”,
“title”: “Workflow.WorkflowVersion”,
“type”: “integer”
}
},
“type”: “object”
}
},
“type”: “object”
},
“source”: {
“description”: “Context in which an event happened”,
“title”: “Request.Source”,
“type”: “string”
},
“type”: {
“description”: “Value describing the type of event related to the originating occurrence.”,
“title”: “Request.Type”,
“type”: “string”
}
},
“type”: “object”
}
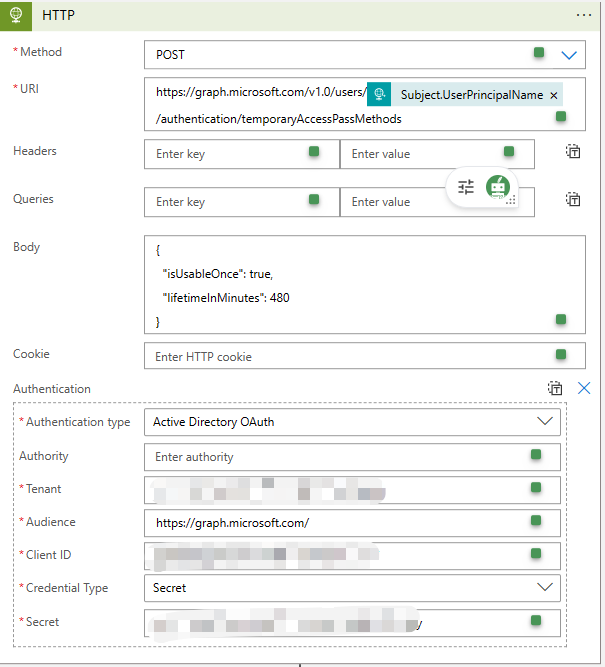
Next step, is to trigger HTTP POST API to retrieve the temporary access password for the user variable “Subject.UserPrincipalName”. I’ve left the TAP expiry as 480 mins which is default but can customized to a lower value as well.
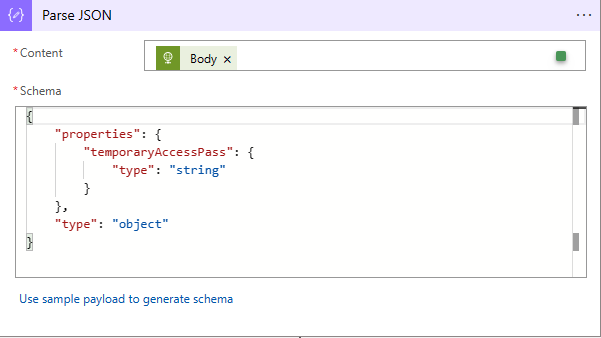
Next step, is to parse the body content for the TAP received from the above execution.
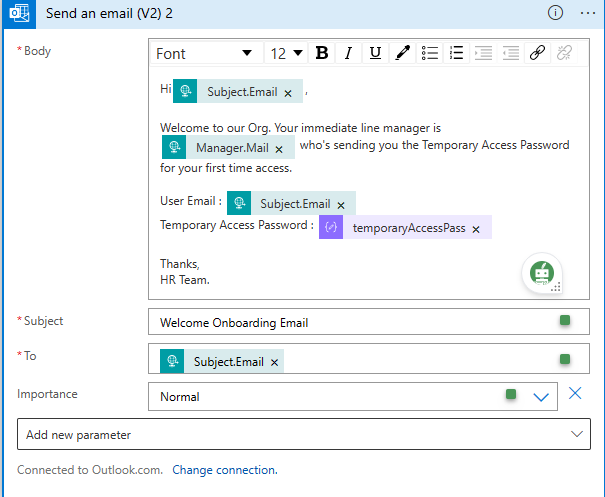
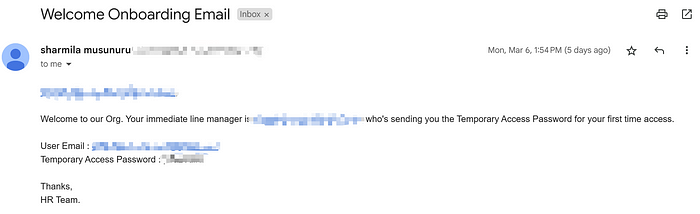
Now Send an email with the details populating the user fields and TAP with the immediate manager fields retreived from User Properties in Azure AD.
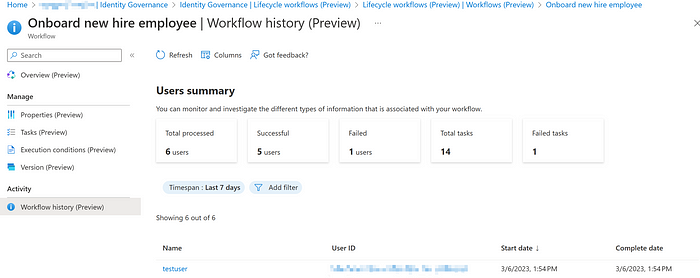
Now, create a testuser in Azure AD with the department field “IT” which will trigger the workflow. You can check the workflow history from the below screenshot to see if its successful or failed.
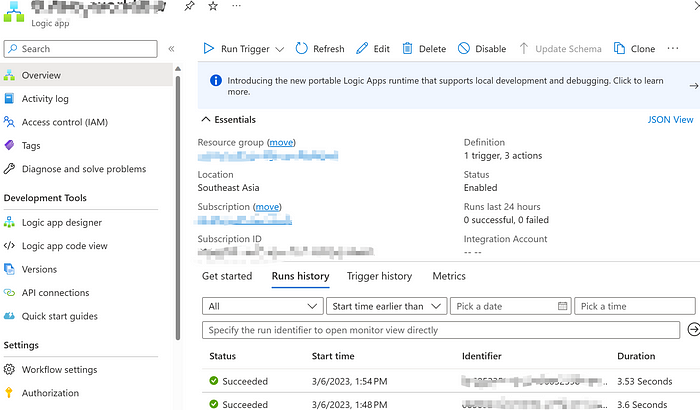
Alternatively, verify the run history from Logic app to check if all the tasks mentioned are succeeded, with the duration time as per below screenshot.
Finally, validate the email sent with the information fields and try logging into the azure portal with the same.
About the Author
Cloud Solution Architect @Microsoft

Reference
Sharmila, M., 2023, Understanding the Azure AD Life Cycle Workflow: A Comprehensive Guide, Medium.com, Available at: https://medium.com/microsoftazure/understanding-the-azure-ad-life-cycle-workflow-a-comprehensive-guide-6cf463ce2a6b [Accessed on 4 July 2023]