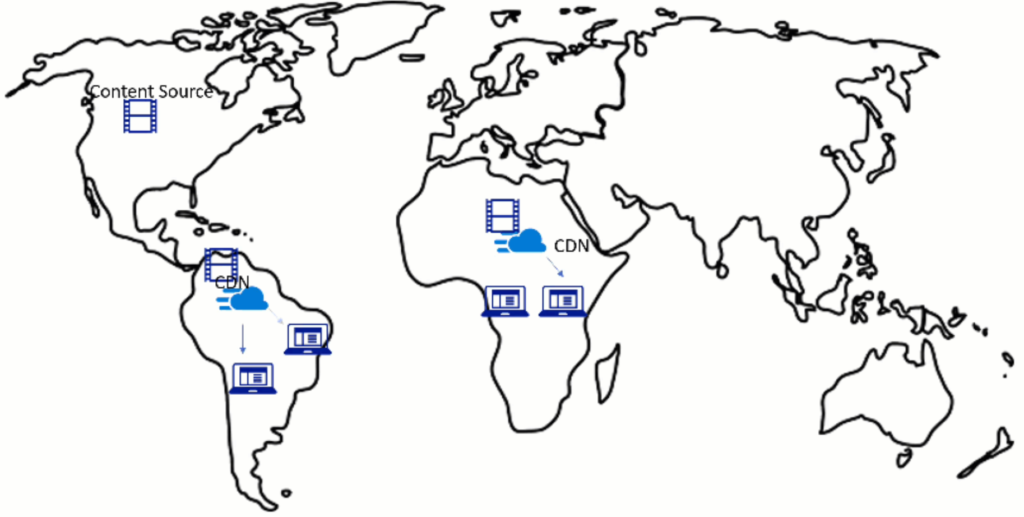
A Content Delivery Network, or CDN, is a globally distributed network for delivering, well, content. Content can include images, videos, CSS and any other asset used for providing web services. The advantages to a CDN include: caching data closer to the users to increase web site performance, improving reliability by leveraging a global caching network and reducing bandwidth by shifting traffic to the CDN.
Microsoft Azure provides several CDN options backed by Azure, Verizon or Akamai. This post covers deploying a CDN backed by Azure with a custom domain name. Azure CDN is backed by Azure Front Door Service and is suitable for general web delivery, video streaming, and large files. Azure CDN supports custom DNS names and provides a free SSL certificate for custom host names.
Video Version Here:
What is a CDN
At a high level, Azure CDN works by caching data from a source to the CDN based on the request of the client. The client requests the content based on a specific DNS hostname. The CDN determines the location of the client based on the DNS lookup. Content is copied from the source and cached locally to the client. The next time a client requests the content, it’s pulled from the local cached, speeding delivery by moving the content closer to the client.
Create the Storage Account
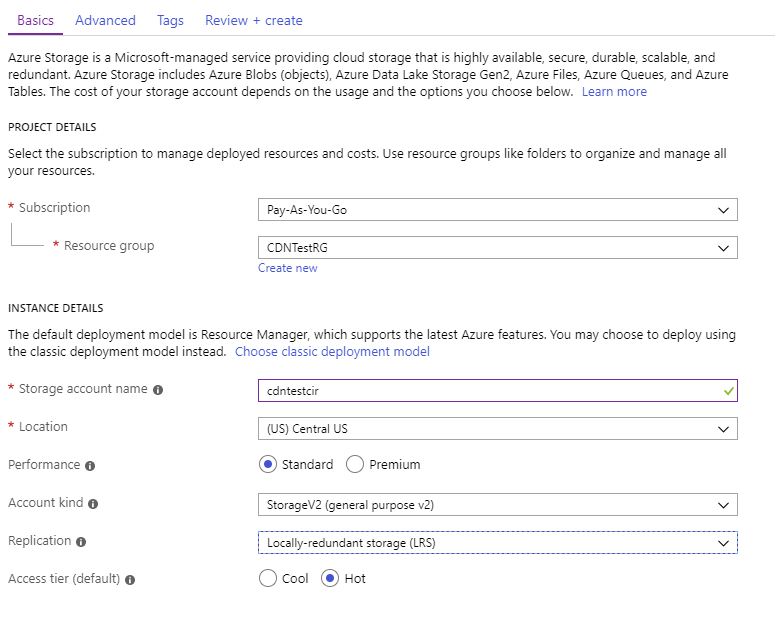
The example below uses an Azure Storage Account blob container to host the source content. Start by creating a new Resource Group and Storage Account. The Storage Account and CDN will go into the same Resource Group. The Storage Account can be V1 or V2, for this example, I’m creating a V2 Storage Account.
Once the storage account is created, create a new blob container to store the CDN content. Set the Public Access Level to Blob (anonymous read access for blobs only). the CDN will only propagate content that is publicly accessible. As this is content to a public web site, making the content publicly available is necessary.
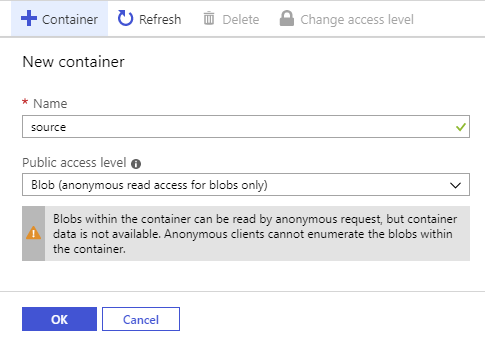
New Public Container
Create the CDN
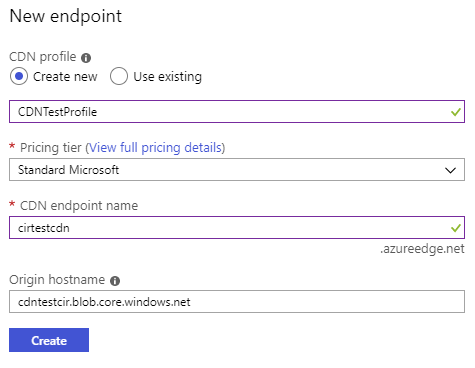
Next, go to Azure CDN under Blob service in the Storage Account management blade. From there, set up a new CDN profile. A profile can hold multiple endpoints, providing they are the same pricing tier and provider. Enter a name for the new profile and move onto pricing tiers.
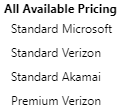
There are four options for Pricing tiers. I use Standard Microsoft in this example. More information on the different pricing options can be found here.
Give the CDN an endpoint name after the pricing tier is selected. This name is part of the URL and has to be globally unique. This will also be the CNAME alias if using custom domain names.
The finished endpoint will look similar to below. Click Create to set up the endpoint.
The CDN Endpoint is now running, but there is nothing in the source Storage Account for the CDN to serve. Any simple HTTP code will work for testing. I will deploy a static web site available here For this example.
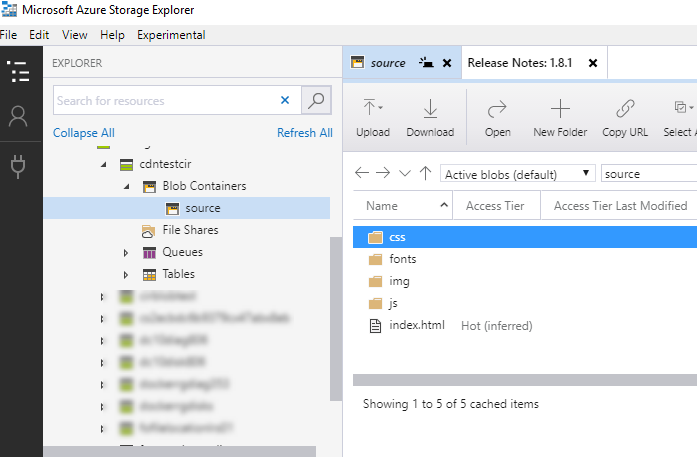
Azure Storage Explorer is used to upload the content to the root of the “source” container setup previously.
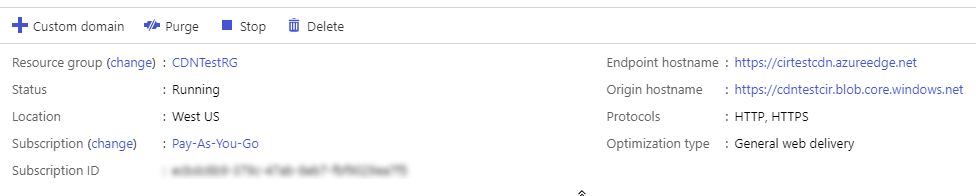
Now that the CDN is set up and content is available, it’s ready to test. In Azure, Go to CDN, Select the CDN Profile and the Endpoint we just created. Under settings, there is an option for Endpoint hostname. This is the URL used to access the content.
Clicking on the URL will display the message “This XML file does not appear to have any style information..”.
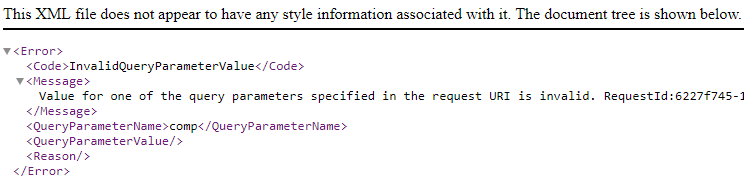
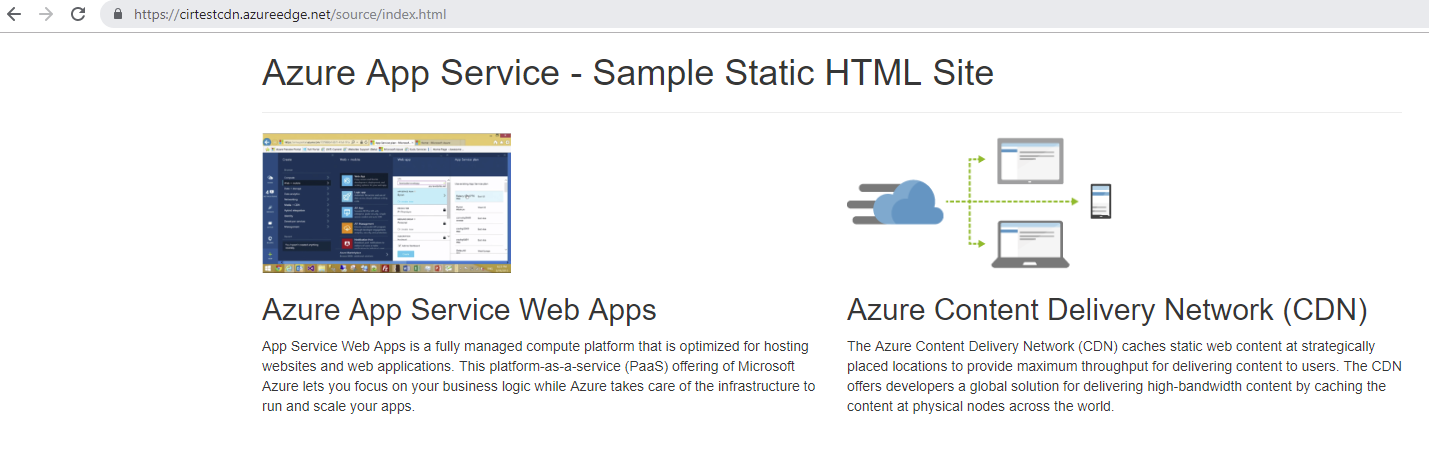
This is expected. A CDN is not a web server. It doesn’t assume you are looking for index.html if you don’t add it to the path, and it won’t redirect to a virtual directory. A CDN is used to reference content by an absolute and explicit path. For my example, I uploaded the content, including the *index.html* file to the *source* directory. If I add /source/index.html to the end of the hostname I can access the web content.
Congratulations, if you are following along you now have a functioning CDN. Before we move on, let’s cover some of the features you may need to use for administering the CDN.
The Purge
Go back to the CDN Endpoint. At the Overview blade, notice the four buttons at the top.

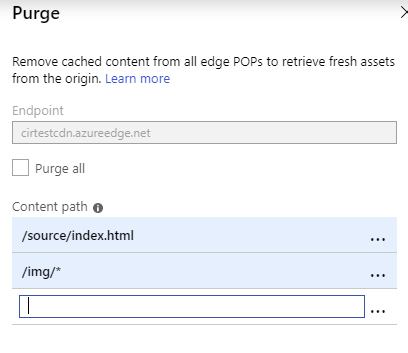
I will cover the Custom Domain option later and you can probably figure out that Stop will stop the CDN and Delete will delete it. The Purge Option is helpful if you update content at the source and need to clear outdated content from the global CDN cache. Click Purge and add the path to the content to remove from the cache. You can also use a wildcard * to remove all content from a given directory. Select the Purge All option to remove all content from the global cache.
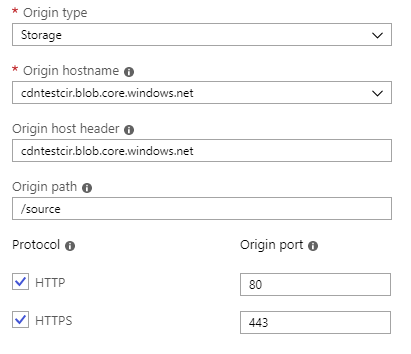
There are other options under Settings. You can update the content source, change Compression method and Caching rules as well as implement Geo Filtering. Go to Origin and notice that adding an origin path of /sourcefrom the example in this post will eliminate the need to add /source to the URL. The option to remove HTTP or HTTPS and change the origin port is also available under Origin settings.
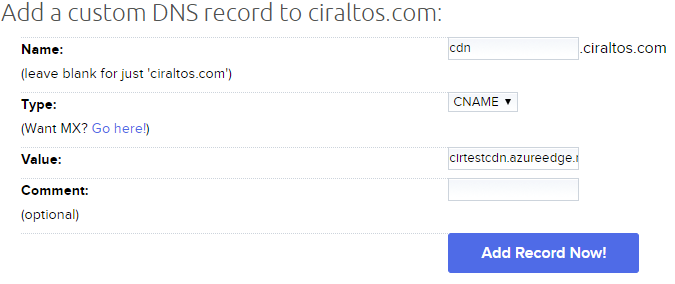
So far, we have used an azureedge.net domain to access the CDN. What if you want to add your own custom domain? This can be done in two steps. The first step is to add a CNAME to your DNS that points your custom domain and hostname to the azureedge.net domain of the CDN. For my example, I added a CNAME record that points cdn.ciraltos.com to cirtestcdn.azureedge.net. This record has to be added and propagated beforecontinuing to the next step. Each DNS provider is different, consult their documentation for help added a CNAME record.
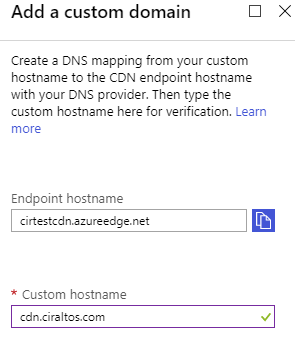
Once the alias record is added and available, go to the Overview or Custom Domain blade in the portal and click on + Custom domain at the top of the screen. This brings you to the Add a custom domain window. Add a custom hostname to the Custom hostname field. This step validates external DNS. If Azure can’t resolve the new hostname to the endpoint you will see an error like below.
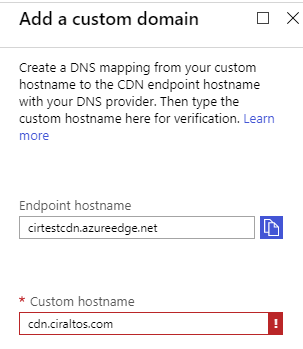

Once finished, the new hostname will resolve to the CDN endpoint.
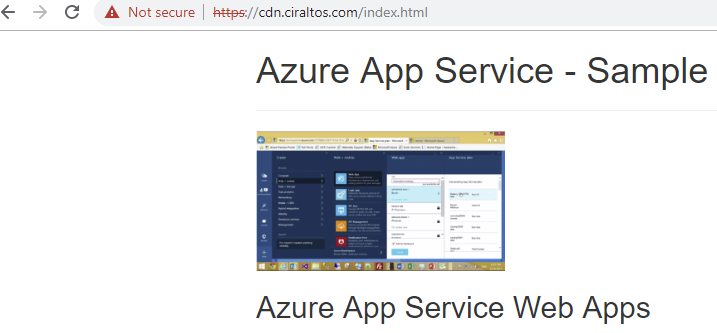
The big red certificate error may have caught your attention. There is a simple reason for this. Microsoft provides a valid certificate for the azureedge.net domain. I don’t (yet) have a cert for the custom domain and have to accept the certificate warning to access the page.
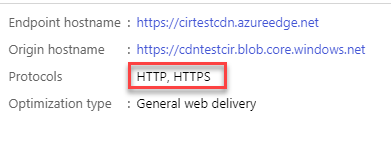
What about HTTP and custom domains you may ask? That’s a good question. The CDN clearly indicates that HTTP and HTTPS are supported.
However, when I try to access the custom URL with non-encrypted HTTP (or azureedge.net for that matter) I get the message below “The account being accessed does not support HTTP.”
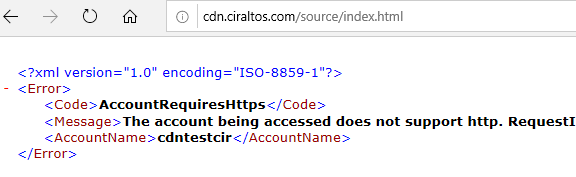
The clue is the Account name in the error message. The problem isn’t the CDN, it’s the storage account. Go to the Storage Account and open the Configuration blade. Notice the option for Secure transfer required is set to enabled. This is the option forcing HTTPS. If you want to use a custom hostname on the CDN without SSL, Secure transfer required has to be disabled on the storage account.
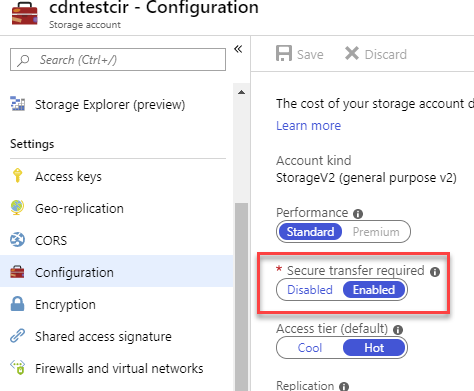
Storage Account Secure Storage Required
Speaking of SSL
This is the last section, I promise (well, last of part 1). Any serious webmaster will use SSL to deliver content. Functioning SSL requires a Certificate. In this next section, we are going to obtain and apply a web cert for the CDN.
There are a couple of options to enable SSL. The first, and more complicated, is to bring your own certificate. In this scenario, the certificate is added to a Key Vault. Once added, the CDN is granted access to the Key Vault and uses the cert to encrypt traffic. This option is necessary if using your own certificates. For this example, I’m going to use the free and easy option.
The steps below use the CDN managed certificate. Microsoft uses Digicert to provision the certificates. This is a free, managed option available as part of the CDN service. Domain ownership is validated by the CNAME mapping added when configuring the custom domain.
There is one precaution you may want to consider before you go to requesting the cert. If Digicert can’t validate your domain for any reason, it will default to email for validation. Digicert will email the address listed in the WhoIs information on your domain. Digicert will also email the addresses listed below to validate ownership. Make sure you have access to one of these addresses in the event CNAME validation fails.
- admin@<your-domain-name.com>
- administrator@<your-domain-name.com>
- webmaster@<your-domain-name.com>
- hostmaster@<your-domain-name.com>
- postmaster@<your-domain-name.com>
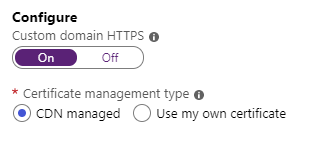
Request the certificate from within the Custom Domains blade by simply turning Custom domain HTTPS on and selecting the CDN managed option.
The validation process is automatic, but not instantaneous. It took about an hour for this example to finish. Below is the output once completed.
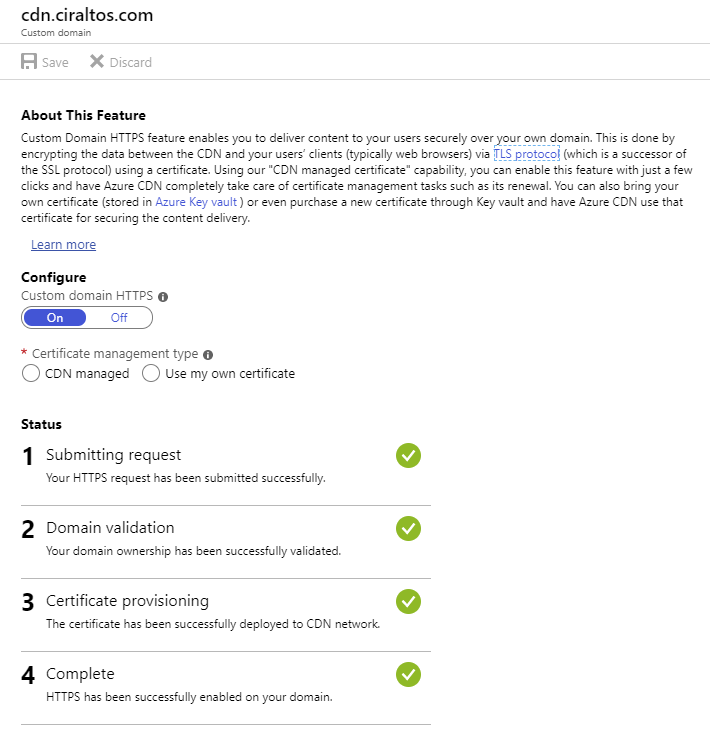
Cert Provisioning 4
Now that the cert is provisioned the web site is accessible without a cert error.
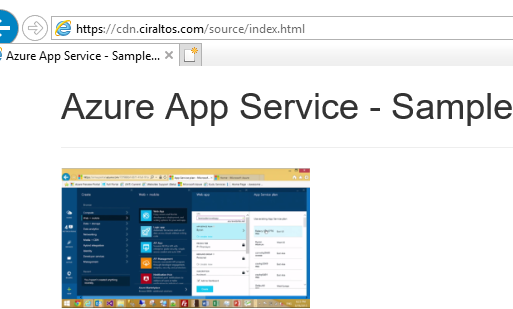
Custom HTTPS URL
That is it. You now have an enterprise-grade, fully functional HTTPS Content Distribution Network.
About the Author:
Travis Roberts is the Manager of Data Center Services at a Minnesota based Credit Union. Travis has 20 years of IT experience in the legal, pharmaceutical and marketing industries, and has worked with IT hardware manufacturers and managed service providers. Travis has held numerous technical certifications over the span of his career from Microsoft, VMware, Citrix and Cisco. Travis maintains a blog at www.ciraltos.com and active on Twitter @ciraltos
Reference
Roberts, T. (2019). How to configure an Azure CDN. Available at: https://www.ciraltos.com/how-to-configure-an-azure-cdn/ [Accessed 11th August 2019].