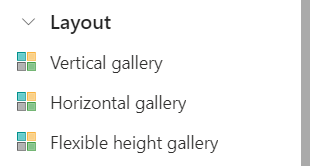
The Power Apps gallery controls allow developers to easily display tabular data from a datasource or local collection. Currently we have 3 gallery types (1) Vertical gallery, (2) Horizontal gallery and (3) Flexible height gallery (vertical lay-out). The preferred gallery type will depend on how you would like to visualize the data.
While all galleries have native scroll functionality, the scroll direction is dependent on the chosen gallery type. The horizontal gallery for instance only permits scrolling on the horizontal axis, and vice versa for the vertical gallery.
Some time ago I answered an interesting question on the Power Apps Community forum, where a horizontal gallery had to be scrollable in both directions. In this blog post we will learn how to leverage the vertical container control to allow galleries to scroll in both directions regardless of gallery type.
Table of Contents
VERTICAL GALLERY
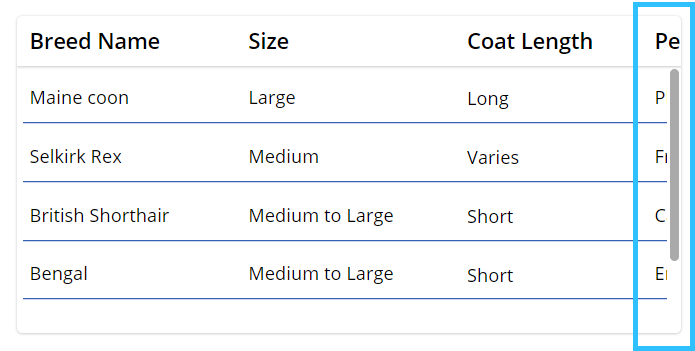
To start, I have created a vertical gallery set-up where I unfortunately do not have sufficient horizontal space to show all table columns. Although I can scroll through all rows, I am unable to fully view the last column name and values.
Add a vertical container
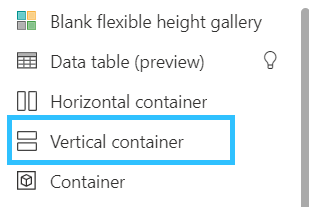
As a first step, add a vertical container to your canvas screen by (1) selecting Insert in the top header, (2) navigating to the Layout section and (3) selecting Vertical container.
Set the vertical container X, Y, Width & Height properties according to your current gallery set-up, as the container should fill all space that is currently occupied by your gallery and header. Afterwards add your gallery headers to the vertical container and then add the gallery control. Note that your gallery headers should be grouped in a regular container control. Finally, your Tree View structure should look as follows:
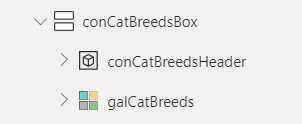
Adjust vertical container properties
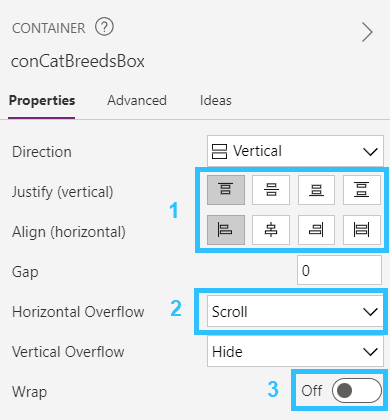
Select the vertical container, navigate to the property panel on the right side of your editor and adjust the vertical container properties:
- Justify vertical & Align horizontal values should remain ‘Start’.
- Set Horizontal Overflow to ‘Scroll’.
- Wrap should remain off.
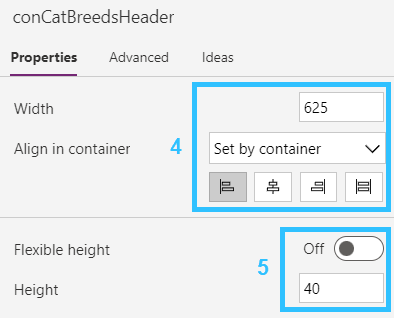
Select the Header container and adjust the right property panel as follows:
- Align in container should remain ‘Start’ and adjust the Width to the expected max width of your header container needed to display all columns – in my case 625.
- Turn off Flexible height and adjust the Height property to the required size.
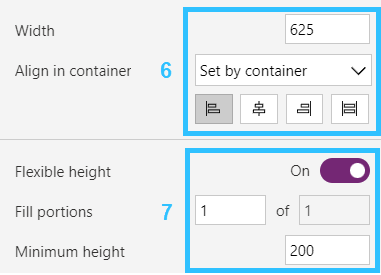
Finally, select the Gallery control and adjust the properties as follows:
- Align in container should remain ‘Start’ and adjust the Width to the expected max width of your gallery needed to display all column values – in my case 625. (or HeaderContainerName.Width)
- Flexible height should remain on. This allows the gallery height to automatically scale depending on the vertical container height.
Final result vertical gallery

HORIZONTAL GALLERY
A similar approach can be taken in order to create a horizontal gallery that also allows for scrolling across the vertical axis. To start, I have created a horizontal gallery where the bottom values are not fully visible.

Add a vertical container
As a first step, add a vertical container to your canvas screen by (1) selecting Insert in the top header, (2) navigating to the Layout section and (3) selecting Vertical container.
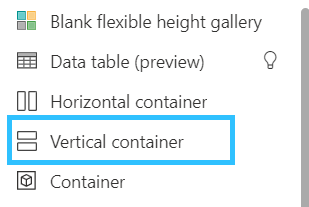
Set the vertical container X, Y, Width & Height properties according to your current gallery set-up, as the container should fill all space that is currently occupied by your gallery. Add your gallery to the vertical container – this may result in some UI clean-up after copy-pasting. Your Tree View structure should look as follows:

Adjust vertical container properties
- Set Align horizontal to ‘Stretch’, Justify vertical should remain ‘Start’.
- Set Vertical Overflow to ‘Scroll’.
- Wrap should remain off.
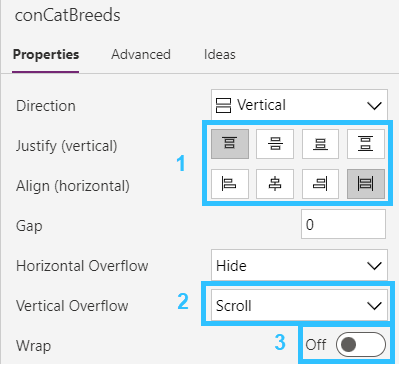
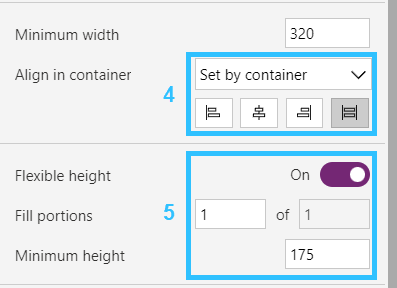
Select the Gallery control and adjust the properties as follows:
- Align in container should remain ‘Stretch’.
- Flexible height should remain turned on. Adjust the Minimum height to the expected total height of your Horizontal gallery needed to display all data – in my case 175.
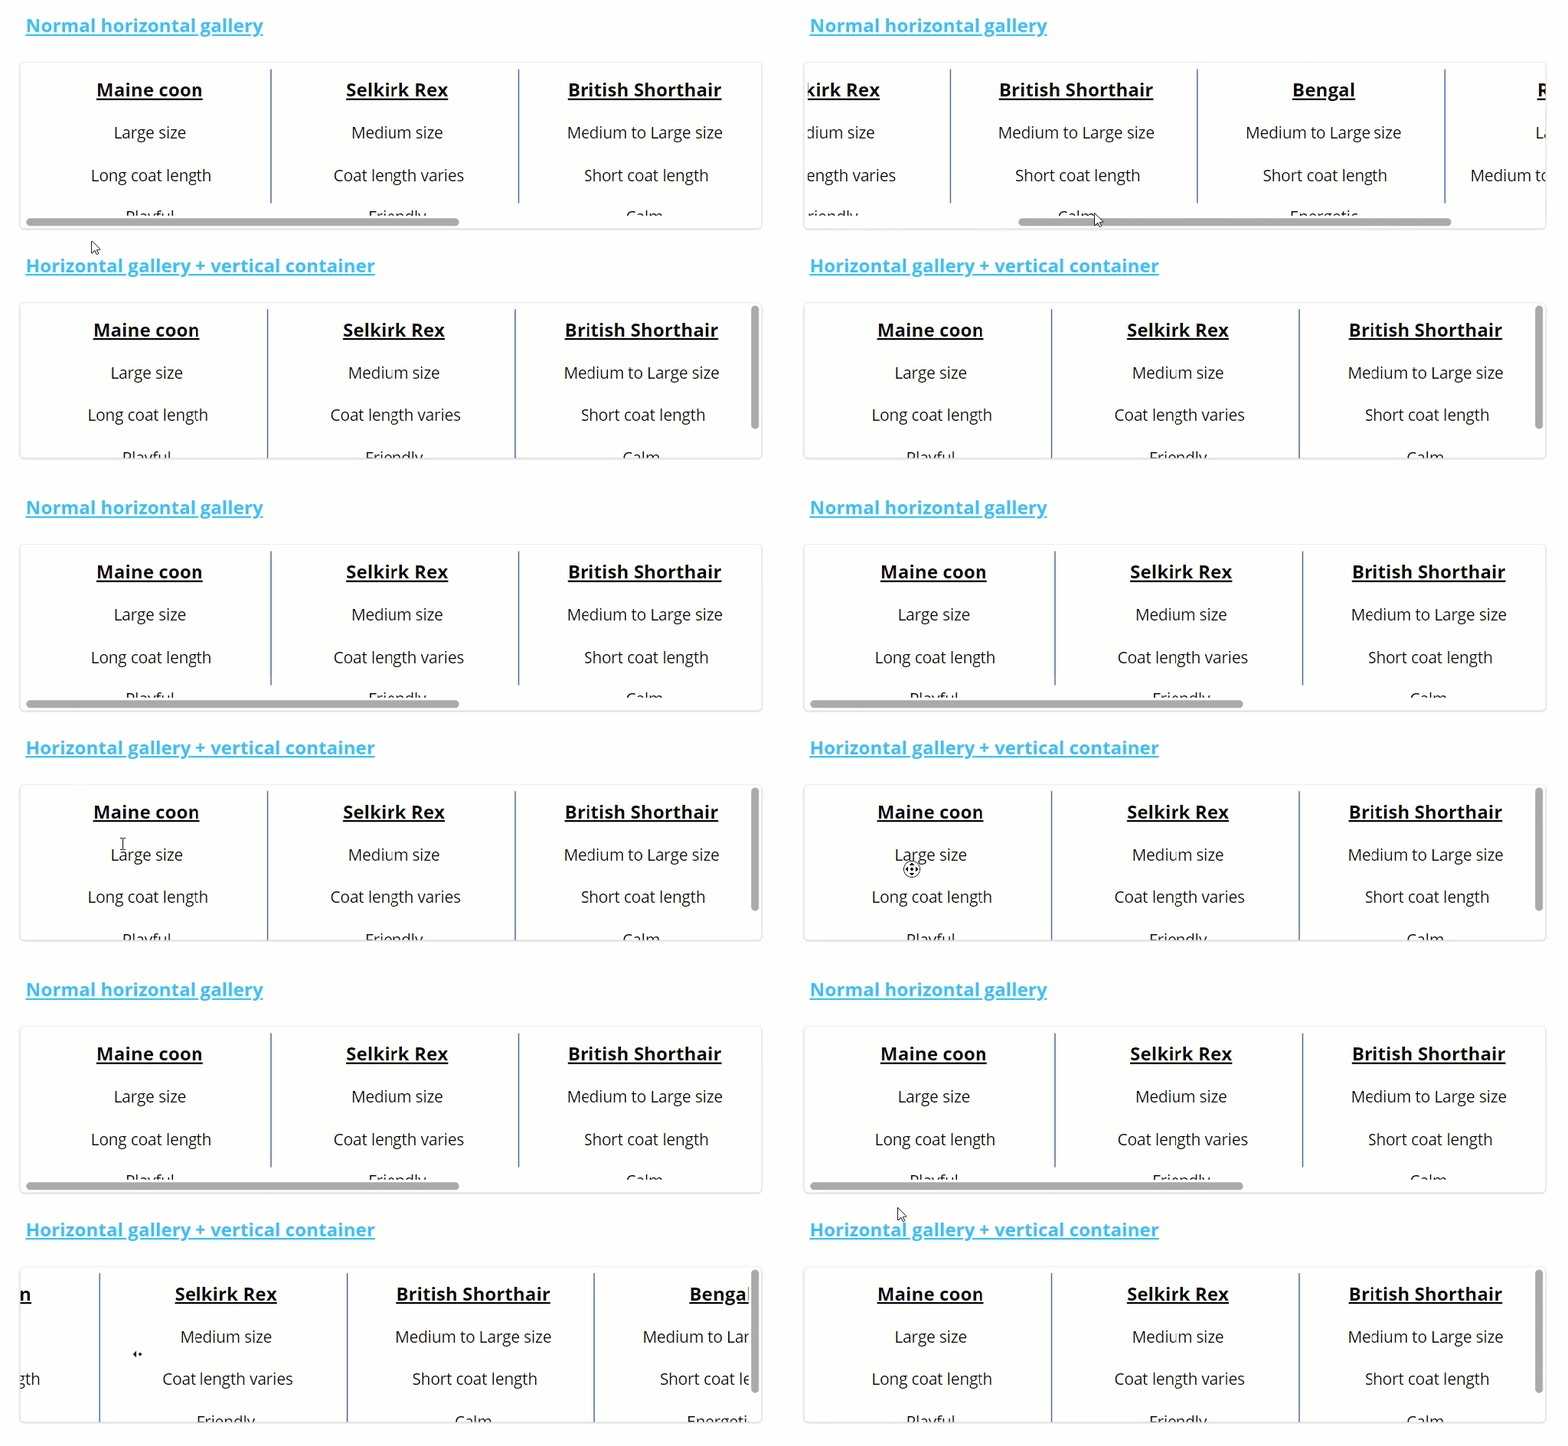
Final result horizontal gallery
HORIZONTAL GALLERY LIMITATION
Should the user want to scroll horizontally by manually dragging the scrollbar, then they will have to scroll down vertically first. That said, scrolling horizontally without scrolling down first can be done by scrolling via the mouse wheel press. The latter was shown in the Gif above.
In the section below we will explore how to display both the horizontal and vertical scrollbar on the container axes by delegating both scroll options to the container.
Possible workaround
In addition to the vertical scroll, we can also delegate the horizontal scroll to the vertical container by calculating our gallery width dynamically. This workaround will result in both scrollbars displaying on the container axes without the need to scroll down to find the horizontal scrollbar.

However, this method will add additional complexity and decrease app performance due to client-side calculations. I would only recommend this workaround for smaller datasets.
Required property adjustments
Starting from our finished product of the ‘Horizontal Gallery’ section, we will need to make the following changes:
- Set the container Horizontal overflow to ‘Scroll’
- Set the gallery Show scrollbar toggle to off
- Set the gallery Align in container to ‘Start’
- The gallery Width property should be set to the code below
(Self.TemplateWidth + Self.TemplatePadding) * Self.AllItemsCount + Self.TemplatePadding
In case your gallery template padding property is set to and will remain 0, we can shorten the code to the following:
Self.TemplateWidth * Self.AllItemsCount
About the Author
Laurens Martens is a Power Platform Developer at delaware with a main focus on Power Apps, Power Automate and Dataverse. As a recognized Microsoft Power Apps Community Super User, he loves to share his passion within the Power Platform community through blog posts and answering technical questions on the community forums. As a self-taught developer obsessed with all things low code (and his three cats) he aims to bring a fresh perspective to the benefits of low code development from both a business and technical point of view.
References
Martens, L., (2023), ‘HOW TO CREATE A GALLERY SCROLLABLE IN BOTH DIRECTIONS’, available at: https://laurensm.com/how-to-create-a-gallery-scrollable-in-both-directions/, [accessed on 27th March 2024].


