In our previous blog, we have covered the basic knowledge about Microsoft Graph and Azure Active Directory Graph API. From this blog, let’s have some more knowledge about consuming Microsoft Graph APIs secured with Azure AD for SharePoint development.
SharePoint Framework (starting from v.1.4.1) can be used to consume Microsoft Graph APIs secured with Azure AD. This section of the blog gives an overview of how to consume Microsoft Graph API in a SharePoint Framework solution using custom permissions.
Let’s search users based on their name in the current tenant using Microsoft Graph API with SharePoint Framework in the below example. Here, a client-side SPFx web part is used to get the inputs from an end user and the MS Graph API is used to search a user based on the provided inputs from the end user. The searched result output contains all the matching names through Office UI Fabric component DetailsList.
Create a SharePoint Framework solution
Ensure you are using SharePoint Framework generator v.1.4.1 or later in your environment. If you are running an old version, you need to update framework version to 1.4.1 or later using below command.
npm install -g @microsoft/generator-sharepoint
- Create a new project directory named spfx-api-scopes in your favorite location by following Step 2 – To Create SPFx web part from this link.
- When scaffolding is completed, start Visual Studio code using below command.
code
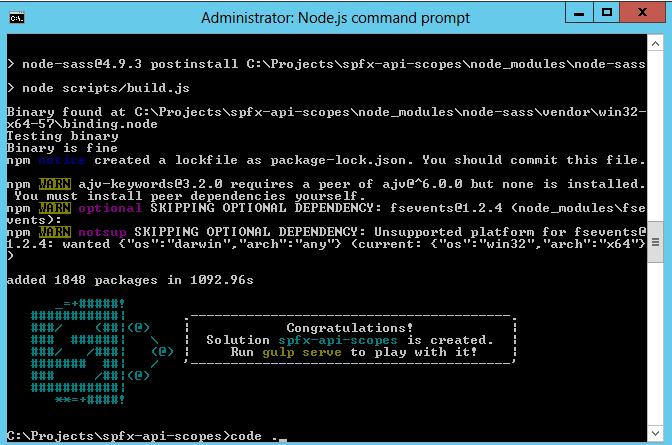
Node.js Command Prompt
Configure initial elements
Create custom properties to use in the client-side web part.
- Create a source code file named ClientMode.ts inside src/webparts/graphConsumer/components folder of the solution.
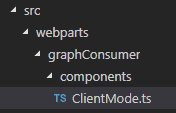
Create a source code file
-
- Declare a TypeScript enum for ClientMode property of web part inside ClientMode.ts file.
ClientMode.ts
export enum ClientMode {
    aad,
    graph,
}
|
-
- Inside GraphConsumerWebPart.ts file (path: \src\webparts\graphConsumer\GraphConsumerWebPart.ts), modify IGraphConsumerWebPartProps interface to include ClientMode.
GraphConsumerWebPart.ts
export interface IGraphConsumerWebPartProps {
 clientMode: ClientMode;
}
|
-
- Change getPropertyPaneConfiguration() method for property-pane choice selections.
GraphConsumerWebPart.ts
protected getPropertyPaneConfiguration(): IPropertyPaneConfiguration {
    return {
        pages: [
          {
              header: {
                  description: strings.PropertyPaneDescription
              },
              groups: [
                {
                    groupName: strings.BasicGroupName,
                    groupFields: [
                      PropertyPaneChoiceGroup('clientMode', {
                          label: strings.ClientModeLabel,
                          options: [
                            { key: ClientMode.aad, text: "AadHttpClient"},
                            { key: ClientMode.graph, text: "MSGraphClient"},
                          ]
                      }),
                    ]
                }
              ]
          }
        ]
    };
}
|
-
- Also, you will need to update the render method to create an instance of React component to render client mode choices.
GraphConsumerWebPart.ts
public render(): void {
    const element: React.ReactElement<IGraphConsumerProps > = React.createElement(
      GraphConsumer,
      {
          clientMode: this.properties.clientMode,
          context: this.context,
      }
    );

ReactDom.render(element, this.domElement);
}
|
-
- Add below import statements at the top of the GraphConsumerWebPart.ts file to import PropertyPaneChoiceGroup control and ClientMode enum.
GraphConsumerWebPart.ts
import * as React from 'react';
import * as ReactDom from 'react-dom';
import { Version } from '@microsoft/sp-core-library';
import {
 BaseClientSideWebPart,
 IPropertyPaneConfiguration,
 PropertyPaneChoiceGroup
} from '@microsoft/sp-webpart-base';

import * as strings from 'GraphConsumerWebPartStrings';
import GraphConsumer from './components/GraphConsumer';
import { IGraphConsumerProps } from './components/IGraphConsumerProps';
import { ClientMode } from './components/ClientMode';
|
Update resource strings
-
- Rewrite the interface in mystrings.d.ts file inside src/webparts/graphConsumer/loc folder to compile the solution.
mystrings.d.ts
declare interface IGraphConsumerWebPartStrings {
    PropertyPaneDescription: string;
    BasicGroupName: string;
    ClientModeLabel: string;
    SearchFor: string;
    SearchForValidationErrorMessage: string;
}
|
-
- Update en-us.js file in the same folder to configure values for resource strings.
en-us.js
define([], function () {
    return {
        "PropertyPaneDescription": "Description",
        "BasicGroupName": "Group Name",
        "ClientModeLabel": "Client Mode",
        "SearchFor": "Search for",
        "SearchForValidationErrorMessage": "Invalid value for 'Search for' field"
    }
});
|
Apply style for client-side web part
You will need to update SCSS style file
-
- Add following styles in GraphConsumer.module.scss under src/webparts/graphConsumer/components folder.
GraphConsumer.module.scss
.form {
    @include ms-font-l;
    @include ms-fontColor-white;
  }

  label {
    @include ms-fontColor-white;
  }
|
Configure React component
Modify GraphConsumer component under src/webparts/graphConsumer/components folder.
-
- Edit IGraphConsumerProps.ts file to include the custom properties by importing ClientMode enum and WebPartContext type.
IGraphConsumerProps.ts
import { WebPartContext } from '@microsoft/sp-webpart-base';
import { ClientMode } from './ClientMode';

export interface IGraphConsumerProps {
    clientMode: ClientMode;
    context: WebPartContext;
}
|
-
- IUserItem interface file defines users fetched from the tenant and it is inside the components folder.
IUserItem.ts
export interface IUserItem {
    displayName: string;
    mail: string;
    userPrincipalName: string;
}
|
-
- Create a new file IGraphConsumerState.ts inside components folder to add a new interface for React component. Import IUserItem interface in IGraphConsumerState.ts state file under components folder.
IGraphConsumerState.ts
import { IUserItem } from './IUserItem';

export interface IGraphConsumerState {
    users: Array<IUserItem>;
    searchFor: string;
}
|
-
- Add required import statements in GraphConsumer.tsx file.
GraphConsumer.tsx
import * as React from 'react';
import styles from './GraphConsumer.module.scss';
import * as strings from 'GraphConsumerWebPartStrings';
import { IGraphConsumerProps } from './IGraphConsumerProps';
import { IGraphConsumerState } from './IGraphConsumerState';
import { ClientMode } from './ClientMode';
import { IUserItem } from './IUserItem';
import { escape } from '@microsoft/sp-lodash-subset';

import {
 autobind,
 PrimaryButton,
 TextField,
 Label,
 DetailsList,
 DetailsListLayoutMode,
 CheckboxVisibility,
 SelectionMode
} from 'office-ui-fabric-react';

import { AadHttpClient, MSGraphClient } from "@microsoft/sp-http";
|
-
- Outline column definition for the DetailsList Office UI Fabric component after the import statements.
GraphConsumer.tsx
let _usersListColumns = [
 {
     key: 'displayName',
     name: 'Display name',
     fieldName: 'displayName',
     minWidth: 50,
     maxWidth: 100,
     isResizable: true
 },
 {
     key: 'mail',
     name: 'Mail',
     fieldName: 'mail',
     minWidth: 50,
     maxWidth: 100,
     isResizable: true
 },
 {
     key: 'userPrincipalName',
     name: 'User Principal Name',
     fieldName: 'userPrincipalName',
     minWidth: 100,
     maxWidth: 200,
     isResizable: true
 },
];
|
-
- Update render() method with the below code.
GraphConsumer.tsx
public render(): React.ReactElement<IGraphConsumerProps> {
    return (
      <div className={ styles.graphConsumer }>
       <div className={ styles.container }>
         <div className={ styles.row }>
           <div className={ styles.column }>
             <span className={ styles.title }>Search for a user!</span>
             <p className={ styles.form }>
               <TextField
                   label={ SearchFor }
                   required={ true }
                   value={ this.state.searchFor }
                   onChanged={ this._onSearchForChanged }
                   onGetErrorMessage={ this._getSearchForErrorMessage }
                 />
             </p>
             <p className={ styles.form }>
               <PrimaryButton
                   text='Search'
                   title='Search'
                   onClick={ this._search }
                 />
             </p>
             {
               (this.state.users != null && this.state.users.length > 0) ?
                 <p className={ styles.form }>
                 <DetailsList
                     items={ this.state.users }
                     columns={ _usersListColumns }
                     setKey='set'
                     checkboxVisibility={ CheckboxVisibility.hidden }
                     selectionMode={ SelectionMode.none }
                     layoutMode={ DetailsListLayoutMode.fixedColumns }
                     compact={ true }
                 />
               </p>
               : null
             }
           </div>
         </div>
       </div>
     </div>
   );
}
|
-
- Change React component type as shown below.
GraphConsumer.tsx
export default class GraphConsumer extends React.Component<IGraphConsumerProps, IGraphConsumerState> {

    constructor(props: IGraphConsumerProps, state: IGraphConsumerState) {
      super(props);

        // Initialize the state of the component
        this.state = {
            users: [],
            searchFor: ""
        };
    }
|
-
- Handle events for TextField component and validations for search criteria.
GraphConsumer.tsx
@autobind
private _onSearchForChanged(newValue: string): void {

    // Update the component state accordingly to the current user's input
    this.setState({
        searchFor: newValue,
    });
}

private _getSearchForErrorMessage(value: string): string {
    // The search for text cannot contain spaces
    return (value == null || value.length == 0 || value.indexOf(" ") < 0)
      ? ''
      : `${SearchForValidationErrorMessage}`;
}
|
-
- Add below code to examine client technology for consuming Microsoft Graph.
GraphConsumer.tsx
@autobind
private _search(): void {
// Based on the clientMode value search users
    switch (this.props.clientMode)
    {
    case ClientMode.aad:
        this._searchWithAad();
        break;
    case ClientMode.graph:
        this._searchWithGraph();
        break;
    }
}
|
Configure the API permissions requests
You need to explicitly mention the permission requirements in the solution manifest file in order to consume Microsoft Graph API.
To achieve this, configure webApiPermissionRequests in package-solution.json file under config folder
package-solution.json
{
    "$schema": "https://developer.microsoft.com/json-schemas/spfx-build/package-solution.schema.json",
    "solution": {
        "name": "spfx-api-scopes-client-side-solution",
        "id": "b13889b9-2455-4c4b-894b-a951b4fd5d27",
        "version": "1.0.0.0",
        "includeClientSideAssets": true,
        "skipFeatureDeployment": true,
        "webApiPermissionRequests": [
        {
          "resource": "Microsoft Graph",
          "scope": "User.ReadBasic.All"
        }
    ]
  },
  "paths": {
      "zippedPackage": "solution/spfx-api-scopes.sppkg"
  }
}
|
webApiPermissionRequests item defines the resource and scope of permission request. The resource can be name or Azure AD ObjectId for which to configure permission request. Microsoft Graph is the resource for consuming Microsoft Graph capabilities. The scope defines the type of the permission or its unique ID.
You can use User.ReadBasic.All permission to search users and get user properties such as displayNameand mail.
Consume Microsoft Graph
You can use two ways to consume Microsoft Graph:
- AadHttpClient client object: used to consume Microsoft Graph or any other REST API
- MSGraphClient client object: used to consume Microsoft Graph only.
AadHttpClient client object
-
- Call context.aadHttpClientFactory.getClient() method to create a new instance of AadHttpClient client object.
- Insert below _searchWithAad() method inside GraphConsumer class in the sample solution
GraphConsumer.tsx
private _searchWithAad(): void {
// Using Graph here, but any 1st or 3rd party REST API that requires Azure AD auth can be used here.
this.props.context.aadHttpClientFactory
  .getClient('https://graph.microsoft.com')
  .then((client: AadHttpClient) => {
      // Search for the users with givenName, surname, or displayName equal to the searchFor value
      return client
        .get(
          `https://graph.microsoft.com/v1.0/users?$select=displayName,mail,userPrincipalName&$filter=(givenName%20eq%20'${escape(this.state.searchFor)}')%20or%20(surname%20eq%20'${escape(this.state.searchFor)}')%20or%20(displayName%20eq%20'${escape(this.state.searchFor)}')`,
        AadHttpClient.configurations.v1
      );
  })
.then(response => {
    return response.json();
})
      .then(json => {

          // Prepare the output array
          var users: Array<IUserItem> = new Array<IUserItem>();
// Map the JSON response to the output array
json.value.map((item: any) => {
    users.push( {
        displayName: item.displayName,
        mail: item.mail,
        userPrincipalName: item.userPrincipalName,
    });
});

// Update the component state accordingly to the result
this.setState(
  {
      users: users,
  }
);
})
      .catch(error => {
          console.error(error);
});
}
|
MSGraphClient client object
Insert below _searchWithGraph() method inside GraphConsumer class in the sample solution.
GraphConsumer.tsx
private _searchWithGraph(): void {

this.props.context.msGraphClientFactory
  .getClient()
  .then((client: MSGraphClient): void => {
      // From https://github.com/microsoftgraph/msgraph-sdk-javascript sample
      client
        .api("users")
        .version("v1.0")
        .select("displayName,mail,userPrincipalName")
        .filter(`(givenName eq '${escape(this.state.searchFor)}') or (surname eq '${escape(this.state.searchFor)}') or (displayName eq '${escape(this.state.searchFor)}')`)
      .get((err, res) => {

          if (err) {
              console.error(err);
              return;
}
// Prepare the output array
var users: Array<IUserItem> = new Array<IUserItem>();
// Map the JSON response to the output array
res.value.map((item: any) => {
    users.push( {
        displayName: item.displayName,
        mail: item.mail,
        userPrincipalName: item.userPrincipalName,
    });
});
// Update the component state accordingly to the result
this.setState(
  {
      users: users,
  }
);
});
});
}
|
Deploy the solution
You’re now done to build and deploy the solution.
- Run the gulp commands to build the solution.
gulp build
-
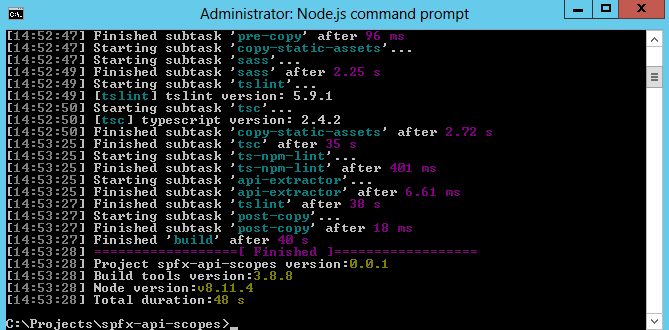
Gulp Build
Bundle and package your solution.
gulp bundle
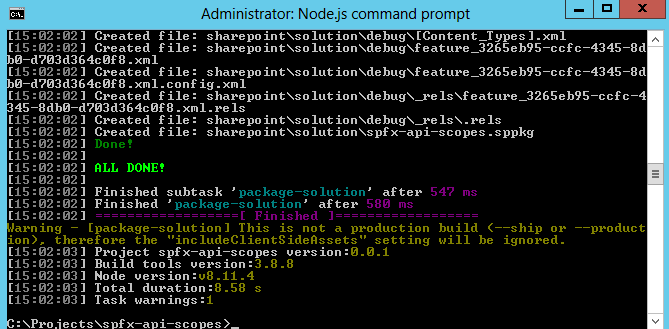
Gulp bundle
gulp package-solution

Gulp package-solution
- Upload the solution package (.sppkg file) from sharepoint/solution folder of your project directory to the app catalog of your tenant.

Upload the solution package
- Once you upload the package in “Apps for SharePoint”, a message at the bottom of the screen conveys that the package requires permissions. This is because of the webApiPermissionRequests property where we mentioned “Microsoft Graph” as a resource and “User.ReadBasic.All” as the scope in package-solution.json file. Click Deploy.
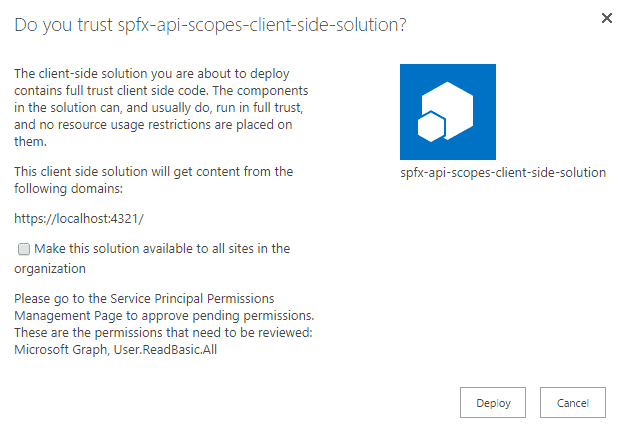
Click deploy
- Navigate to the SharePoint Admin Center and choose Try the preview from the upper right hand corner.
SharePoint Admin Center
- Select API management under Advanced in the quick launch menu.
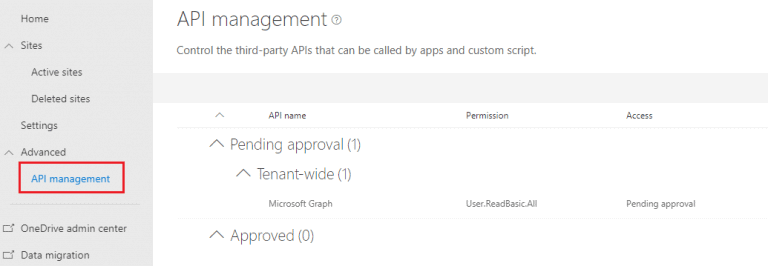
API management
SharePoint Online admin of your tenant can approve or deny any pending permission approval request. You cannot view the solution package which requests the permission though.
- Select the permission requested inside package-solution.json file and choose Approve or reject.
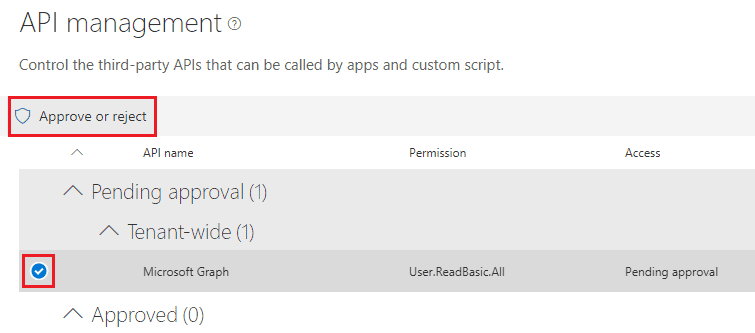
Approve or reject
- Click Approve from Approve or reject access panel to provide access.
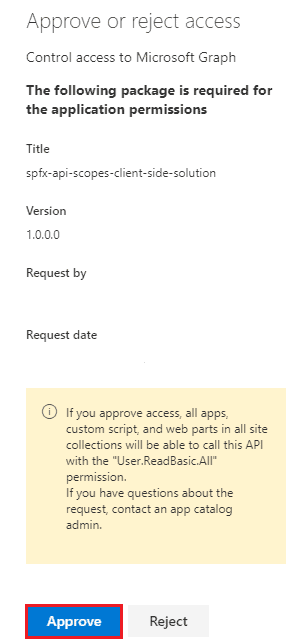
Approve
- Once successfully approved, you are now ready to test your solution.
Test the solution
- Execute below gulp command to run your solution.
gulp serve –nobrowser
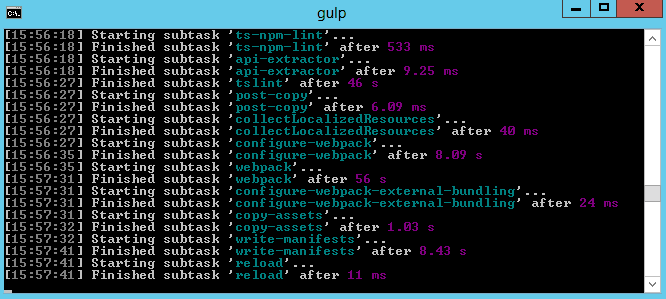
Gulp
- Open the browser and navigate to the SharePoint Framework Workbench page for your tenant.
https://<your-tenant>.sharepoint.com/_layouts/15/Workbench.aspx
-
Add the newly configured GraphConsumer client-side web part.
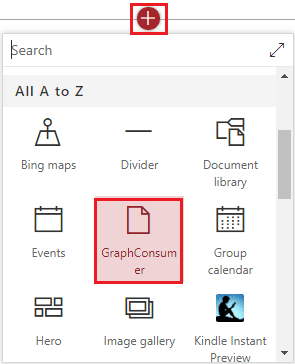
GraphConsumer
- Set ClientMode from properties, either AadHttpClient or MSGraphClient and search for users.

AadHttpClient as ClientMode

MSGraphClient as ClientMode
Done! This way you can consume Microsoft Graph APIs in SharePoint Framework.
Conclusion
Using Microsoft Graph API, the Azure AD resources are accessed to provide searched users in a secure manner. Multiple APIs can be used from Office 365 and other Microsoft cloud services through a single endpoint i.e. Microsoft Graph (https://graph.microsoft.com). Microsoft Graph supports to access data from multiple Microsoft Cloud Services including Azure AD, SharePoint, MS Planner, MS Teams, etc.
Reference:
TatvaSoft. (2019). Microsoft Graph with SharePoint Framework. Available at: https://www.tatvasoft.co.uk/blog/microsoft-graph-with-sharepoint-framework/ [Accessed: 7th March 2019].


