Top tips and need-to-knows!
Power Apps form controls are a great way to provide simple, lightweight data capturing functionality in canvas apps. Whilst many prefer using the Patch function to create and edit data, form controls have and will continue to have their place. This is likely to be especially true for beginners to Power Apps, but that’s not to say the more experienced amongst us should dismiss them.
In this article, I’m going to go over my top tips & tricks for working with forms in Power Apps. I’ve separated out the tips into two sections – config and design.
Setup
Before I dive into my tips for Power Apps forms, a quick explanation for my setup to support this article.
I’m using SharePoint as a data source as this supports one of the tips in the article. I have set up three identical lists, each with 2 rows of dummy data to begin with:
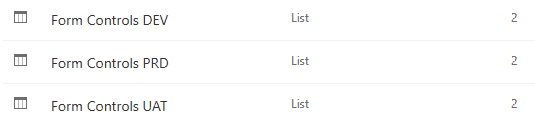
Each list has a single line of text column configured to accept no more than 30 characters. They also have a number field, configured to only accept numbers between the range of 1-20.
Configuration tips
See below for my regular configuration tips for Power Apps form controls.
Don’t use the Display Form
When adding a form control to an app, you have two options; Display form and Edit form:
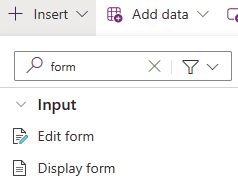
The Display form option is only suitable for viewing records. You cannot use this form control type to create or edit records. You may only have the requirement to display a record now, but what if that changes in future? If you have used a display form and need create or edit abilities, you’ll need to delete the display form and use the edit form instead. This could be annoying if you have lots of other in-app functionality that’s dependent on that form.
So for future proofing your apps, always select the Edit form by default. The next tip strengthens this choice.
One form, multi-purpose
A single edit form can be used for creating new records, editing existing records or simply viewing records. I love reusable stuff!
In my example, I’m using a gallery to view items in the Form Controls DEV SharePoint list. I’ve also renamed my form control to frmForm. I’ve added a couple of icons to the gallery so users can view or edit the item. Outside of the gallery is a button to create a new item. We can use a single Edit form control for all three scenarios with three very simple bits of code.
In the OnSelect property of the View icon, I’ve added the following:
// View the selected record
ViewForm(frmForm)
In the OnSelect property of the Edit icon, I’ve added the following:
// Edit the selected record
EditForm(frmForm)
Finally, in the OnSelect property of my button control, I’ve added the following:
// Create a new record
NewForm(frmForm)
Let’s see the behaviour of each three in action:
I’ve seen lots of different, less optimal ways of doing this; showing and hiding different forms, using variables to change the DefaultMode property of the form, etc. The above approach should simplify this massively.
Check if data is valid before submission
When it comes to Power Apps forms, there’s lots of cool properties you can work with. None more so than Form.Valid. This provides a boolean true/false output as to whether the data in your form is valid for the data source.
I’ve added an independent label to my app. We can access the output of form.valid by referencing the form control by name, then selecting the valid property:
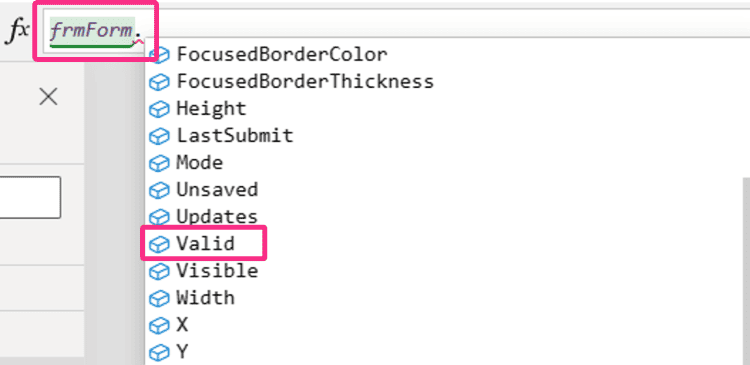
In my SharePoint lists, the NumberColumn is set to only allow a number between 1-20. Using Form.Valid, I can provide insight to my users as to whether what they’re entering is valid with the data source configuration:
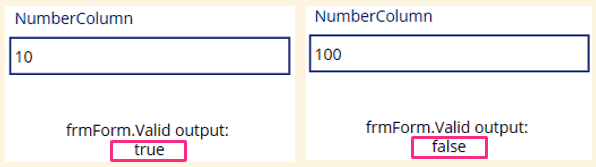
How could this be helpful? Perhaps you can disable the submit button for your form until all data is correct. This might be the code you can add to the DisplayMode property of a button. As the output returns a boolean value, we don’t need to anything like = true or = false. Simply reference the property:
// Disable button if any data entered isn't compatible with the data source
If(
    frmForm.Valid,
    DisplayMode.Edit,
    DisplayMode.Disabled
)
Check if form has unsaved changes
Another gem for Power Apps forms is Form.Unsaved. This is another property with a boolean output, designed to let you know if data has been added or updated in the form but not saved back to the data source:
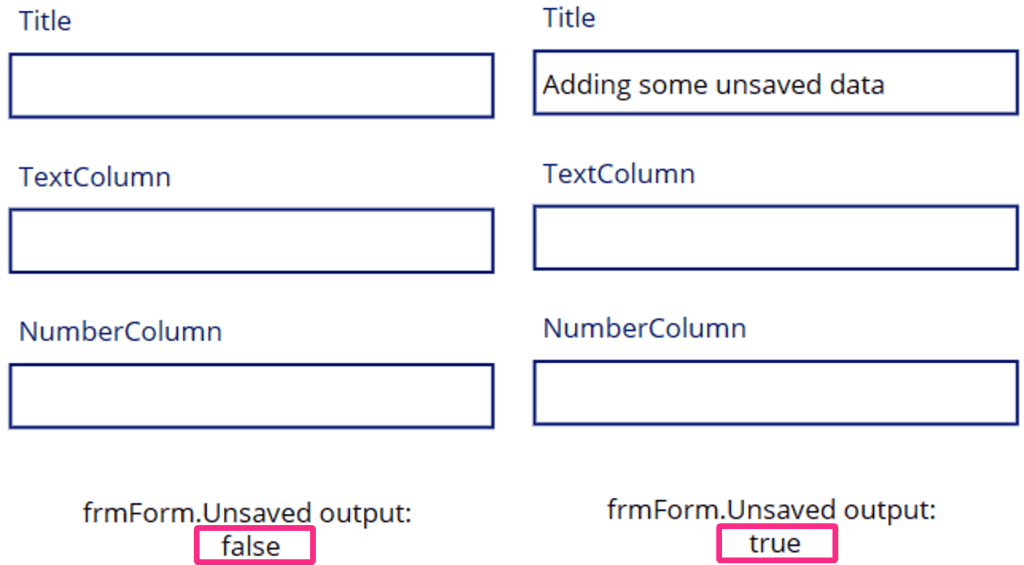
What if users try to navigate away from a screen, or try to add or edit another record without saving changes? We can use this property to alert users with a message, or navigate them to a confirmation screen for example:
// Send user to confirmation screen for potentially losing unsaved changes
If(
    frmForm.Unsaved,
    Navigate('Are You Sure Screen')
)
Forms use in-built validation…
Power Apps forms have in-built data source validation. This is super cool, as with the Patch method you have to do a lot of this yourself manually. Two such examples are the use of the DataSourceInfo and Validate functions.
In my SharePoint lists, the TextColumn is set to accept no more than 30 characters. When adding a form control to our app, the DataSourceInfo function will be added automatically to get this information for us. We can select the text input control inside our data card and see the Maximum length property is already set to 30:
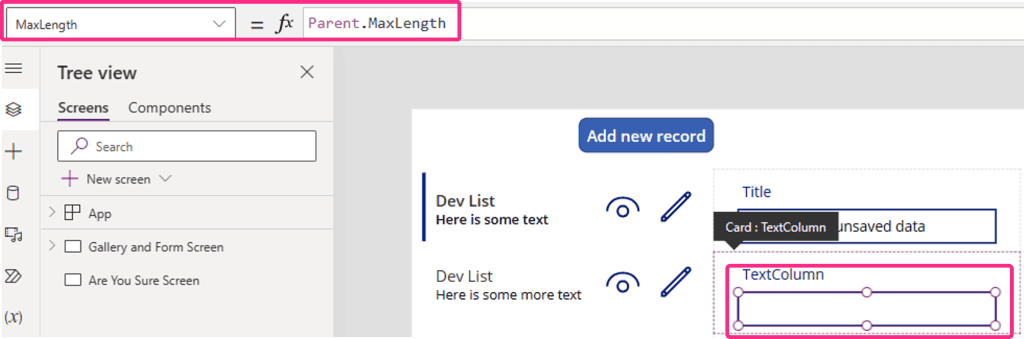
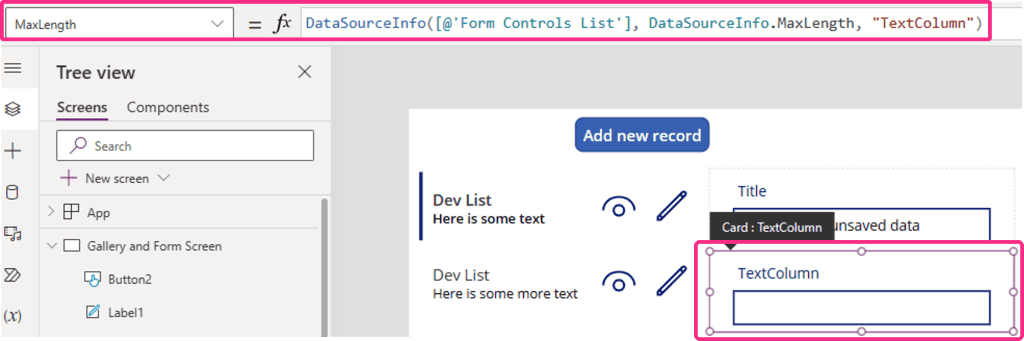
This property is derived from its parent – the Data Card. Looking at the MaxLength property for that, we see the DataSourceInfo logic that gets the value for us:
Another in-built function is Validate. If you try and submit a form with errors, you’ll likely see a message appear under the offending field(s):
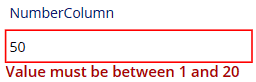
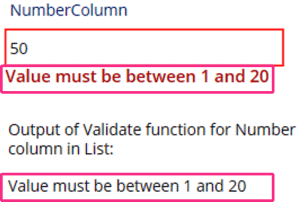
You can’t easily get to the source of this though; the text property of that label points to Parent.Error. However, the Data Card doesn’t have an error property for you to look at or therefore change. However, we can add a label and with the Validate function to see the origins:
// Check if number is allowed
// Can replace 50 with output of a text control
Validate(
    'Form Controls List',
    "NumberColumn",
    50
)
The output as follows:
I find nerdy little things like that pretty cool. There’s a bunch of other good benefits to the DataSourceInfo function too, check out my article if you want to know more.
… but you can check for errors too
The in-built DataSourceInfo and Validate functions are good, but might not capture everything. We can use another form-based property to help us check the quality of the data in the Power Apps form.
Form.Error is accessed much like Valid or Unsaved, only that Error’s output is text instead of boolean. It’s also worth keeping in mind that this output doesn’t update real-time, it only updates with a submission attempt.
A simple tip is to use the output of Form.Error in a Notify message to users if their submission has failed.
// Attempt form submission
SubmitForm(frmForm);
If(
    // If an error has occurred, notify user
    // Include message from Form.Error output
    !IsBlank(frmForm.Error),
    Notify(
        frmForm.Error,
        NotificationType.Error,
        4000
    )
)
Here’s what the user would see if an error has occurred:

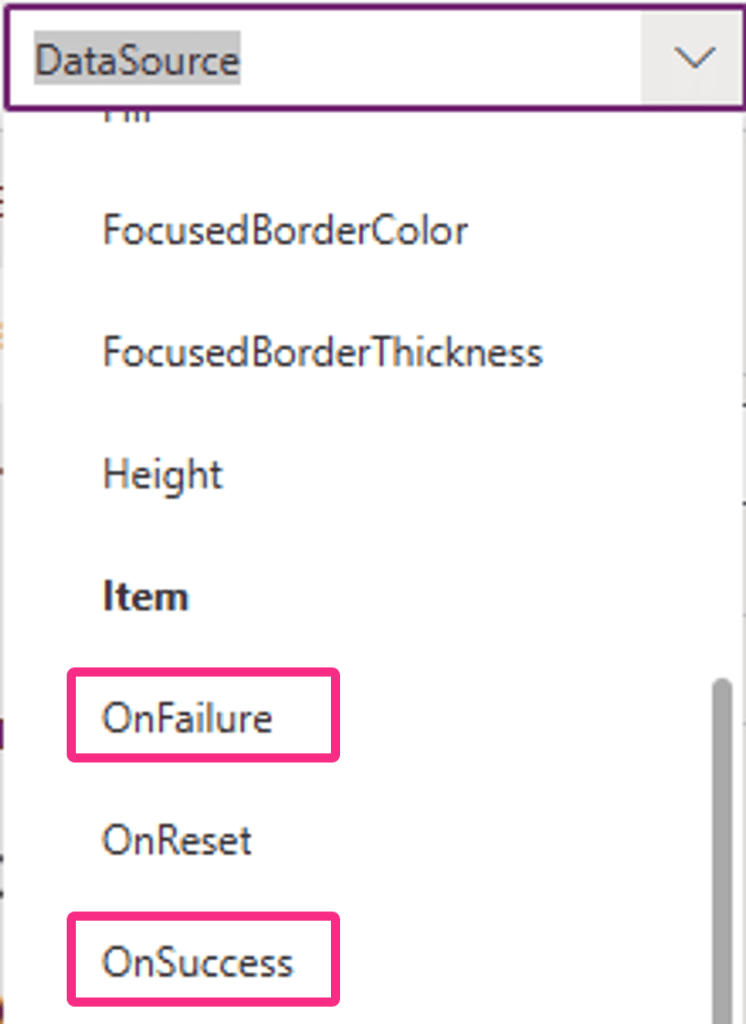
Use the OnSuccess and OnFailure properties
For Power Apps forms these are two of my favourite properties. So simple yet so effective.
With the in-built validation and checks a form control, it can automatically determine whether the record has saved. As developers, we can add Power Fx into these properties to perform additional or subsequent actions. With the form control selected in your app, you can access both properties via the drop down in the top left:
My go-to code for OnFailure is adding the notify function, warning users that their submission has failed. The Form.Error code above would be a great candidate, but you can also have your own custom messages too.
In the below example, I’ve joined the Form.Error output with some additional text. As the OnFailure property is directly relating to the same control, I can use the Self reference too:
// If form submission fails, show message to user
If(
    !IsBlank(Self.Error),
    Notify(
        $"{Self.Error} Alternatively, contact your system administrator",
        NotificationType.Error,
        4000
    )
)
You may want to track these errors too. Perhaps you want to write information back to a different SharePoint list to keep track of form submission fails. Or we could send an email to log a support ticket.
We can add multiple lines of Power Fx to the OnFailure property to handle these types of scenarios:
// If form submission fails, show message to user
If(
    !IsBlank(Self.Error),
    Notify(
        $"{Self.Error} Alternatively, contact your system administrator",
        NotificationType.Error,
        4000
    )
);
// Create record in Errors tracking list
Patch(
    'Global App Errors List',
    Defaults('Global App Errors List'),
    {
        Title: "Form Controls App",
        ErrorMsg: Self.Error,
        UserEmail: "Craig.White@platformsofpower.com",
        ErrorDateTime: Now()
    }
);
// Then send an email to Support
Office365Outlook.SendEmailV2(
    // To
    "Support@platformsofpower.com",
    // Subject
    "Data submission error in Form Controls App",
    // Body
    "Hi, There's been an error in the app, details are: " & Self.Error
)
In the same way, we can use the OnSuccess property to let our users know everything has worked. Once again, you can chain additional tasks with the Power Fx. A common thing I tend to do is reset the form ready for a new submission or edit:
// If form submission is successful
Notify(
    "Form submission successful!",
    NotificationType.Success,
    2000
);
// Reset form
ResetForm(Self)
Get the last submitted record

I can also choose to store the whole record as a variable or collection. I then have a cached version of the last record so can access any of those properties on demand.
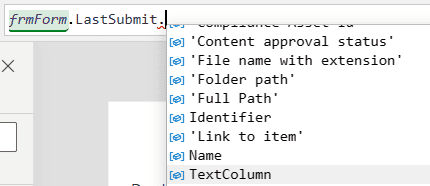
A neat trick can be to store the last submitted record, then present some unique values to the user in the Notify message via the OnSuccess property:
// Store last submitted record as a variable
Set(
    gvLastSubmittedRecord,
    Self.LastSubmit
);
// If form submission is successful, display list ID of entry created/updated
Notify(
    $"List ID {gvLastSubmittedRecord.ID} created/edited successfully",
    NotificationType.Success,
    2000
);
// Reset form
ResetForm(Self)
The technique for storing the last submitted record works regardless of data source. You’ll only be able to store and/or reference fields relevant to your table and columns for that data source.

Making fields conditionally required
When setting up columns in a data source (especially SharePoint), you can specify whether the column needs to have information in it. There’s no leeway here, it’s either a yes or a no. So what if we want a field to be mandatory based on the response to another question in the form?
In Power Apps forms, required fields are indicated with an asterick. Within each data card, there’s a StarVisible label that will show or hide depending on whether the field is required. We can work with this config to make fields conditionally required. In my scenario, I want the NumberColumn field to be mandatory if the TextColumn field says Star Wars.
First, we need to select the data card for NumberColumn (1). This is the parent object that houses the Required property that we then need to select (2):
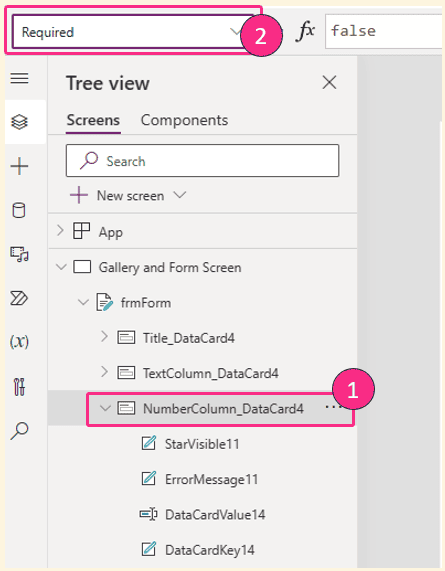
This is where we’ll add our condition. The Required property is boolean true/false, so we need to make sure that’s the same output for any condition. The field will be conditionally required if someone enters ‘Star Wars’ into the TextColumn field. It’s as simple as this to add the Required condition for NumberColumn:
// Conditionally required if TextColumn equals Star Wars
txtTextColumn.Text = "Star Wars"
With that configured, all other functionality works as expected. If a user tries to submit the record when the field is conditionally required, all automatic validation & error checking kicks in – no additional configuration required!
In the demo below, watch the asterisk appear when Star Wars is added to TextColumn. Existing column validation for the number range of 1-20 still exists:
Changing from text input to another control
This was a common scenario for me when I used to develop with SharePoint lists as a data source. The list would have a single line of text field, but the form experience for the user would show a drop down or combo box control. So how do we do that and ensure all existing in-built logic is honoured?
In this example, let’s make NumberColumn a slider control instead. Once the data card is unlocked, we can add a slider control in. I’ve updated the Min and Max properties of the slider using the DataSourceInfo function:
// ---- POWER FX FOR MIN PROPERTY
// Get min value of NumberColumn in SP list
DataSourceInfo(
    'Form Controls List',
    DataSourceInfo.MinValue,
    "NumberColumn"
)

// ---- POWER FX FOR MAX PROPERTY
// Get max value of NumberColumn in SP list
DataSourceInfo(
    'Form Controls List',
    DataSourceInfo.MaxValue,
    "NumberColumn"
)
That will dynamically ensure we adhere to the underlying column config. If it changes, it will be reflected in our app. It also means users can’t go over the max (which they could do with a text input control).
With the slider added and configured, next we need to make sure the Data Card takes the value from the slider control and NOT from the original text input control. With the Data Card selected, find the Update property:
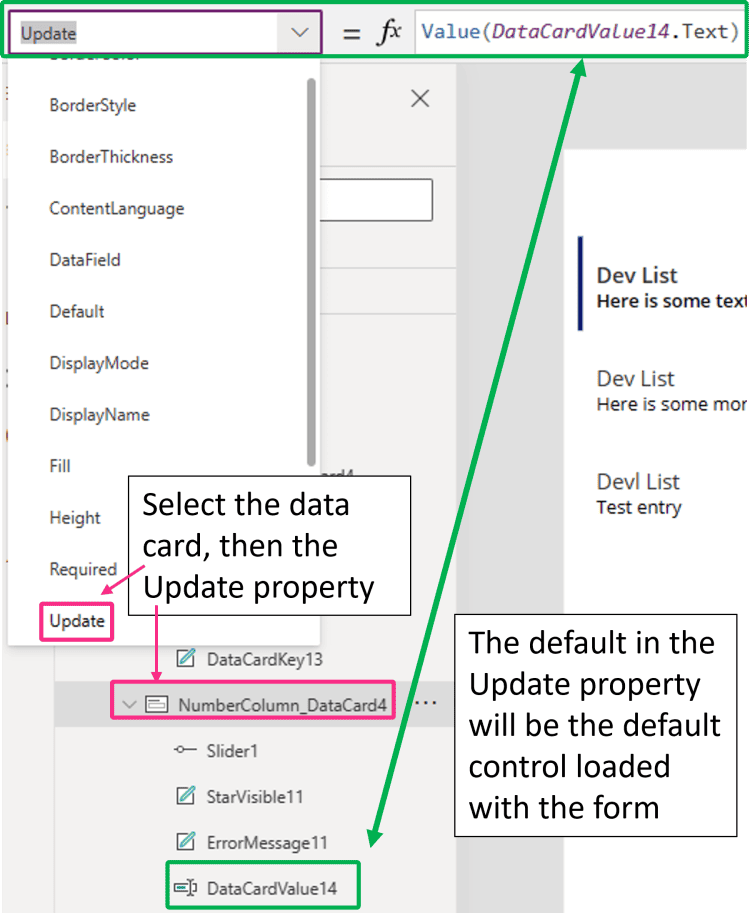
Delete whatever default reference is in the Update property and replace it to reference the output of your replacement control. In this example, that’s the slider:

Finally, update the Default property of the slider control to Parent.Default. This will ensure when you’re viewing or editing existing items, the slider control will show the correct value.
That’s it! Any existing validation logic for the form will continue to work alongside the switch of controls. You can do the same for other controls too, just remember to update the relevant Default property.
Don’t neglect architectural best practice
If you’re using Dataverse tables, you can ignore this one. However, if you’re using SharePoint lists as your data source, read on.
In the setup section at the start of the article, I mentioned creating three identical SharePoint lists to cover development, testing and production instances. It’s important we do not hardwire form controls to a single list, but make dynamic to communicate with the right list at the right time.
At a higher level, the first step for any Power Platform development is to create a solution. Even if it’s just going to house a single app – put it in a solution. They’re also good for creating and storing environment variables, which includes creating dynamic references to SharePoint data sources (ie lists).
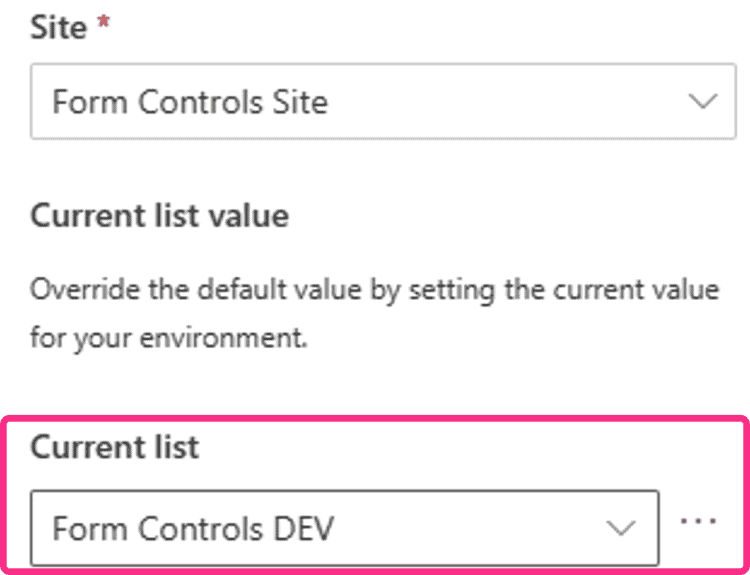
In my example, I’ve created two environment variables; one for the SharePoint site and another for the SharePoint list. In the first instance, the environment variable for the list starts with the DEV version:
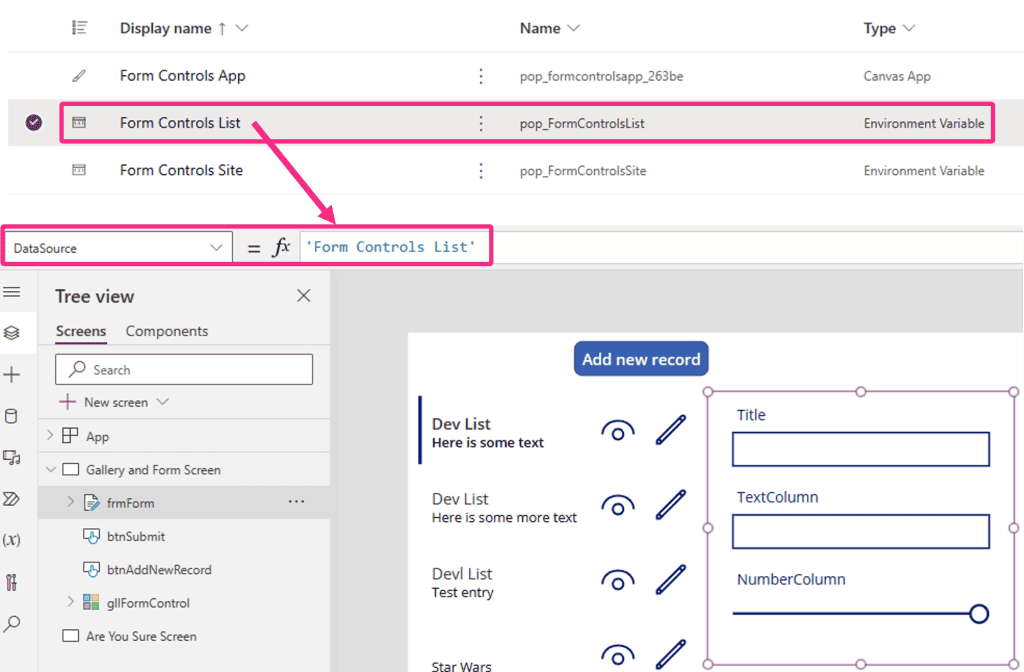
We can then apply that environment variable to the DataSource property of the Power Apps form control:
This way, when we promote the solution through our application lifecycle management process, we can simply update the list-based environment variable to point to the UAT or PRD versions.
You can read more about solutions or environment variables if you’re unfamiliar with the concepts or technicals.
Design tips
See below for my regular design tips for Power Apps form controls.
Bulk update basic properties
You want to select all the labels and controls in your form to change the font, font size or other properties. You can select multiple controls within a data card but not for the whole form. We don’t want to be repeating the same changes manually over and over, so how can we select all relevant controls in the form at once?
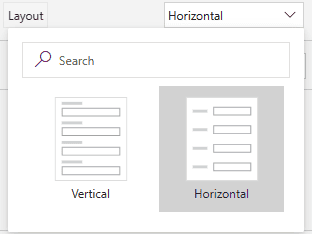
With the form control selected, change the Layout property from Vertical to Horizontal:
Then, in the top left hand corner, click on the Undo icon:
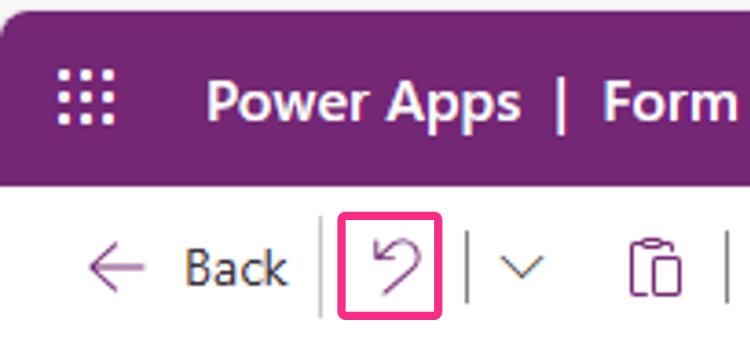
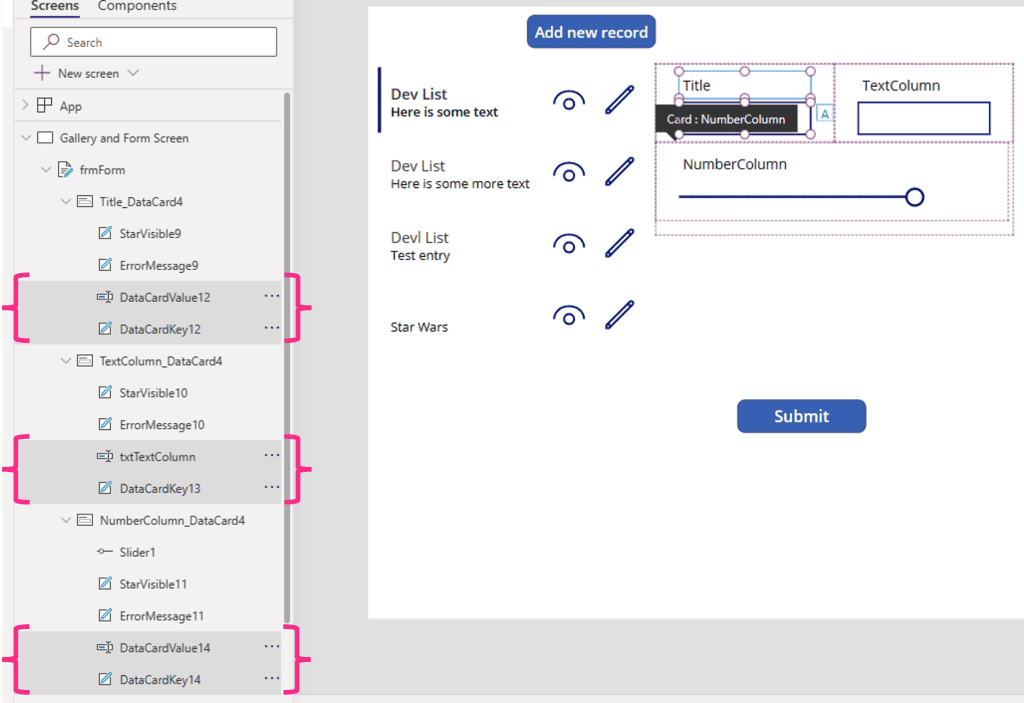
That’s it! Daft isn’t it, like why would that even be a solution… but it is! As you can see from the image below, even though only one set is selected in the form itself (top right), the relevant fields are multi-selected. You can’t do this manually by holding down the Ctrl key and clicking on specific controls, so this is both a quick and massive win:
Turn off snap to columns
If want considerably more control over how your Power Apps form control looks, turn off the Snap to columns setting:
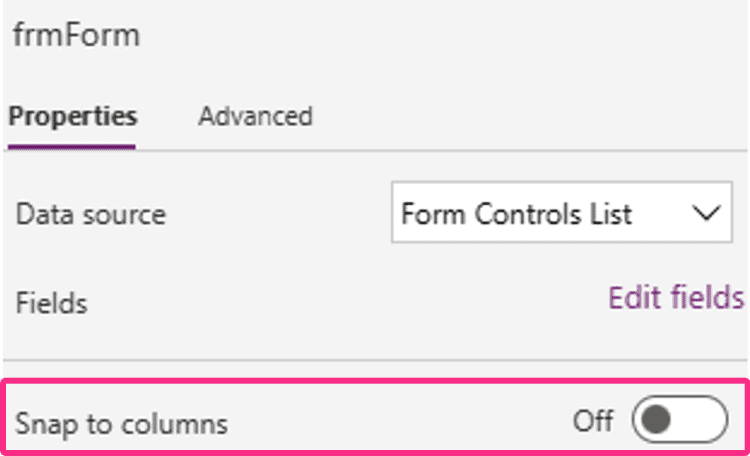
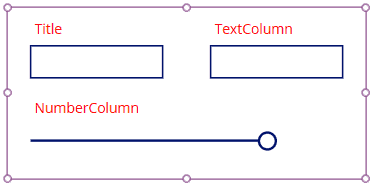
You can now resize individual fields, or have different number of fields per row. This gives you a lot more flexibility for how the form can be designed and presented to users.
They don’t have to look butt ugly
The out-of-the-box classic form control does indeed look pretty grim when you add it to a screen. The new modern form control looks better, but there are less customisation options (at present, anyway). At time of writing, the modern form control is also still in preview, meaning it’s not recommended for Production apps yet.
So classic it is then. But we don’t have to make do with the default look and feel, we can customise to make them look way more appealing. I’ve done many a form overhaul and, whilst it can take a bit of time, the end product is invariably worth it.
I could do a blog series on its own on this topic, but instead I’ll give a huge community spotlight to Victor Sanwoolu. He’s been smashing out some awesome YouTube content recently, including this video on re-designing a classic form control. Go and check it out and give him a subscribe whilst you’re at it!
There you go, my go-to tips & tricks for Power Apps form controls.
Thanks for reading. If you liked this article and want to receive more helpful tips about Power Platform every week, don’t forget to subscribe or follow me on socials 😊
About the Author
I’m Craig! I live in the UK and I’ve used a variety of Microsoft technologies for over 20 years, including Visual Basics, SQL, SSRS, SharePoint (on-premise and Online), InfoPath, SharePoint Designer and most of the wider Microsoft 365 services. Since 2016, I’ve been heavily absorbed in the Power Platform stack; back then it was Power BI, PowerApps (without the space!) and Flow. It’s changed and grown a bit since. I currently work for a large Microsoft Gold Partner in the UK, as a Power Platform / Low Code Ecosystem Architect.
References
White, C. (2024). ‘Working With Form Controls In Power Apps’, Available at: https://platformsofpower.net/working-with-form-controls-in-power-apps/ [Accessed: 26th March 2024].