In my last post, I talked about how you can set up your SharePoint site to roll up content on different parts of the site using Content Search Web Part (CSWP).
In that post I mentioned we’d take a look at how you can customize the rendering of the display template for the items that are rolled up so rather than having generic results coming back in a generic look – you can brand them and make them look however you want. You can even have your results show as a slider etc with a bit of extra JavaScript magic.
In this post we’ll take a look at basic components which you’ll need to customize your display templates for the CSWP.
I’m going to be using default set up of Office 365 Developer site in SharePoint Online and steps here apply to at the time of publishing this post.
1. Navigate to the masterpage gallery on your developer site: click Gear | Site Settings | Master pages and page layouts
2. Open the folder: Display Templates | Content Web Parts
3. Download a copy of the Control_List.html and rename it to something like MyControlList.html … this is a file which we’ll be modifying to introduce custom results rendering
You will need to supply this file only if you like to add anything prior to repeating items being rendered, for example some sort of a header. If you only want to modify the actual repeating results and not add anything overarching at the top – you won’t need this file. In our case, I will create an new rendering template for the header section and add a piece of text so we can see how it appears
To do that you need to find the section in this file that starts with this:
<ul class=”cbs-List”>
and add anything you want to see before the list right before, similar to this:
<a href='[link to all results]’>View More</a>
<ul class=”cbs-List”>
Change the value in <title> to something like My Custom Rendering, since this is how the user will pick the template from the CSWP settings UI.
4. Save the file (with a new name, make sure) and upload it back to the Content Web Parts. When you save the file and accept the default properties, you will see that accompanying JS file was created.
5. For the items rendering template, find the file Item_TwoLines.html from Content Web Parts, download it and give it a new name, in my case MyItem_TwoLines.html
6. Change the value in <title> to something like My Two lines, since this is how the user will pick the template from the CSWP settings UI.
7. In here you need to locate the following piece:

and basically the piece above along with the structure is how each of your items will be rendered, so if you need to make any changes to the rendering, add images, add an expanding content – you can do it here.
8. Again, save this file (with a new name) and upload it back to the Content Web Parts. When you save the file and accept the default properties.
9. Now on to testing!
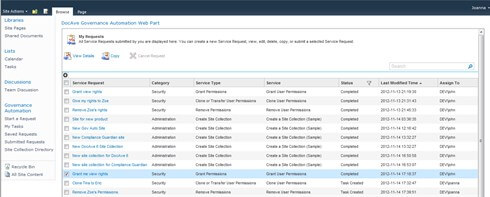
Add a new CSWP to the page and make sure it shows any content just for the demo purposes.
10. Access the web part properties and set the display templates options as shown below:
display templates
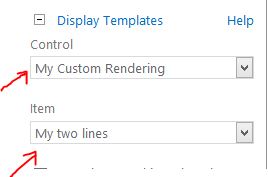
Provided of course you kept the names as in the example.
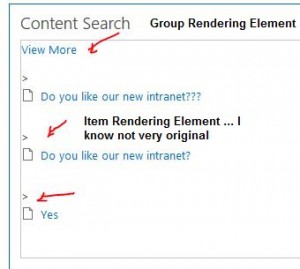
You will see instantly that the web part has a new grouping section in our case it was a View More link as well as any customization you added to the item display – it will show up here too!
The benefit of this approach is that you’re reusing a CSWP back end functionality and get any rendering you want, heck you can even get a custom slider this way!
Enjoy!
This article was first published by Yaroslav on ShareMiuch.com . For more inofrmative content fromYaroslav check out our resource centre here where you choose from a range of intomative blogs and eBooks from Yaroslav including a webinar on ’15 Minutes SharePoint Branding’
If you have any questions or feedback on Yaroslav’s article please leave a comment below. We would love to hear from you.
Yaroslav Pentsarskyy has been architecting and implementing SharePoint solutions since its 2003 release. Yaroslav has extensive .NET and SharePoint development experience working with medium-sized businesses, nonprofits, and government organizations.

Yaroslav Pentsarskyy
As a recipient of the Microsoft Most Valuable Professional (MVP) 2009 and 2010 Award, Yaroslav is also a developer audience leader for VanSPUG (Vancouver SharePoint Usergroup) and actively contributes to local and not-so-local technical communities by presenting at technology events and sharing his findings in his almost-daily blog: www.sharemuch.com.