When people think of SharePoint, they think of it as the place to store company-wide information and data. As far as uploading or creating new documents, SharePoint never really raised concern. After conducting research and client surveys, however, what does seem to be a major source of frustration is the issue of searching for and locating documents within SharePoint. Here is how to display search results in SharePoint Online.
SharePoint Search Is Not Google
Let’s address the expectations of end users first. When dealing with SharePoint Search, a majority of end users expect to upload their content to SharePoint and find it via a search à la Google. Basically, they have grown accustomed to a search option being easy, instantaneous, and requiring no additional actions on their part.
Let’s think about this: There are engineers, marketers, project managers, developers, and many others at Google making sure that the content is indexed, crawled, ranked, and distributed accordingly. Their major source of income is from the advertising made via their platform, so it is to be expected that the distribution and surfacing of the data are optimized.
Then what about SharePoint Search? You do have features available out-of-the-box and they will do the basic requested actions you would expect, but to take full advantage of the available platform, there are some steps you can complete to make sure your organization is reaping all the available benefits SharePoint has to offer.
Use Content Types
One good best practice is to create a content type (a set of columns attached to SharePoint assets) and attach it as the default for the relevant document libraries you are creating. By grouping common fields together, you gain the ability to add a default template for the content type or set up a custom workflow for that specific content type.
There is a bonus for SharePoint Search in all of this, which is that the default “Document” content type will always be available when you create a simple document library. If your business is used to dealing with sets of documents that have common fields by which they can be grouped, then this will be a great asset for you.
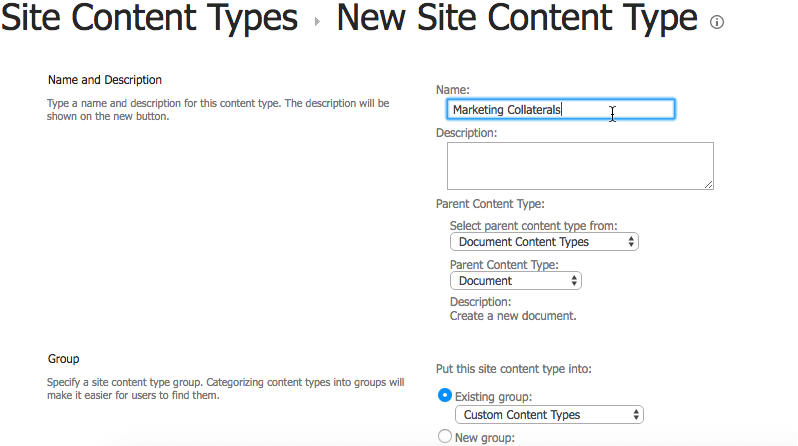
Site Content Types
Be Sure to Reindex Your List or Library
I found this to be tricky when I started consulting on SharePoint Online. Typically, in an on-premise environment, you would make sure you have access to Central Administration to monitor the search crawl(s) happening on your SharePoint environment. On SharePoint Online, this is managed and controlled by Microsoft. When calling them and asking them about the frequency of full crawls, they typically say it occurs within 24 hours. It is true most of the time, but losing the ability to review the crawl(s) means that you have to guess when Search is not working correctly. This, of course, has a tendency to raise concern (Is it because of my content? Is it because of my query? Is it because it is not fully indexed yet?).
To be on the safe side, make sure to hit “Reindex Document/List Library” to reindex all of the content during the next crawl. This is available under Document Library/List Settings >> Advanced Settings.
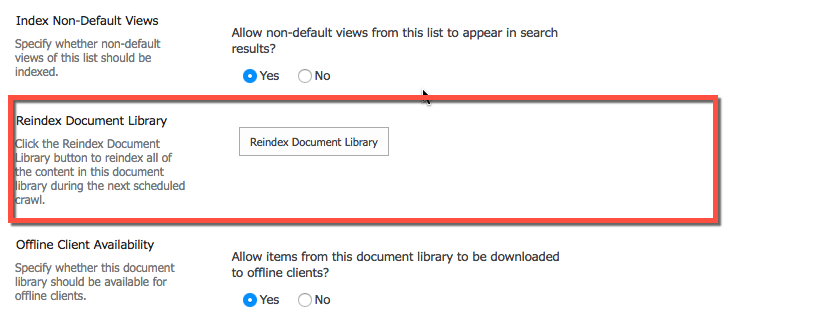
Reindex document library
If you feel like you did not get a full crawl, don’t hesitate to open a ticket with Microsoft Support to inquire about it. Their support answers quickly and you are paying for it, so you might as well utilize their help in cases of doubt.
Map Crawl Property to Manage Property
This is perhaps the more advanced section of this article, but bear with me because it is key — especially if you are planning to surface content using the SharePoint Search Content Web Part.
When you create a custom column, it will likely create a crawled property using the following format: ows_[Column_Name]. Per default, this property might not be mapped to a managed property. The managed property is what will allow you to query and set query text in Search.
To map the crawled property and managed property, make sure you are a SharePoint administrator of your Office 365 subscription before navigating to https://[tenant]-admin.sharepoint.com to click on “Search” and “Manage Search Schema.”
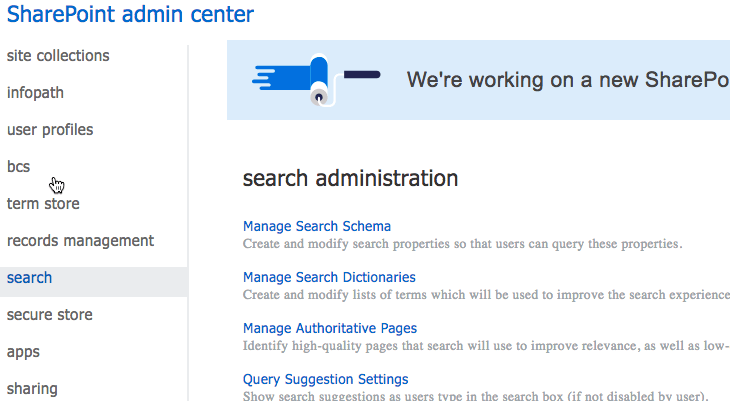
SharePoint Admin Center
Option 1: Create a new managed property
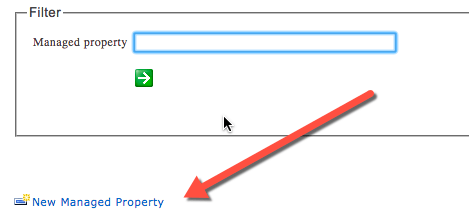
New managed property
- Click on “New Managed Property”
- Give it a name
- Select the type of information to be stored
- Be sure to click on “Searchable,” “Queryable,” and “Retrievable”
- Other options are not as important but are worth reading through; for example, if your field is going to store multiple values, make sure to check “Allow multiple values”
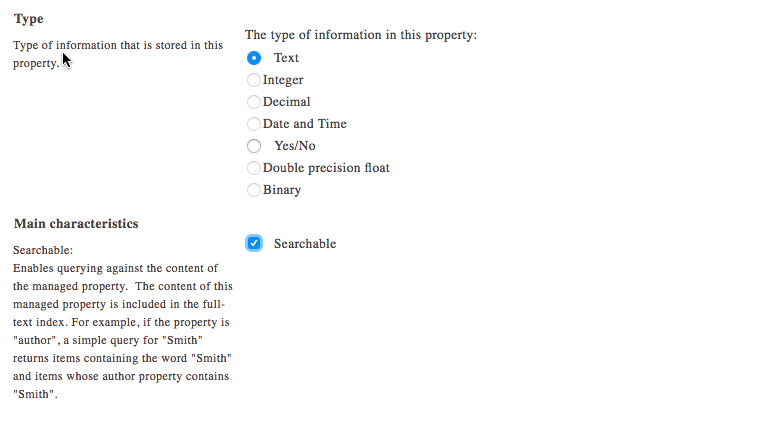
Type
- Add a mapping, which is where you select the crawled property that you have created and want to search; if you have multiple crawled properties, you may have to repeat the steps for each property
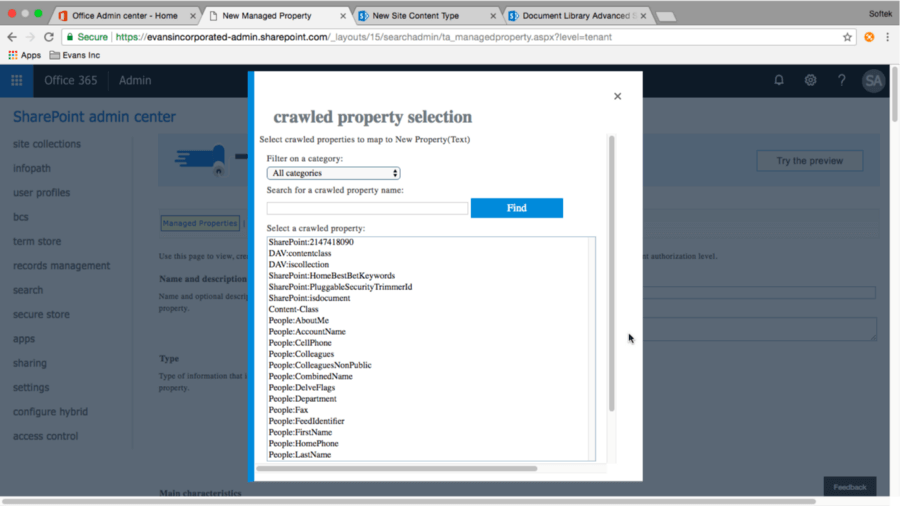
Crawled property selection
- Click OK to save and you are done
This method is good because you can efficiently name the managed property you have created; unfortunately, it will not allow you to select the name from the dropdown in the Content Search Query Web Part. However, you can type out the property and it will allow you to search and filter.
Build your query
Option 2: Map a pre-existing property
Microsoft provides a few columns by default that you can use to map to your crawled properties. They all start with “Refinable,” followed by the type of data it is expecting to receive. For example, if you want to map with a text field, you would use RefinableString00. Obviously, check that nothing is currently mapped in the column; if there is, move to the next property.
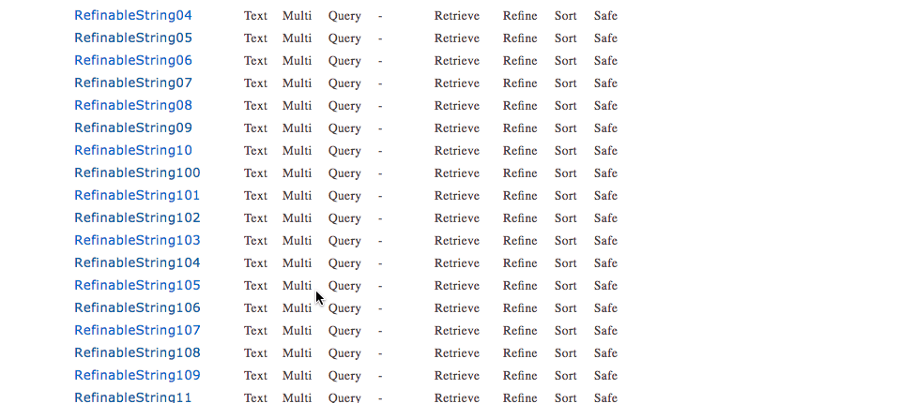
RefinableString00
- Edit one property as needed
- Follow the same steps from Option 1 to map the crawled property
The only difference between the options is that, in Option 2, the properties can be found using the Content Search Query Web Part dropdown.
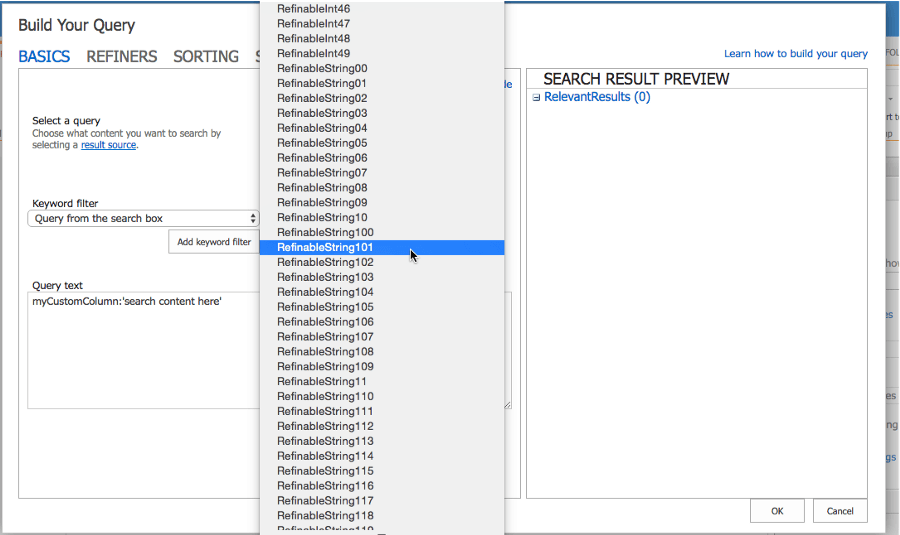
Content Search Query Web Part dropdown
Content Search Web Part
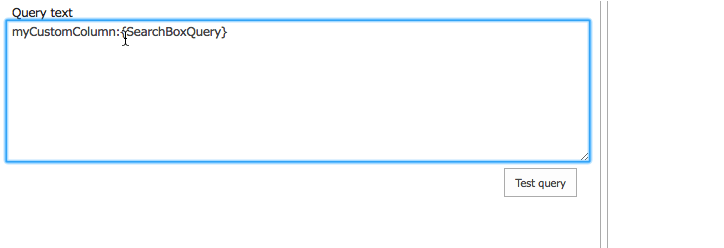
One of the most useful web parts introduced in SharePoint 2013 is the Content Search Web Part. This allows you to surface documents based on Search Query, as well as set your query text, refiners, and even result controls/displays.
I could write a full article just about this web part, but in the context of this article, note that once you have the managed property set up and the search index is fully indexed, you will be able to set query text as follows:
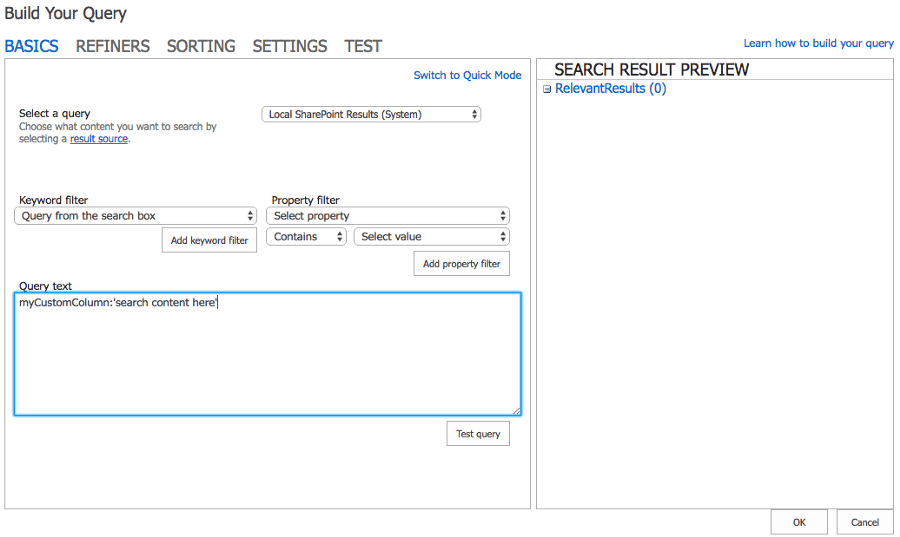
- myCustomColumn:’content’
- myCustomColumn:{SearchBoxQuery} -> This is to get the search input from the end user to filter
Query text
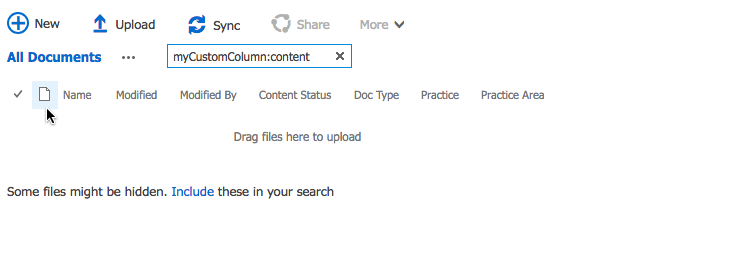
If your search returns nothing, you can check the managed property by navigating to the document library or list library and trying to filter there. If the view returns no results, then there is an issue with your managed property.
myCustomColumn
Finally, use the search display templates in order to modify the views (please check back for my upcoming article about this).
Considerations for Custom Development
With the methods above, you can quickly create and adjust a custom search. However, you will need to consider the following:
- The Content Search Query Web Part limits the number of results to 50 in the view. In other words, if you search for a very generic term, it will only display the first 50 results in that web part. If you need to display more, you can use the SharePoint Search API which will limit results to the first 500 (review REST API documentation here and PNP Core method here).
- Pagination, Count Results, and client-side filtering is not provided out-of-the-box. Again, you can achieve most of this using SharePoint Search API, which provides you with more control over the front end display.
- If you are planning to use the modern experience, there is no equivalent at the time of this article’s publication to the Content Search Query Web Part.
- You will have to activate Publishing Infrastructure at the site collection level and SharePoint publishing features on the SharePoint site in order to call the Search web part in classic mode.
About the Author:

Reference: Quach, K. (2018) Display Search Results in SharePoint Online. Available at: http://niftit.com/display-search-results-sharepoint-online/ [Accessed 6 July 2018]