In this article, we will learn how to create a PowerApps Vertical Gallery with a Horizontal Scroll bar. There was a requirement for one of the customers where we have to display the gallery on the bottom left with 8 columns but the gallery was not supposed to occupy the whole screen width, there was left navigation(Tabs) using 25% of the canvas space and we have to adjust 8 columns in other 75 % which was not quite possible.
Go to any PowerApps Edit mode and Click on New Screen
Step – Click on Add control and Expand Category Layout and Add Horizontal Container
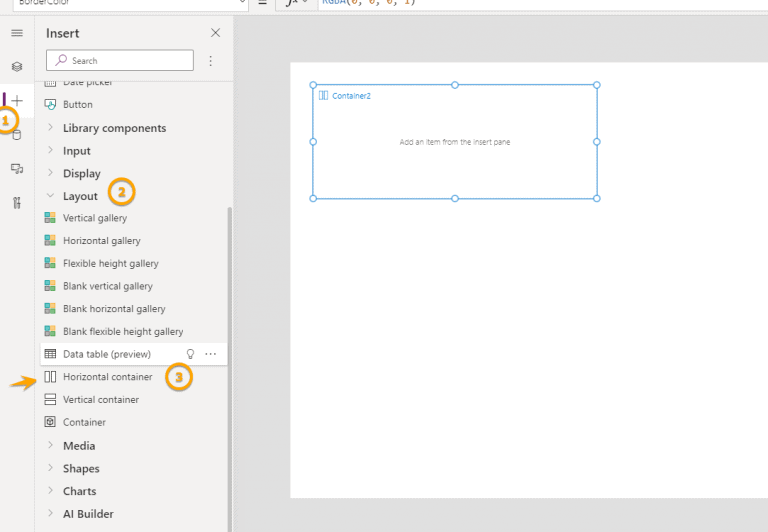
Step – Select the horizontal container we just added and then add a Normal container inside it

Step – Add Vertical Gallery insider the normal container
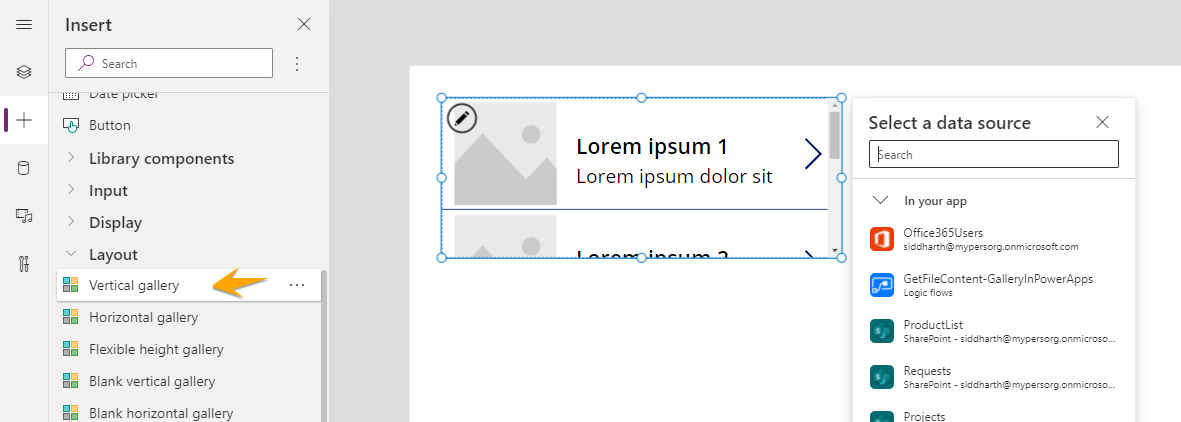
Step – Choose any data source you would like to connect
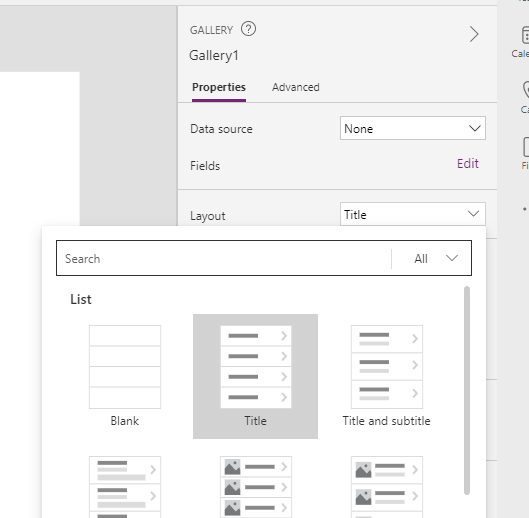
Step – Select the gallery and choose a simple layout with the only Title, we will need to change this to show multiple columns (in tabular format)
Format the Gallery to show multiple columns in a tabular format like below and set the width of the gallery to our choice.
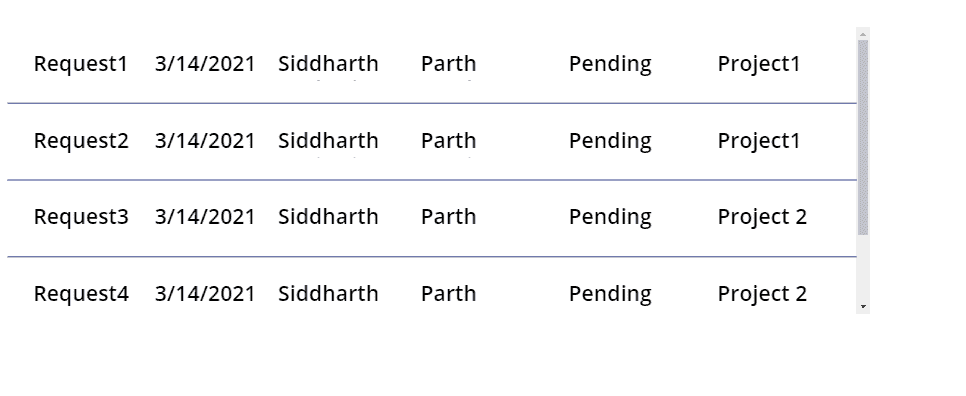
for this example to see that the scroll bar will come horizontally, I have first increased the width of the gallery and added required columns next to each other
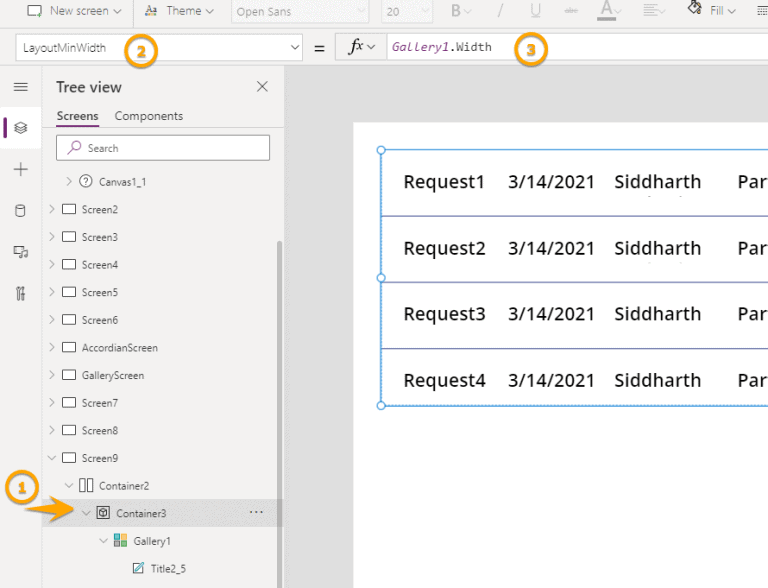
Step – Select normal container(container3 in my case) and set LayoutMinWidth to the width of Gallery
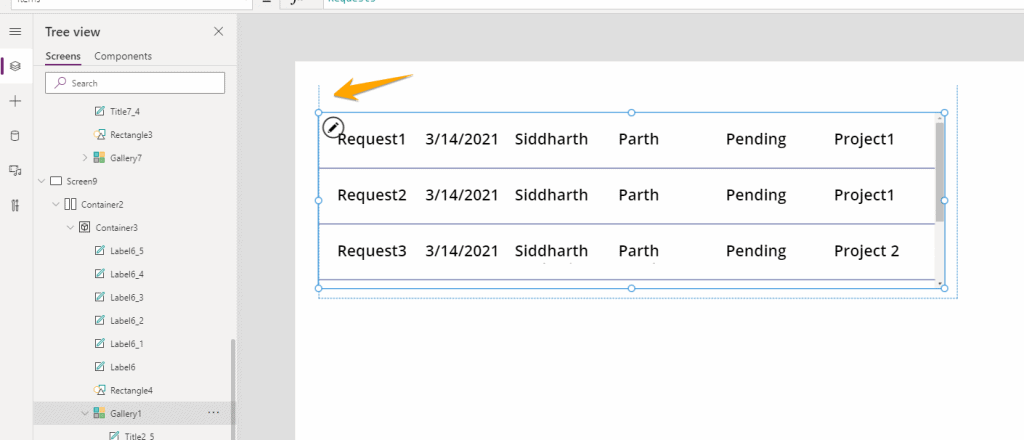
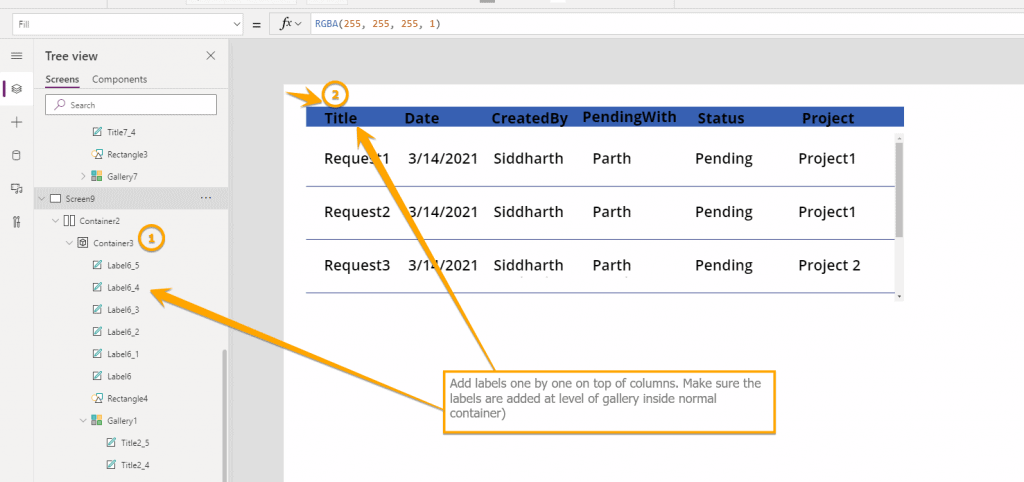
Step – Let us now add headers to this gallery. Resize the gallery height to add space for columns names
Select Gallery and reduce the height from the top using mouse.

Step – Set the size of the Horizontal Container of our choice(in my case I set it to 650 now) and I could see some columns being cut off from view.
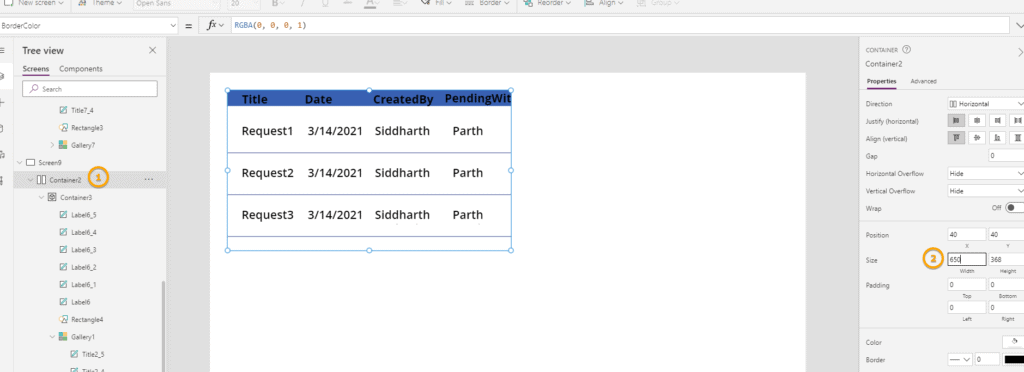
Step – Select Horizontal Container(container2 in my case) and Set Horizontal Dataflow to Scroll

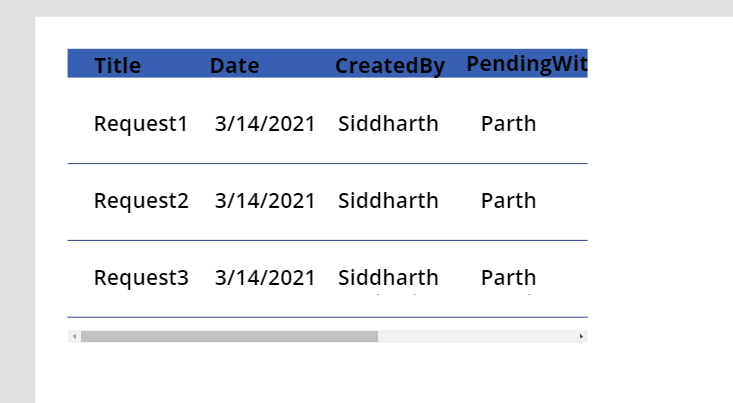
And as you do this you can see horizontal scroll will appear in the gallery.
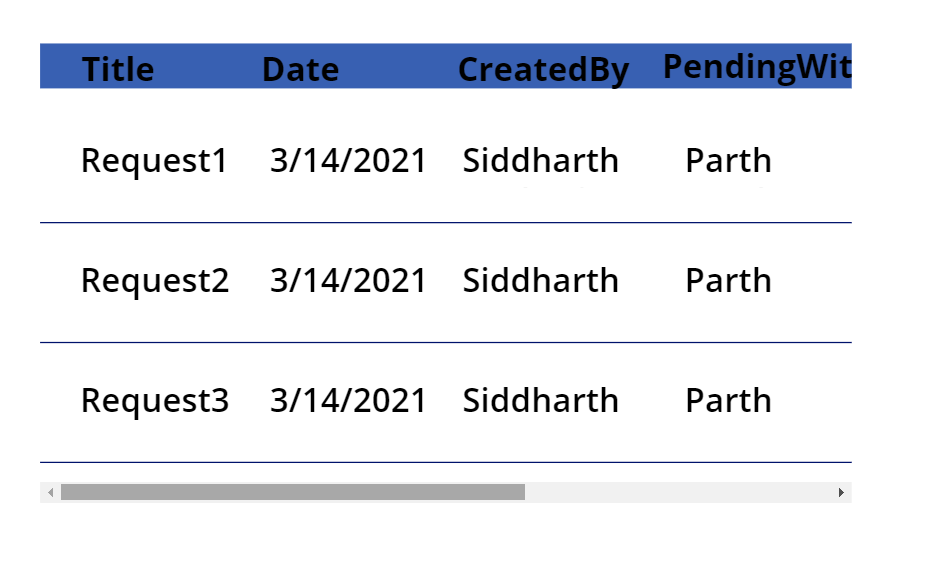
Step – select preview mode and scroll to right and you will see that data and both column headers will also scroll
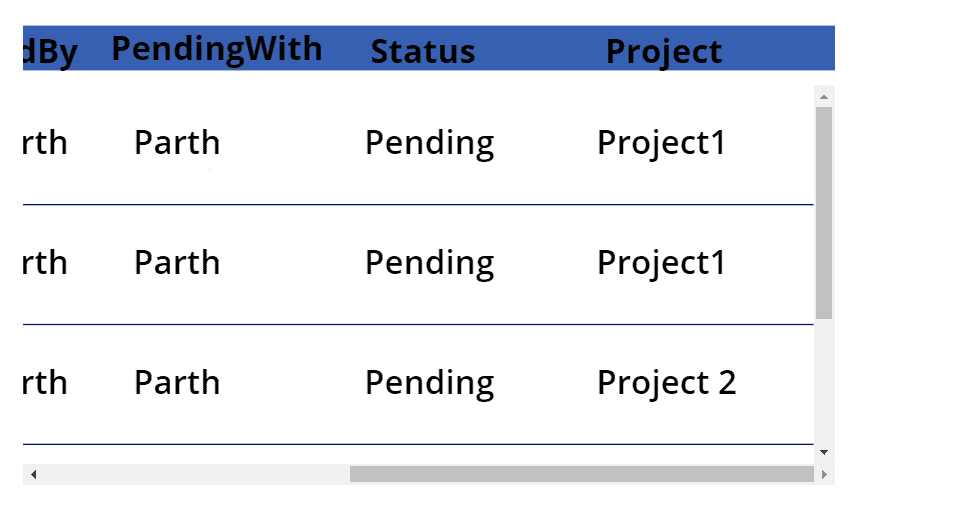
After scrolling to right…
So in this way you can set the horizontal scroll bar to Power Apps Gallery along with the column header as scrollable.
Hope this helps…Happy Low Coding.. 🙂
About the Author:
Reference:
Vaghasia, S. (2021). PowerApps Vertical Gallery with a Horizontal Scroll bar. Available at: https://siddharthvaghasia.com/2021/05/12/powerapps-vertical-gallery-with-a-horizontal-scroll-bar/ [Accessed: 22nd May 2021].