Custom Vision Service as part of Azure Cognitive Services landscape of pretrained API services, provides you an ability to customize the state-of-the-art Computer Vision models for your specific use case.
Using custom vision service you can upload set of images of your choice and categorize them accordingly using tags/categories and automatically train the image recognition classifiers to learn from these images and come up with image recognition predictions when you supply an input image. Later consume this service as an API in your existing applications.
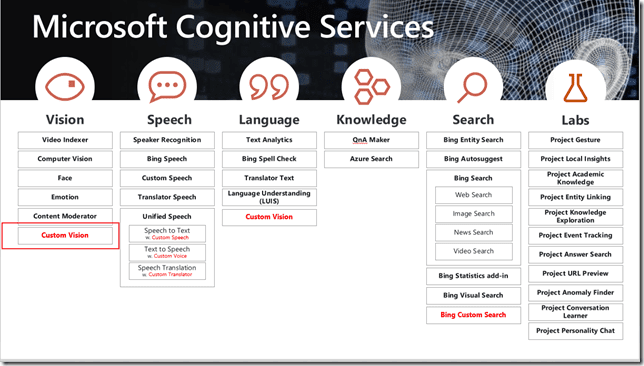
Microsoft Cognitive Services
For example: Here is how an image of Hollywood Actor – Harrison ford being accurately predicted by the custom model through training using a series of pictures of Harrison Ford through different ages and shapes.
I build this sample during Global AI Bootcamp Letterkenny– Hands on Labs, and will take you further through this article. Harrison Ford is my all time favourite actor.
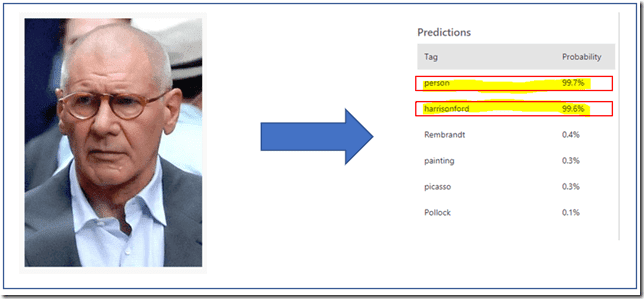
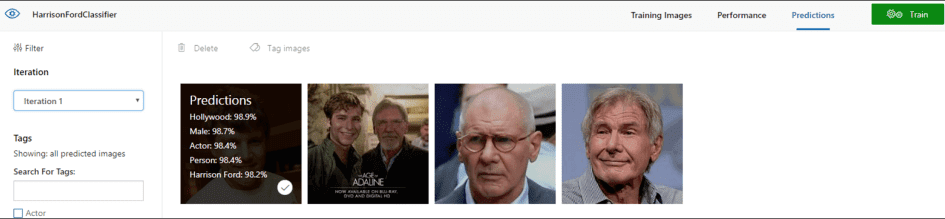
Predictions
Another example, Harrison Ford was one among 3 in a photo. Here is how the results would look like.
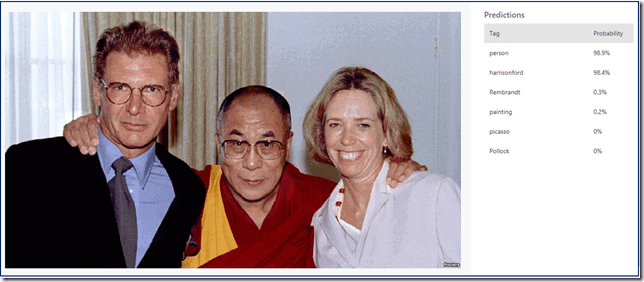
3 in a photo
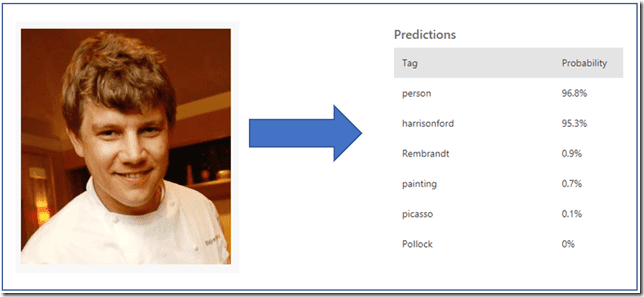
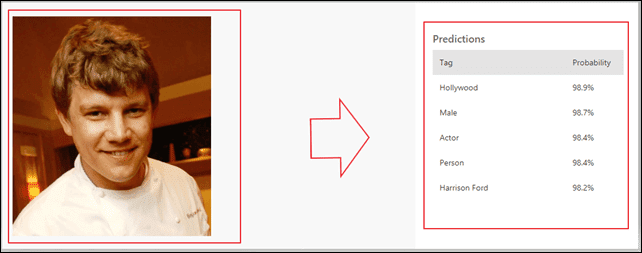
Here is how Harrison Ford’ sons picture is being predicted as Harrison Ford, due to similar facial characteristics. |f we further train this model, we can improve it’s capabilities to come up with accurate predictions.
Now let us see, how it was implemented.
In this article I am going to use a set of Harrison Ford images found on Google Images and then upload them to Custom Vision service like below. For more accuracy, I tried to collect images of Harrison Ford through different stages of his life, so that computer vision model could evolve to predict more accurate results.

Photogrid
Getting Started with Custom Vision:
The Azure Custom Vision API is a cognitive service that lets you build, deploy and improve custom image classifiers. An image classifier is an AI service that sorts images into classes (tags) according to certain characteristics. Unlike the Computer Vision service, Custom Vision allows you to create your own classifications. The Custom Vision service uses a machine learning algorithm to classify images.
Classification and object detection
Custom Vision functionality can be divided into two features. Image classification assigns a distribution of classifications to each image. Object detection is similar, but it also returns the coordinates in the image where the applied tags can be found.
To get started with our example, first you need to have a Microsoft Account and Register/Login to https://www.customvision.ai
There going to be five steps of activities we are going to do:
1. Setup a Custom Vision Project
Create a new Project by selecting ‘New Project’ button
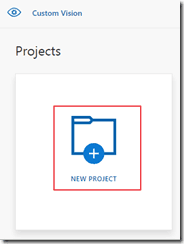
New project
Specify the naming as the followed:
- Name: HarrisonFordClassifier
- Description: HarrisonFordClassifier
- Resource Group: Leave it default to ‘Limited Trial’
- Project Types: Classification
- Classification Types: Multi Label (this is essential, we are going to add multiple tags per image in this example: for say ‘Actor’, ‘Person’ and ‘Harrison Ford’
- Domain: General (for now)
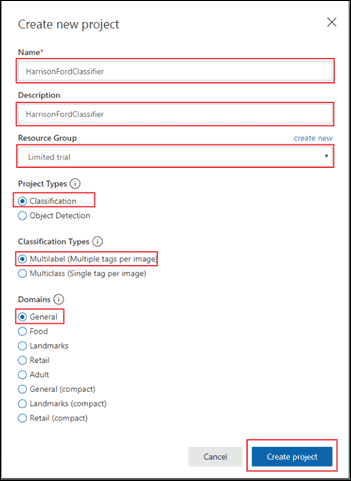
Create new project
2. Upload the Images
a.) Prepare Images
I have gathered a set of images you can download it from here, and extract the HF-Demo-Images.zip in to a folder of your choice.
There are two folders in it first folder(harrisonford) contains all reference images for training the model and second folder(hf-quicktest) contains all the quick test images we are going to use for evaluating the model.
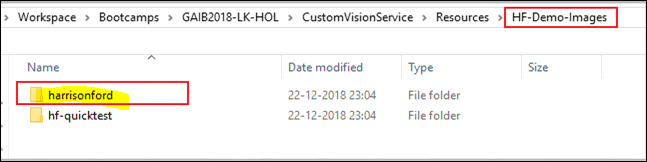
HF-Demo-Images
b.) Create Tags
Select ‘+’ icon to create a new tag and create the following tags
- Actor
- Hollywood
- Harrison Ford
- Person
- Male
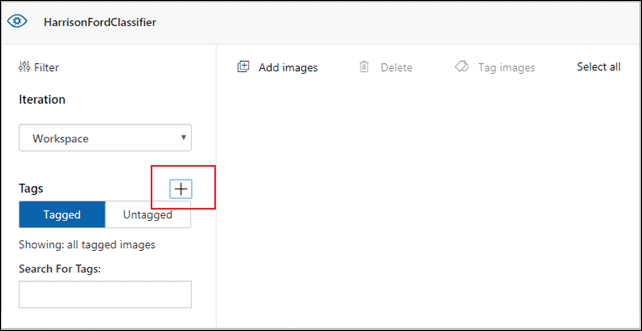
Add a tag
Enter Tag Name and click on ‘Save’

Create a new tag
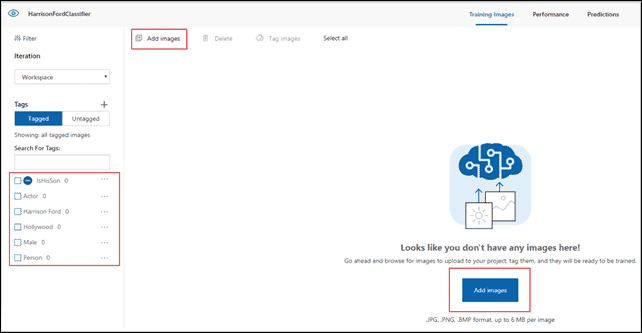
c.) Upload Images
Now that we created all the tags, lets upload the images and tag them with respective tags.
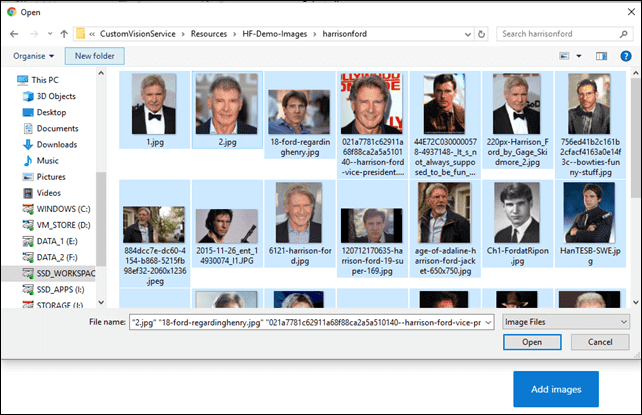
Click on ‘Add Images’ button and select the images from “harrisonford” folder to upload.
All images
New folder
d.) Assign Tags
Now specify the associated tags in My Tags section, selecting from the drop down
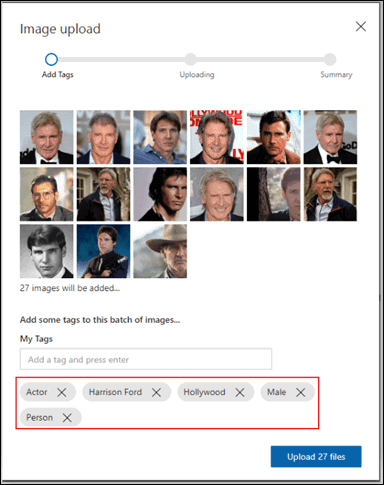
Image upload
Then click on Upload
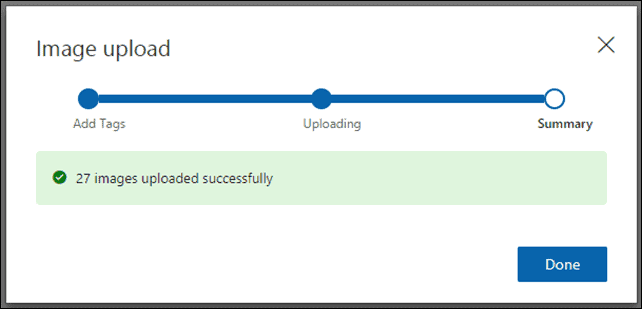
Image upload
Have a review of the images uploaded
Review images
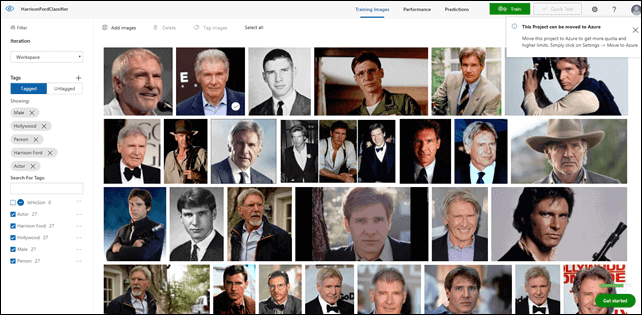
3. Train


Training images
This initiates the first automatic training(Iteration 1) based on the tags you assigned and images associated to it.

Iteration 1
Once that step is completed let us review the output of the training.
It shows a precision and Recall of 100% indicates our image classification model is trained now to provide Precision of 100% and Recall of 100%.
PS: Recall means out of the tags which should be predicted correctly, what percentage did our model correctly find?
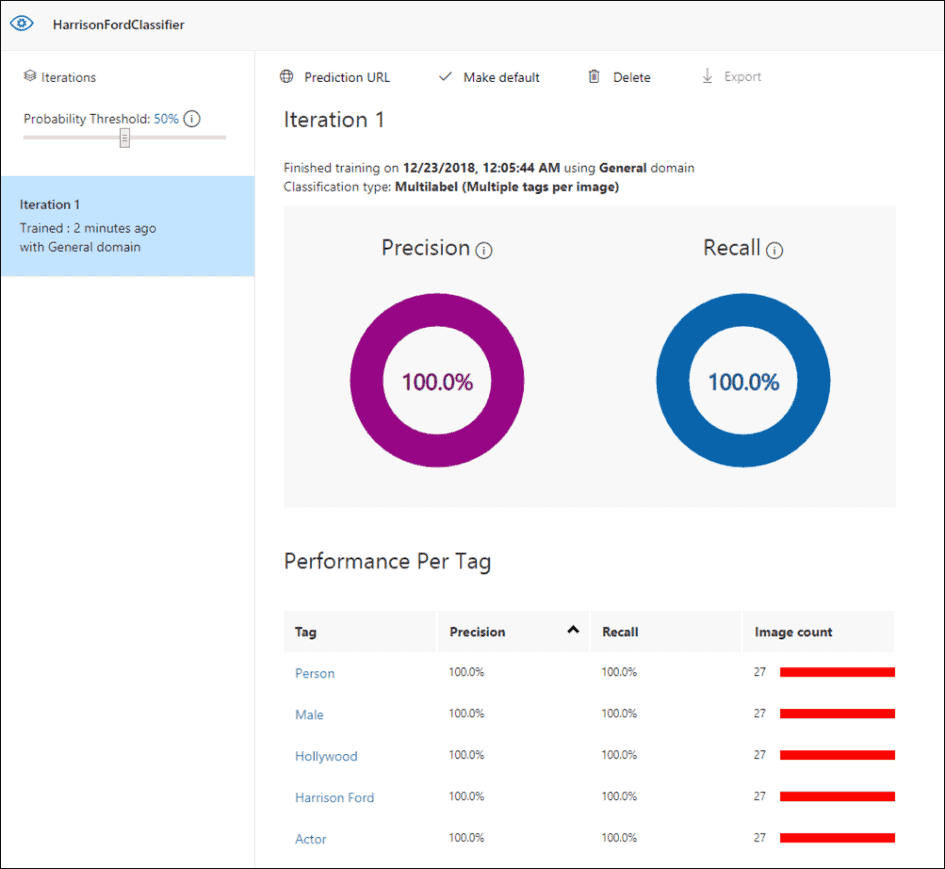
Precision and Recall
4. Evaluate the Model
Now that our classifier is trained, let us evaluate the accuracy. For that we are going to use the sample images from “hf-quicktest” folder.
a.) First click on Quick Test button on top – ![]()
b.) Select a local image or select an image URL
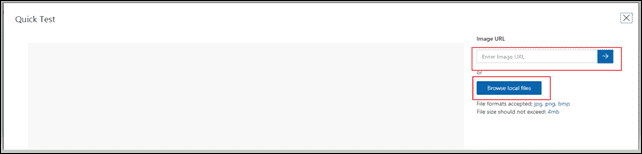
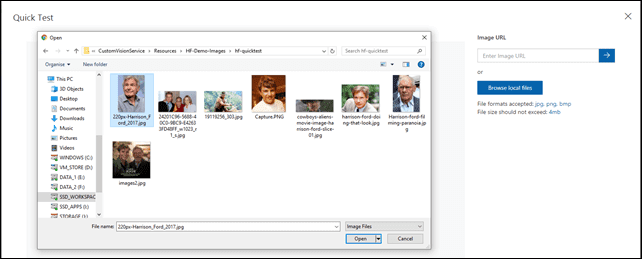
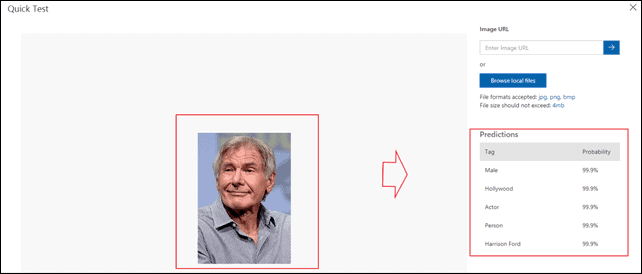
Image testing
Lets try another image
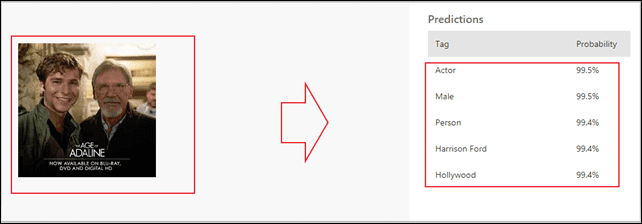
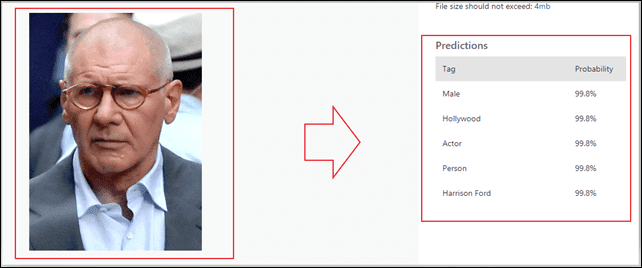
Image testing with a different image
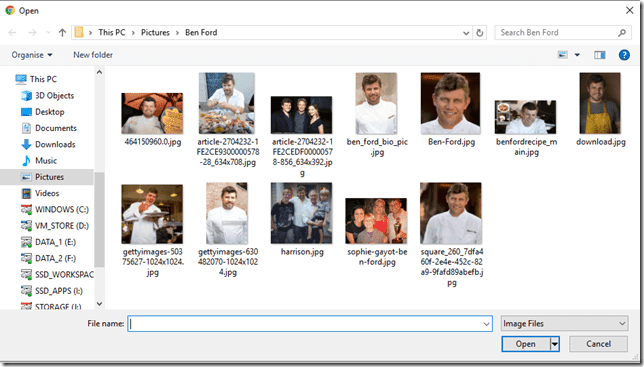
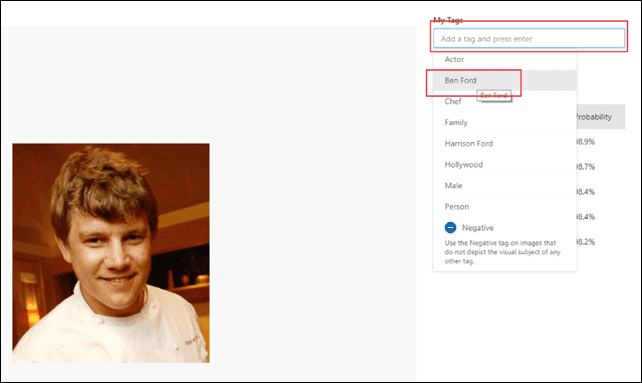
Next let us try to upload an image of Ben Ford (Harrison Ford’s son)
Tag – Probability
5. Active Learning
Now that we have couple of accurate predictions, Active Learning involves training the model again from the prediction samples we used. This would make the model evolve to provide us more accurate predictions, for example we correcting the model as it identified that Ben Ford also as Harrison Ford based on similar facial features. In real world, he is a different entity other than his father.
Ben Ford is a Chef by profession. So I am going to upload some of his pictures and tag them as Ben Ford. Also couple of images of both father and son together, and then initiate the training again. Hope they would not feel agitated.
Ben Ford

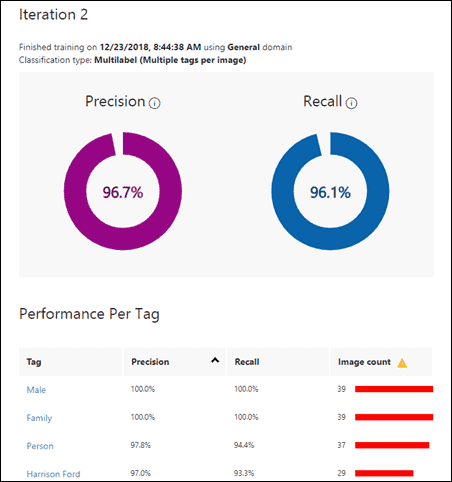
Iteration 2
Now if you look at training performance, Precision and Recall values came down a bit, we can realize it is because we have two persons being tagged with some common tags etc.
Iteration 2
Let us do a Quick Test with the previous image of Ben Ford again. voilà!, we have some accurate prediction.

Predictions
Similarly, we can repurpose some of the previous prediction images from Predictions tab and add them with right Tags. Then retrain the model again to evolve the model.

Predictions
HarrisonFordClassifier
Add a tag
The End:
Now that you have learned how you can train Custom Vision API with set of images and retrain them again for more accuracy. Once your training is completed and you are happy with the performance, you can integrate the logic in to your existing apps using Custom Vision REST APIs. You can follow the HOL that covers the integration topic here.
Custom Vision Services provides you state-of-the-art Classification and object detection capabilities to customize it for your specific need with quick and easy steps. This help you reduce your time to market and increase ROI (Return of Investment) for your product lines or ideas.
Start learning today using the below reference links.
References:
- Custom Vision Service site: https://azure.microsoft.com/en-us/services/cognitive-services/custom-vision-service/
- Documentation: https://docs.microsoft.com/en-us/azure/cognitive-services/custom-vision-service/home
- Try Custom Vision Service
- Cognitive Services Updates
Disclaimer: All the images referenced in this article are available on the public domain and there is no way any private images are been included in this examples. We respect Harrison Ford and his family privacy, this article is just an attempt to prove the capabilities of Azure Custom Vision Services, no way intended to insult or invade Mr.Harrison Ford’s privacy.I am a big fan of you sir.
About the Author:
A passionate hardcore application programmer, software architect, and technology evangelist with over 13 years of experience in Web, Mobile, and Cloud applications design and development.
A hardware geek, a kick-starter, and a quick learner.
Reference:
Mohan, N. (2018). Azure Cognitive Services–Experience Image Recognition using Custom Vision (Build an Harrison Ford Classifier). Available at: http://blog.thingx.cloud/2018/12/23/azure-cognitive-services-experience-image-recognition-using-custom-vision-build-an-harrison-ford-classifier/ [Accessed: 11 January 2019]