Azure Functions can be defined as the cloud services that are available on the Azure portal providing updated infrastructure and resources that are needed for running the applications. It is used to build web APIs, respond to database changes, process IoT streams, manage message queues, and more.

In this article, we will explore how to create a python function that will respond to HTTP requests. Here we will test the code locally and then deploy it on the serverless environment of Azure functions.
- To configure the environment :
Before getting started, make sure that you have the following requirements in place:-
- Azure Account : An Azure account with an active subscription. use the following link:
2. Azure Functions Core Tools :The Azure Functions Core Tools version 3. x.
3. Python installed with Azure Functions : Python versions that are supported by Azure Functions. For more information, see How to install Python.
4. Visual Studio Code on the supported platforms.
5. The python extension for VS Code.
6. The azure function extension for VS Code.
Let us install Azure function extension :
- Go to extensions option and search for Azure function and install the extension as shown in the following window.
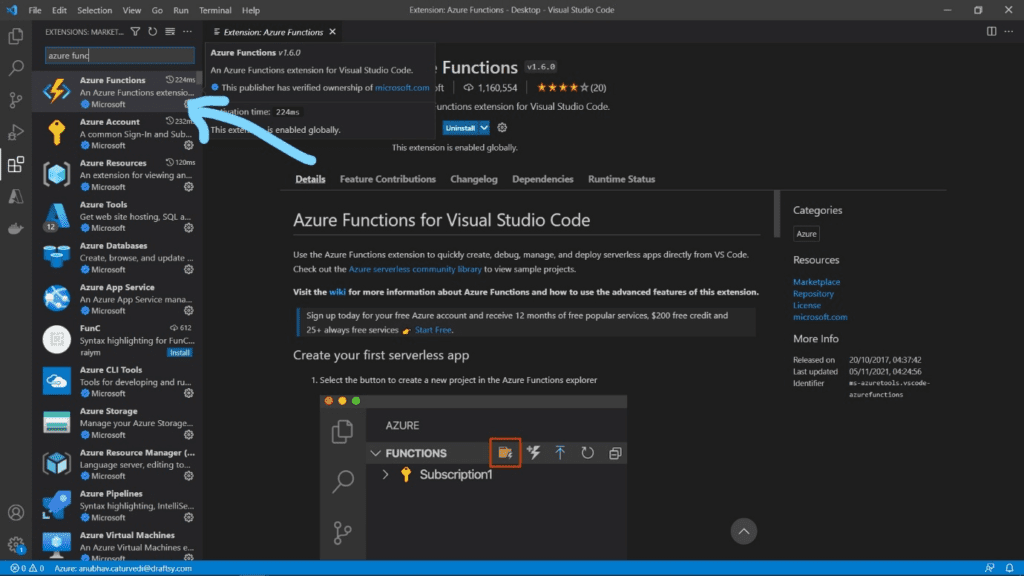
2. After installation you will be able to see the extension and will appear as the following image below :
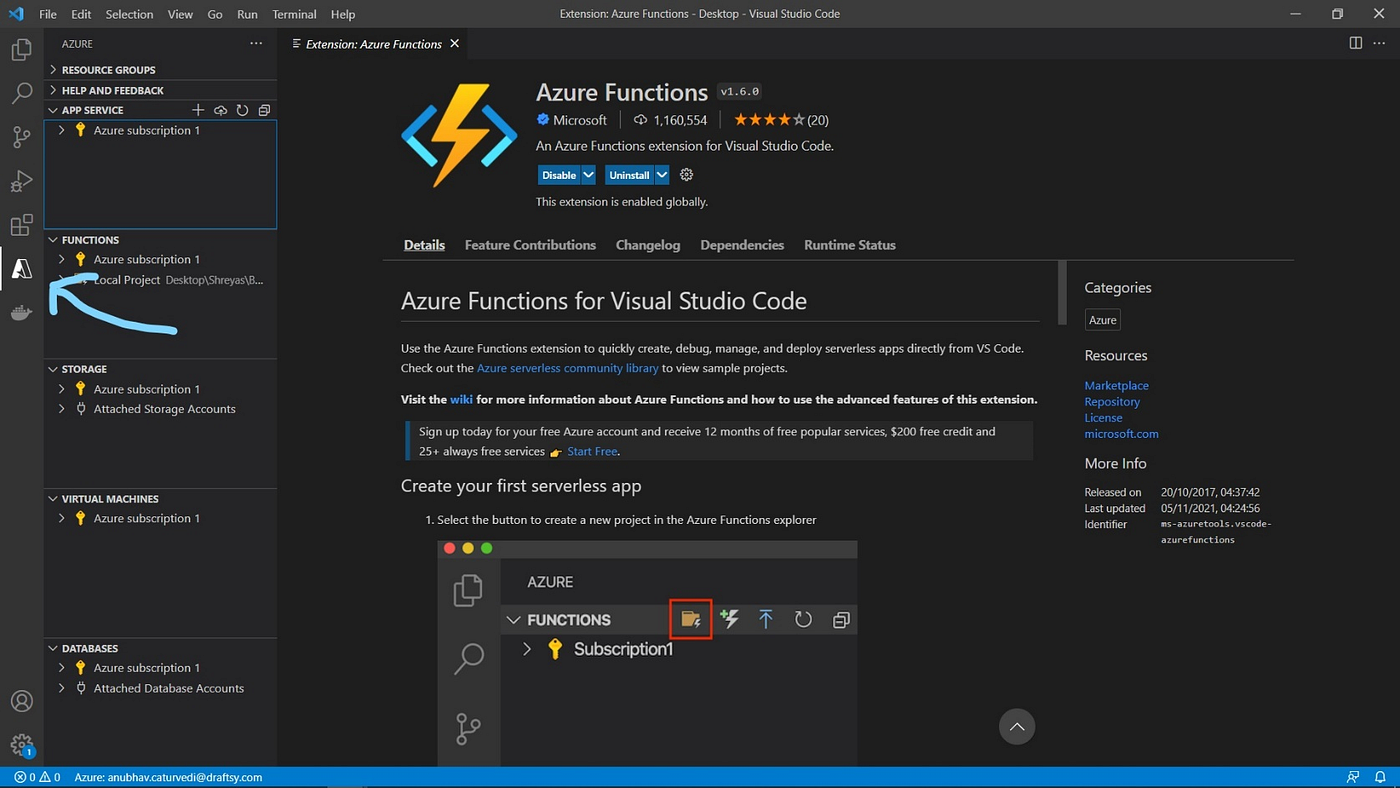
Now let’s create your local project:-
- Choose the Azure icon in the Activity bar, then in the Azure: Functions area, select the Create new project… icon.
- Choose a directory location for your project workspace and choose Select.
- Provide the required information at the prompts.
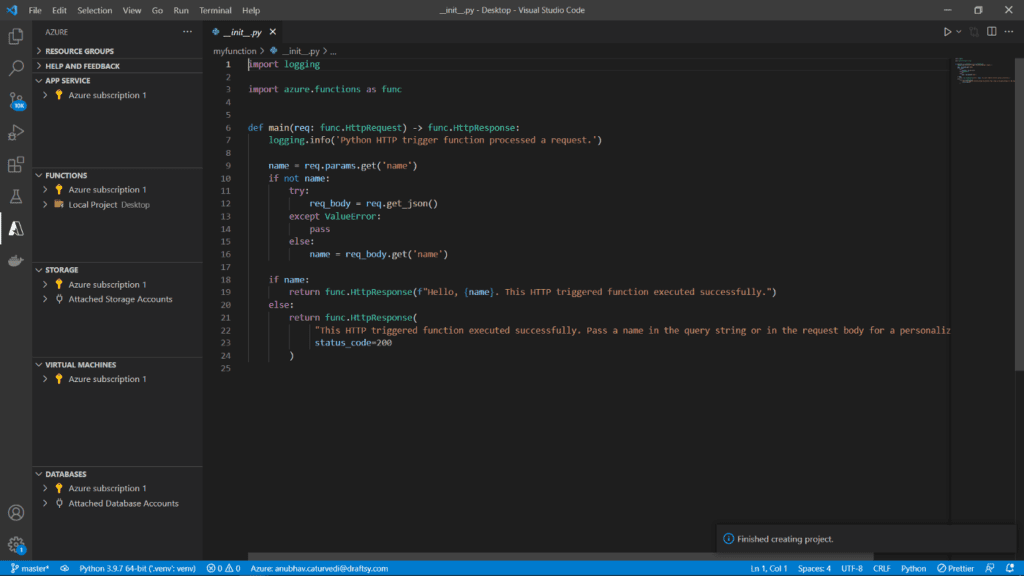
- Using this information, Visual Studio Code generates an Azure Functions project with an HTTP trigger. You can view the local project files in Explorer. You can use the code over here for this demo .
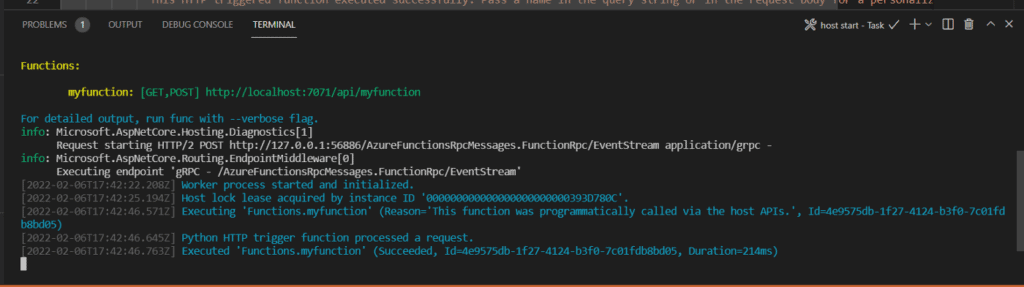
5. After this, we will run the code and we will get the following output. To call your function, press F5 to start the function app project. Output from Core Tools is displayed in the Terminal panel. Your app starts in the Terminal panel. You can see the URL endpoint of your HTTP-triggered function running locally.
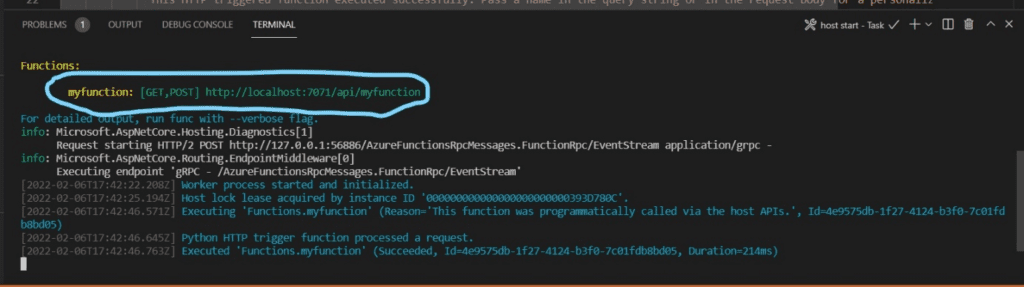
6. In the following image, copy the link given in the terminal.
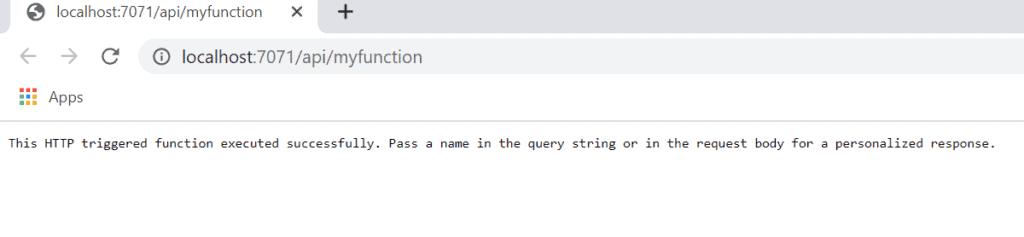
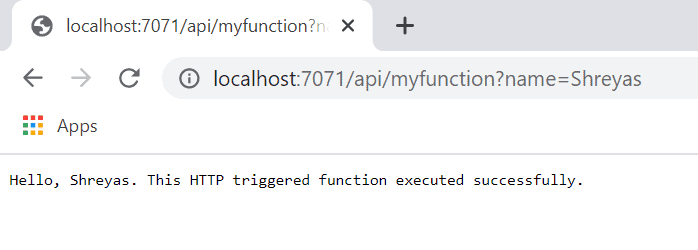
7. A tab will be opened in your browser which runs the HTTP trigger function locally.
8. Add the name at the end of the URL “?name=Shreyas”, and will print the following string.
9. After this, press Ctrl + C to stop Core Tools and disconnect the debugger. After you’ve verified that the function runs correctly on your local computer, it’s time to use Visual Studio Code to publish the project directly to Azure.
Now our next step is to publish the function on azure.
Here we will create the function app and then deploy the code.
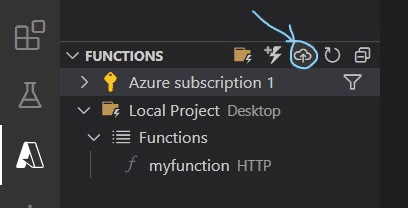
- Choose the Azure icon in the Activity bar, then in the Azure: Functions area, choose the Deploy to function app… button.
2. Next step is to provide the following details in the prompt.
- Select folder: Choose a folder from your workspace or browse to one that contains your function app. You won’t see this if you already have a valid function app opened.
- Select subscription: Choose the subscription to use.
You won’t see this if you only have one subscription. - Select Function App in Azure: Choose + Create a new Function App.
(Don’t choose the Advanced option, which isn’t covered in this article.) - Enter a globally unique name for the function app: Type a name that is valid in a URL path. The name you type is validated to make sure that it’s unique in Azure Functions.
- Select a runtime: Choose the version of Python you’ve been running on locally. You can use the python — version command to check your version.
- Select a location for new resources: For better performance, choose a region near you.
-> The extension shows the status of individual resources as they are being created in Azure in the notification area.

3. After the completion of the above steps the following resources will be created in the azure subscription using the names based upon the function application.
- A resource group, which is a logical container for related resources.
- A standard Azure Storage account, which maintains state and other information about your projects.
- A standard Azure Storage account, which maintains state and other information about your projects.
- A function app provides the environment for executing your function code. A function app lets you group functions as a logical unit for easier management, deployment, and sharing of resources within the same hosting plan.
- An Application Insights instance is connected to the function app, which tracks usage of your serverless function.
4. After this , select the View output in the notification section to view the creation and deployment results that also include the azure resources that you have created. In case you missed the notification, you can click on the bell icon in the lower right corner to see it again.

So finally, you have created your own azure function…
congratulations !! 👍🏻
For any further queries or anything related to Python or Azure Development, Coding, Blogging, or Tech Documentation you can DM me on Linkedin or Instagram at id=acanubhav94.
Special credits to my team members: Siddhid and Anshika .
This blog featured as part of Azure Week. Find more great Azure content here.
About the Author:
Anubhav has worked as an Engineer (Developer) and Content Creator in the domain of Linux System Programming, Blockchain , DevOps, MLOps and Applied ML companies and Organizations like Reliance Jio , Oracle,Hitachi ABB Powergrids, United Nations for 1 year Contracts each. Also worked as hands-on instructor on freelancing basis for companies like Deloitte,Dell,General Electric(GE),Infosys,TCS,Redington,Allstate,Mercedes,Bank of America,HiMedia(OpenCV ML),RBI,NPCI,BEL,CGI,Cognizant,Sunlife Consulting,L&T Infotech. He has worked as a Content Strategist for UpGrad (shooting technical videos with SME’s from Ola,Microsoft,IIIT’s,Walmart),preparing contents, illustrations for Higher Education Learning (Blockchain,ML) .Learning Consultant for basic to intermediate level content for executives at Emeritus . He holds a Bachelors Degree in Computer Science & Engineering from Maharaja Sayajirao University of Baroda (100 % Scholarship for being in Merit by Gujarat State Govt.) followed by PG Diploma in Applied Statistics from IGNOU.

Chaturvedi, A. (2022). Creating Azure Functions using VSCode Editor and Python. Available at: https://consultanubhav-1596.medium.com/creating-azure-functions-using-vscode-editor-8f28e3a3c95d [Accessed: 8th July 2022].