The new Project Oakdale connected Teams application preview version saw the rollout during the Microsoft Ignite 2020 last week. Now it is easier than ever to create a smart bot to Microsoft Teams using Power Virtual Agents app in Teams that can have conversations and perform actions with team members – or with everyone in the company. And all that without coding and if your bot is simple it will only take 5 minutes!
Power Virtual Agents in Teams come included in the Teams licensing and don’t require extra add-ons. These are perfect to start creating more bots in your organization.
The last two chapters in this post also overview two other, a more Citizen Dev level, ways how to add more capabilities to the bot: searching for best answer in questions & answers database and automatically booking a Teams meeting with support person.
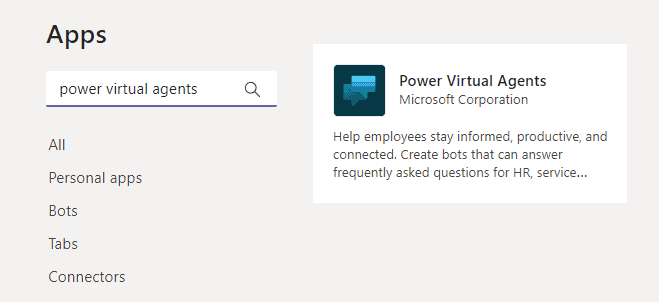
Start by going to the Teams app store and installing Power Virtual Agents -app to your Teams.
Once you have the application open you can start creating your own bots. If you create a bot to a team that doesn’t have a project Oakdale environment yet it will take a moment longer than to those teams that has the project Oakdale components. Since it is a matter of few minutes you shouldn’t worry about it too much. You can see existing bots in the Chatbots-tab.

Click on Start now to start creating a new bot.
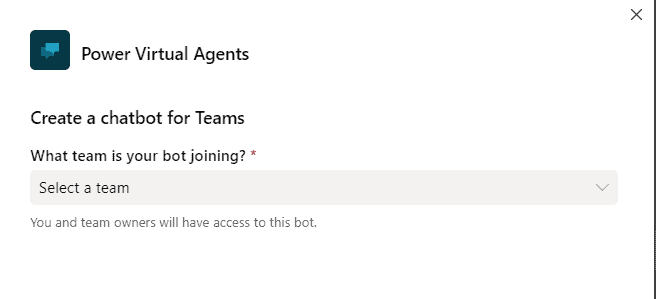
Let’s choose a team and continue

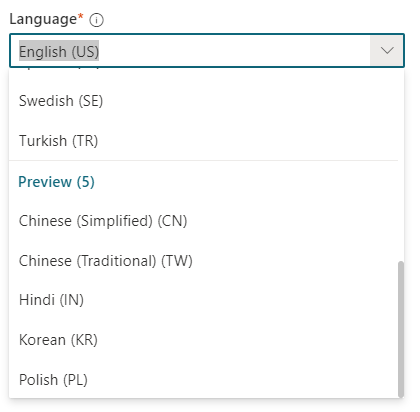
Give your a bot a nice friendly name and choose it’s language. There are several languages available already (even Swedish, Dutch and Japanese) but no – no Finnish. Not yet at least.
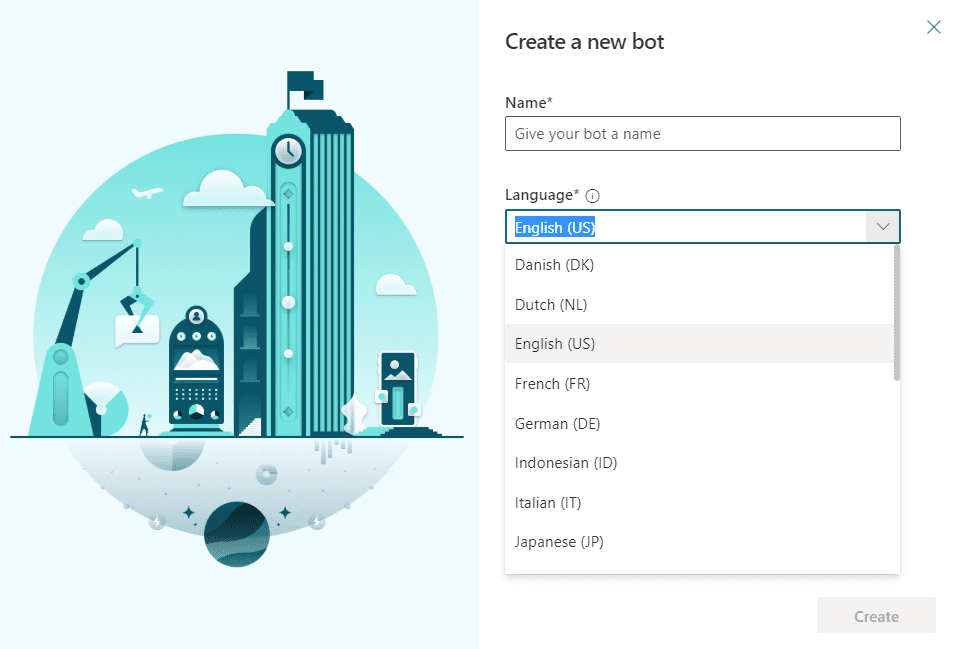
After entering the name and choosing the language click Create and wait for a few moments.

After that you can proceed
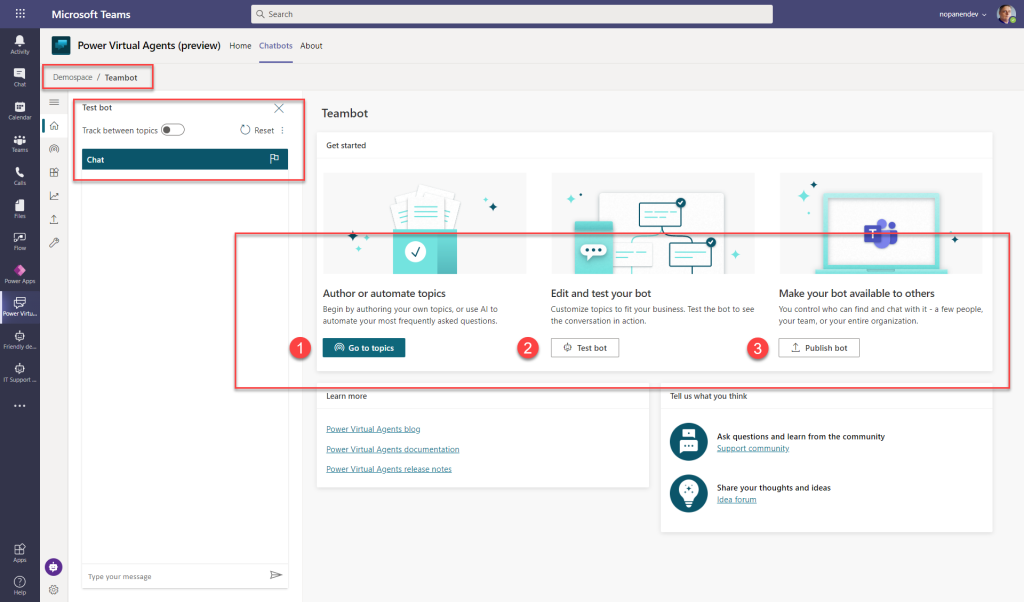
Looking at the screen: top left square area tells you the team and the bot name. Under that you have a test bot section.
Block marked with numbers:
- Go to topics to create bot conversations and actions. This is bot’s logic.
- After you have done topics (or even meanwhile) you can use the Test bot functionality to make sure bot works without giving access to anyone else
- Finally Publish bot to make it available to your team members
Go to topics
In the topics you can see User Topics and System Topics. As a bot editor you can add, edit and delete User Topics. To get you started every bot comes with 4 predefined sample topics. You can turn them off, edit them or delete them as you wish.
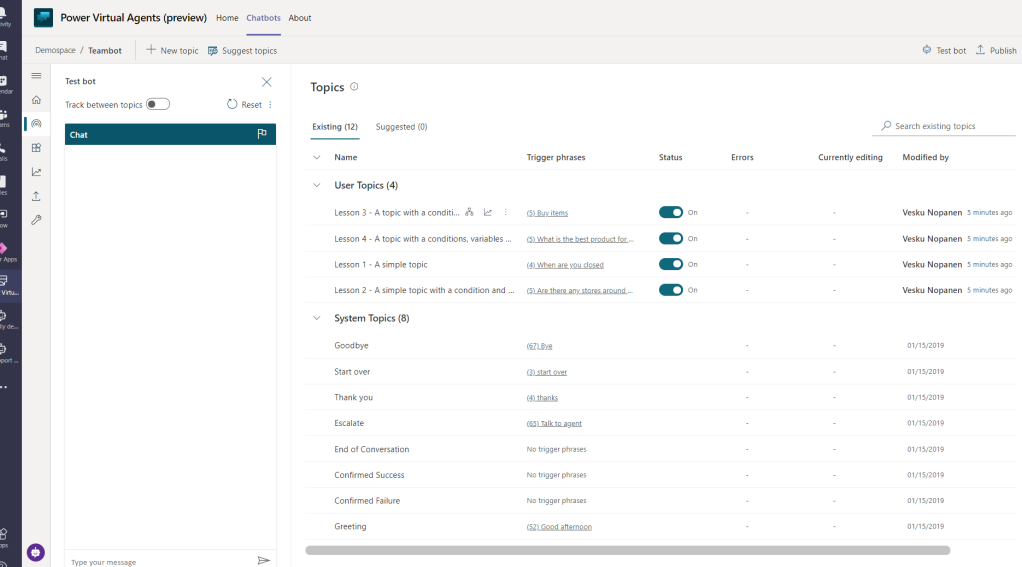
System Topics can not be deleted but you can edit their contents. These are coded to react to specific words or situations. It is good to customize some key topics like Greeting and End of Conversations to suit your needs. I also usually turn off Lesson topics with the switch.
But let’s create a new Topic that could tell user something about the team they are a member of.

Just click on + New topic.

You need to enter the topic a name (Welcome to the team) and some trigger phrases how this conversation begins. After adding Trigger phrases make sure to Save topic before moving to the Canvas. During my tests I have found out that you can loose some important information now and then unless you save before moving to another dialogue or screen. So with the words of Larry: Save early, save often.
After saving: click on “Go to authoring canvas” to create the actual conversation.
Creating the conversation flow
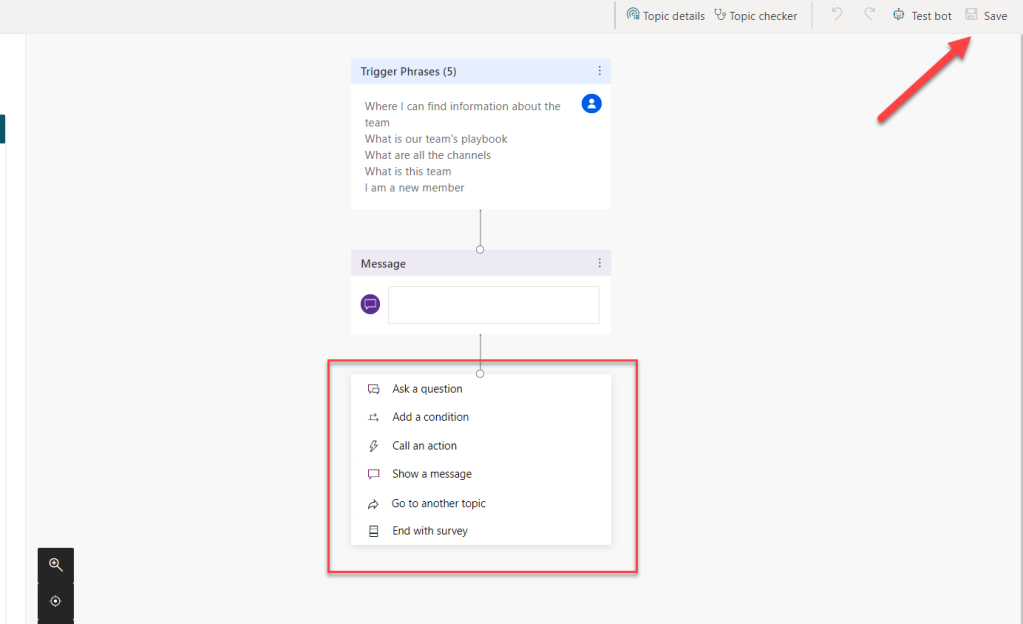
In the Authoring canvas you can create the flow. But remember to Save it now and then when you do modifications!
- Ask a question allows you to ask questions from the user, there are several predefined models available. If you create a question with multiple answers you can choose to branch the conversation flow from there.
- Add a condition to choose action without asking questions. This relies on variable values that you may have asked from user before.
- Call an action will let you create and call a Power Automate Flow. These Flows are stored inside the team environment so one Flow can not be reused between two bots who are in different teams. If bots are in the same team you can reuse their Flows.
- Show a message. Write a message and show it to the user.
- Go to another topics allows smarter design and better use of topics
- End with survey goes to end the conversation session.
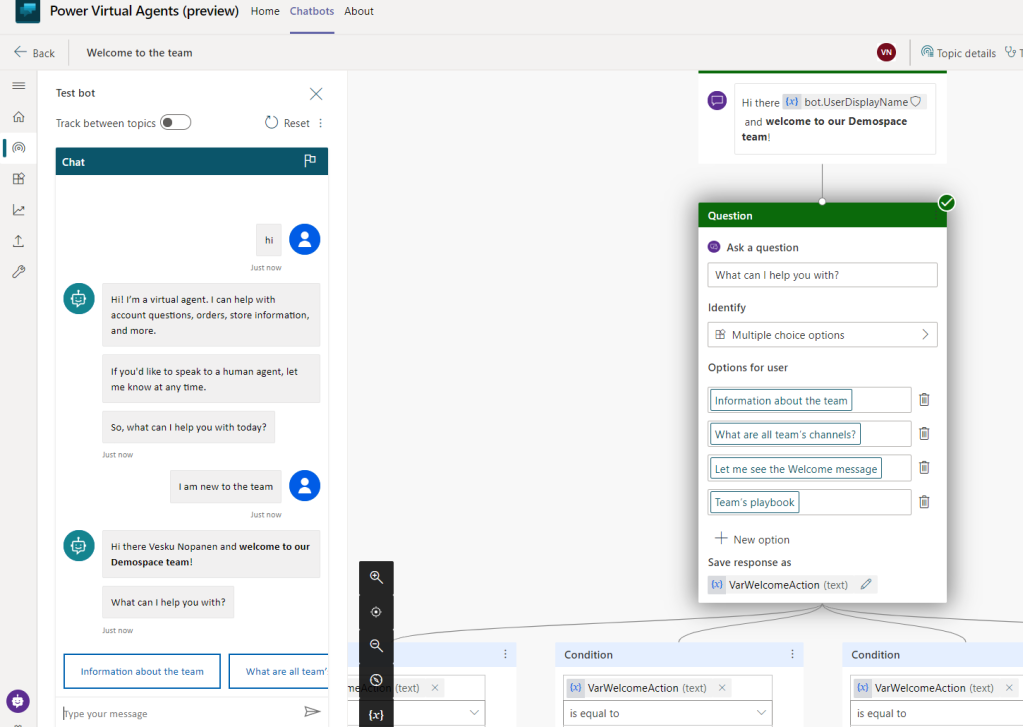
Let’s start with a greeting message.
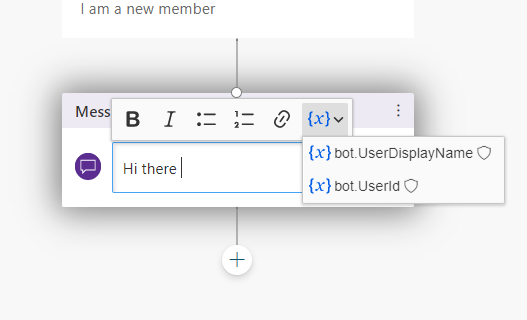

As can be seen the user is already authenticated! Greeting user with the personalized message is as easy as choosing the bot.UserDisplayName from the variables list! After that let’s go on and ask a question:

Multiple choice options is a good one to “pick one topic and we go on from there” which is the most traditional way. You can also save user’s entire response (for example a message to HR) or you can use other types of questions as well: the list is rather long and you can add your custom entities there. We keep this one a simple and just give a few choices:

When we define the variable to save the response we have option to save it so that the answer is reusable across different topics in the bot. This is useful when user is asked to provide information and if that information is already provided it can be skipped. For this particular bot we don’t need to remember the answer.
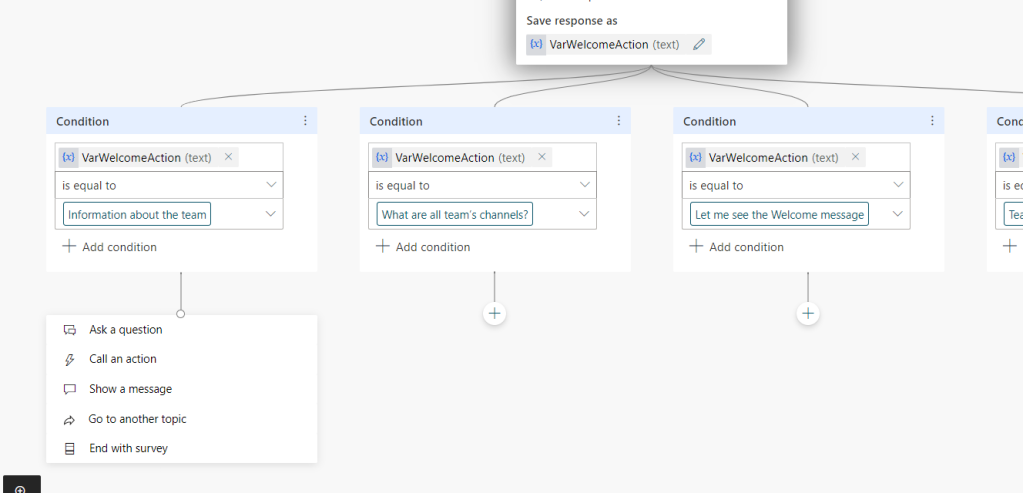
From this point it is just about adding answers to all these sections. Don’t leave conversation flows hanging like in this example.

End the conversation in a structured way using End With Survey. This way sessions end and you can have better statistics how helpful the bot is. If the End With Survey is too chatty you can go to System Topics and edit it’s conversation flow by editing it’s Authoring Canvas.

Yes – it is this simple. Of course creating a bot in just 5 minutes means it doesn’t have much conversation flows. In 10-15 minutes you can already add there several questions and answers using the example above.
Did you remember to save?
Testing the bot
While you are editing the bot you can see the Test bot area on your left.

Let’s give this bot a test.
When you are testing the bot and you have also the Authoring canvas open you can see how the conversation flow is proceeding.

Yes! The bot works and it also recognized me! The end of conversation is indeed chatty.

Publish the bot to the team
First, go back to the bot topics screen.
You have two options how to go to the Publish screen. Choose either one.
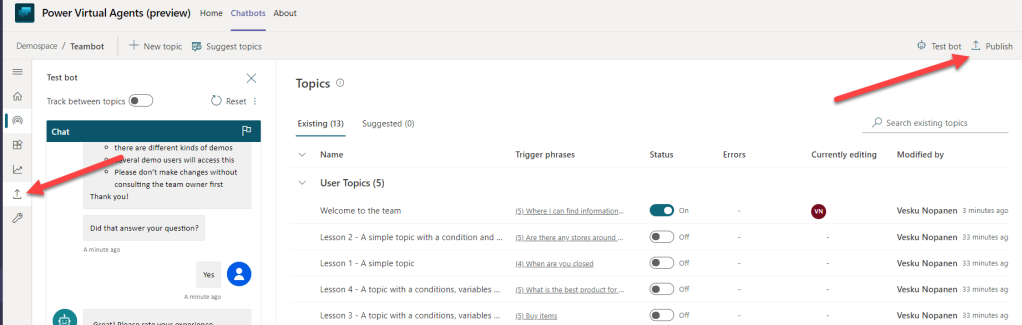
First Publish the bot and then Share it to the team or even to the wider audience (if you have permissions).
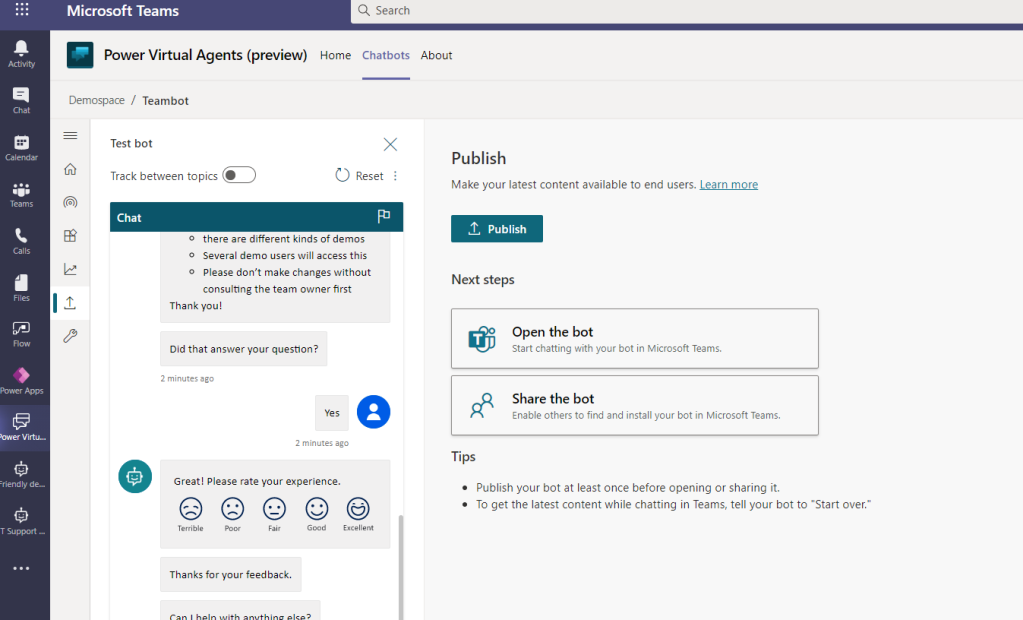
After hitting publish it can take 15 minutes before the latest edits are available in the team.

Clicking on “Share the bot” opens the screen where you can edit Bot details and also share it to your team. Let’s take this route first.
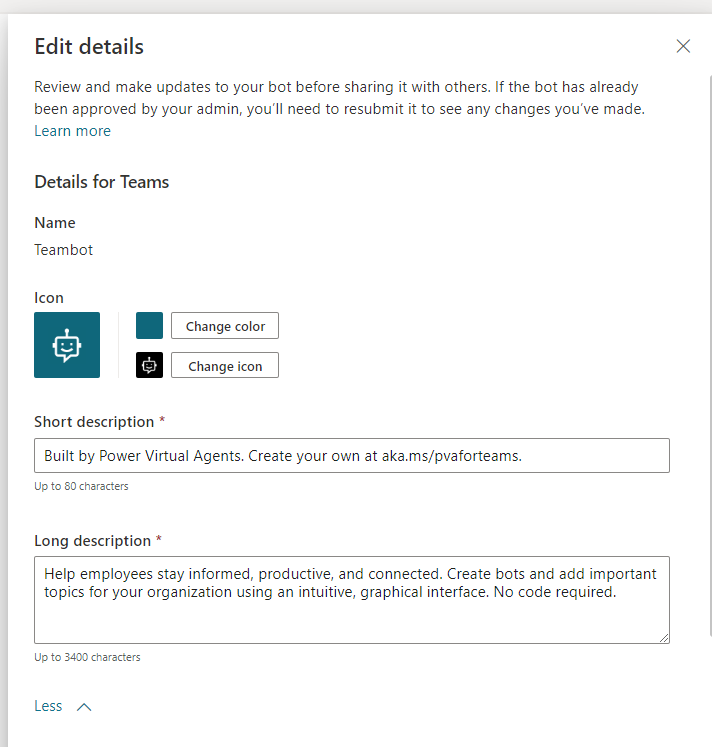
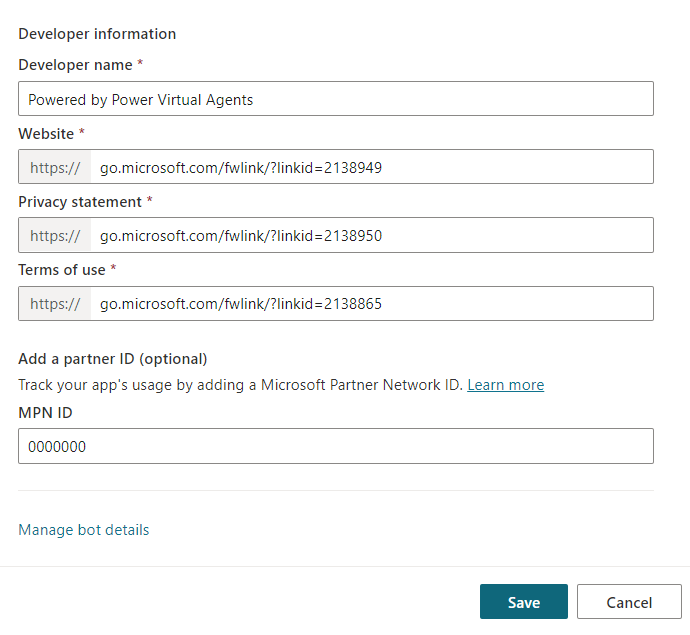
As you can see you can edit the name, description, icon and also the developer information! Going with defaults is ok in the demo but organizations should always fill up Privacy statement and other links with proper ones.
Adding to Teams is very easy


This is not the most clear way when you have lots of users in your team – but it is still something you can instruct to do. Keep reading this blog post: there is a other way to make it more easily available to users in your organization.
And this bot adding screen is where those details like description, privacy policy and terms of use matter.

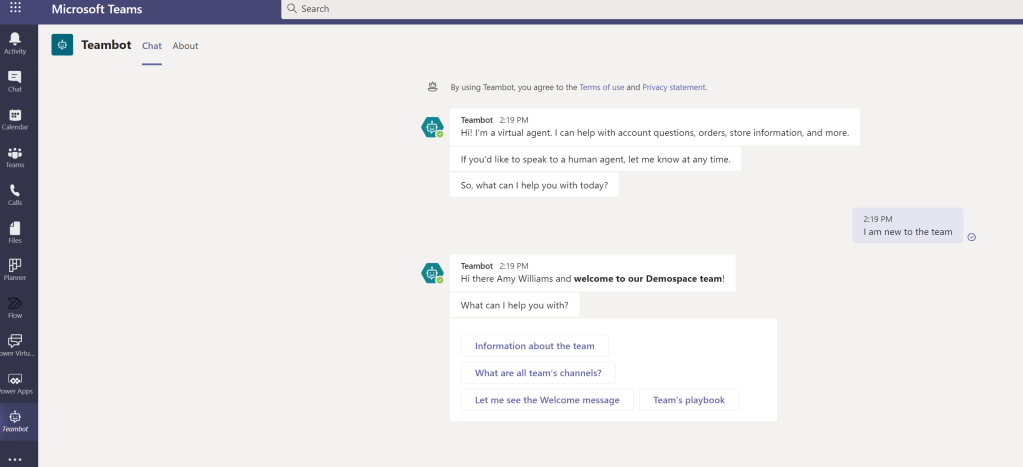
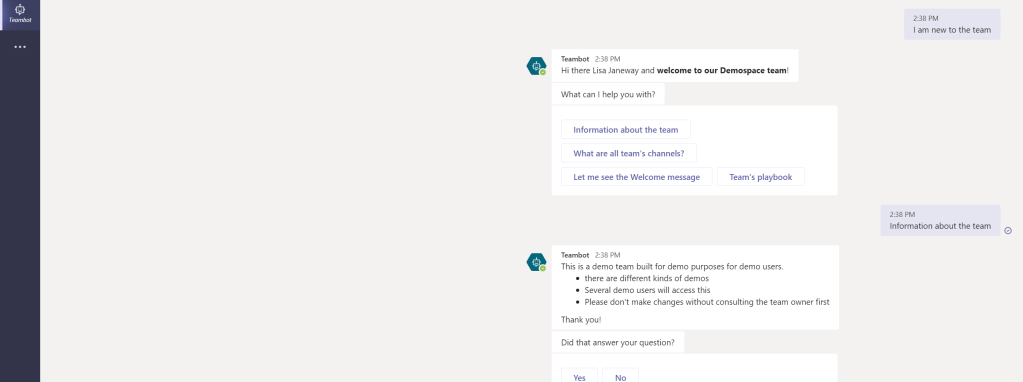
And looking from the eyes of a other user this is how it looks like. And yes – the user is recognized automatically.
Since userID is also available automatically in the Authoring Canvas that information can be used with Call to Action Flows to stay aware of the user.
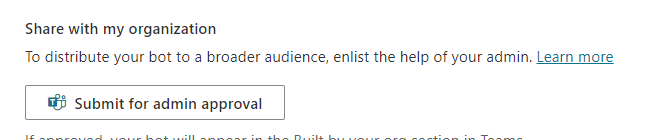
Submit for admin approval
Ok – that was for the team member. How about adding the bot to others (group of people or everyone) in my organization? Let’s share the bot to everyone in my company! For this you will need to inform your Teams Admin about the new bot they need to approve.

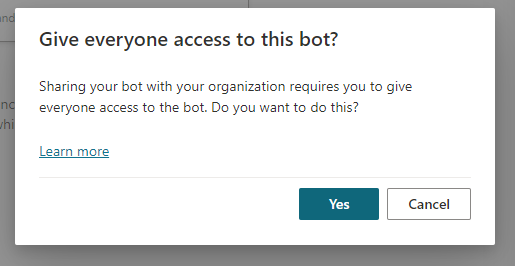
You then can review and edit details before submitting it.

And there is a another final confirmation..
And then it is a waiting game after being in touch with your Teams Admin.

Once the Admin opens the Manage apps-section in Teams Admin and looks for the bot they can see it blocked.

From the app screen they can choose to Publish it.


Meanwhile Admin can go to Teams Apps – Setup Policies and install the app automatically for everyone.


Save the Policy and.. yes – this will take several hours (up to 24) until it affects users.
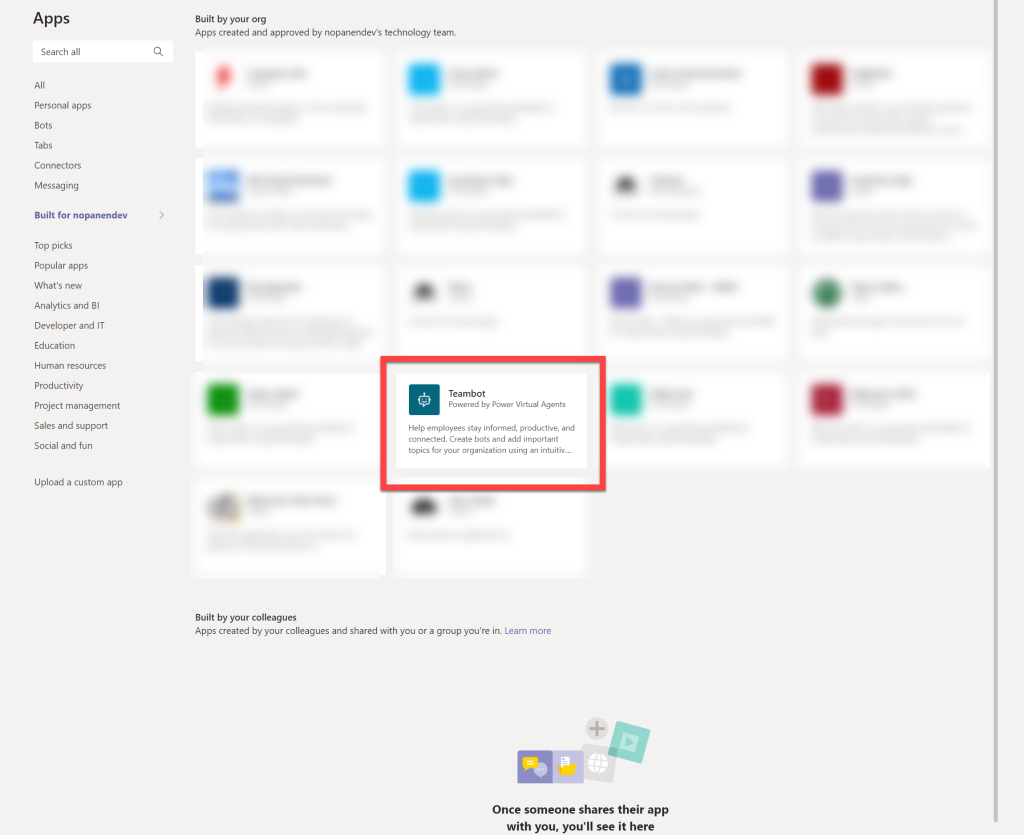
After some time has passed the app is available for users to install. And in case the app was installed to every user using Setup policies they don’t have to even view this screen.
Of course when creating bots that are available for everyone in the company Project Oakdale database can not be used – but there are lots of other useful ways how to use bots in organizations. With the upcoming 25k team member limit it will be possible to create bots for quite a large audience and still use Project Oakdale provided database (it does have limits so plan wisely). Read here to learn more about Project Oakdale limits and differences to Common Data Service.
How about adding Questions & Answers?
Q&A is a very common use case for the bot: answering questions so the real person doesn’t have to. IT and HR can be relatively busy and they don’t work 24/7 so the bot is the excellent way to deliver people answers. If you want you can learn more about QnA Service from here. This is a part that needs some access to Azure Portal as well to create the connection to QnA Maker: be in touch with your IT so they can deliver it. Once you have all the information you can add a Call to Action part that does the QnA Query and delivers the best answer to the user. I am going to be showing how to do this step by step in the future blog post.
The end result can be as simple as this:

You provide the Call to Action (Power Automate Flow) the question text as a parameter and display the result to the user.
The Flow is also quite simple. The most tricky part is not visible: how to create a QnA Maker connection but I will cover that in the future article.
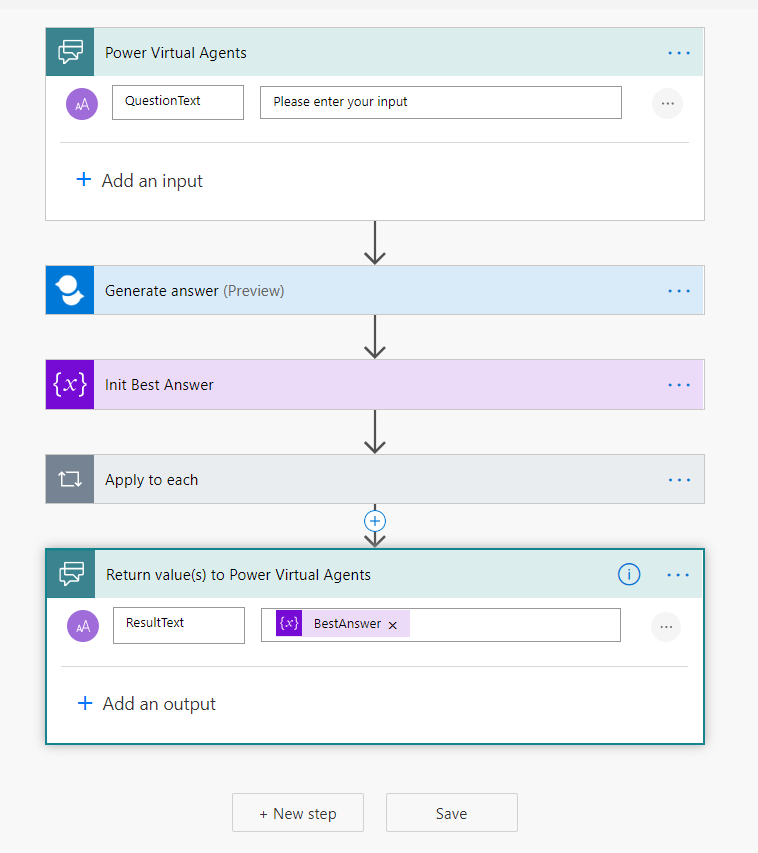
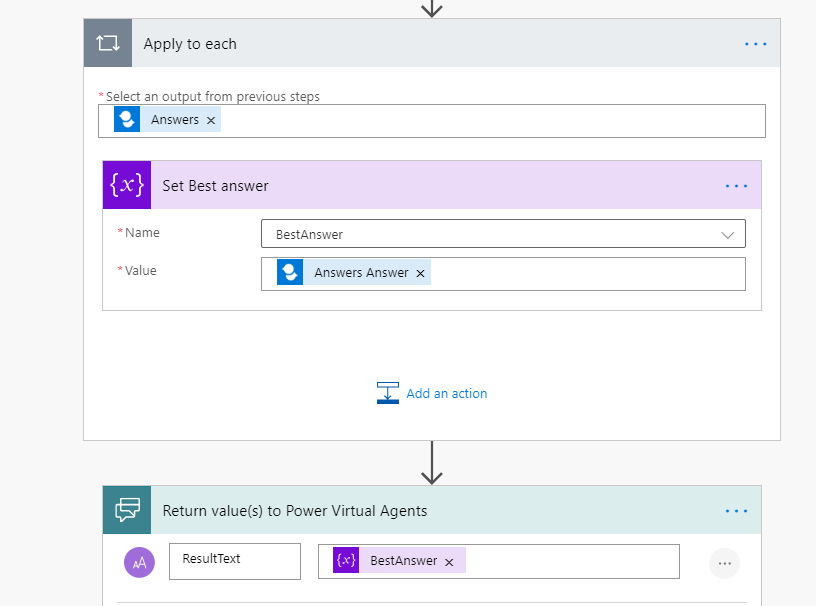
The parameters for input and output are defined in the Flow and question is then passed to the Generate Answer action.

Since we define there is only one answer returned it will make the return result easy one. The Generate always returns an array (list of results) even when only one is defined. So Power Automate will generate a Apply to each loop when doing a variable setting.
Of course you don’t have to use QnA Maker database for answers. It could be looking up answers from a SharePoint / Microsoft List but QnA Maker is way more smart when it comes to finding best results. When a SharePoint list is used you would have to code the logic for getting the answer.
Bot can also book a Teams meeting with your support persons
And yes – in every Bot there is a moment when bot just can’t find the answer. And simpler the bot is the more often you will encounter that. Usually there is a “escalate” option how to be in touch with people directly. But why not book a meeting based on people’s available times in calendars? I will cover this scenario in more step-by-step guide later as well – this is just to show it is possible and for enthusiastic power users a spark to start building their own version even before my blog article emerges. This version is still a super-quick POC that doesn’t do nice time conversions nor return the time for user in their timezone..
Just like with the previous call it is rather easy to call the already created Flow from Power Virtual Agents Authoring Canvas.

In this one also we pass in couple of parameters: The question that was left unanswered and we also pass in the userID that is automatically known by the bot. As a return we get the meeting time and person’s identity who we are meeting with.

- Get user profile (V2)
- Find meeting times (V2)
- Create a Teams meeting

There are also Start and end times for the meeting. The end time is added with a few days to the future and we only return one meeting option to make the Flow easier. This could be used to suggest a few times that were returned to the user and they would choose one.
For the outcome of the Find meeting times you need to do some Parse JSON to retrieve the person and the beginning & end time of the meeting. I reused the SupportPersons variable to set it to the selected support person. I will show more about that in the future blog post.
When you have those it is easy to create a Teams meeting.

And that’s it. There is a Teams meeting added to both user’s and support person’s calendar.
While Power Virtual Agents in Teams have some limits compared to the separately paid version these are very powerful and can be used to empower teams to do much more.
Just remember there is a 500 max limit to Project Oakdale environments so it is a good idea to start educating Team Admins and team owners about these: both limits and possibilities.
In later blog posts I will cover more Power Virtual Agents – like how they can be made more smart and how you can use your own entities. Stay tuned!
For more news check out our resource centre
About the Author:
Principal Consultant and Microsoft MVP Helping and coaching customers to find benefits and value when adopting new tools, methods, ways or working and practices into daily work-life equation. I am always eager to challenge current situation and dig out new possibilities and ways to think and work. In my work I am also an adviser for customers so they can discover best benefits, gain best value & ROI out of chosen tools. My expertise area is Office 365, covering especially Teams, Power Platform (Power Automate, Power Virtual Agents, Power Apps), SharePoint and tools that create a modern workplace solution and practices. Buzzwords and tags that describe what I do: #Office365, #MicrosoftTeams, #PowerPlatform, #PowerAddicts, #SharePoint, #ModernWork, #Adoption, #Teamwork #Flow #GraphAPI #Automation
Reference:
Nopanen, V. (2020). How to: create #nocode bots to teams super-easily in 5 minutes using Power Virtual Agents app in Teams. Available at: https://myteamsday.com/2020/09/30/pvateamsbots/ [Accessed: 24th November 2020].