Hi All. Today we will discuss how to use Lightweight Bot and Azure Automation to interact with Teams Call Queue (with examples) Have you ever wondered how to give to end users a way to interact, change or update a Teams Auto Attendant or a Call Queue without needs to use the Teams Admin Center or PowerShell and without any Admin roles?
The first example of that needs is an “On Call Service” Teams Call Queue that some users have to transfer to different mobile numbers every shift change.
The second example is an emergency trigger that a user can run to transfer every Teams Call Queue calls to a different Call Queue.
In this article I will show how to achieve that using Azure Automation Runbooks and a MS Teams Lightweight Bot, nearly for free!

In this article you will find:
- Azure Automation setup
- Example #1: “On Call Service” Teams Call Queue redirection
- COMING SOON -> Example #2: Emergency Call Queue transfer to a different Call Queue
Azure Automation setup
1. Azure Automation Account creation
The first step is to create an Azure Automation Account in your Azure subscription.
- On the Microsoft Azure portal click on Create a resource

- Search for Automation and click Create
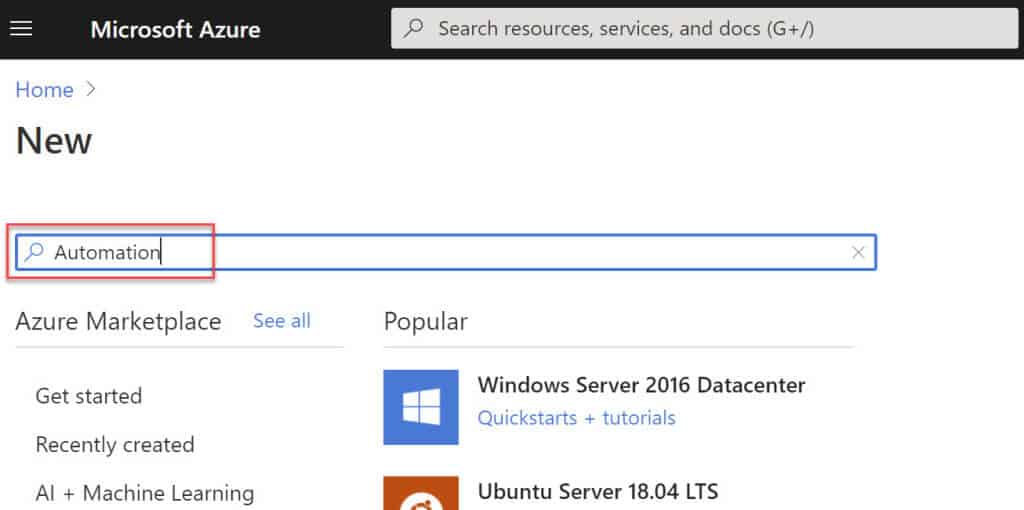

- Enter the information like the example below
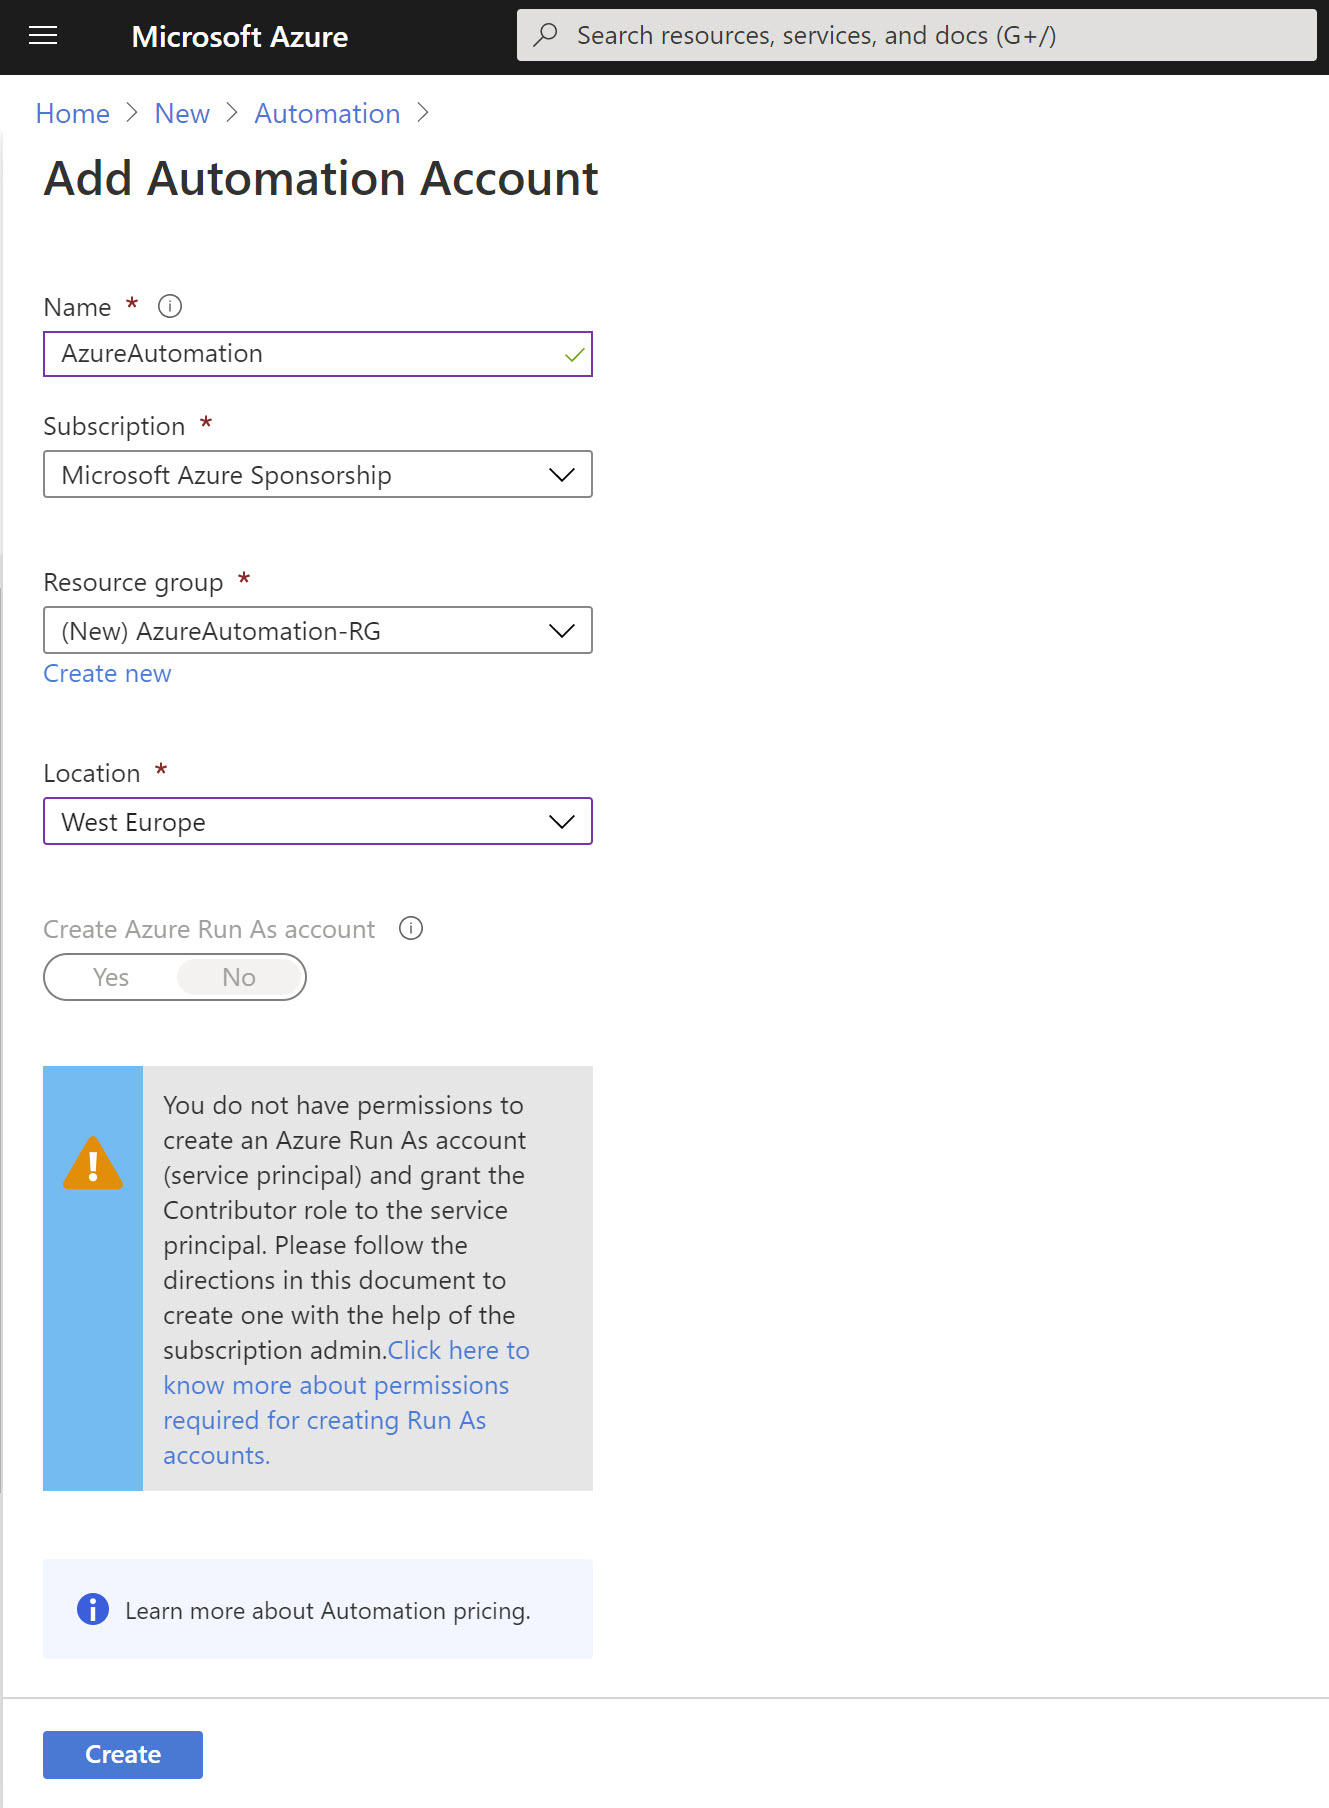
- The new resource will be created in few seconds

2. Add Teams PowerShell Module
Now that we have an Azure Automation Account, we have to add the PowerShell module used in our Runbooks.
- Go to the Azure Automation Account just created, scroll the left menu to Shared Resources -> Modules.
We need the Teams PowerShell module, that is not present by default.
To add it, click on Browse gallery

- Enter “teams” into the search area, the MicrosoftTeams PowerShell module will appear. Click on it

- When you are into the MicrosoftTeams PowerShell module, click on Import then OK


- You will see the message “Module import is in progress”

- If you return to the Modules page, you will see that the MicrosoftTeams module is present with the Import Status

- After few minutes the Status will change to Available

3. Add Azure Automation Credentials
What we need now is a set of Credentials to be used by Azure Automation into our Runbooks.
In this example I use a technical account with these (recommended) settings:
Sync Status: Cloud only
Username format: @yourdomain.onmicrosoft.com
Password: extremely complex and set to Never Expire
Roles: Teams Service Admin
Licenses: none
MFA: not supported
It’s very important to understand that Runbooks do not have directly access to Account Credential.
Username and Password are set only in the next step and will never be directly used in the Runbooks
- Go to Credentials and click on Add a credential

2. Enter the information to create a new Credential set.
The value entered in the Name field will be the name of the Credential set and it will be used in the Runbooks

3. Now you have a Credential set to be used your Runbooks.

Example #1: “On Call Service” Teams Call Queue redirection
The first example of that needs is an “On Call Service” Teams Call Queue that some users have to transfer to different mobile numbers every shift change.

1. Call Queue settings and Identity
I’ll not cover how to create a Teams Call Queue in this article, if you need information on that process follow this article in Microsoft Docs: Create a call queue
Note: remember to assign a PSTN Usage Policy to the Call Queue Resource Account, with the Grant-CsOnlineVoiceRoutingPolicy cmdlet, to allow outbound call from the Call Queue to the PSTN.


Before we can proceed to the Runbooks step, we need the Identity of the “On Call Service” Call Queue.
To obtain it, connect to Microsoft Teams via PowerShell (more information here), run this command and copy the Identity value of the Call Queue.
Get-CsCallQueue | select Name,Identity
2. Runbook and Webhook setup
- Go to Azure -> Azure Automation Account -> Process Automation -> Runbooks -> Create a runbook -> insert the Name and select PowerShell as Runbook type -> Create

- Copy and Past the following code into the Runbook, be sure to replace <AzureAutomationCredential> and <CallQueueIdentity> with your own values.
param
(
    [Parameter (Mandatory = $false)]
    [object] $WebhookData
)

# Retrieve Queue Number from Webhook request body
$Body = (ConvertFrom-Json -InputObject $WebhookData.RequestBody)
$Body.Text -match "(\d+)"
$NewQueueNumber = $Matches.0

# Authenticate to Teams
$Credential = Get-AutomationPSCredential -Name '<AzureAutomationCredential>'
$Session = New-CsOnlineSession –Credential $Credential
$Output = Import-PSSession $Session

# Set Queue Number
Set-CsCallQueue -Identity <CallQueueIdentity> -TimeoutActionTarget "tel:$NewQueueNumber"
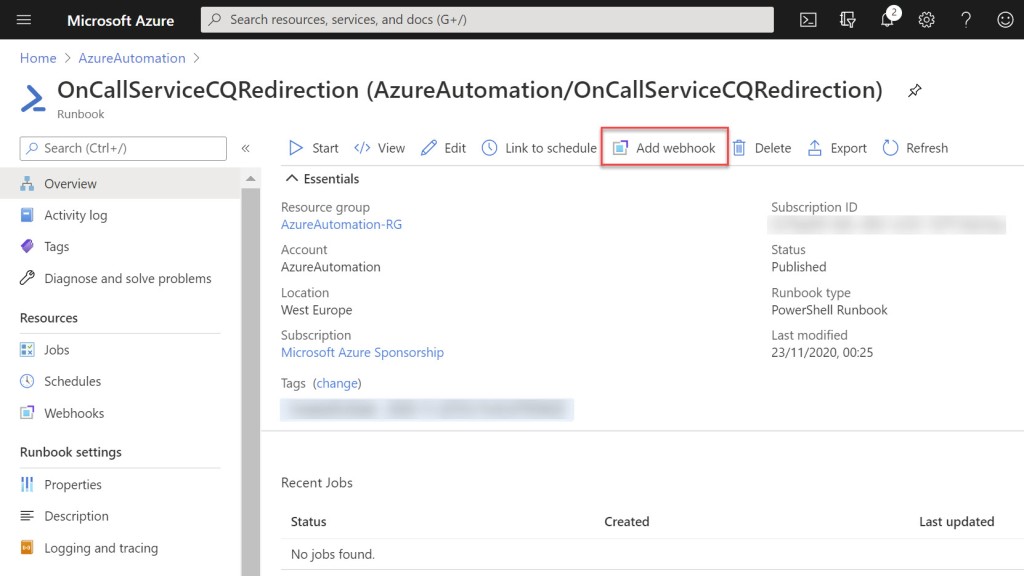
- Click Publish to complete the Runbook creation

- In the Runbook page, click Add webhook
- Follow the sequence, enter the Name you prefer (I suggest to use the same name for Webhook and Runbook), be sure to raise the Expiration data and copy the Webhook URL to a safe place (there is no way to retrieve it later)

3. Ligthweight Bot setup (outgoing webhook)
The last step is to add a Microsoft Teams Lightweight Bot (outgoing webhook) to a Team, normally this is the Teams used by the On Call Service Operators and Managers.
It’s important to undersand that everyone that can access the Team where you will add the Bot, will be able to trigger the Bot and change the Call Queue settings.
You can find more information on outgoing webhook here.
- Open Microsoft Teams and enter the designated Team -> click 3 dots next to the Team’s Name -> Manage team

- Click on the Apps Tab then on Create an outgoing webhook in the bottom of the page.

- The Name of the Lightweight Bot will be the command used in Teams to trigger the Runbook, so choose it wisely, it should be easy to remember for users.
In this example I use TransferTo as the name of the Lightweight Bot, so users will invoke it with @TransferTo <mobile#>
Paste the Webhook URL into the Callback URL field then click Create

- Even if we will not use it, copy the Security token when appear and store it.

- The Lightweight Bot (Outgoing Webhook) is ready and listed in the Apps Tab

4. How to use it
One of the most important aspect of this solution is that it’s very easy to use.
The On Call / On Duty Operator that needs to receive calls on his mobile phone number (for example 1234567), it will simply have to write the name of the Lightweight Bot and it’s mobile number, for example
@TransferTo 1234567
To be sure, wait 30-60 seconds then verify that incoming calls to the Call Queue will be redirect to On Call / On Duty Operator mobile number.
That’s it.

Note: The Outgoing Webhook will always reply with the message “Sorry, there was a problem encountered with your request”. This is an expected behaviour and it’s not related to any specific problem. Simply ignore it

5. How to check it
- If you want to check what happened, open the Azure Automation Runbook, you should see the list of recent jobs, status and time.
Click one to see details

- The Job Input details will show you the WEBHOOKDATA arrived from Teams Lightweight Bot (you will see the mobile number entered after the Bot name)

- The Output details will show you the Set-CsCallQueue command results with the value set in the TimeoutActionTarget field

- In All Logs you should see 0 Errors and 0 Warnings

- In the Teams Admin Center -> Call Queue settings, you should see the mobile number entered by the last On Call Operator.

About the Author:
Microsoft Office Apps & Services MVP
MCSE | SfB and Teams Enterprise Voice Specialist
Ribbon SBC | KalliopePBX | DECT Specialist
Cloud Video Interop Solutions | EICC Solutions
Reference:
Vitali, L. (2020). How to use Lightweight Bot and Azure Automation to interact with Teams Call Queue (with examples). Available at: https://lucavitali.wordpress.com/2020/11/23/how-to-use-lightweight-bot-and-azure-automation-to-interact-with-teams-call-queue/ [Accessed: 27th November 2020].
Check out more great Microsoft Teams Content here or join our mailing list to stay up to date.