Background
I just wrapped up a project where I created a company store application using a combination of SharePoint (for the back-end lists), PowerApps (for the front end interface) and Flow (for the workflow/business logic). I should probably do a detailed video showing off the solution as a whole at some point but for now, I wanted to highlight one aspect of the solution. One of the requirements for the store app was to be able to easily mark an order as shipped and enter a tracking # which will automatically notify the user that their order was shipped and update the order status to shipped.
The Set Up
All of the orders are stored in a SharePoint list. This list has fields for an Order #, Ordered By, Ordered Date, etc as seen below:
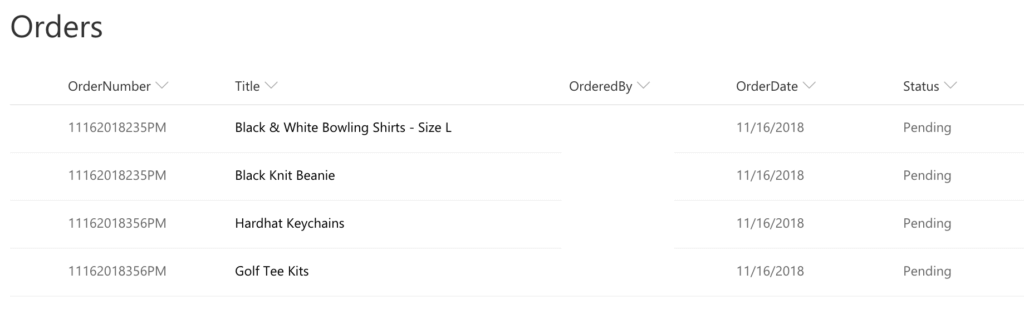
Orders
The goal is to have a simple button right on this screen that the order manager can click which will prompt them to enter the order tracking # and automatically kick off a Flow to notify the person who ordered the item to let them know it has been shipped.
Building the Flow
The first step to make this work is to build out the Flow. In Flow, we’ll create a new blank Flow with the trigger being “SharePoint – For a Selected Item”. For this trigger, we want to add an Output called “Tracking #” that is a string type. This will prompt the user to enter in a Tracking # when they manually execute this Flow.
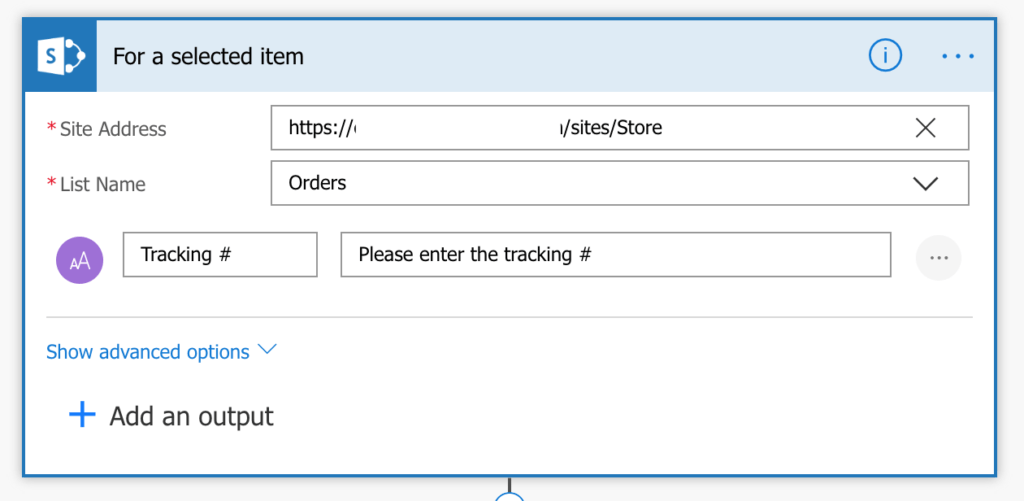
For a selected item
Figure 2 – For Selected Item Trigger
The “For Selected Item” Trigger does not give you any metadata from your SharePoint item. We need to retrieve the metadata such as Ordered By and Ordered # so we can use that in the email we will need to send to the person who made the order. So, to get the metadata, we need to insert a “SharePoint – Get Item” Action.
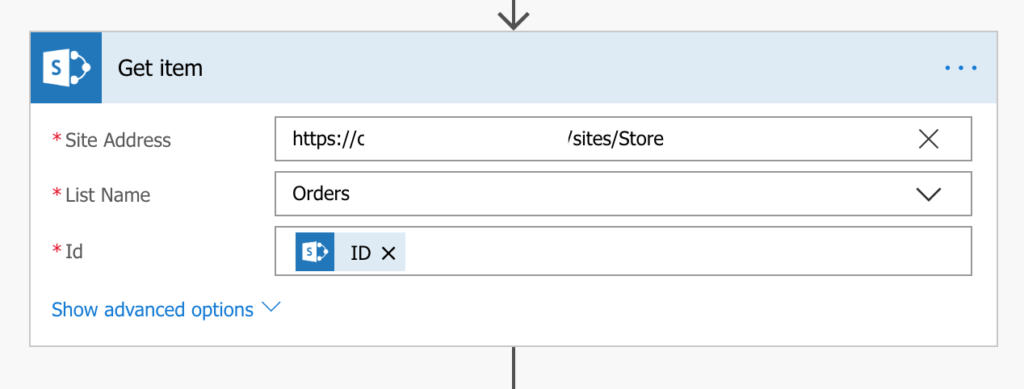
Get item
Figure 3 – Get item action
Now that we have the metadata, we need to insert a “SharePoint – Update Item” action so that we can mark the Status of this item to Shipped and add in the shipment date and tracking #.
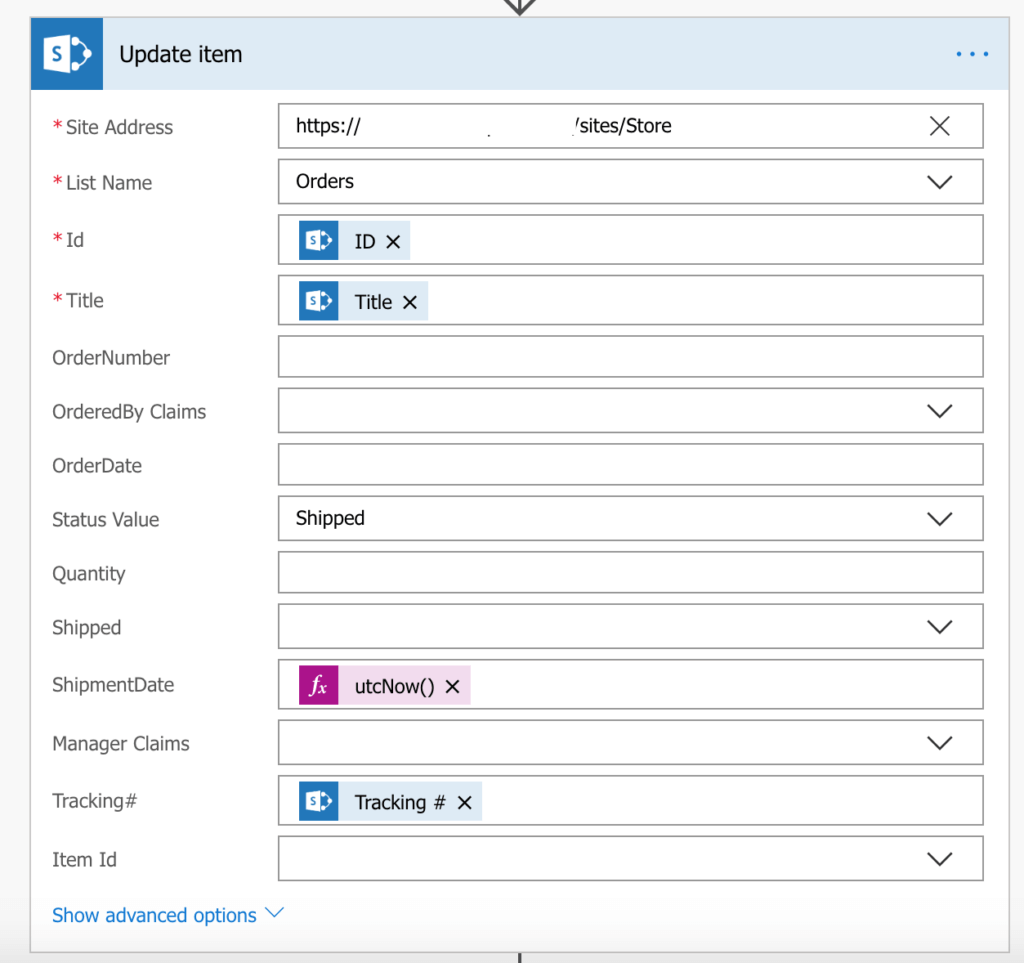
Update item
Figure 4 – Update item action
The last step of the Flow is to insert a “Send Email” action so we can notify the user that their order was shipped.
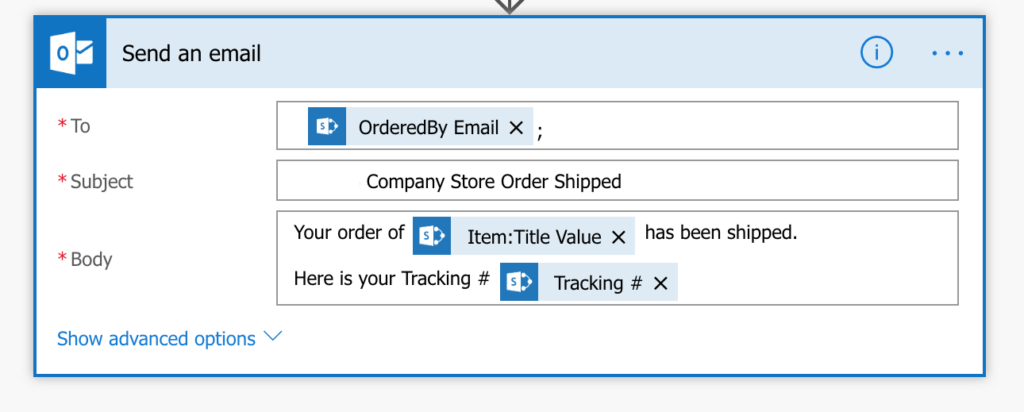
Send an email
Figure 5 – Send Email action
Executing the Flow from SharePoint
Now that we have our Flow built, we need to figure out how to execute that from our Orders list. To accomplish this, we can take advantage of the SharePoint Column Formatting functionality. Column formatting is a new feature for SharePoint Modern lists that enables you to insert JSON to change the look and feel of your SharePoint lists. One of the things you can do with this is add a Hyperlink in a column which can execute a Flow. You can read more about SharePoint View and Column Formatting here: https://docs.microsoft.com/en-us/sharepoint/dev/declarative-customization/view-formatting
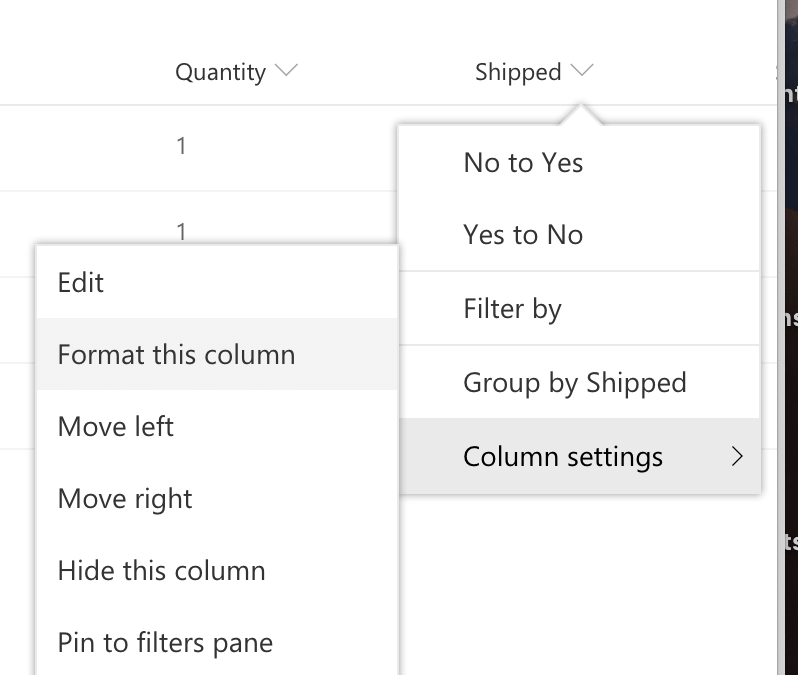
In the SharePoint Orders list, I added a Boolean field called “Shipped”. We will apply our Column Formatting to this field to render it as a hyperlink that kicks off the Flow. To apply Column Formatting, click the arrow next to the Shipped field we created early and select “Format this Column”.
Column settings
Figure 6 – Column Formatting in SharePoint
A section will pop up on the right with an empty text box for you to paste in the JSON. We will paste in the following JSON into that block.
{
  "$schema": "https://developer.microsoft.com/json-schemas/sp/column-formatting.schema.json",
  "elmType": "span",
  "style": {
    "color": "#0078d7"
  },
  "children": [
    {
      "elmType": "span",
      "attributes": {
        "iconName": "Flow"
      }
    },
    {
      "elmType": "button",
      "style": {
        "border": "none",
        "background-color": "transparent",
        "color": "#0078d7",
        "cursor": "pointer"
      },
      "txtContent": "Mark as Shipped",
      "customRowAction": {
        "action": "executeFlow",
        "actionParams": "{\"id\": \"3460209a-1b44-43bf-bd51-81e2dde89264\"}"
      }
    }
  ]
}

The only thing that you will need to change if implementing this yourself is the GUID in the “actionsparams” section to the GUID of your Flow and the text in the “txtContent” section if you want it to say something else.
Click “Save” to apply the formatting to the Shipped column. Now you will see the Shipped column has a hyperlink with the text “Mark as Shipped” as seen below:
Orders
When a user clicks the hyperlink a dialog box will open on the right hand side prompting for a tracking #.

Run flow screen
The user can then click “Run Flow” which will execute the Flow and send the email.
About the Author:
Microsoft MVP. Owner of ThriveFast. Process Automation Princess. SharePoint Siren. Karaoke Queen. A woman who codes, but teaches others to build apps and automation with zero code.
Reference:
Dunnam, A (2018). Manually Executing a Flow from SharePoint with Column Formatting. SharePoint Siren [blog]. Available at: hhttps://www.sharepointsiren.com/2018/11/manually-execute-flow-from-sharepoint/ [Accessed 20th December 2018]