Requirements: Before reading the article please make sure that you have System Adminstrator role in your environment because it’s important to registering an application to Azure Active Directory — a.k.a Azure Entra ID.
Why do you need create custom connector?
Sometimes you need to use some APIs or 3th party services to using your canvas application or Power Automate Flow which haven’t being on Microsoft’s existing connection list so, custom connector helps to communicate with that services.
Microsoft Graph API
If you have no idea about what Microsoft Graph API is, please visit official documentation. Also, you can experiment the APIs via Graph Explorer. It lets you see the result of the APIs.
We will use Microsoft Teams (beta) API which name is replies to a message in a channel. This API provides a replies messages that were written to a Teams channel message by someone.
App Registeration on Azure Active Directory
Before starting create a custom connector in an environment, you need to register an application via Azure Active Directory, it’s important to providing secure connection with the Teams API.
Firstly, you need to go to Azure Portal, and you can directly search within Azure services as App Registeration.
Click on New Registeration
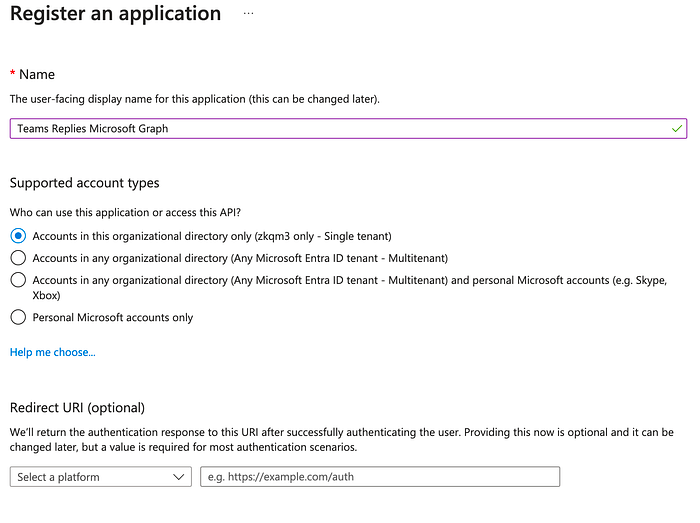
I will not provide a Redirect URI now. Click on Register
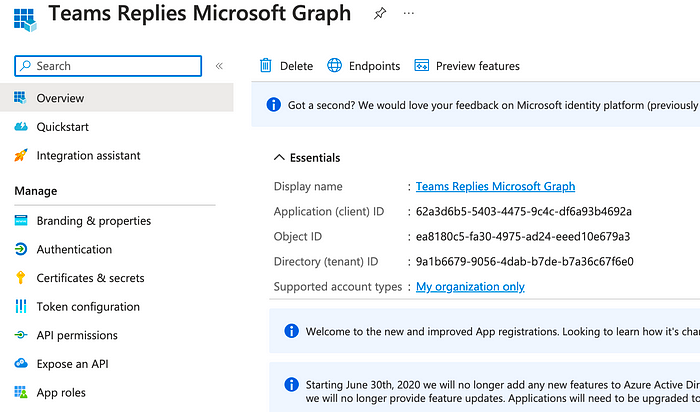
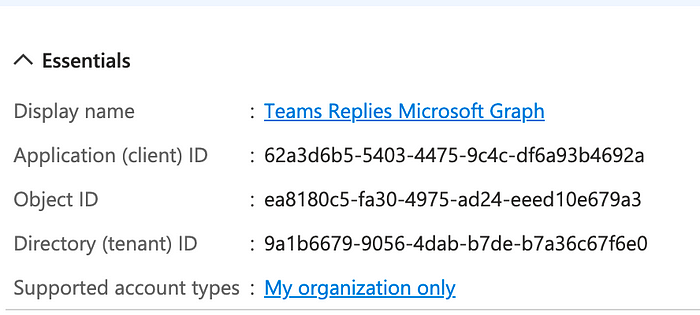
After click on register button, you are going to see the screen. We have three important section to save some of the important and required information for next steps: Save the information from Certificates & secrets, provide required permissions via API permissions tab, and lastly save the Application (client) ID
Please don’t try to use showing information because it’s just an example. It is not going to work if you use it. Please provide your own.
Note that Application (client) ID, it’s important to provide the ID information during custom connector creation.
Click on Certificates & secrets tab
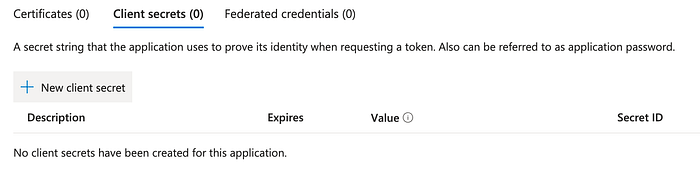
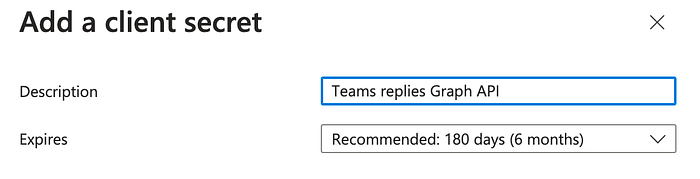
Click on Add
After creating client secret, your secret ID and value will ready to use. Please note that secret value to prevent miss it for later usage.

Give required permissions
Don’t forget to give a required permissions to properly using the API, if you don’t provide the required permissions, the app wouldn’t reach to the information that you register.
Let’s have look what we should provide to properly use the replies to a message in channel API in your environment. There are two ways to know that, you can directly check the related API documentation or look at the Graph Explorer Modify Permission tab
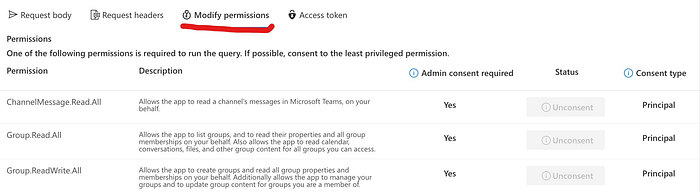
We should provide ChannelMessage.Read.All, Group.Read.All, Group.ReadWrite.All permissions to properly use the API.
Also, please don’t forget this API in beta now so, may have some unexpected conflicts happened at some complex scenarios.
After providing required permissions, it should look like this
![Click on Grant admin consent for [YOUR_TENANT _NAME]](https://miro.medium.com/v2/resize:fit:700/1*RIx42dlto0PCmA75dyEwPg.png)
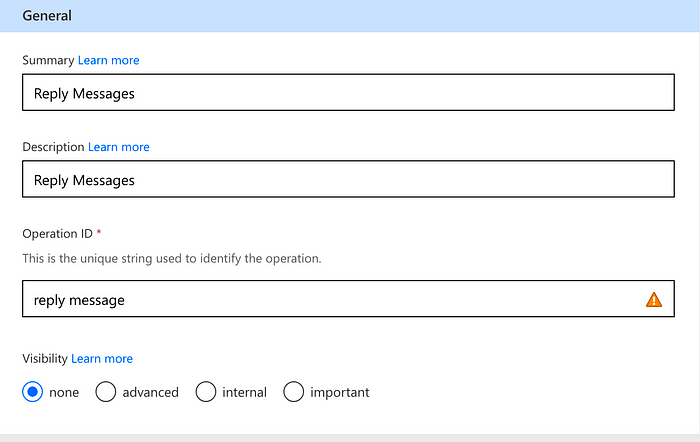
Now, time to create a new blank custom connector. Let’s have a look how to create a custom connector from scratch
Creating Custom Connector
Go to make.powerapps.com
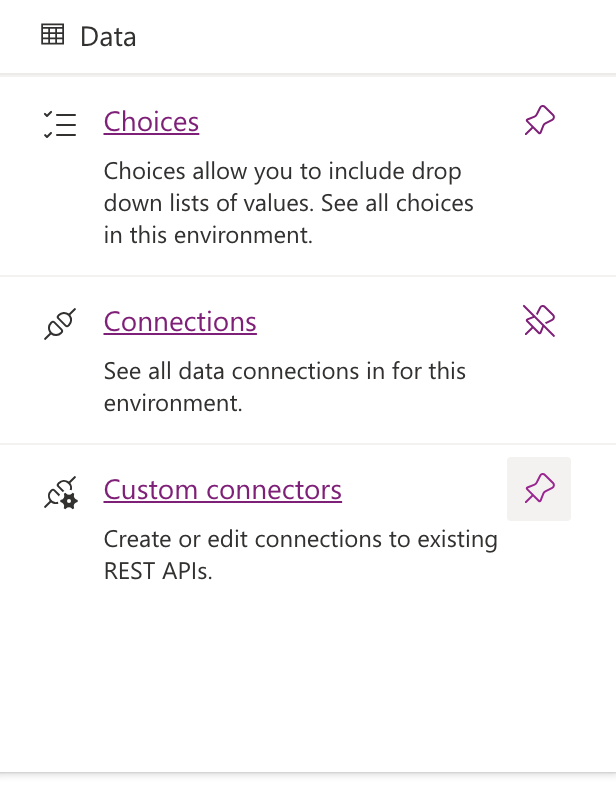
You can find custom connectors from More section. Click here and Discover all..
You will see the custom connector in Data section
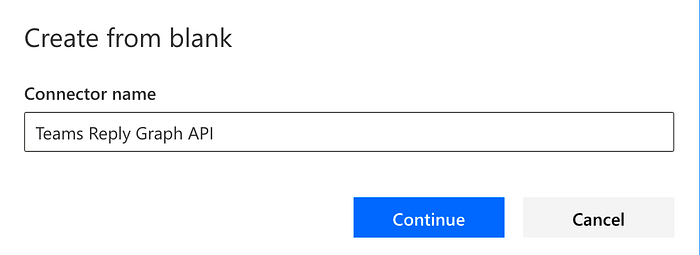
After navigate custom connector section, click on New custom connector -> Create from blank

You can configure connector icon, icon background-color or Description. We just consider required fields that we should provide to the connector.
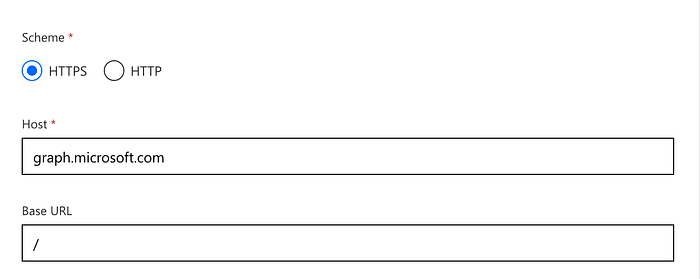
Provide Host: graph.microsoft.com
Click on Security
Security tab is very important because we will provide authentication information that we previously created on Azure Active Directory via app registeration
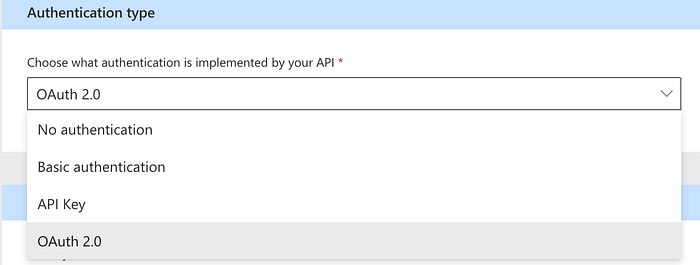
As you can see, there are plenty of Authentication types available on the list. We are going to use OAuth 2.0. This connection type lets you use Azure Active Directory connection between your app and the API
You should provide required fields (Client ID, Client secret and Resource URL)
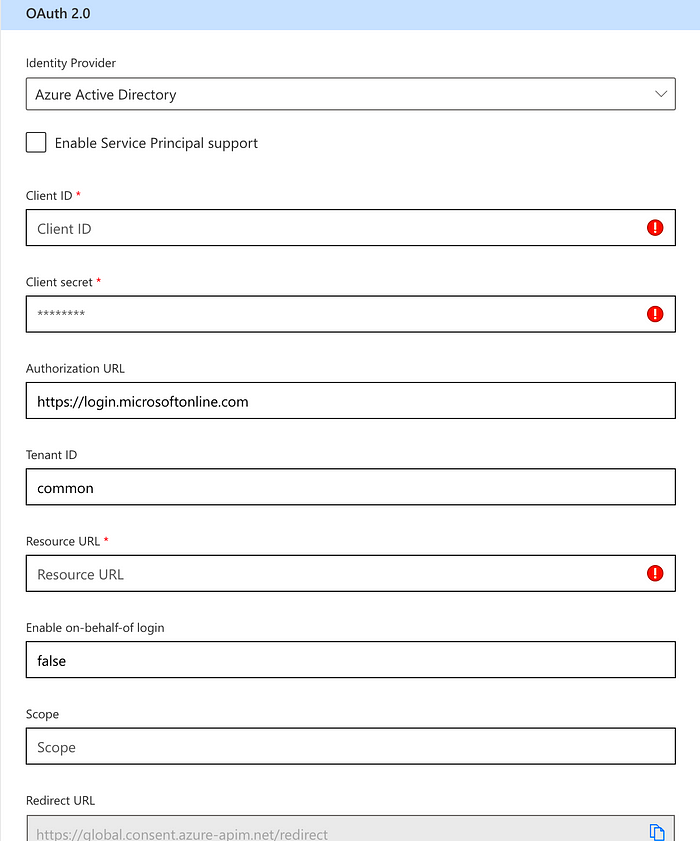
You can find Client ID your app’s Overview screen
Click on Definiton
You will provide the API information like URI, method, parameters etc.
In request tab you should provide the URI, methods, headers.
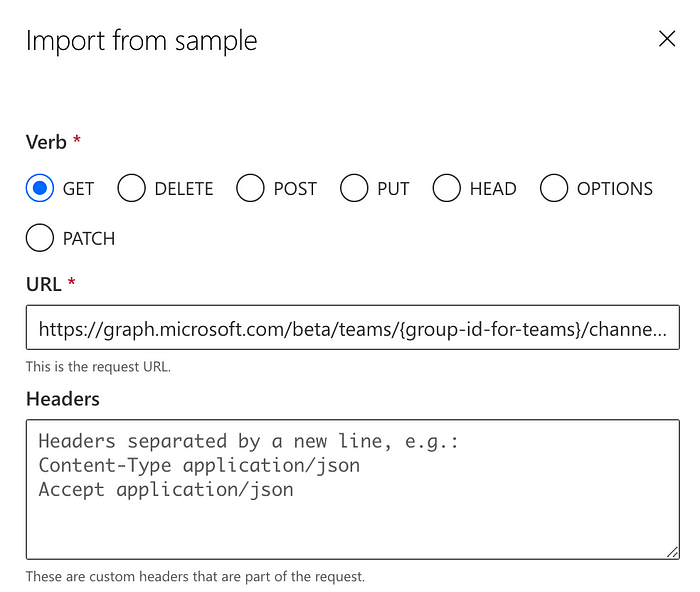

You will realize the Path section will be automatically fill after you provided method and URL
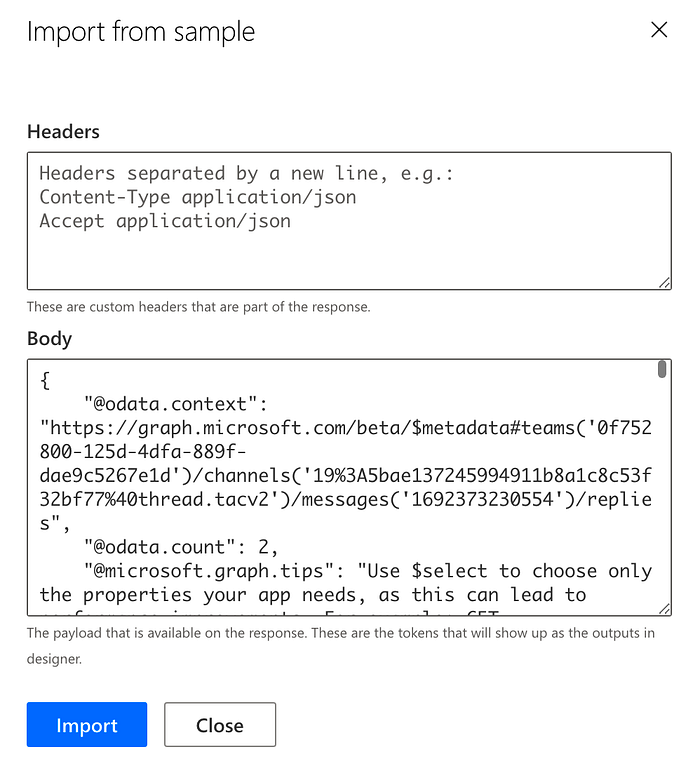
Same way you should provide response that returns from API. You can find the response on Graph Explorer page and can directly paste it here.
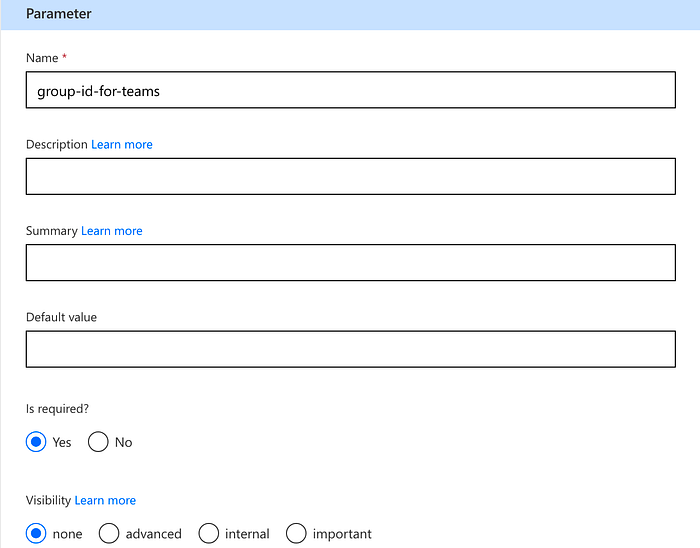
Lastly, you may check the parameters information in order to make sure that it properly configured:
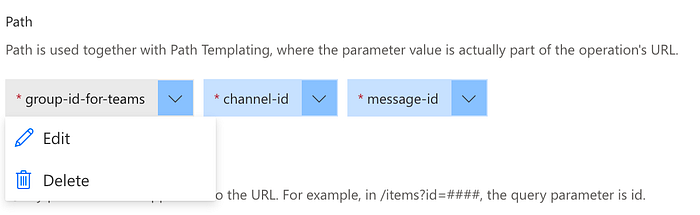
Make sure that Is required set as Yes
Just one thing to do creating connection is crucial part of the using the custom connector, otherwise it will not let you save the custom connector configuration
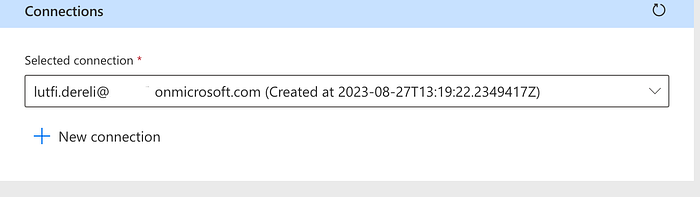
You will see selected connection as it is. If you can not see any connection, please create a new connection.
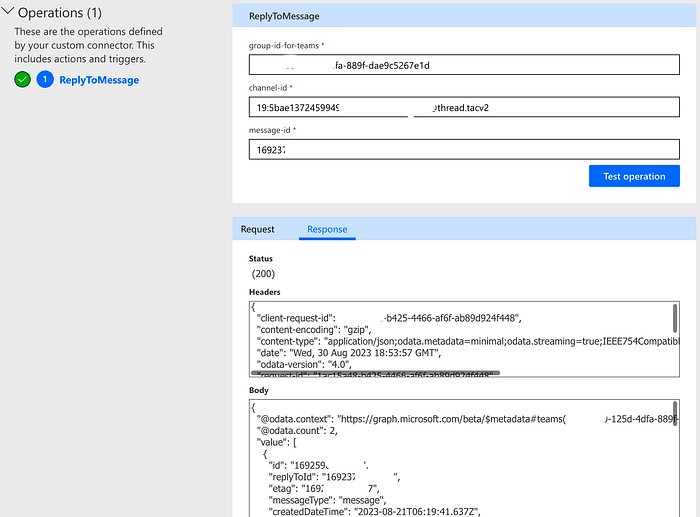
Test your custom connector
You are ready to use your brand-new custom connector now. Just provide the related parameters and see the result!
Now you can use your custom connector in Power Apps and Power Automate on your environment.
Thanks for reading.
About the Author
Power Platform Developer | Digital Citizen | Data Enthusiast | TechInLove —
Reference
Dereli, L., 2023,Power Apps: Creating Microsoft Graph API custom connector, Blog.gopenai.com, Available at: https://ltfdre.medium.com/power-apps-creating-microsoft-graph-api-custom-connector-56d867fa795c [Accessed on 12 September 2023]
STAY UP TO DATE
Catch up on the latest blogs, eBooks, webinars, and how-to videos.
Not a member? Sign up today to unlock all content.
Subscribe to our YouTube channel for the latest community updates.