This is part one of a complete solution that I will post on how to use Power Automate custom connectors with CDS.
Power Automate is getting more and more part of the daily processes of Dynamics CRM, with the ability to use hundreds of connectors to get and send data across platforms.
Recently I had to prepare a PoC (Proof of Concept) of connecting GoToWebinar with Dynamics CRM. The requirements were simple, to be able to get the webinar details, to get the registered users, and to get the attendees. Of course, the process has to check if the GoToWebinar user existing in CRM or not and if it doesn’t do create it. Later on, this data will be used by the Marketing team for automation after the webinar ends.
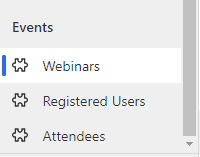
What I did in CRM was, first to create three new entities: Webinars, Registered Users, and Attendees.
Out-of-the-box, there is a connector in Power Automate for GoTo Webinar, which is 50 percent of the solution, so the rest was to build to logic.
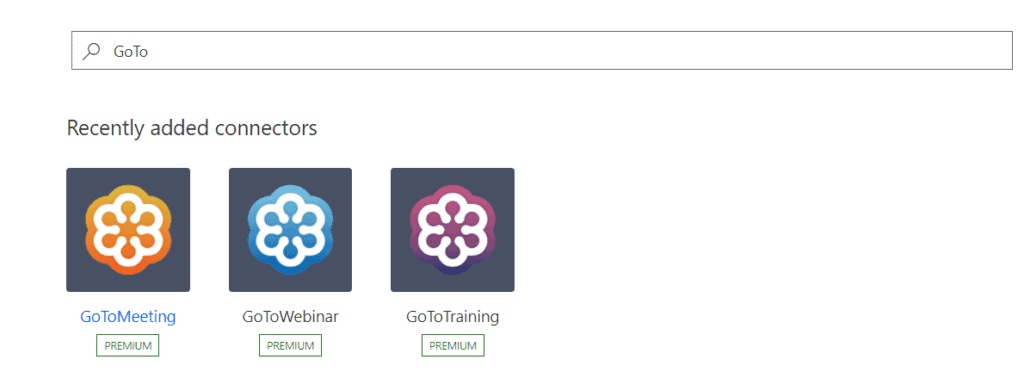
But when I start building the flow, I’ve noticed that there are certain things that I cannot retrieve from GoTo Webinar. For example; the list of attendees, the list of sessions, session performance (such as interest rate, number of registrants and attendees, and etc.)
The solution is to build my own Custom Connector in Power Automate. For those of you who are scared of this, and think that it is something that requires developer skills, I will say, DON’T BE! It is easier than you think, and now I’m going to guide you through the process of creating a Custom Connector in Power Automate.
- First thing is to create a free trial account for GoTo Webinar.
- Once you have the account you need to logging to LogMeIn Developer’s page
- Once you have an account, you need to create a new OAuth Client
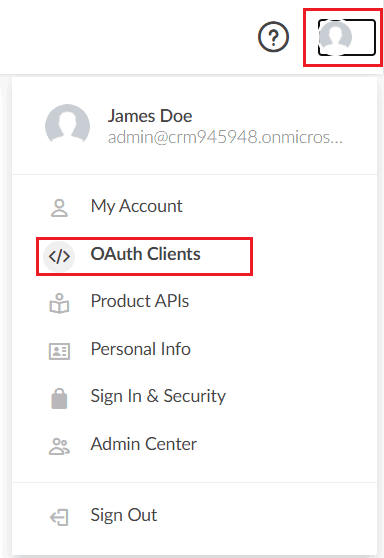
- Fill in the details of the client such as Name and Description, and add some sample Redirection URL (https:demo.com). Later on, you will put a real URL generated by Power Automate.

- Next, you will select the Scopes of the Client (a.k.a what data you will need from a client (for example; user information, GoTo Webinar sessions, etc.) If you are not sure, just select all.

- The last step is very important: make sure you’ve saved in a .txt file your client details such as Client ID and Client Secret. The client secret is the most important here, as once you proceed further, you cannot retrieve it again, and therefore you will need to create a new client.

- When you are ready, confirm that you have stored the client secret somewhere else, and click done.
You should see something like this:

- Now, go to Power Automate, go to Data -> Custom Connectors

- Select New Custom connector -> select from blank, and give the connector a name (GoTo Webinar Custom)
- You can upload some pictures for your connector to look more presentable for the end users when using them in a Flow. The rest of the properties are as follow:
Scheme: HTTPS
Host: api.getgo.com
Base URL: /
Click Security to proceed further

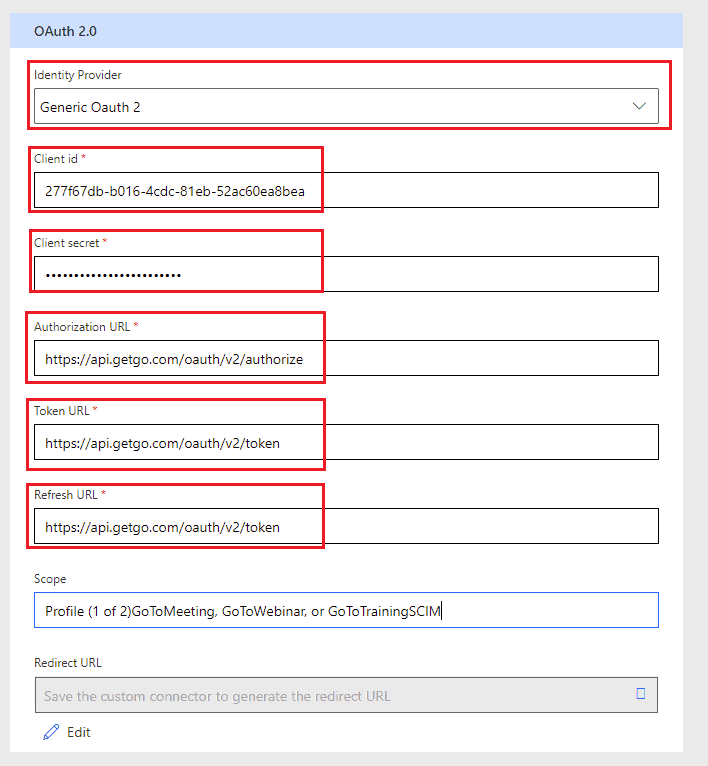
- Next, you need to specify all the communications URLs and add your Client details as follow:
Identity Provider: Generic OAuth 2
Client ID: <ID from https://developer.goto.com/
Client Secret: <Secret that you’ve saved on .txt file earlier>
Authorization URL: https://api.getgo.com/oauth/v2/authorize
Token URL: https://api.getgo.com/oauth/v2/token
Refresh URL: most of the time is the same as the Token URL unless specified otherwise by the provider https://api.getgo.com/oauth/v2/token
Scope: can be also found in the Client details in https://developer.goto.com
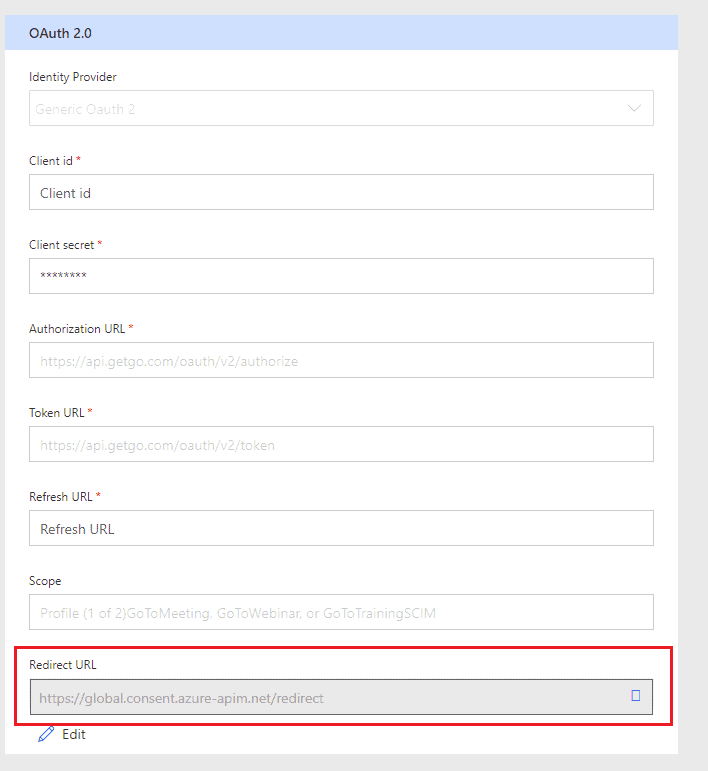
- Return back to the Security page, and at the bottom of the page, you will see that a Redirection URL has been generated. Copy the URL and return back to Client details in GoTo Webinar Dev page
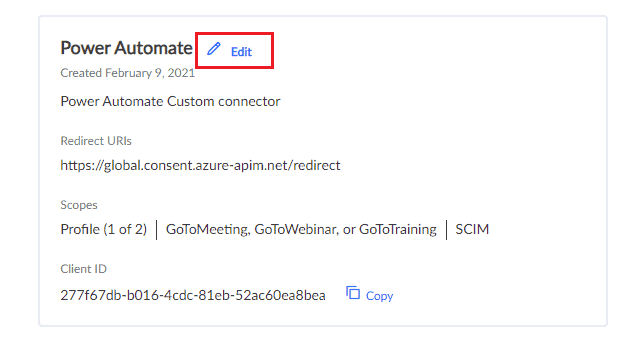
- Select your Client and click on Edit.
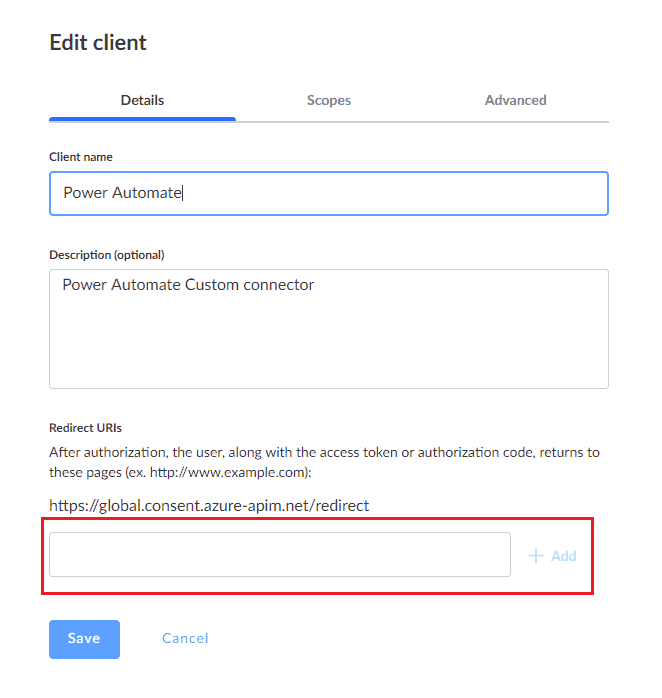
- Add a new Redirection URL, and delete the old one, and click save
- Return to your connector in Power Automate, and navigate to the Definition page. Here the fun part starts. This is where you will specify which APIs you need to retrieve from GoTo Webinar.
For a list of all APIs, you can refer to this page.
We will create only one Action, the rest are exactly the same.
- Click on New Action to create new API action.
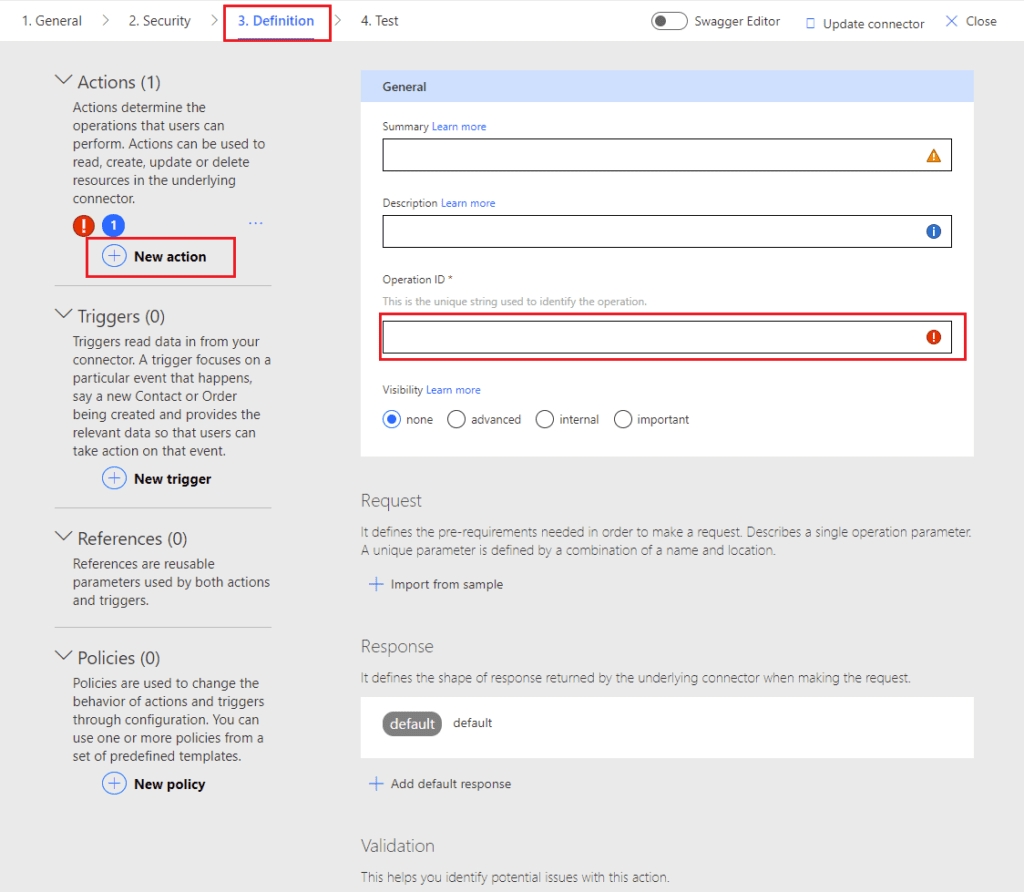
- Summary and Description are can be the same text, while Operation ID is how the Action will be displayed in a Flow, and must not have any spaces. When ready, click on Import from sample.

- We will get the session attendee’s information.
Verb: will be GET
Click Import when ready.

- Before we move forward lest talk a little about the GoTo API actions:
- This is the Product API that you need (in our case this is GoTo Webinar)
- These are the APIs provided to use with an external system. You can see that they are nicely divided into categories, so it is easy to find what you are looking for. As we need session attendees, this will either be in Sessions or Attendees category, it is attendees by the way.
- this is the API URL that will be used to get the required information. You copy it exactly as you seeing it.
- This is the JSON Output that will be returned. Inside the JSON are all the properties that you can use, for example, First Name, Email Address, etc.
- These are the required parameters that will be dynamically inserted into the API URL. You cannot GET the required information until you provide all parameters. Here we can see that if we use this Action in Power Automate, we will need to provide organizer key, webinarKey, and sessionKey. If we don’t have these details in some of the Actions, then we need to find the API that will return this property.

- Back in Power Automate, we can see that the Required Parameters are now showing.

- When done adding more Actions, don’t forget to click Update connector, and click Test

- The test is pretty simple, and actually tests the connection with GoTo Webinar server, which will open an authentication window, where you need to add your GoTo Webinar username and password.

- If the connection is successful, you will see the Selected Connection will be populated

It is time to see if we can use our Custom Connector inside a Flow. It will appear in the Custom section inside a new step.
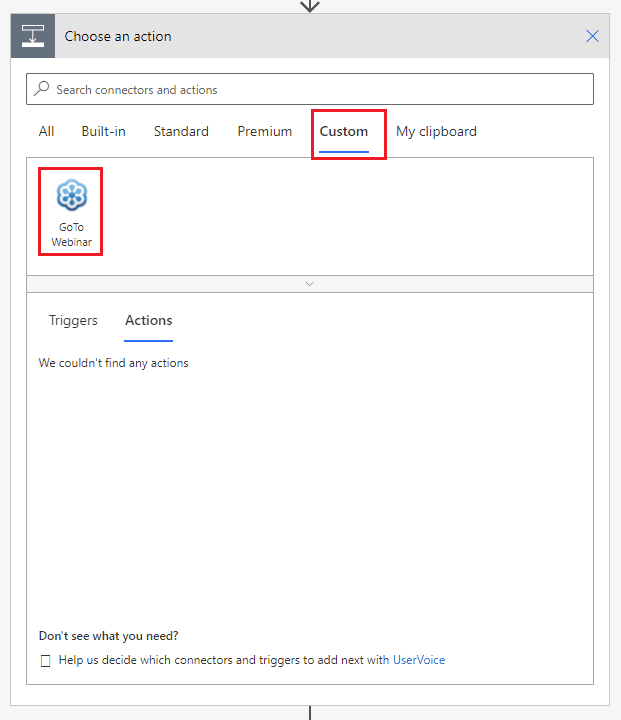
You should see only one action available, and this is Get session attendees

And these are the required parameters to get the session attendee’s details.

Customer connectors provide great flexibility to connect to any service that is not part of the OOB connectors in Power Automate, by simply add the required API URL. This saves a lot of time looking for a developer to set the API from zero.
In the next post, I will show you how to use the custom connector outputs with CDS
For more great content, check out the Resource Centre
About the Author:
Hi all, I’m from Sofia, Bulgaria. I’ve been working with Office 365 and Dynamics 365 for more than 5 years. Started as a Technical Support Engineer and slowly but surely found my way as a Dynamics CRM Consultant. Recently I’ve started my own company in Bulgaria called Simetrix Consult, for providing training for Office 365 and Dynamics CRM. Always willing to learn new tips and tricks about Office 365 and Dynamics CRM.
Feel free to reach out to Kiril with any queries you may have via LinkedIn.
Reference:
Radoslavov, K. (2021). Custom Connector in Power Automate. Available at: https://365community.online/custom-connector-in-power-automate [Accessed: 7th March 2021].
Find more great Power Platform content here.

