
Microsoft Teams is becoming more and more the central working point where, regardless of the industry, companies are focusing more and more.
In my case, I see this especially in the voice sector. But of course there are also other areas where I personally have more and more points of contact.
One of these points is the availability of data in Microsoft Teams.
In this blog article, I describe a use case that I have encountered again and again in the past months, and for which I have been allowed to implement some projects, or will implement them in the future.
This use case is about a company that wants to replace its existing on-premise file server and migrate the data to the Microsoft Cloud to SharePoint online.
I will not describe in detail how such a migration can take place, as many articles on this topic already exist. Some of them even explain it much better than I can do here.
I will describe here how such a migration can look like from the Microsoft Teams point of view and how we can make our migrated data visible in the File Explorer.
Therefore, we will focus on the following three Microsoft Cloud Platforms:
- Microsoft Teams Admin Center
- SharePoint online Admin Center
- Endpoint Admin Center (Intune)
Preparation (Phase 1):
Before we can implement anything at all, we need a corresponding planning phase. Every SharePoint administrator or engineer will see this in exactly the same way.
The first step is to analyse how much and which data should be migrated. The second step is to define where this data should be migrated to and who should have access to it.
Optionally, it can also be decided whether tools such as sensitivity labelling should be introduced or not.
Preparation (Phase 2):
Once phase 1 of preparation is complete, and we know which SharePoint sites are to be created, we go into the Microsoft Teams Admin Center and create the target directories in the form of Teams. (It must already be clear which of the teams are to be created as “Public” or “Private”, for example.
We proceed as follows:
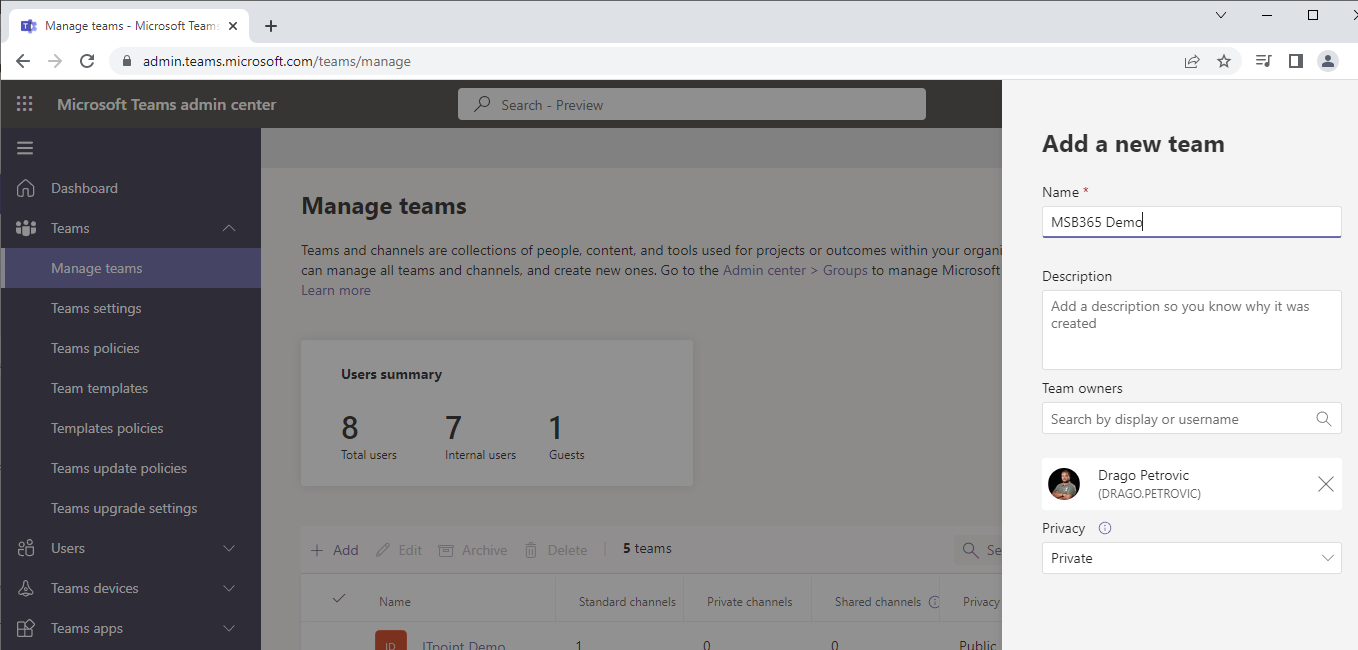 | In the Teams Admin Portal, we go to Teams > Manage Teams > +Add and create a new team according to our specifications, Microsoft automatically creates a corresponding SharePoint online site for this. |
 | The corresponding users can now be authorized in the team itself. Alternatively, these users can be added later, or the teams can be created by template with preconfigured channels. We repeat this process for each new site. |
Important: The SharePoint sites must be created in the Teams Admin Center. This ensures that the users can access the corresponding sites with Microsoft Teams. If the SharePoint sites are created in the SharePoint Admin Center, they are not visible in Teams.
Happy Microsoft Teams Week! Explore more content here.
Preparation (Phase 3):
Now that the SharePoint sites have been created, the File Explorer settings will be configured. To do this, we go to the Endpoint Admin Center (MS Intune):
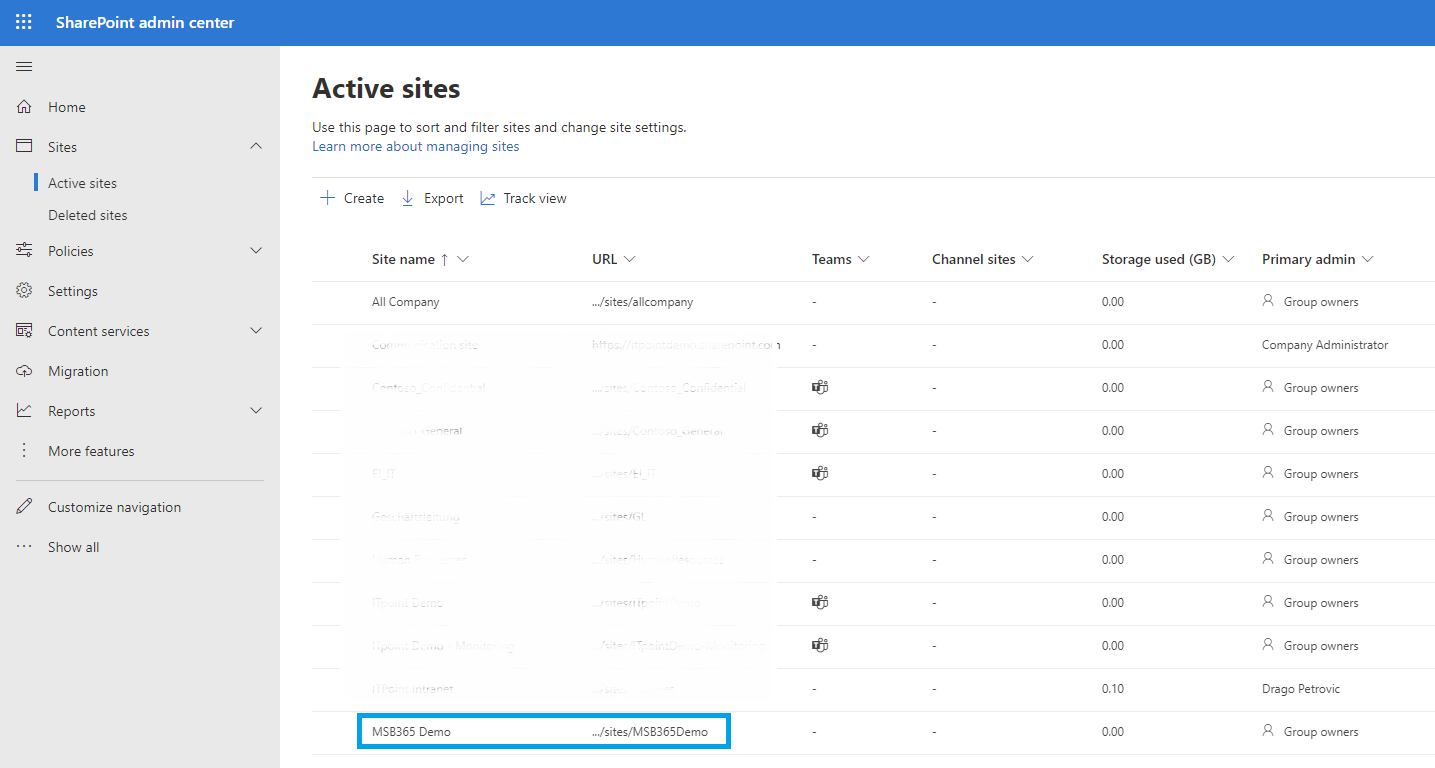 | Before we go to the Intune portal, however, we have to get the so-called Library ID. We can do this directly in the SharePoint Admin Center on the site itself, or via Microsoft Teams.In the SharePoint Admin Center, go to Sites > Active Sites > click on the URL of the corresponding site. |
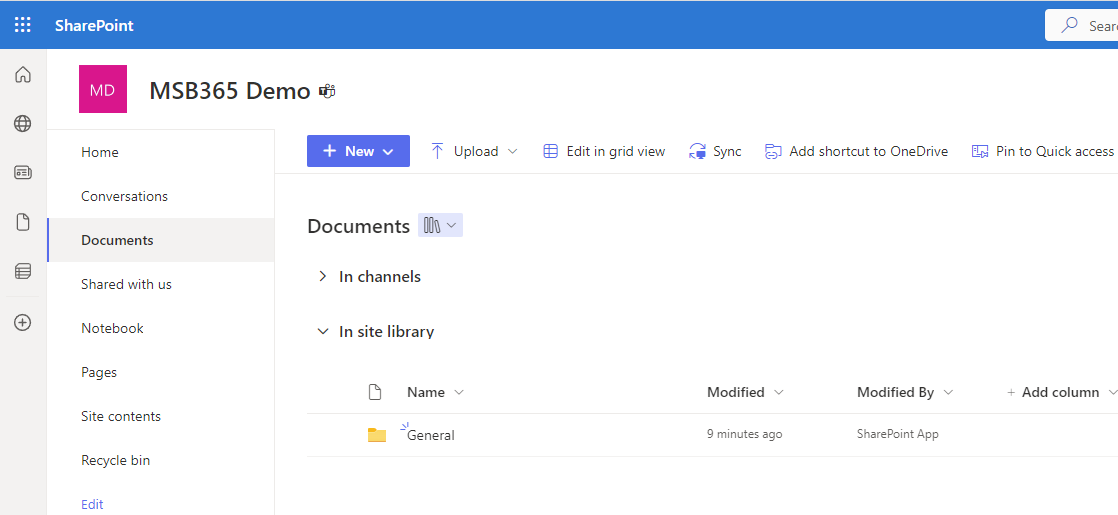 | On the corresponding site, we go to Documents and then to Sync. |
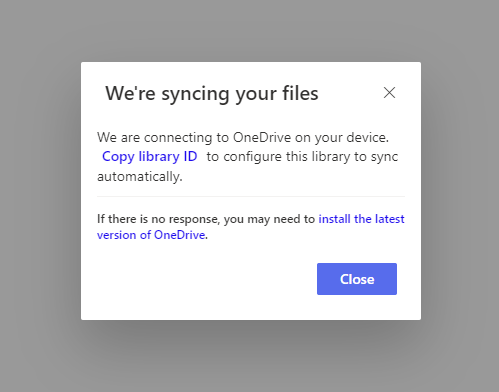 | After pressing the Sync button, we get the option to copy the Library ID, which we save to the clipboard. |
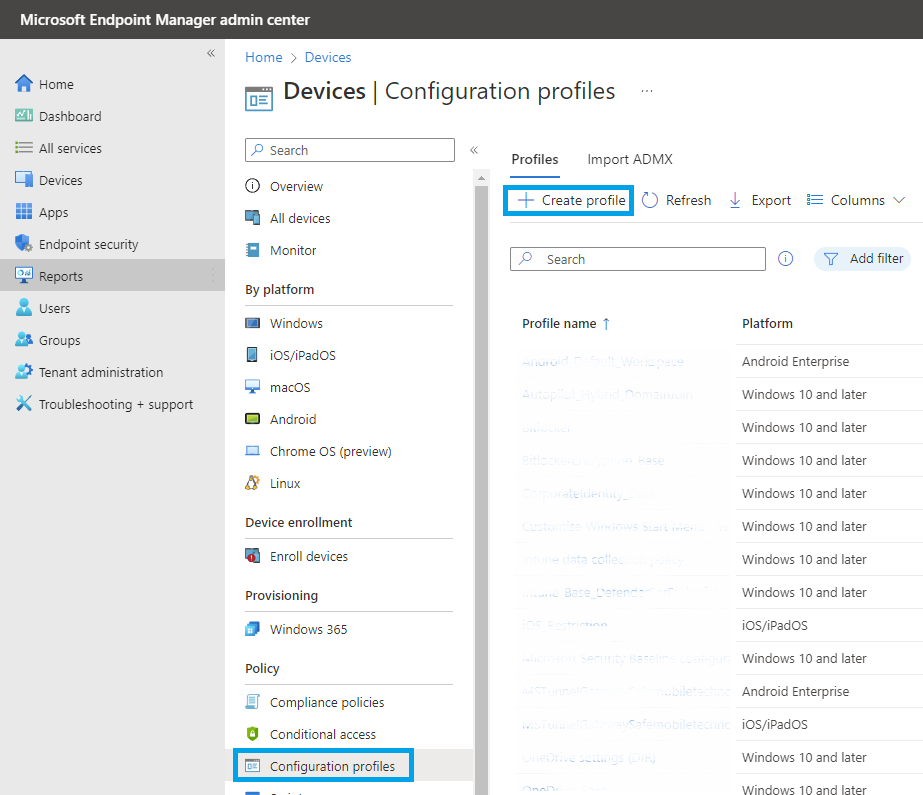 | In the next step, we go to the Intune Admin Center.Here we go to Devices > Configuration profiles and create a new policy with +Create profile. |
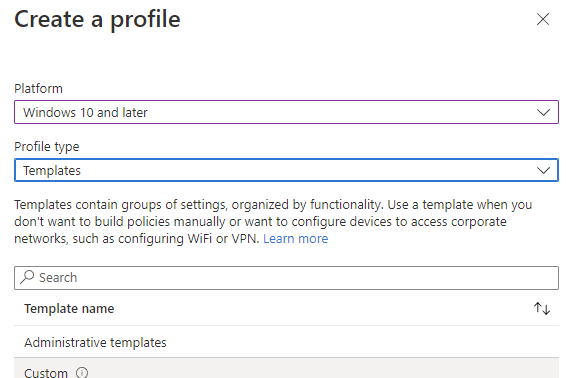 | Select Windows 10 and later as the platform and Templates as the profile type. Then continue with Administrative templates. |
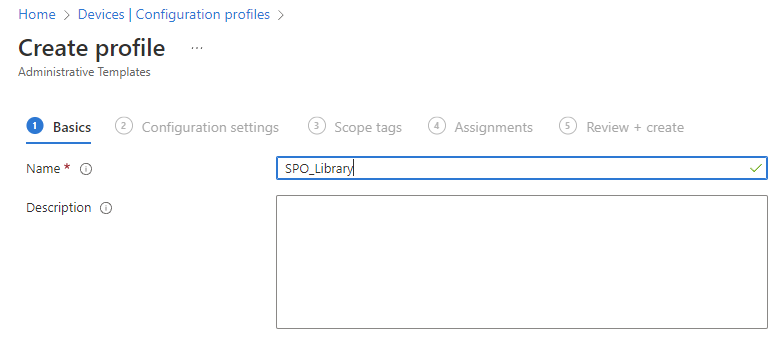 | Give the new profile an appropriate name |
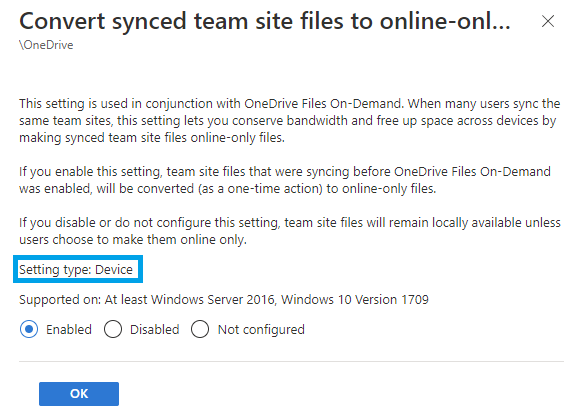 | The following settings must now be made here: Convert synced team site files to online-only files > Enable |
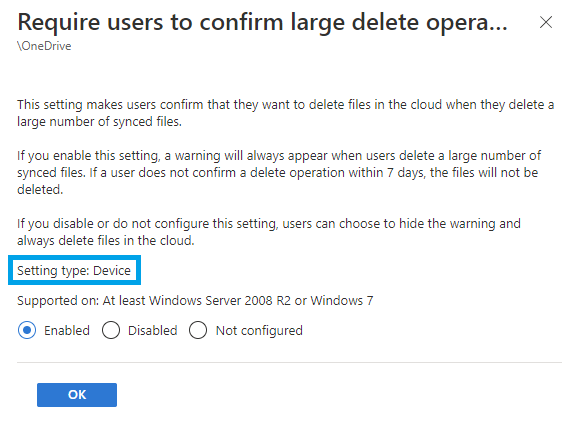 | Require users to confirm large delete operations > Enable |
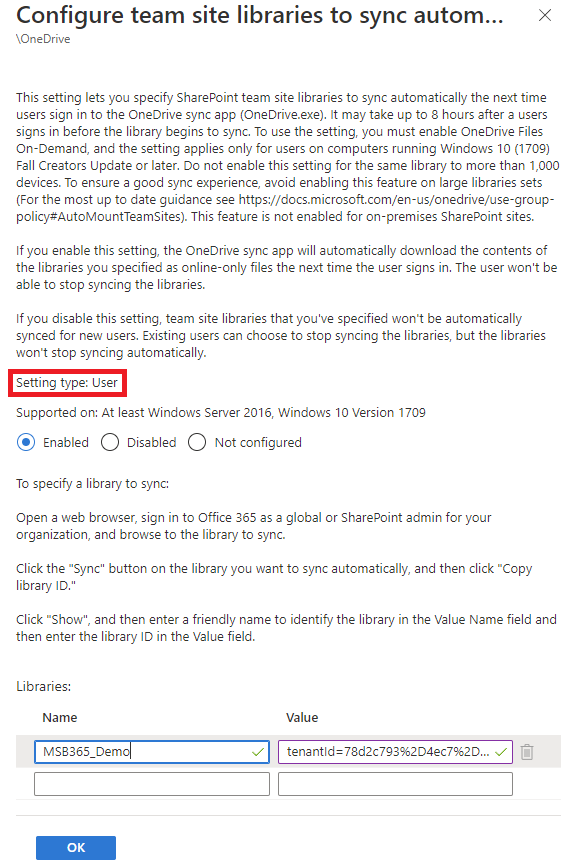 | Configure team site libraries to sync automatically > Enable Caution: This setting type is a user setting. We also need the Library ID here, which we copied from SharePoint online. |
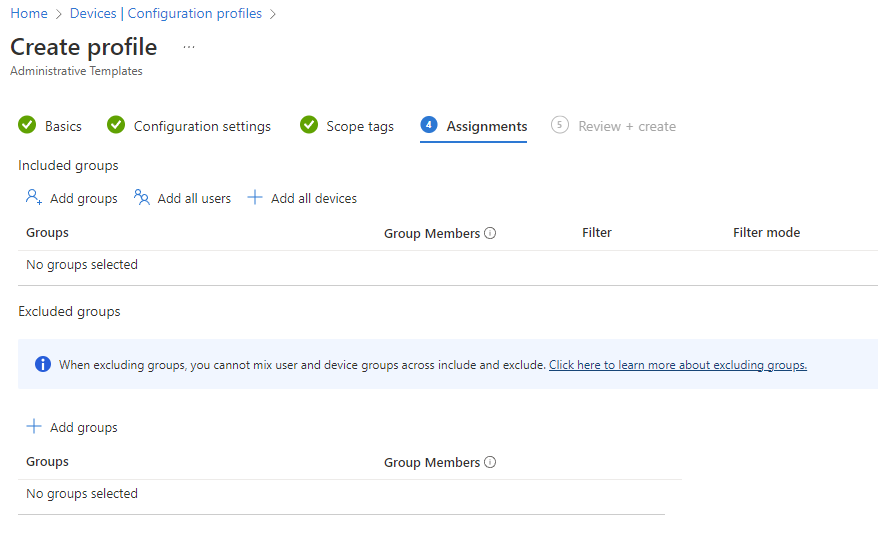 | In this point, the corresponding Azure Active Directory authorization group must still be assigned. |
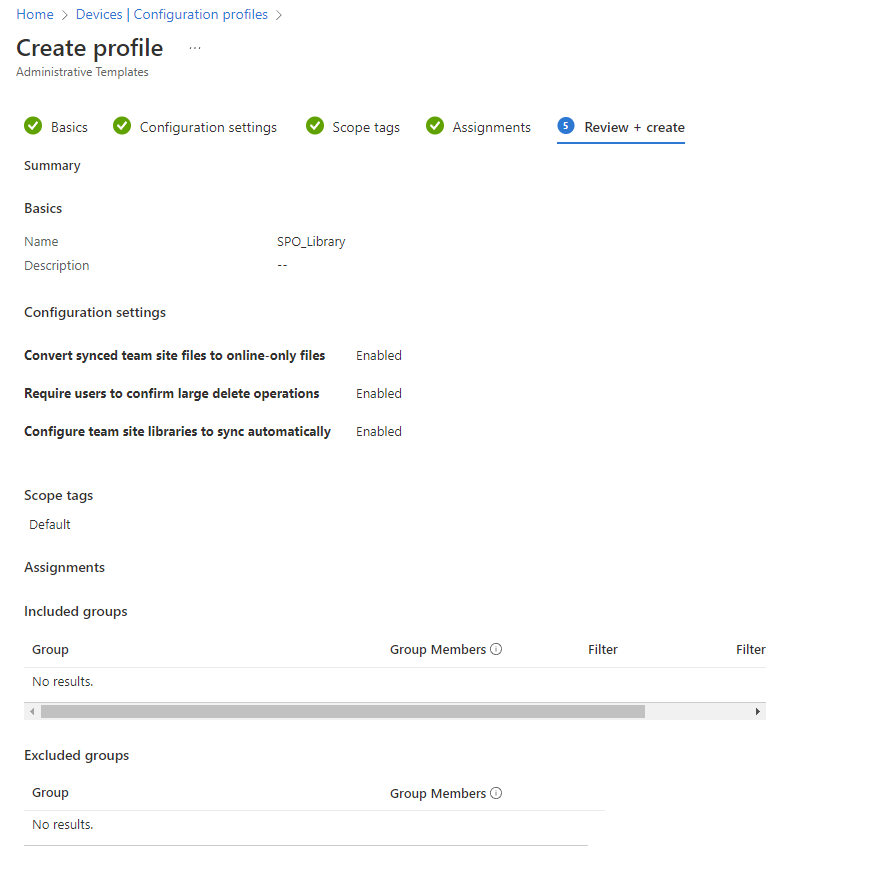 | Here is the summary Done! |
Migration:
Now everything is basically prepared so that users can access the documents after the migration.
We give the users the options:
- Access files in Microsoft Teams
- Access files via Windows Explorer

Checking the permissions:
From experience, we now check the permissions again, and we have to clarify the following points:
- Who has owner rights to which sites?
- Which users have rights to which sites?
- Are sites allowed to be shared with external users?
- If yes, which ones?
- Are the site permissions set correctly? (Public/Private)
- Are the configuration files in Microsoft Intune correctly authorized?
Conclusion:
I hope this article helps you so that nothing stands in the way of a migration to SharePoint online. Personally, it is important to me that mistakes such as the location where the sites have to be created do not happen.
Please inform yourself exactly about how a SharePoint migration is to be carried out and/or talk to your IT consultant partner about it. They should be familiar with the corresponding process.
It is also very important to mention that you should think very intensively about which data should be migrated to which site and how the corresponding permissions should be set.
Also note the option of the Sensitivity Labels. I have not gone into this in this article, but you can read more about it here.
About the Author
Drago Petrovic is a Microsoft 365 Apps and Services MVP, Book Co-author, is recognized as one of the Top Swiss Teams, Exchange and Microsoft 365 influencers. Being an IT professional for more than 18 years and heading Teams voice and Microsoft Exchange projects with more than 150K Mailboxes, or Cloud (O365) Projects for some of the leading Pharma, Insurance and Energy industries, has accelerated his skills exponentially.
Reference
Petrovic, D., 2022, Migrate Fileserver to SharePoint online with Microsoft Teams – and make it accessible in the File Explorer, Available at: https://www.msb365.blog/?p=4932 [Accessed on 13 March 2023]


