This article is inspired by a community question where it was required to have a multistep advanced form across different entities on the PowerApps portals. While it is pretty straight forward while you are in the Create of the application but it gets bit tricky on the Update Part let me explain the business scenario below:
Scenario:
You have an Application Entity and Application Details entity while the original relation should be 1:1, but as this type of relationship is not present in DataVerse so we usually to implement this type of relationship we need to have:
1:N relationship from Application to Application Details , Application Details has a lookup to application
N:1 relationship from Application Details to Application, Application has a lookup to application details.
I will detail here how to implement this scenario step by step through PowerApps portals.
Lets Get Started!
First we need a web page with entity list, to list the Applications and have the option to create a new application and edit an Existing Application:
Please refer to the article below for how to create a web page using an entity list: https://wordpress.com/post/onlinemgblog.wordpress.com/1514
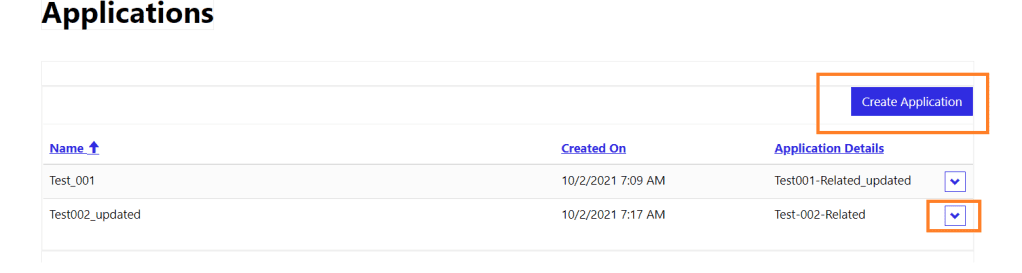
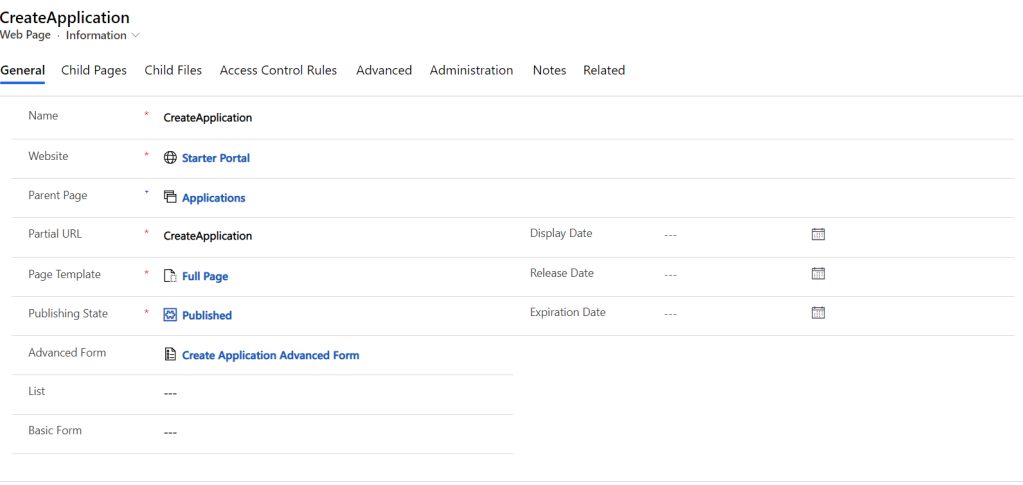
Step 1: Create Application Web page
we will start by creating a new web page as below:
- we need to create the Advanced Form that will be used by the Web page, Go to Portal Management, Advanced Forms and Click New, Give it a name, Choose Website , Save and Click on the Start Step Click New Advanced form Step
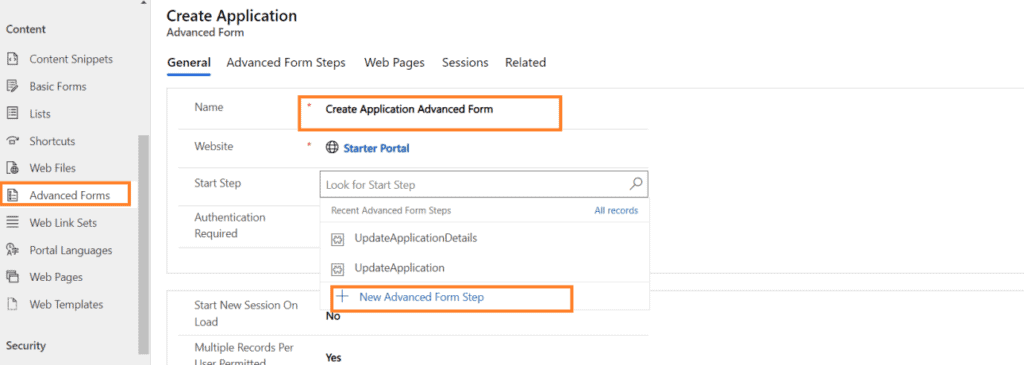
2. On the new Advanced form step, Set the Name to Create Application, Choose Type = Load Form, Choose Target Table = Applications , On the Next Step choose the Create Application Details that we will be creating next (Just do not get confused here, the Next Step is another Advanced form step that will appear after the Create Application which is the Create Application Details)
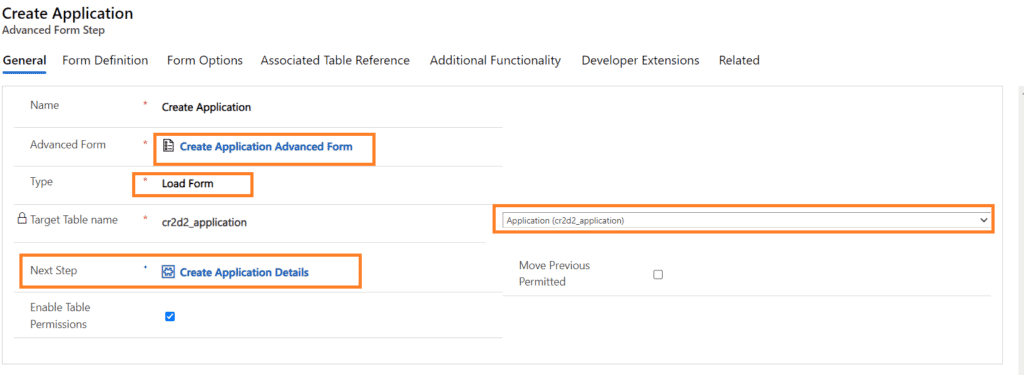
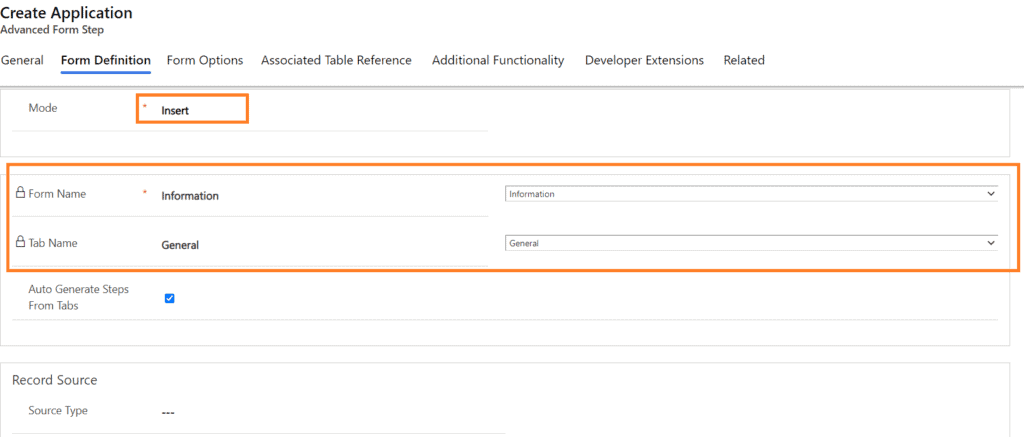
On the Form Definition, Set Mode = Insert and Choose the form and Tab as required
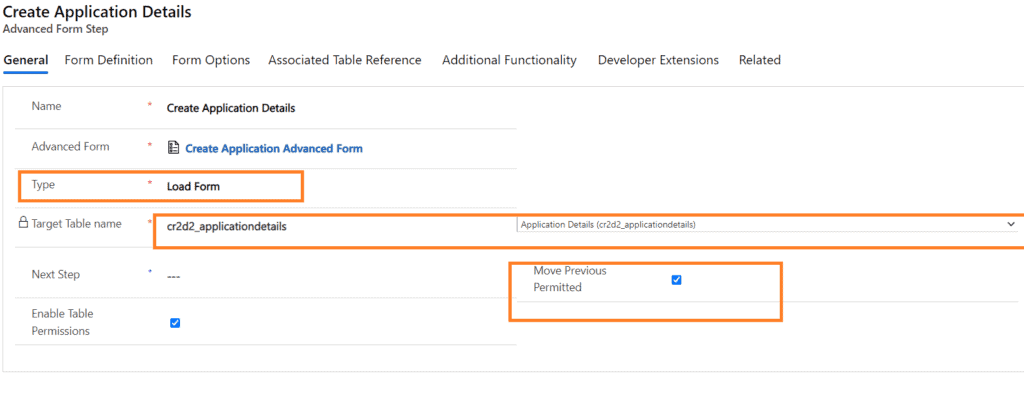
3. Then Go and Repeat the Step 2 to create the Application Details Step, Choose the Target Table as Application Details , and Type = Load Form, you can choose either Move Previous Permitted or not, On Form Definition Choose Insert and Select the form

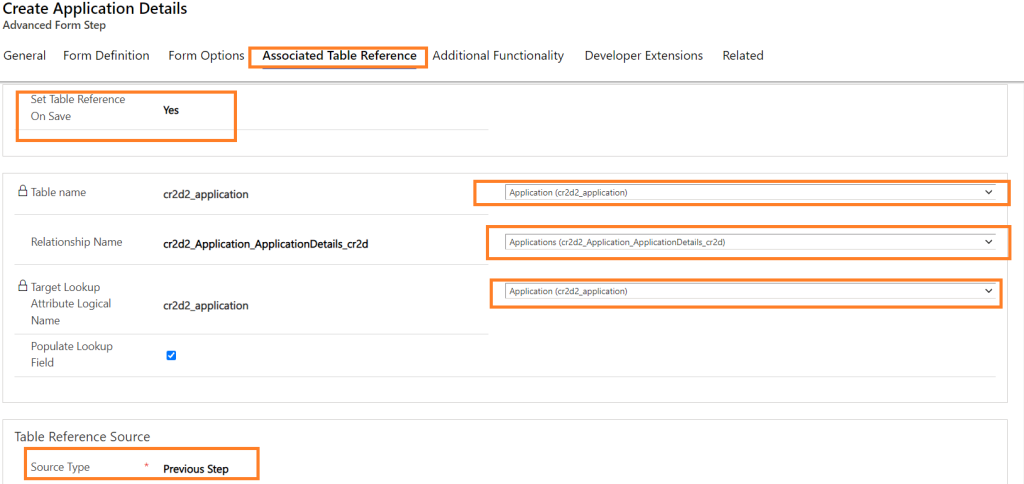
Now comes the new important part where we need to Link the Application Details to the Application in the Previous Step and here comes the Associated Table Reference Tab.
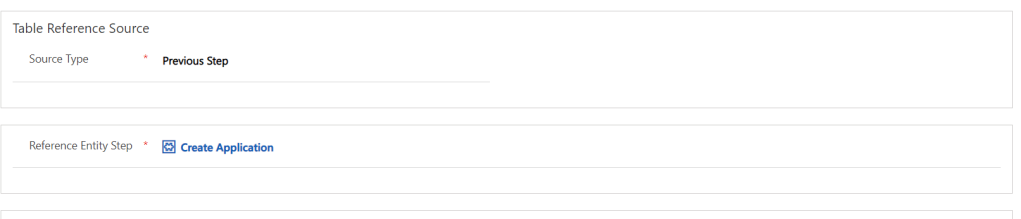
Go to the Associated Table Reference Tab and Set Set Table Reference on Save to Yes, Choose the reference table and relationship and the lookup name which is Application on the Application Details, Set Source Step to Previous Step and Reference Entity Step to Create Application.
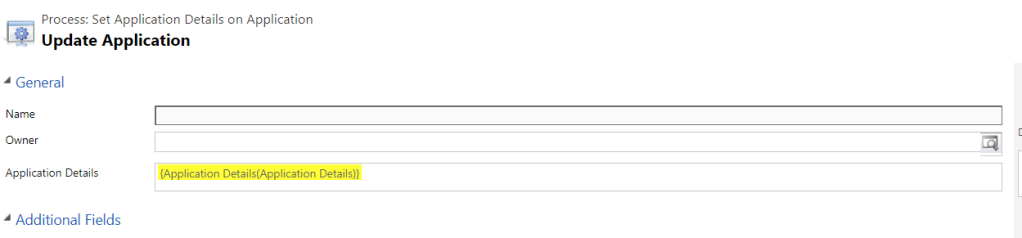
That’s how the lookup of the Application on the application Details record.

4. Set Parent Page as applications, and set the Advanced Form to the page we created in step 1
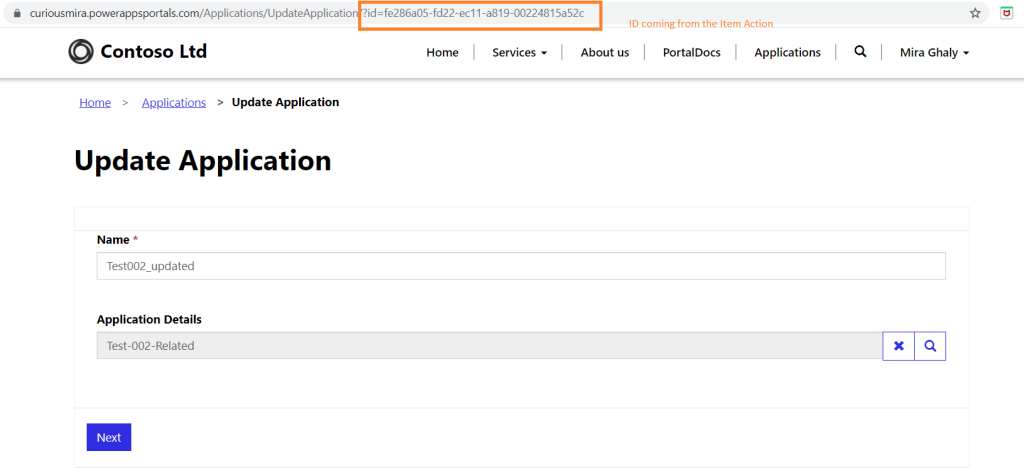
Test your Create application page and you will find the 2 records are linked correctly, now comes the second part where you do the Update Application.
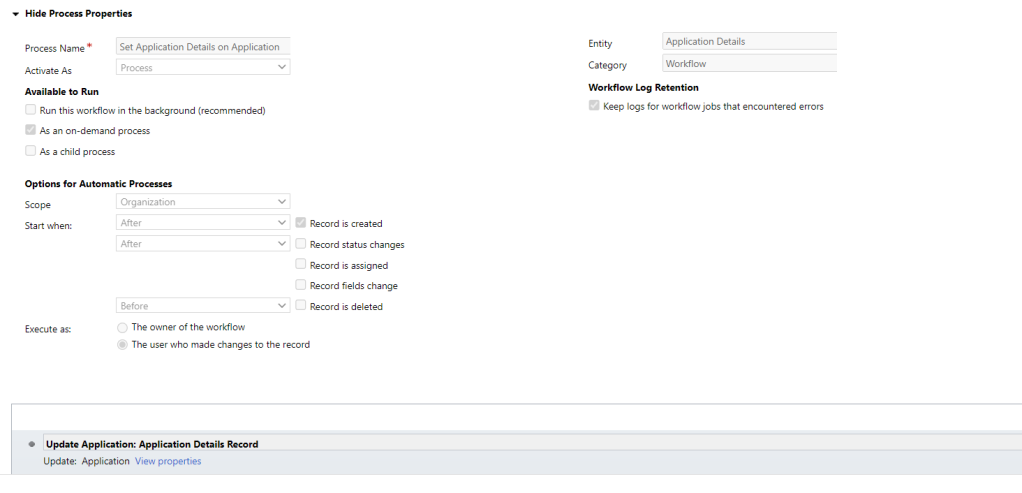
Step 2: Update Application Web Page
Basically we will be repeating the same steps in Step 1 but with Insert Mode = Update but on the second advanced form step here comes the trick how to get the Application details related to the application? The source type accept Query String, Result from Previous Step, Current Portal User, Record Associated to current portal user, so what we need to do is to pass the application details id from previous step(Application) to the Application Details step, Let’s see quickly how this can be done
- The first step on the new advanced form step is the Update Application step, and the Source Type for this step is also a Query string coming from the List Item Action, Set Primary Key Query String Parameter Name to id and set Primary Key Attribute Logical Name to the application Id


2. Now we need to pass the Application Details Id from the Application Step to the Application Details Step and this can be done by injecting the application details id into the form action using JavaScript below on the Form Options:
$(document).ready(function(){
    $('#content_form').attr('action', $('#content_form').attr('action')+ '&applicationdetailsid={{entities.cr2d2_application[request.params.id].cr2d2_applicationdetails.Id}}');
});

2. On the Update Application Details set the source type as below, where the Primary Key Query String Parameter Name = applicationdetailsid and set the primary key attribute logical name.

I do not like long articles but hope it is useful and overcome a gap in the Advanced Forms!
Find more great blogs here
About the Author:
I am an experienced Dynamics 365/ Power Platform Independent Technical Consultant |Microsoft MVP |Dual Super User.I have worked on extending various parts of the Dynamics 365 application using code and recently No code.
I have worked on Large to medium scaled projects in the Middle East and Australia.
I love Troubleshooting and digging and learning new technologies.
Reference:
Ghaly, M. (2021). PowerApps Portals: Advanced Form Multistep on different (tables) entities. Available at: https://onlinemgblog.wordpress.com/2021/10/02/powerapps-portals-advanced-form-multistep-on-different-entities/ [Accessed: 21st October 2021].