Recently Microsoft released some of the features, which were planned to be released on 2nd of December 2019, in their “new” product: Power Virtual Agent. One of them is “Authentication”. In this post I will help you to set up Azure Active Directory as an oAuth2.0 authentication endpoint.
How does authentication in PVA works?
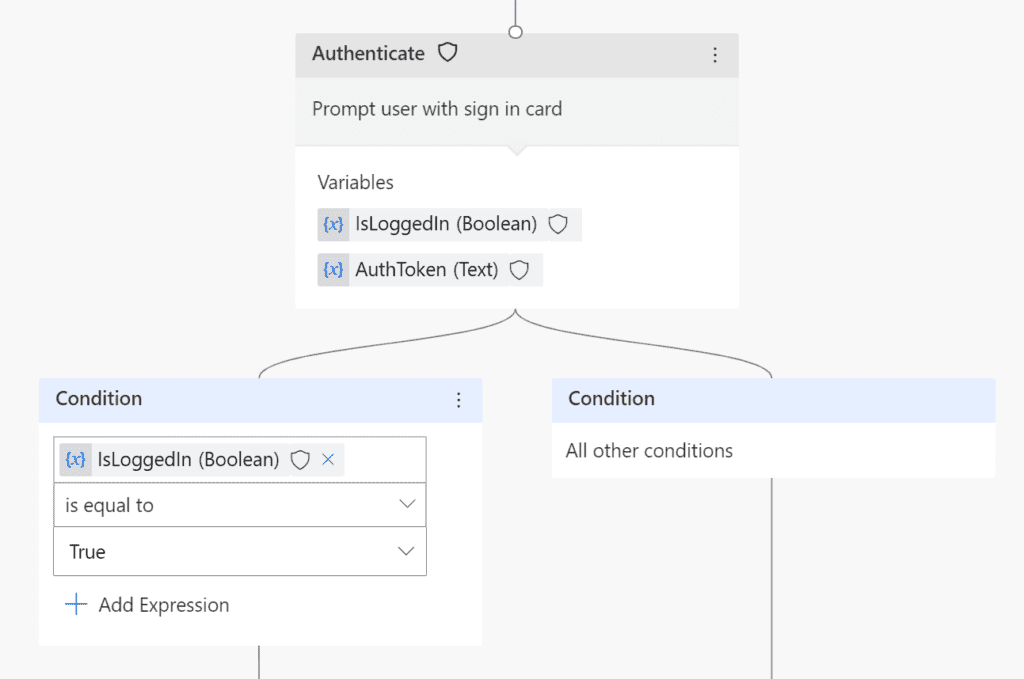
Once you put authentication action in the conversation flow and conversation reaches that point:
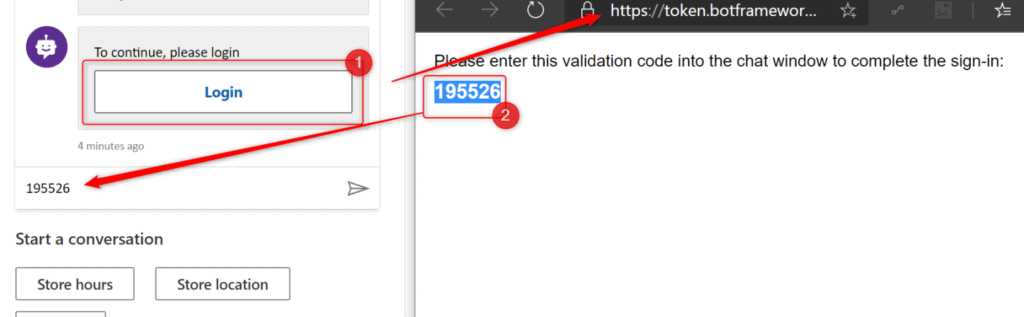
It will display a card with a button to the user, that once clicked will generate an OTP that user has simply to copy and paste into a chat window:
Once user successfully logs in, the there are two variables that are being used in flow after that:
- IsLoggedIn – boolean variable, true if logged in (what a surprise :P)
- AuthToken – this is simply a bearer token generated for the user
Configuration
To access authentication settings of your bot you have to navigate to the following URL: https://powerva.microsoft.com/#/manage/authentication.
Important! You can define a single authentication endpoint per each bot.
The page is showing an empty form, actually not very easy to fill with information, if you are not an expert in Azure AD 🙂

Luckily, there is the documentation written quite well, that helps us to set values for these fields if we want to use AAD as the provider: https://docs.microsoft.com/en-us/power-virtual-agents/configuration-end-user-authentication
| Field name | Value |
|---|---|
| Connection name | Connection name |
| Service Provider | Power Virtual Agents only supports generic OAuth2 providers. |
| Client ID | Client ID of the Azure app (read further) |
| Client Secret | Client Secret of the Azure app (read further) |
| Scope List delimiter | Use: , |
| Authorization URL Template | https://login.microsoftonline.com/common/ oauth2/v2.0/authorize |
| Authorization URL Query String Template | ?client_id={ClientId}&response_type=code&redirect_uri={RedirectUrl}&scope={Scopes}&state={State} |
| Token URL Template | https://login.microsoftonline.com/common/oauth2/v2.0/token |
| Token URL Query String Template | Use: ? |
| Token Body Template | code={Code}&grant_type=authorization_code&redirect_uri={RedirectUrl}&client_id={ClientId}&client_secret={ClientSecret} |
| Refresh URL Template | https://login.microsoftonline.com/common/oauth2/v2.0/token |
| Refresh URL Query String Template | Use: ? |
| Refresh Body Template | refresh_token={RefreshToken}&redirect_uri={RedirectUrl}&grant_type=refresh_token&client_id={ClientId}&client_secret={ClientSecret} |
| Scopes | For the purpose of authentication it should be: openid |
Azure app
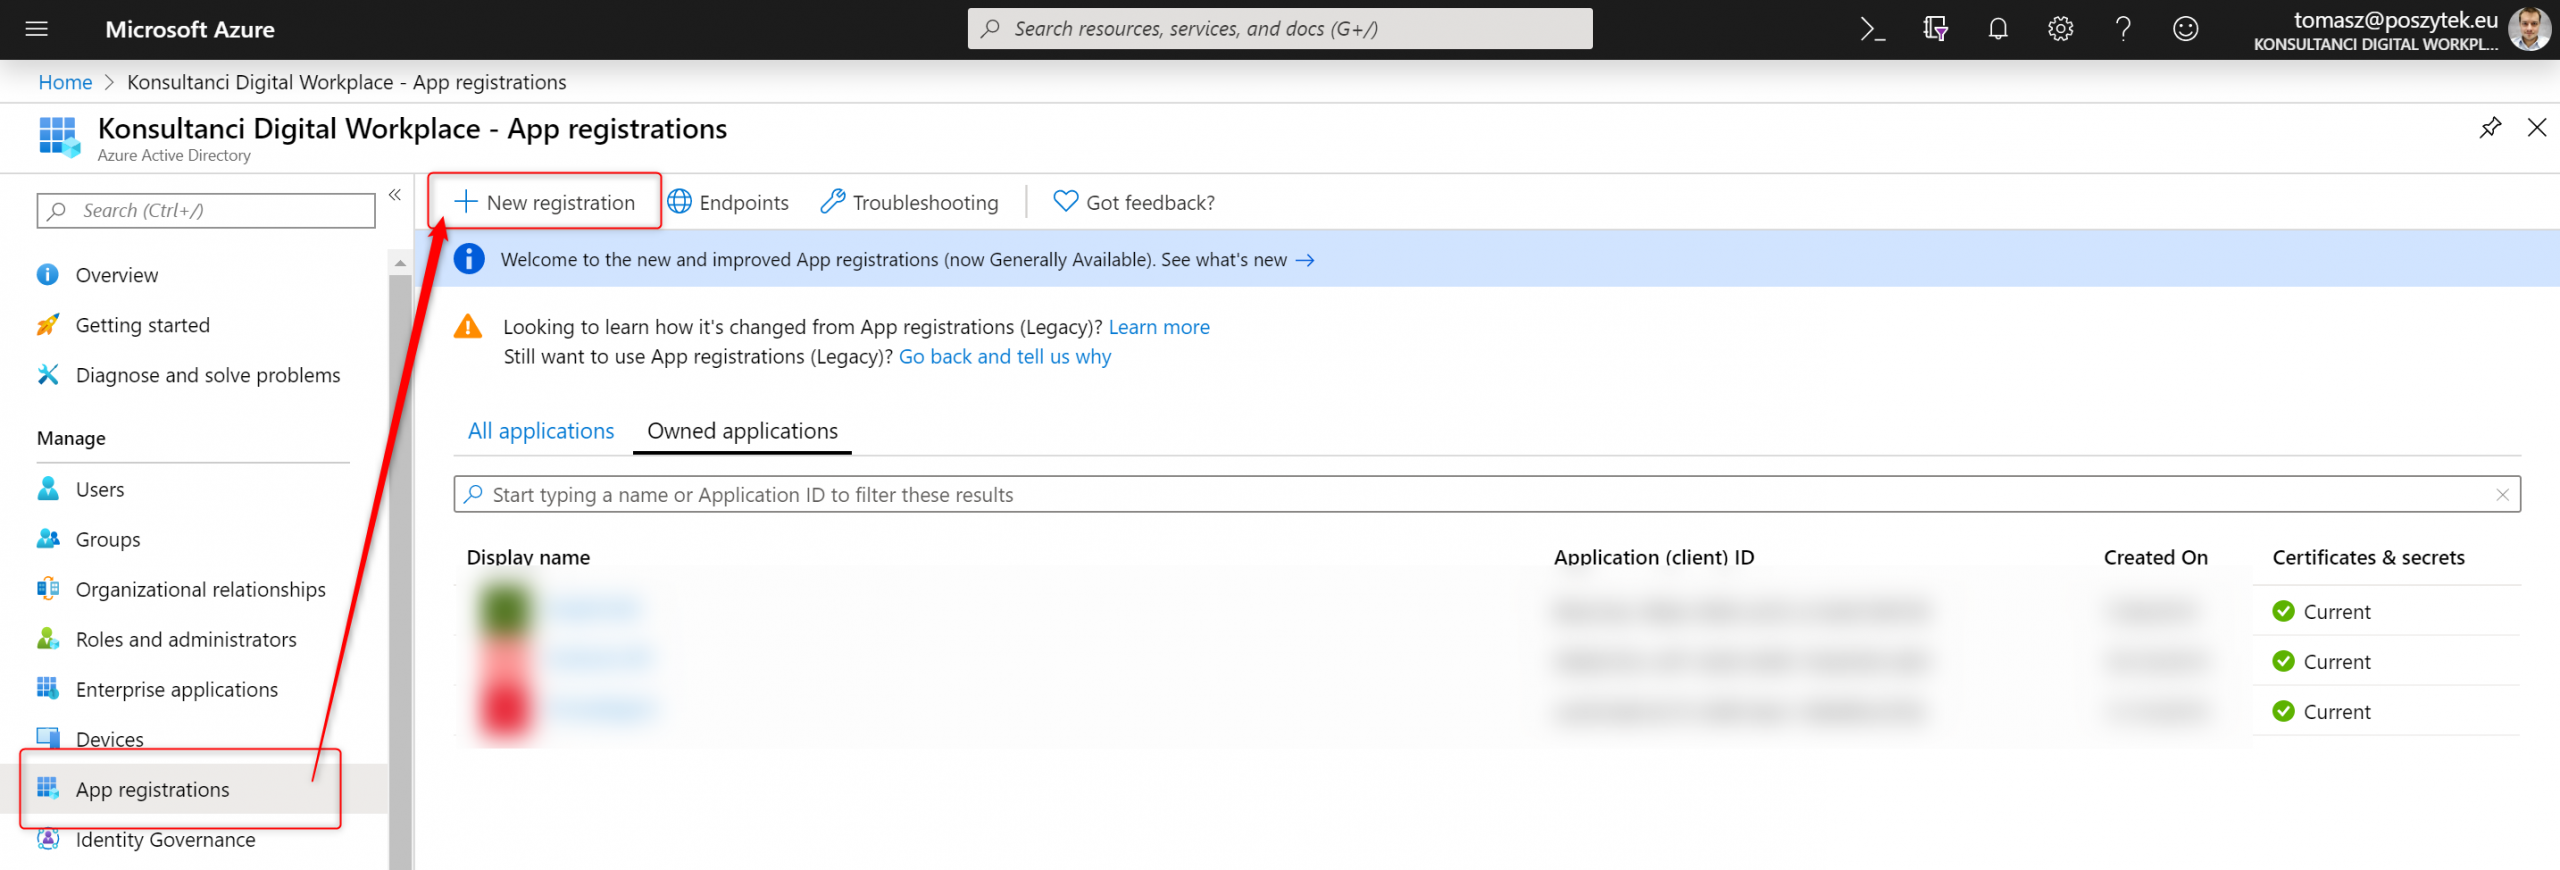
Since the configuration requires the app’s client id and secret key, also the scope name, you have to configure that app in AAD.
To do that open https://portal.azure.com/#blade/Microsoft_AAD_IAM/ActiveDirectoryMenuBlade/RegisteredApps – app registrations blade under Azure AD blade. Next create “new registration”:
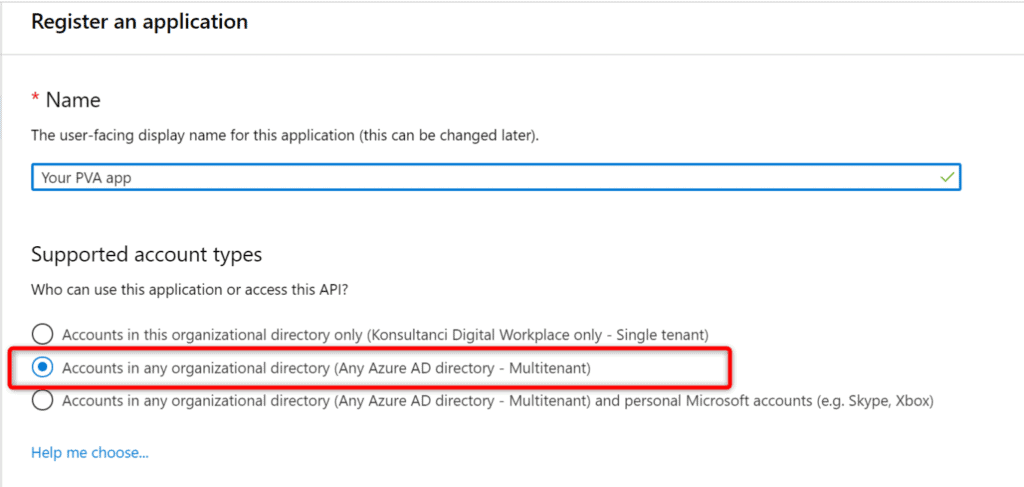
Next define its name and choose “Multitenant” option for the supported account types:
Once the app is registered, you must configure redirect URL. To do that do the following:
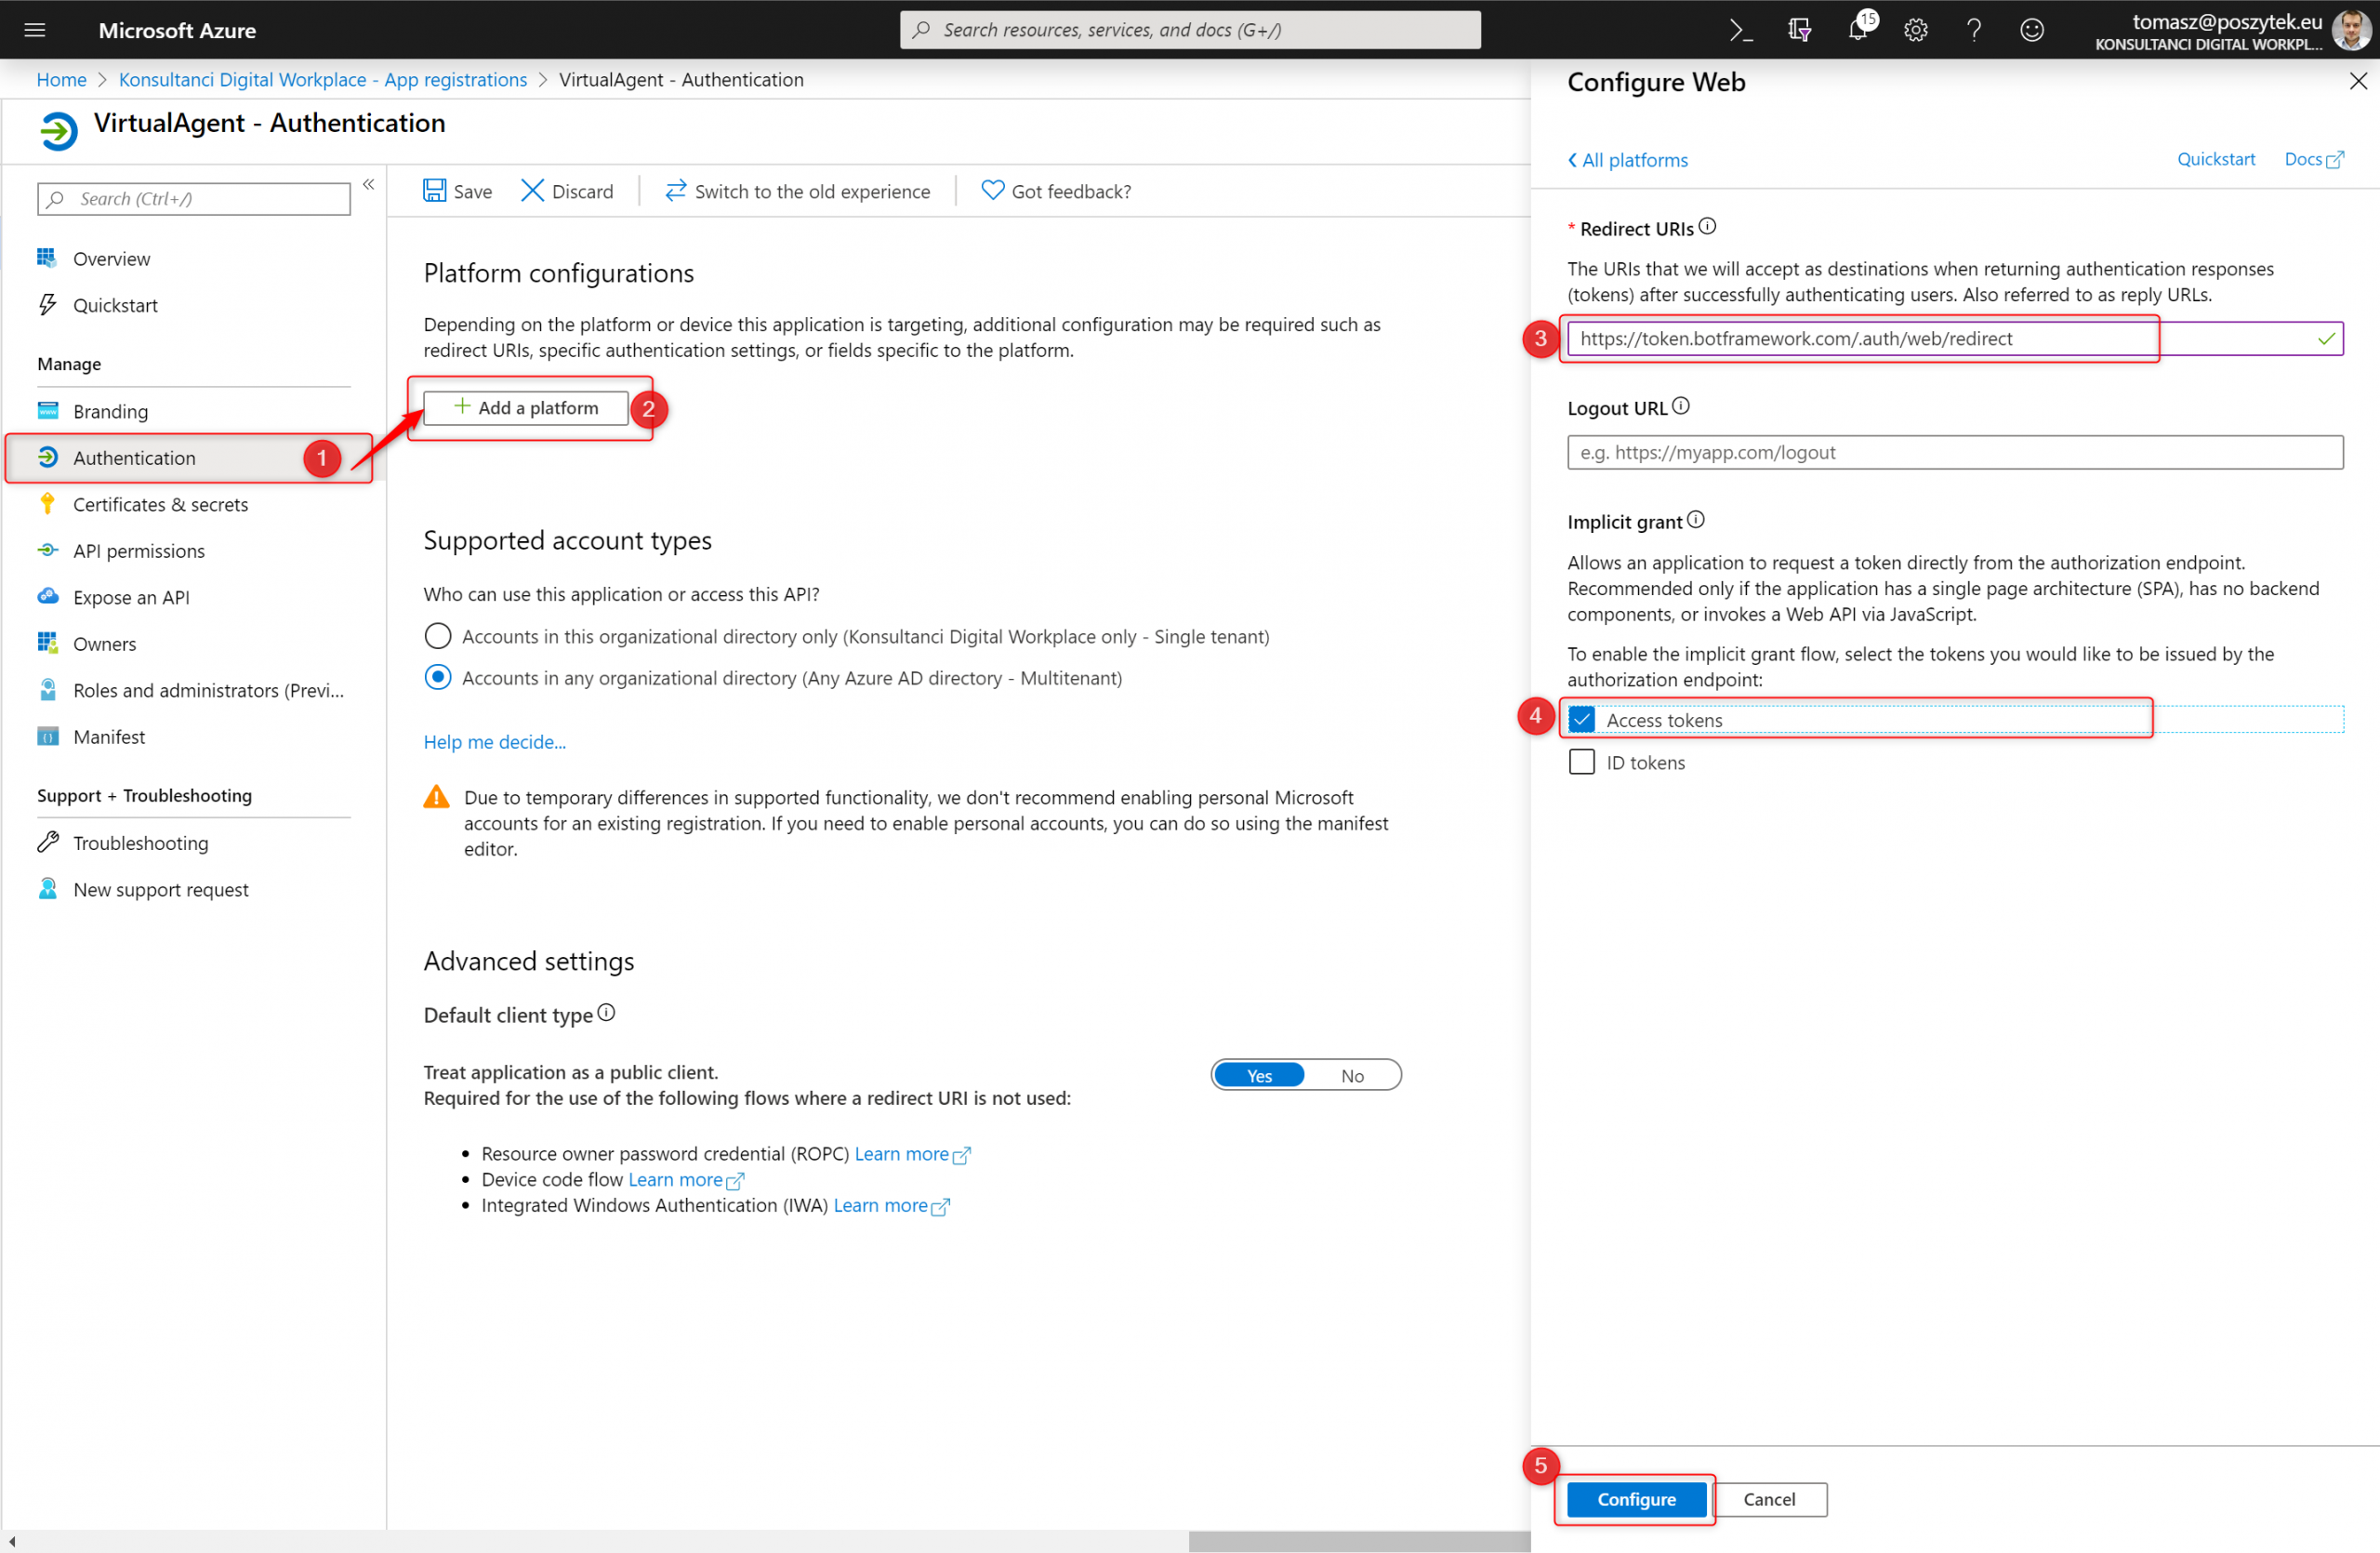
- Next go to the “Authentication” blade
- Click “Add a platform” button
- Type: “https://token.botframework.com/.auth/web/redirect”
- Select “Access tokens” option
- Hit “Configure”.

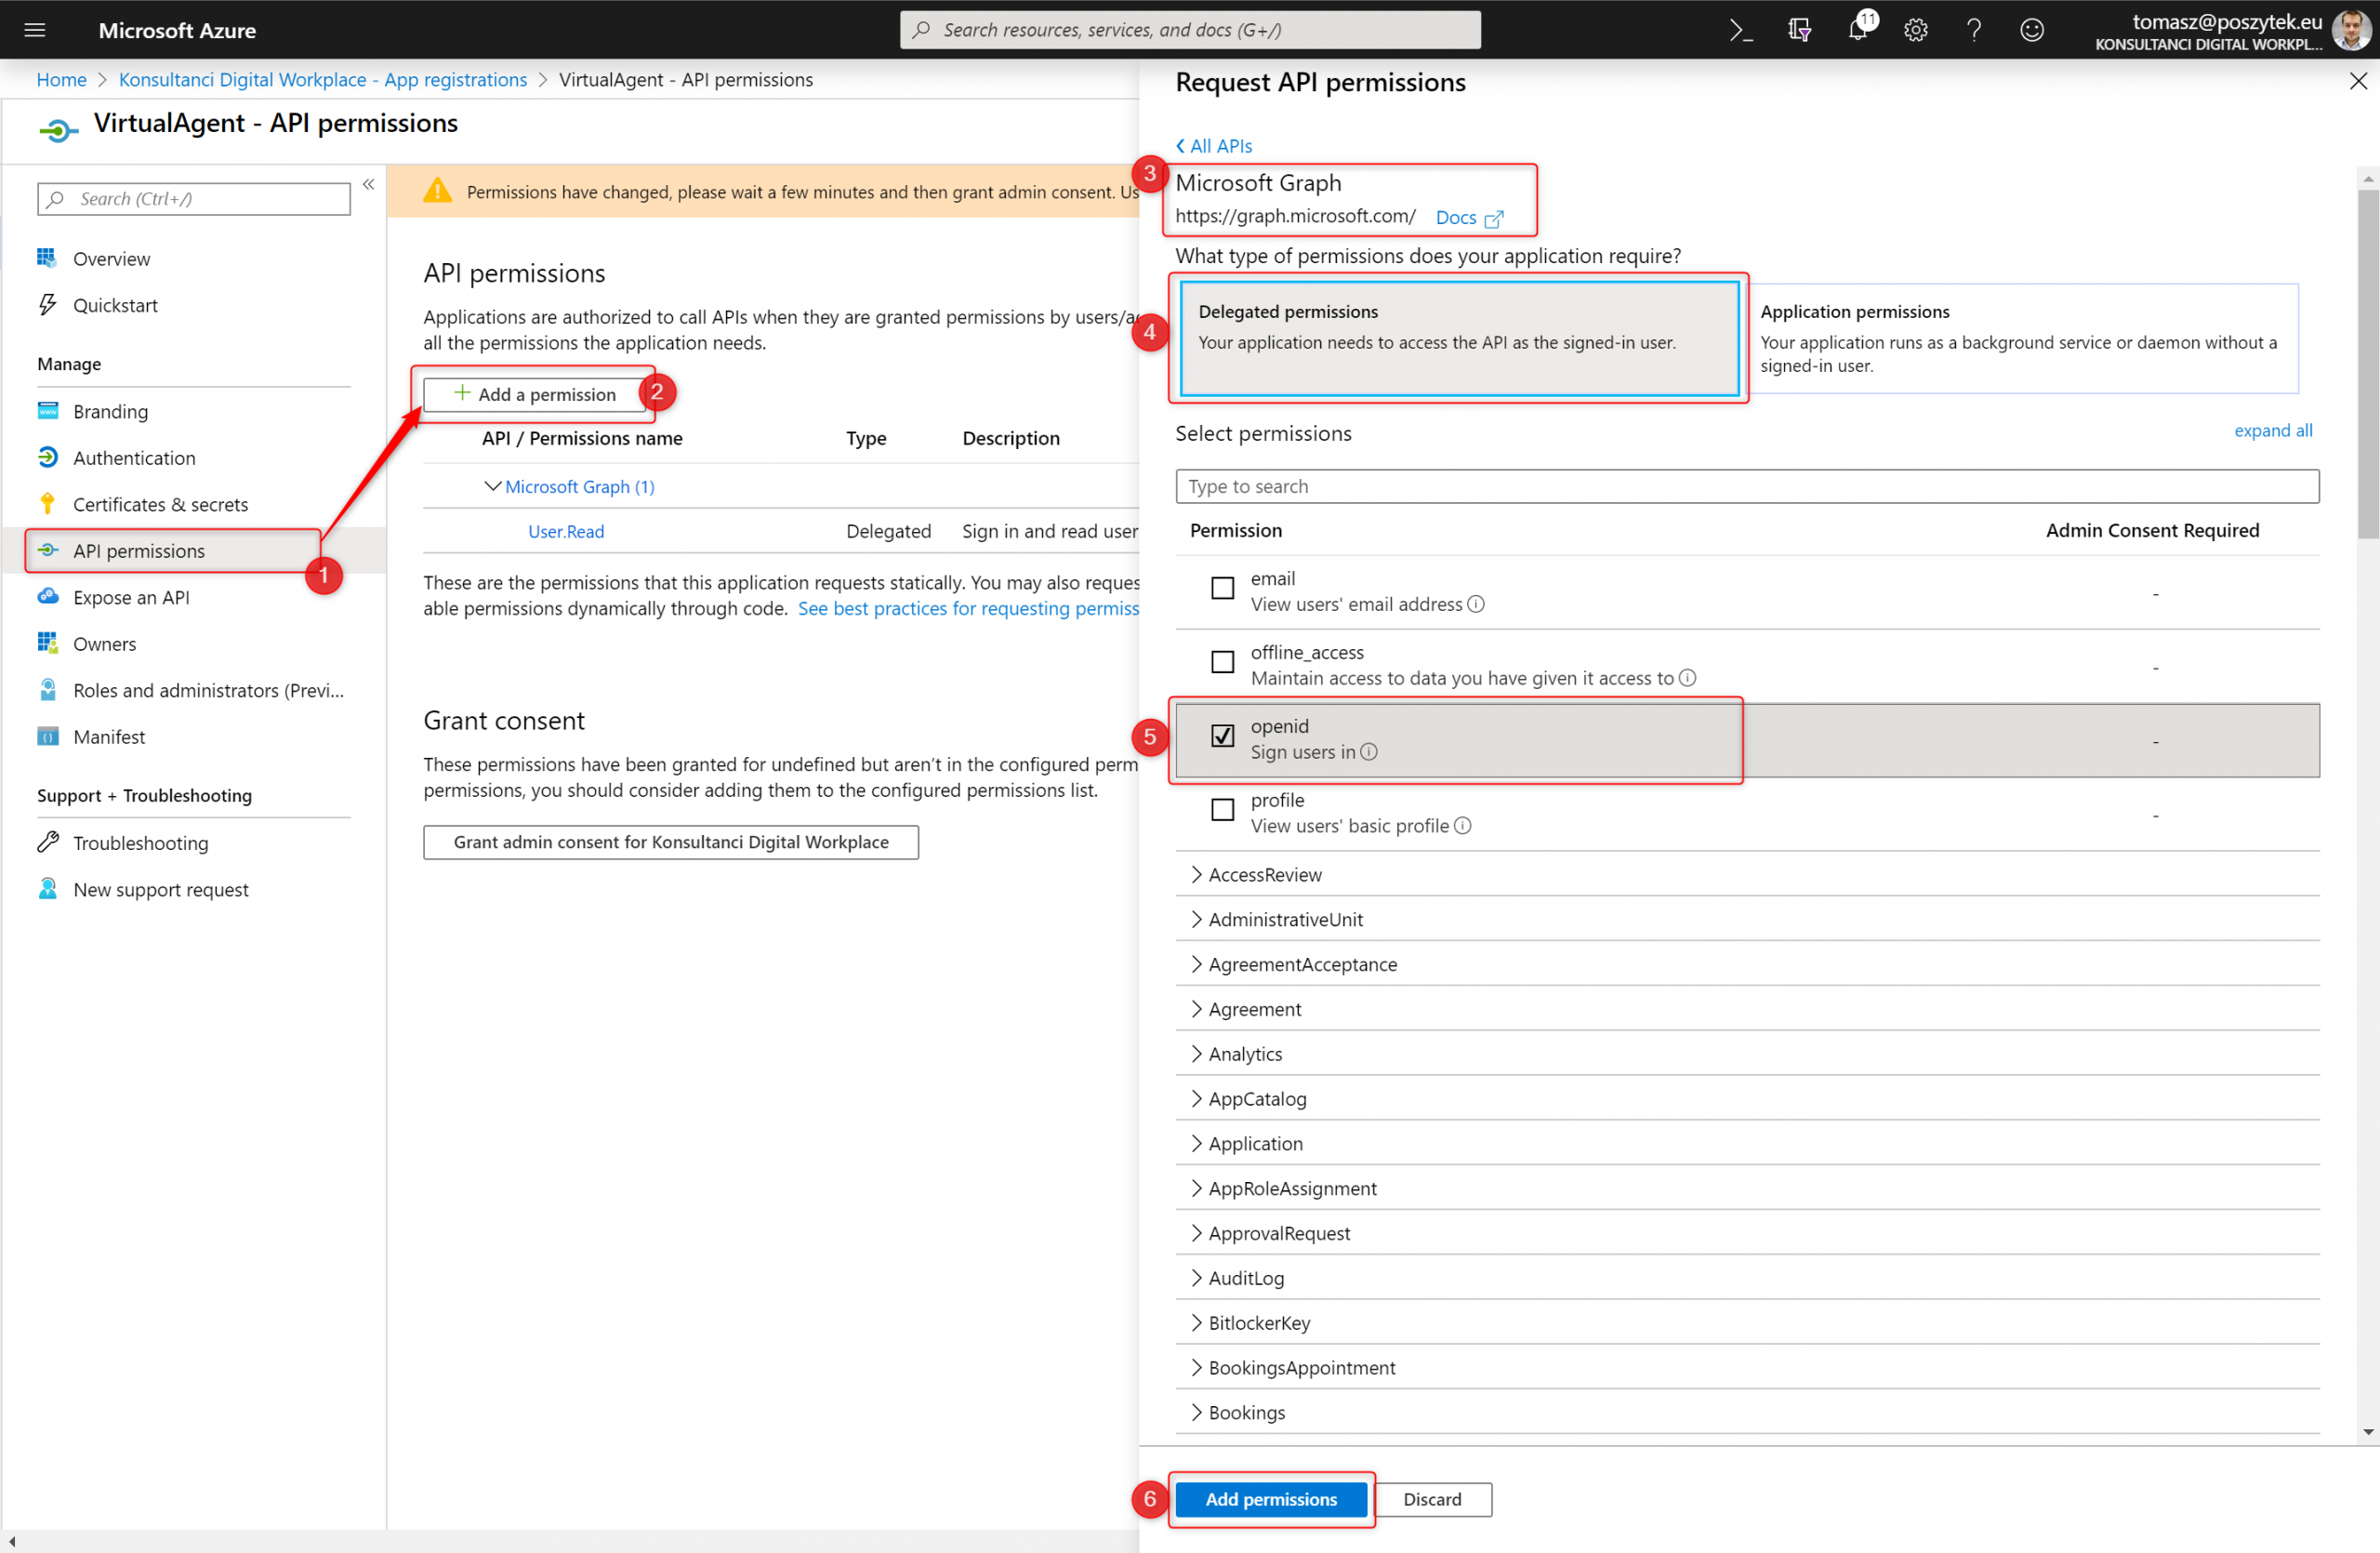
- Go to “API permissions” blade
- Click “Add a permission” button
- Choose “Microsoft Graph”
- Hit “Delegated permissions”
- Select “openid” option
- Hit “Add permissions” button
Finally go to the “Certificates & secrets” and generate new secret key:
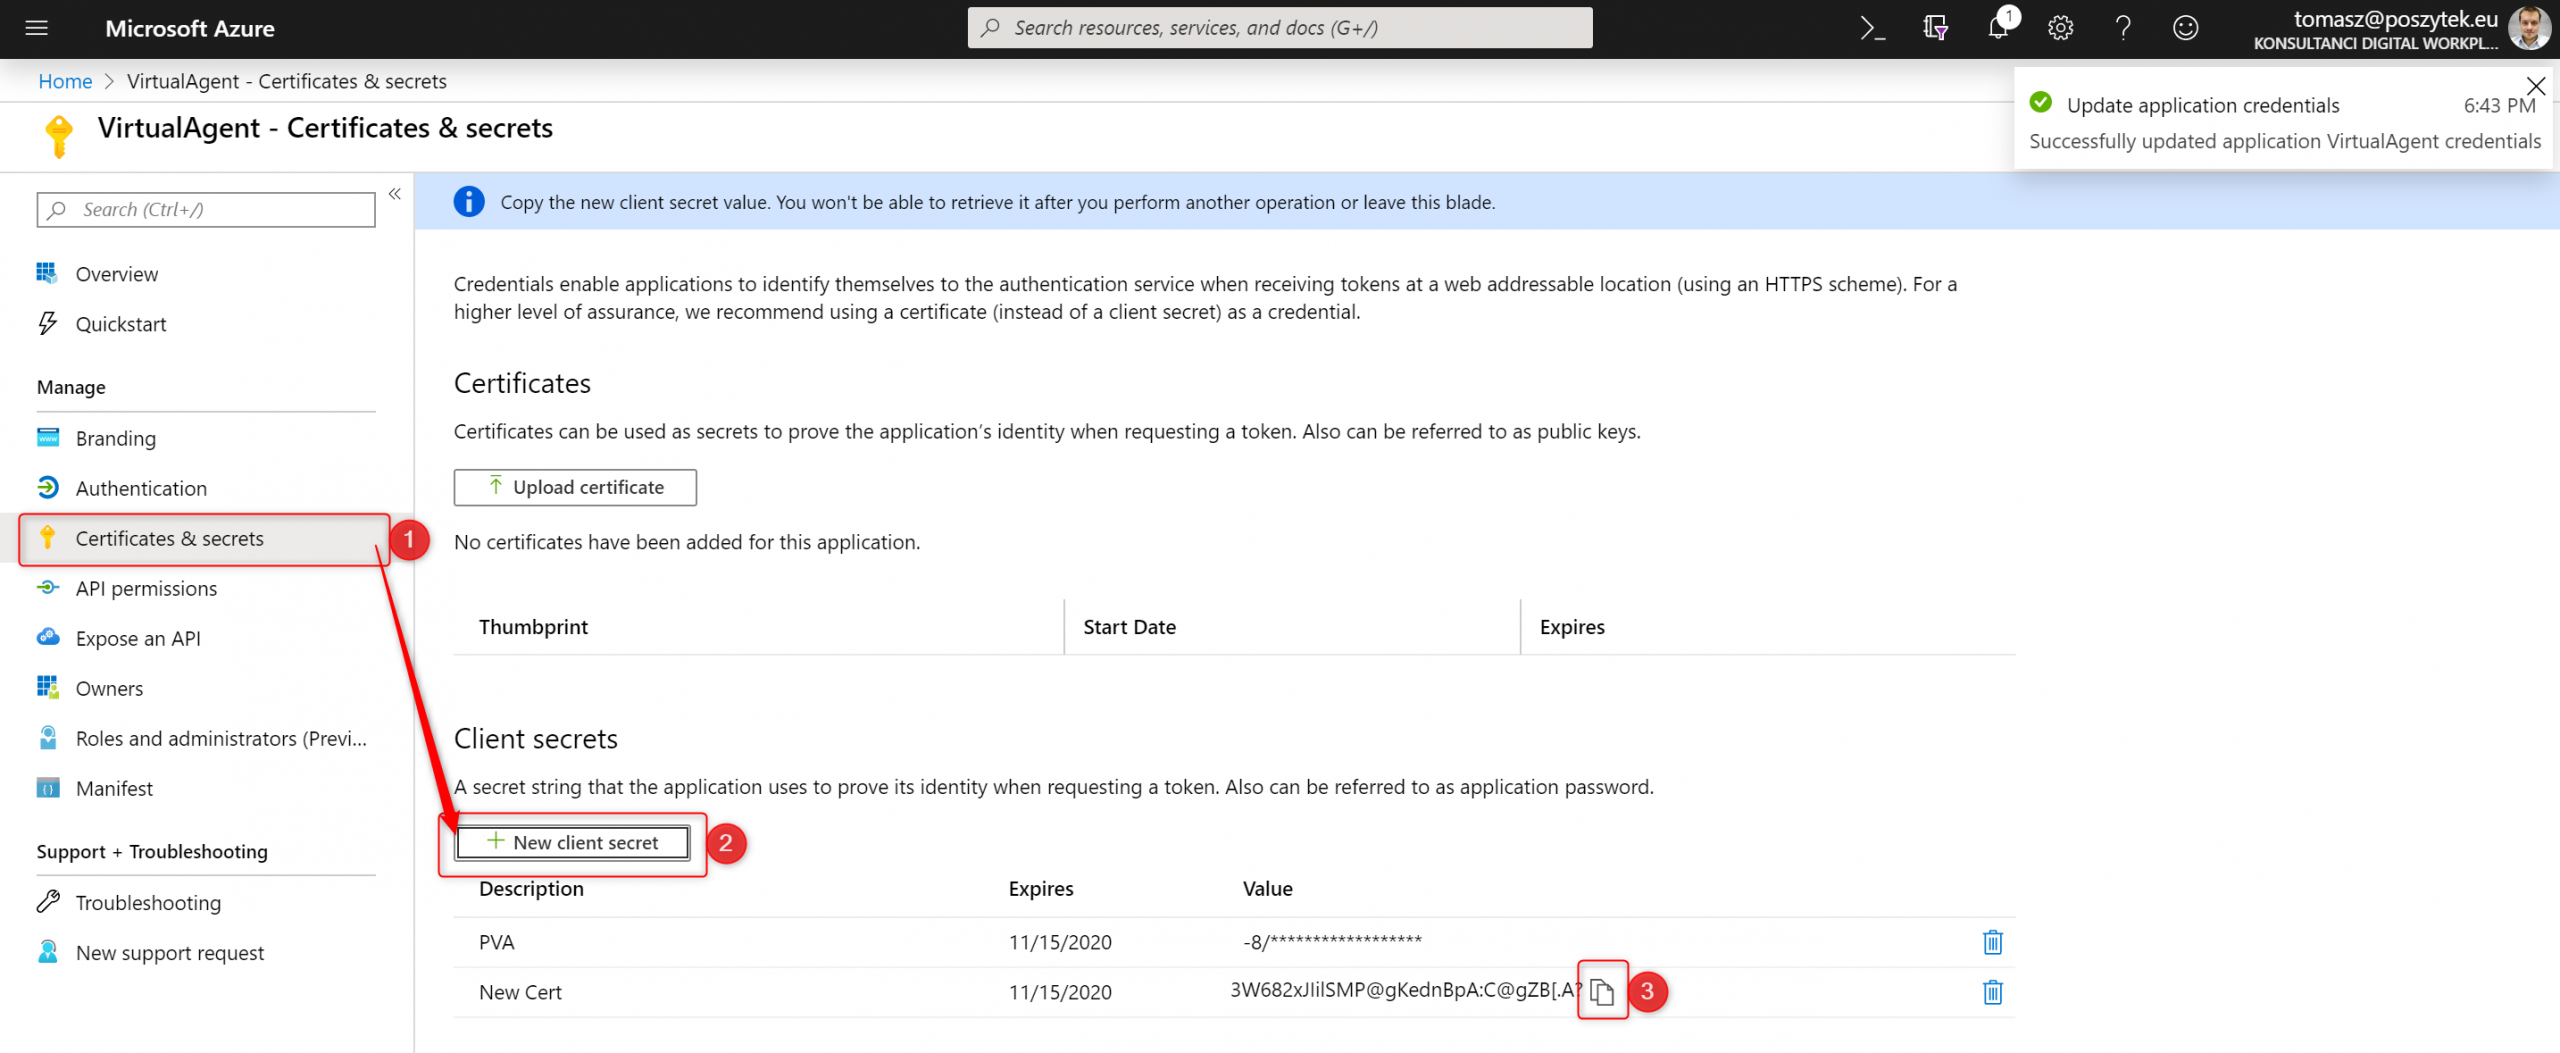
Then copy its value and paste it in the Power Virtual Agent configuration window. Finally go to the “Overview” blade to copy “Client ID” value:
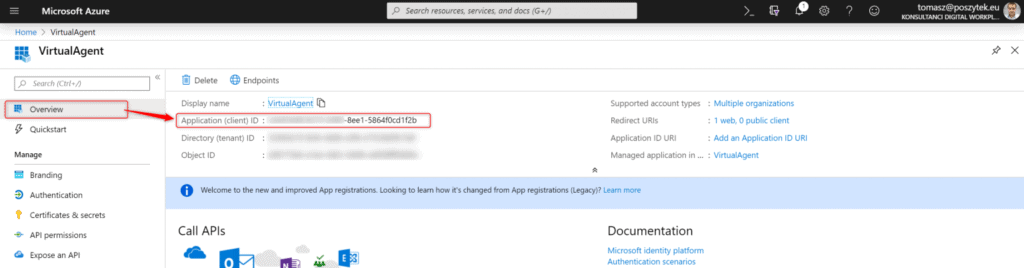
That’s it! Azure App is registered and configured. Copy it’s key and id, and paste in the Power Virtual Agent configuration screen.
I hope this post will help to save hours of searching and figuring out how to configure the authentication with AAD for PVA. Leave me a comment if you need any support!
About the Author:
I’m Tomasz Poszytek, Microsoft Business Applications MVP. From more than 8 years now I’m being involved in projects, which aim is production of various applications using SharePoint as a platform. My adventure started absolutely without a purpose, when in the beginning of 2000 I was given FrontPage installation disc and started experimenting with this WYSWIG tool.
Currently I’m focusing on self development in “cloud” area, where I’m trying to get acquainted with Office 365 features and applications. I’m professionally and personally very much interested in automation of processes, digital transformation, digital workplaces and all tools that helps employees in that area.
From more than a year I’m working with the platform for processes automation – Nintex. I’m also the Nintex Certified Partner and Nintex Virtual Technical Evangelist (Nintex vTE).
Reference:
Poszytek, T. (2019). PVA Series – Authentication in Power Virtual Agent. Available at: https://poszytek.eu/en/microsoft-en/office-365-en/pva-en/pva-series-authentication-in-power-virtual-agent/ [Accessed: 10th April 2020].
Find more great Power Platform content here.