This is part II of the series Teams message cards.
UPDATED: January 2020: Added some more options to the script to filter services and classifications
Part I started off easy, by parsing an RSS feed and present the data in a Teams channel.
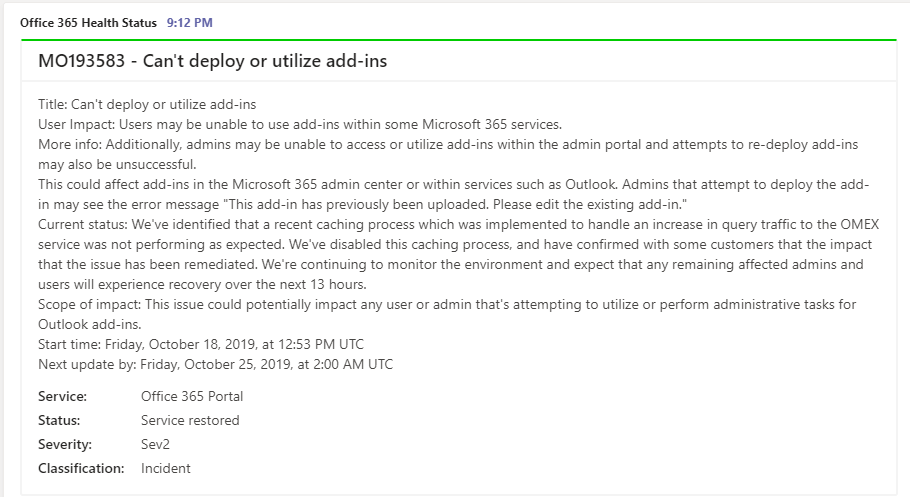
In this second part, we will dig a little deeper. We will look into how to get service health alerts from Office365 into a Teams channel. The use case is that we would like to be notified if any new or updated alerts are available in Teams, without the need of logging into the Office365 Admin portal. Key data from these alerts will be formatted as message cards, with color coding, and adding buttons if any links are available. The script will be run on a schedule (default is 15 minutes, but can be run as often as required).
As this data is not available without logging in to the Office 365 portal, we need to create an authentication mechanism that handles that for us.
High-level steps:
- Authentication: Create an Azure Enterprise App, give the necessary access to read health status
- Set up an incoming webhook
- The script: Set the variables in the script according to your environment
- Test: Run the script to verify
- Automation: Set the schedule using Azure Automation
1. Authentication
- Log in to the Azure portal.
- Find Azure Active Directory in the left pane, or search.
- Go to App registrations
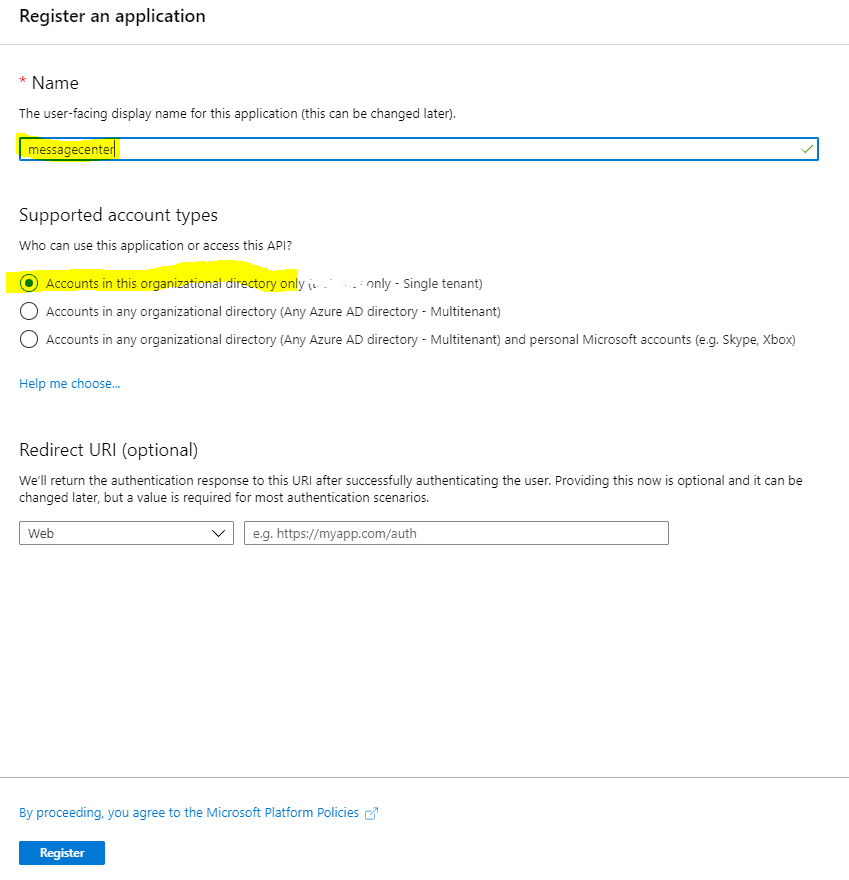
- Click New registration
- Give the application a sensible name, select Accounts in this organizational directory only, and click Register
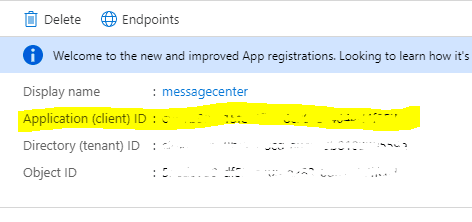
- Copy the Application ID, we need that for later. Also keep a tab on the Directory ID as well, it might be required later.
- Click View API permissions
-Click Add a permission
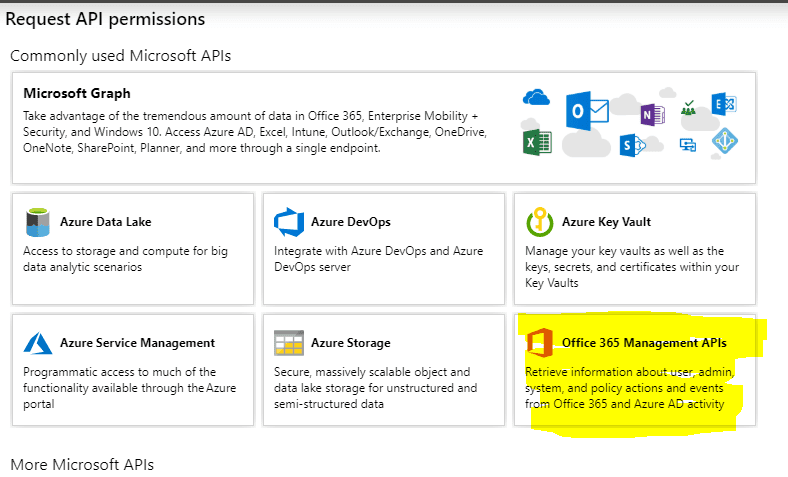
-In the Request API permissions click Office 365 Management APIs
- In the Office 365 Management APIs, click Application permissions
- Expand ServiceHealth and select ServiceHealth.Read. Click Add permissions
- Now we need to remove the permission we don’t need. Click the Microsoft Graph (1), User.Read and click Remove permission in the window that pop up. Confirm by clicking Yes, remove
- All permissions are in place. Click Grant admin consent for yourtenantname and confirm by clicking Yes
- Further we need to generate a client secret for the script. Click Certificates & secrets, and New client secret
- Give the secret a sensible name, and set the expiration date (1 or 2 years, or never). Click Add
- Copy the secret to a secure place, as this is the last time you are able to. If you forget, you need to generate a new secret.
Now the Application ID and Application Key can be used in the script.
2. Incoming webhook Set up an incoming webhook in the Teams channel of your choice. I created a separate team with a channel for each type of service I would like to present.
Check out this article for setting up an incoming webhook in your selected Teams channel.
Copy the URI from the webhook you set up.
3. The script
- Download the script from Github
- Adjust the user variables:
$ApplicationID = 'application ID' $ApplicationKey = 'application key' $TenantDomain = 'your FQDN' # Alternatively use DirectoryID if tenant domain fails $URI = 'Teams webhook URI' $Now = Get-Date $Minutes = '15'
Like in the previous script, the variables you need to adjust are these:
$ApplicationID – from the generated application in step 1
$ApplicationKey – from the generated application in step 1
$TenantDomain – your FQDN primary domain
$URI – the generated URI from the creation of the incoming webhook

UPDATED: January 2020: One of my customers asked if it was possible to filter out alerts they didn’t necessarily wanted to see. So I added some code to facilitate that. Adjust the following variables section as well. Fill in values for services and classifications you want to receive alerts for. I used yes to make it easier to read. Leave the services/classification you don’t want to receive alerts for blank. Like the example below:
# Office 365 Service(s) to monitor
# Leave the one(s) you DON'T want to check empty (with '' ), add a value in the ones you WANT to check (I added 'yes' for readability

$Exchange = 'yes'
$Forms = ''
$Intune = ''
$MicrosoftKaizala = ''
$SkypeforBusiness = ''
$MicrosoftDefenderATP = ''
$MicrosoftFlow = ''
$FlowinMicrosoft365 = ''
$MicrosoftTeams = 'yes'
$MobileDeviceManagementforOffice365 = ''
$OfficeClientApplications = ''
$Officefortheweb = ''
$OneDriveforBusiness = 'yes'
$IdentityService = ''
$Office365Portal = 'yes'
$OfficeSubscription = ''
$Planner = ''
$PowerApps = ''
$PowerAppsinMicrosoft365 = ''
$PowerBI = ''
$AzureInformationProtection = ''
$SharePointOnline = 'yes'
$MicrosoftStaffHub = ''
$YammerEnterprise = ''

# Classification(s) to monitor
# Leave the one(s) you DON'T want to check empty (with '' ), add a value in the ones you WANT to check (I added 'yes' for readability)

$Incident = 'yes'
$Advisory = ''
The script will request new or updated incidents by using the provided application ID and key. It will color code the incident based on state.
- Red: Incident
- Yellow: Advisory
- Green: Incidents with an end time.
As the same incident can show up several times, the script picks the latest index on an incident, to avoid duplicates.
It will then create one or more payloads, and post in the Teams channel.
As the base of the script is the same, I will not cover that here. The difference between this script and the first, is that we need to authenticate in order to get any data. This includes requesting a token (lifetime of 1 hour) which is used to authenticate against your tenant:
$oauth = Invoke-RestMethod -Method Post -Uri "https://login.microsoftonline.com/$($tenantdomain)/oauth2/token?api-version=1.0" -Body $body
    $headerParams = @{'Authorization'="$($oauth.token_type) $($oauth.access_token)"}
    $messages = (Invoke-RestMethod -Uri "https://manage.office.com/api/v1.0/$($tenantdomain)/ServiceComms/Messages" -Headers $headerParams -Method Get)
    $incidents = $messages.Value | Where-Object {$_.MessageType -eq 'MessageCenter'}
4. Test
Do a dry run to see of the script works as intended with your own variables. If you see no incidents posted, it could be because of the time interval. Try to expand the number of minutes to see if you get any hits.
Once your happy, revert the interval and you’re ready to go.
5. Automation
To schedule the script, there are several ways. I prefer an Azure automation runbook. As the runbooks can only be run once per hour, you can either create 4 schedules, or set up another using Azure Logic Apps
About the Author:
Einar Asting is a consultant at Crayon AS focusing on cloud, mostly Microsoft Azure and Office 365. He helps customers of all sizes and in all sectors on their cloud journey. With two decades of experience he works as a technical resource, architect, technical project lead, and is considered a trusted advisor among his customers.
Web: https://thingsinthe.cloud
Twitter: https://twitter.com/EinarAsting
Reference:
Asting, E. (2019). Teams Message Cards – Part II (Office 365 Health Status). Available at: https://thingsinthe.cloud/Teams-message-cards-Getting-Office-365-roadmap-into-channel/ [Accessed 11th February 2020].
Check out more great Microsoft Teams content here or join our mailing list to stay up to date.