This is the last blog post in a series of four about Virtual Entities. We have reached the moment where we will put all the pieces together in order to get a working example of Virtual Entities. In my previous blog posts I have given an introduction to Virtual Entities and showed how to create and register a Custom Data Provider which can be used to display SpaceX Rocket Launches in a Model-Driven App. Take a look at part 1 here. We will now create a Virtual Entity which uses the Custom Data Provider and see the result in an app.
Summary of setting up Virtual Entities
First a summary of the steps that is required. I wrote about it in my first blog post as well, but here is a reminder. Now we assume that the case is that we need a Custom Data Provider. Please note that you do not necessarily need to do the steps in this order. You can create a Virtual Entity and not specify a Data Source and you can go back to the Virtual Entity and update it with the Data Source later.
One way of setting up Virtual Entities:
- Create a Custom Data Provider
- Register the Custom Data Provider
- Add a record of the Data Source (under Settings)
- Create the Virtual Entity and specify the Data Source
Adding a record of the Data Source
We have already created a Custom Data Provider and registered it in my two previous blog posts. Before we go and create our Virtual Entity we will do another step which is to create a record of the Data Source. Remember, in my previous blog post when we registered the Custom Data Provider, a Data Source was also created. One other thing we need to do is to go to the settings area and do a bit of configuration for this Data Source, i.e. to add a record of it. In other cases this step might also include to add some configuration data which is to be passed over to the plugin (Data Provider) from the Data Source.
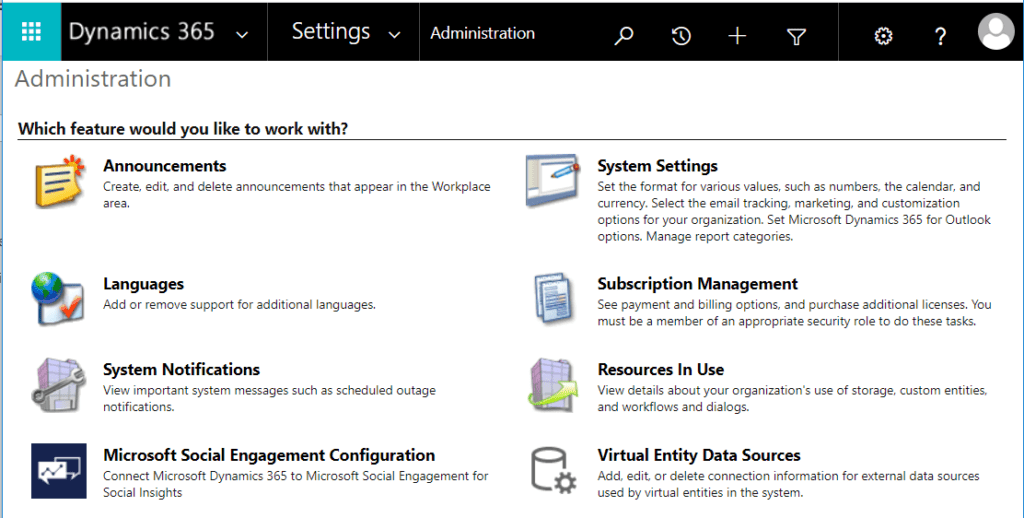
In order to add a Data Source record for the Data Source entity that we created as part of registering our Custom Data Provider, we need to go to Settings. Not any fancy settings, nope, we need to go to the legacy settings. You can reach the legacy settings e.g. from the Admin center, your environment, Settings, Resources, All Legacy, Administration, Virtual Entities Data Sources. Another way is from a Model-Driven App: Settings -> Advanced Settings -> Administation ->Virtual Entites Data Sources.
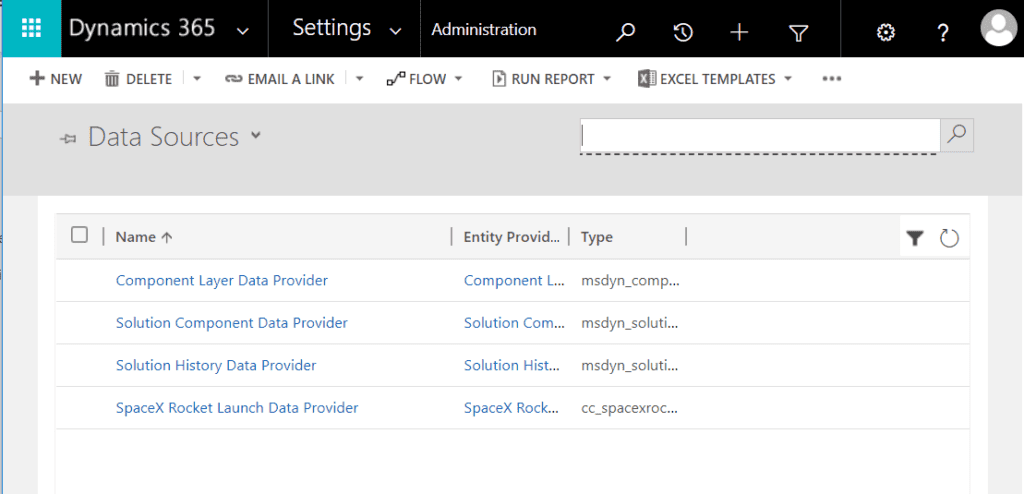
Open Virtual Entity Data Sources. Choose New, select your Data Provider and specify a name. This is your Data Source configuration. When you are done you have a new Data Source and it should look like below.
Creating the Virtual Entity
We do not (yet) have the possibility to create a Virtual Entity with the “new experience” for designing entities, i.e. in the Maker Portal. You will need to click the Switch to classic button from within your solution (or navigate to the classic experience in your own preferred way).
To be able to create a Virtual Entity from within the Maker Portal – I have posted that as an idea on the Power Apps Community site. Go and vote for it if you agree with me that we should be able to do this from the Maker Portal. However, I assume it is already on the Road Map.
In the classic experience – choose to create a new entity. Make sure to check the Virtual Entity check box. As already mentioned, you can choose Data Source [None] if you create the Virtual Entity before you register your Custom Data Provider. If it is already registered and you have also created a record of the Data Source, you can just choose the Data Source.
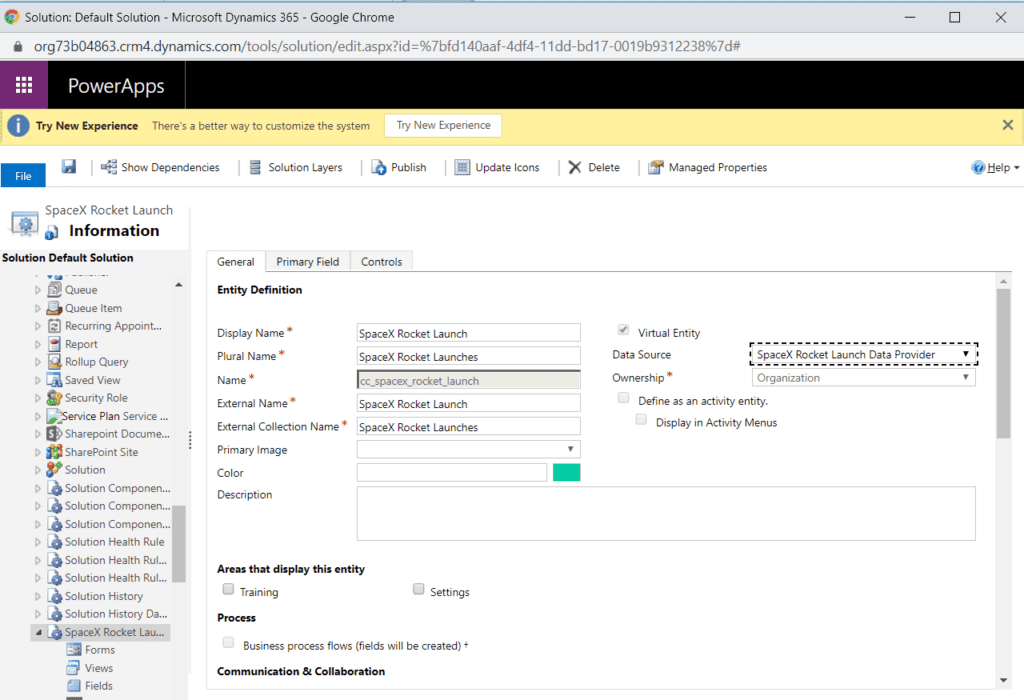
Once the entity has been created, you can see in the maker portal that it is a Virtual Entity and you can add fields to it, modify views and forms, but you cannot change Data Source from there, that you will need to do in the classic experience for now.
Adding fields to the Virtual Entity
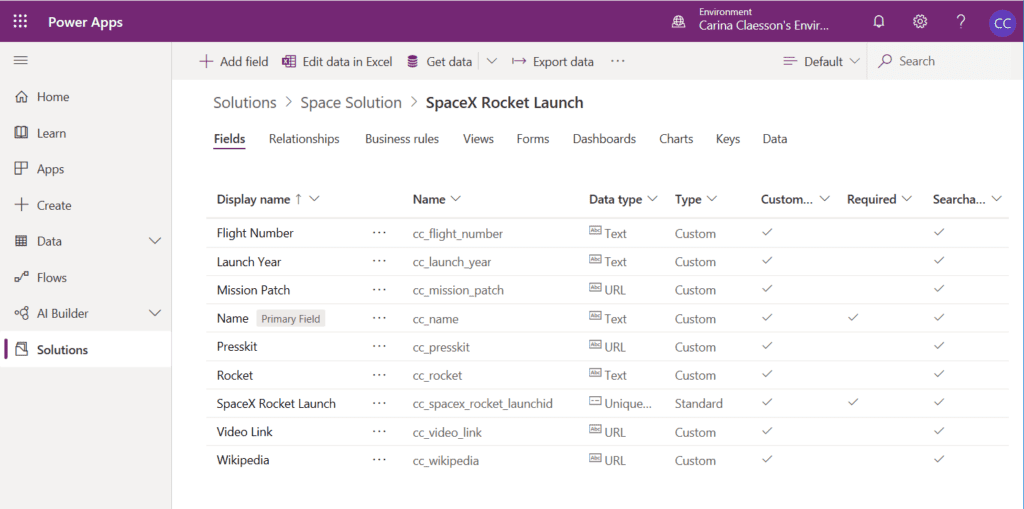
Create the fields which will hold data from the external source. In my code for the Custom Data Provider found in my previous blog post, you can see the fields that is used in this example. I will just add those fields to the Virtual Entity.
SpaceX Rocket Launches in a Model-Driven App
Let us take a look at how it looks in a Model-Driven App. I will just assume that you are familiar with creating a Model-Driven App. Here is how a Virtual Entity looks in it.
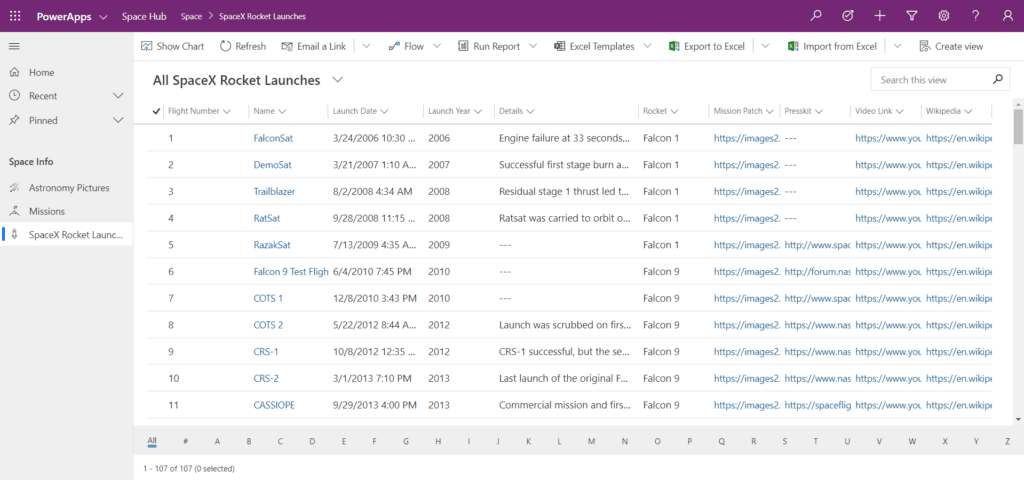

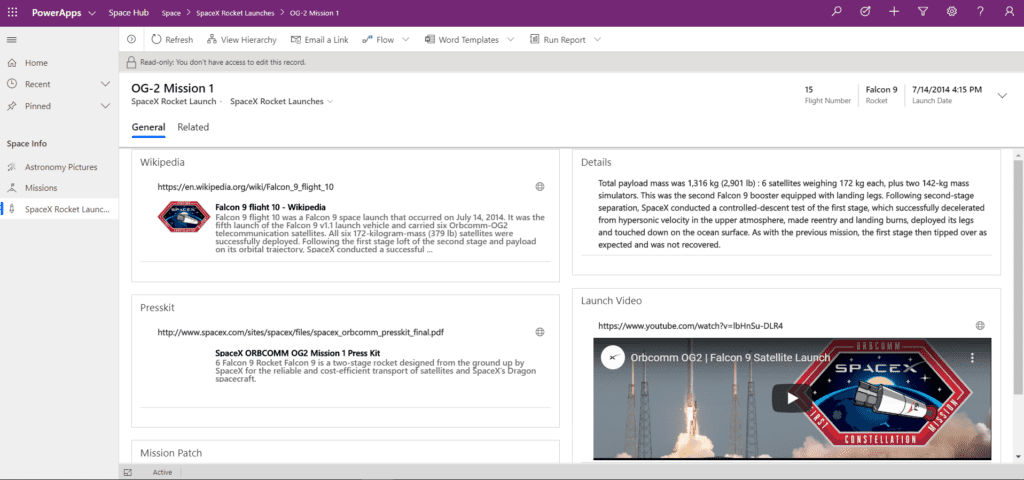
It sure looks pretty much the same as if we would have the data in the CDS. Just remember – in the Virtual Entity and Custom Data Provider case – you will need to implement more than what I have done in my example, in order to get a fully functioning solution including sort, search and navigation functionalty.
This was the last blog post is a series of four about Virtual Entites. I hope you have enjoyed reading this and that someone might find my SpaceX Rocket Launch example useful. If you are interested, do not forget to go and take a look at the code at GitHub, or why not use it as an inspiration for your own Custom Data Provider.
About the Author:
Dynamics 365 and Power Platform Solution Architect from Sweden.
Introduced to CRM 2006, Dynamics CRM/365 CE enthusiast since 2009.
Interested in learning new technologies, problem solving and sharing my technical journey with Community fellows.
Feel free to connect with me on Twitter @CarinaMClaesson or LinkedIn https://www.linkedin.com/in/carinamclaesson/.
Reference:
Claesson, C. (2020). Virtual Entities – How to put the pieces together. Available at: https://carinaclaesson.com/2020/02/27/virtual-entities-how-to-put-the-pieces-together/ [Accessed: 24th March 2020].
Find more great Power Platform content here.