This is the third blog post in a series of four about Virtual Entities. In my previous blog post I went through an example of how to develop a Custom Data Provider. In this one we will look at the steps needed in order to register the Custom Data Provider. In the last blog post I will put the pieces together, set up a Virtual Entity and use the Custom Data Provider that was created in the previous blog post.
Finding the right Plugin Registration tool
When I have developed a plugin, I always use the XrmToolBox and Plugin Registration from there in order to register the assembly and add steps to the plugins etc. With Virtual Entities you cannot do that. You will need to download the SDK Plugin Registration tool and use that one. You can download it from here under SDK Tools Download.
Registering the assembly
I assume that you have built your project and that you now have an assembly to be registered. Open the Plugin Registration tool and logon to your environment.
Remember, in the previous blog post we created two plugins, one Retrieve plugin and one RetrieveMultiple plugin. Now we will register the assembly. Choose Register New Assembly and locate your .dll-file.
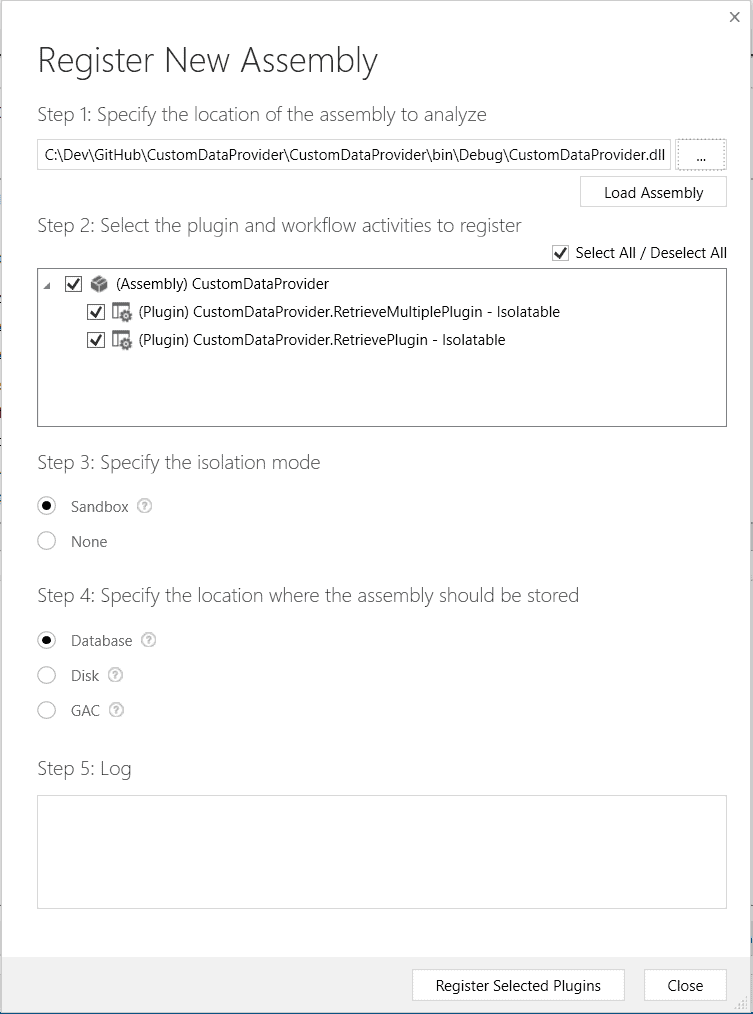
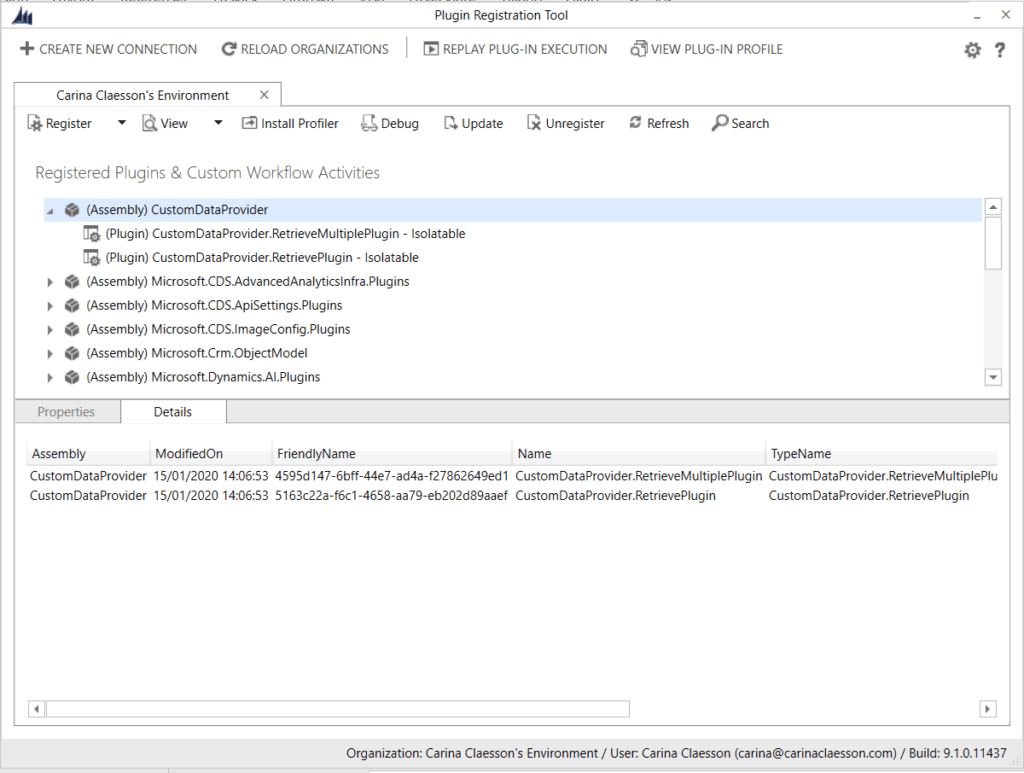
Now it should look like this.
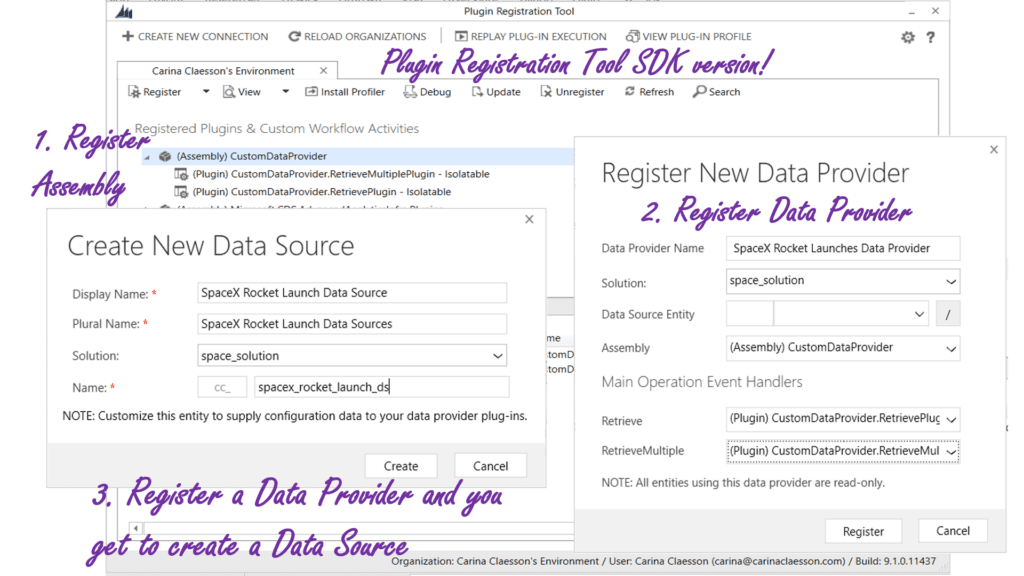
Registering the Data Provider
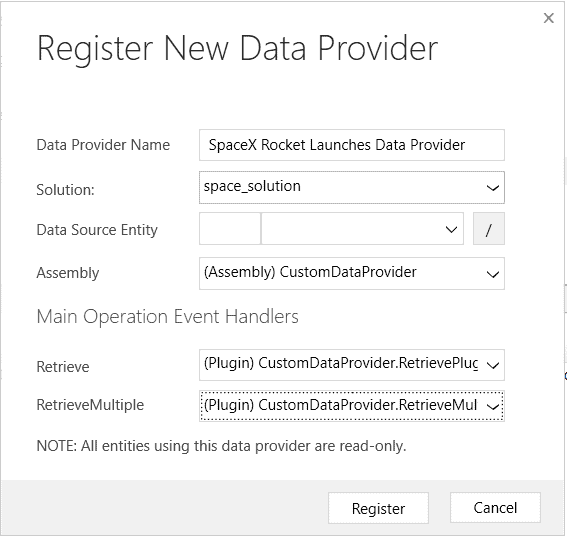
Remember from my previous blog posts about Virtual Entities, we have a Virtual Entity, a Data Provider and a Data Source. Now it is time to register the Data Provider. A Data Source will be created along the way. This time, choose Register -> New Data Provider.
Fill in Data Provider Name, specify a Solution (that you have created before you clicked Register -> New Data Provider), choose your previously registered assembly and the Retrieve/RetrieveMultiple plugins.
While you are registering a new Data Provider you will get to create a Data Source. Under Data Source Entity, choose to create a new Data Source. That will create a new entity in the CDS (not to be mixed up with the Virtual Entity we will use, which we will also create – but in the next blog post).
When you choose to create a new Data Source, you get to fill in a Display Name, a Plural Name, choose a Solution and set an entity name for the Data Source.
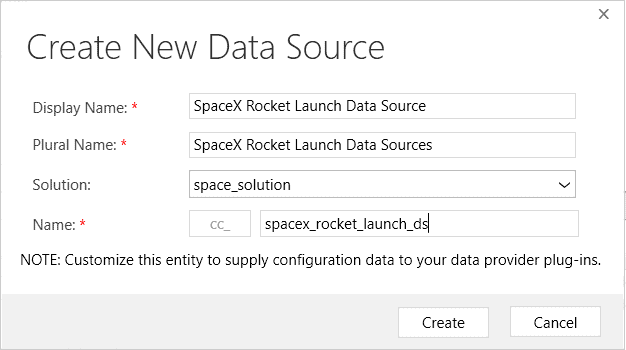
You can see in the picture there is a NOTE text. It says that you can go to the entity and customize it if you want to get configuration data to you data provider plugins. That is what the Data Source is all about – holding configuration data which can be used in the Data Provider plugins.

About the Author:
Dynamics 365 and Power Platform Solution Architect from Sweden.
Introduced to CRM 2006, Dynamics CRM/365 CE enthusiast since 2009.
Interested in learning new technologies, problem solving and sharing my technical journey with Community fellows.
Feel free to connect with me on Twitter @CarinaMClaesson or LinkedIn https://www.linkedin.com/in/carinamclaesson/.
Reference:
Claesson, C. (2020). Virtual Entities – Registering a Custom Data Provider. Available at: https://carinaclaesson.com/2020/02/27/virtual-entities-how-to-put-the-pieces-together/ [Accessed: 24th March 2020].
Find more great Power Platform content here.