Within Azure, we have a free service called Azure Blueprints. Azure Blueprints helps us in simplify largescale Azure deployments by packaging key environment artifacts, such as Azure Resource Manager templates, role-based access controls, and policies, in a single blueprint definition. Easily apply the blueprint to new subscriptions and environments, and fine-tune control and management through versioning. The Blueprints REST API’s are available to manage the different API groups.
In the last months, I have worked on a proof of concept, using “Low Coding“ to assign Blueprints definitions in Azure. This includes a PowerApps App and an Automation flow that’s calling the Azure Blueprint REST API. Within Power Automate, calling REST API’s is mostly done by using the HTTP connector.
Using the HTTP Connector, give us some overhead because each time you need the steps to get the authorisation token.
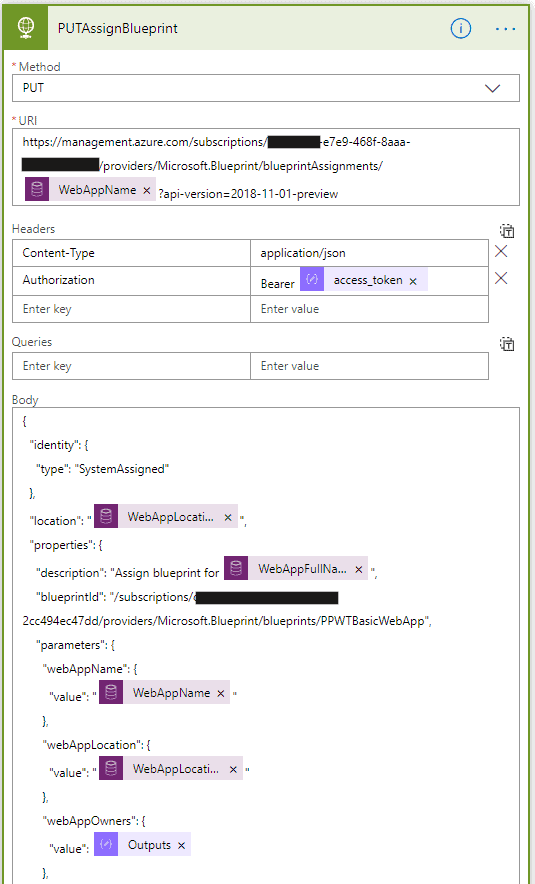
Creating a custom connector in Power Automate will make life much easier. Let us have a look at the REST API to create or update Assignments.
PUT https://management.azure.com/{scope}/providers/Microsoft.Blueprint/blueprintAssignments/{assignmentName}?api-version=2018-11-01-preview
More information about Azure Blueprints REST, can be found here.
Let’s have a look at how I did it and which issues, I had during the creation of the custom connector.

Open Power Automate and select “Data” and click on “Custom connectors”.

Click “New custom connector” and choose in drop down “Create from blank”.
Fill in the connector name and click “Continue”.
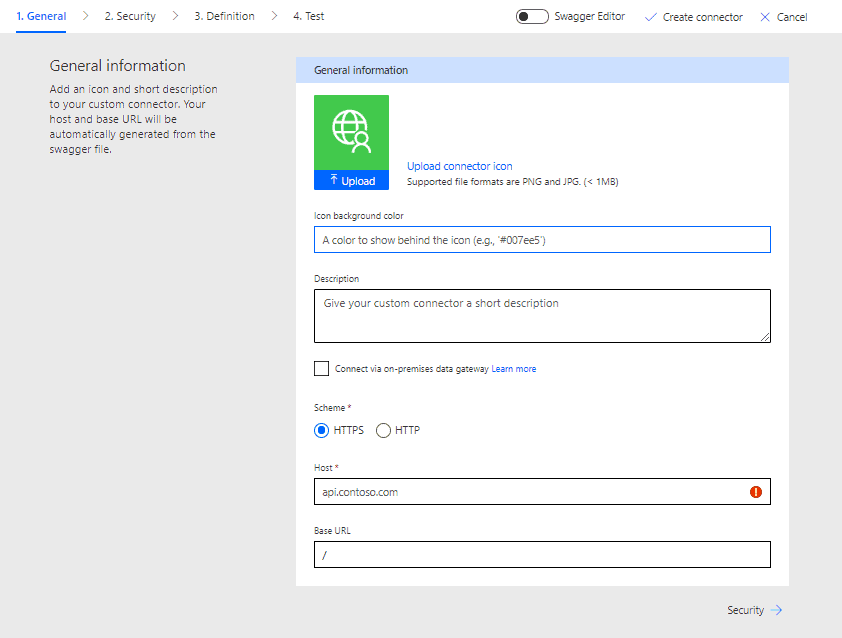
The first step of the setup is adding the “General” settings, like uploading icon, set background colour. This colour setting will influence also the top bar of the connector, see examples below.
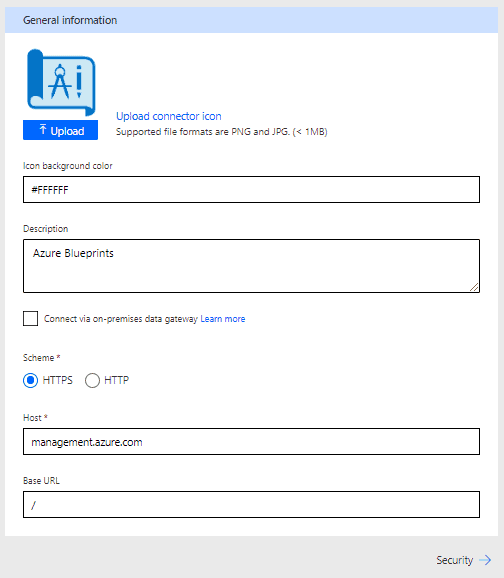
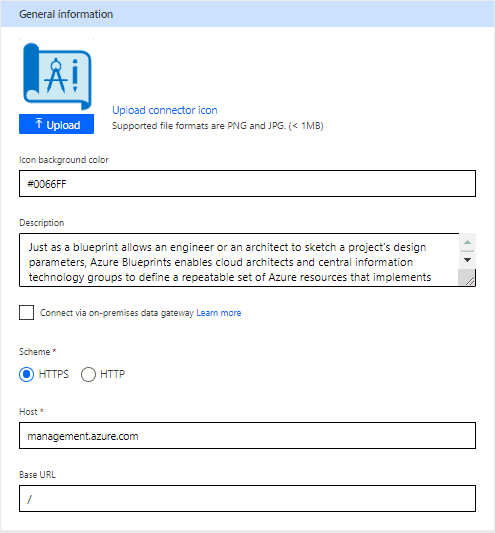
Detail of the first step (General)
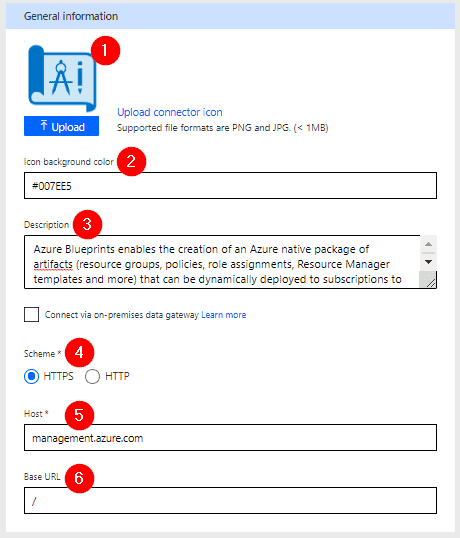
- Image has been uploaded, use PNG or JPG, less then 1MB.
- Used background color: #007EE5
- Adding a description for the custom connector
- Scheme: HTTPS
- Host: This information is available in the REST API documentation. https://management.azure.com/{scope}/providers/Microsoft.Blueprint/blueprintAssignments/{assignmentName}?api-version=2018-11-01-preview
Value: “management.azure.com” - Base URL: Because of variables are not allowed the base URL value is “/”
Step 2: Security
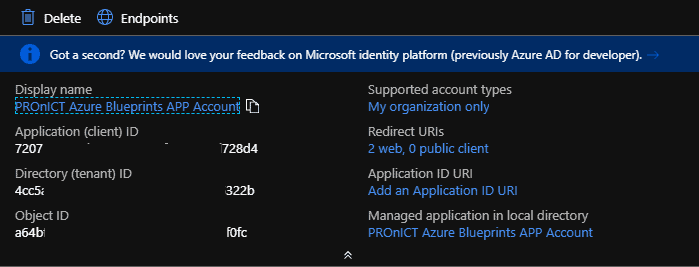
This exist out of two part: Azure and the configuration of the custom connector. In Azure, we will create a new app registration and make note of the application id and secret. Adding the Azure Service Management as API permission and push “Grant Admin consent for <Name>” to activate the permissions
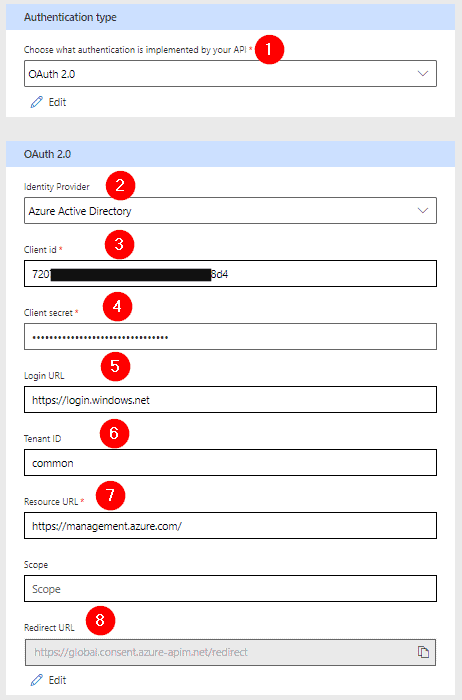
Let go back to the first screenshot:
- OAuth2.0 is used to authenticate to the Azure service.
- Identity provider: Azure Active Directory
- Client id: <APP registration application id >
- Client Secret: <APP registration Secret >
- Login URL: https://login.windows.net
- Tenant ID: Common
- Resource URL: https://management.azure.com/ (See that the final slash has been included)
- Scope: <n/a>
- Redirect URL: Will be create when saving the custom connector for the first time. Copy this URL and go back to the
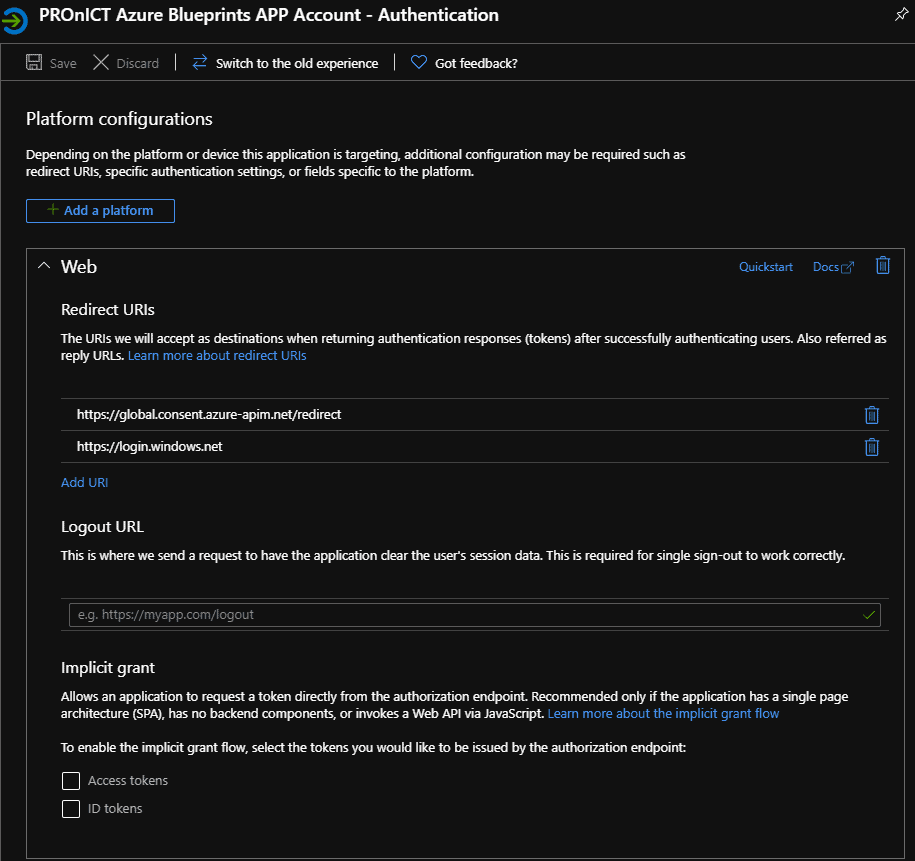
For the APP registration, that we have created in previous step, we will add this copied URI as the “Redirect URIs”.
Step 3: Definition
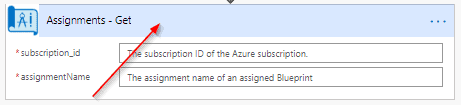
In the last step, we will create actions based in the REST API list. In this example we will add the get assignments in Azure Blueprints.
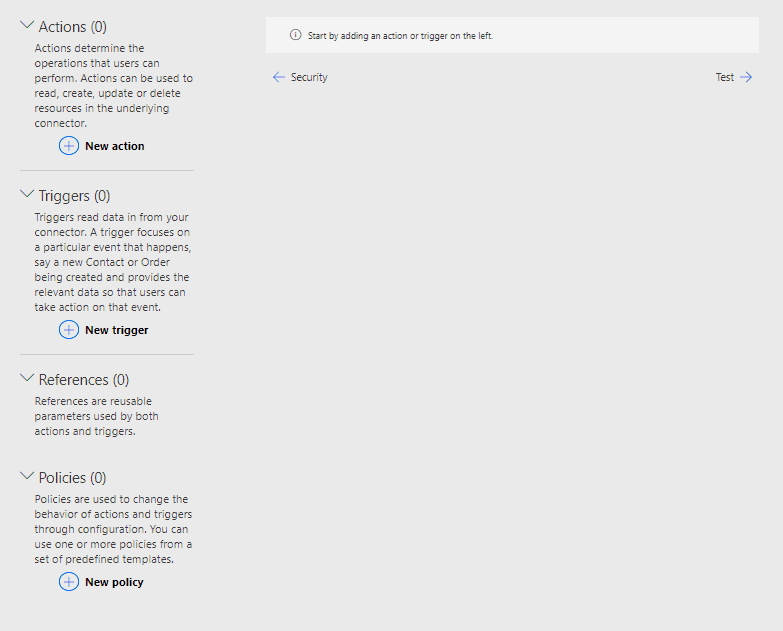
Adding Actions, click “New action”
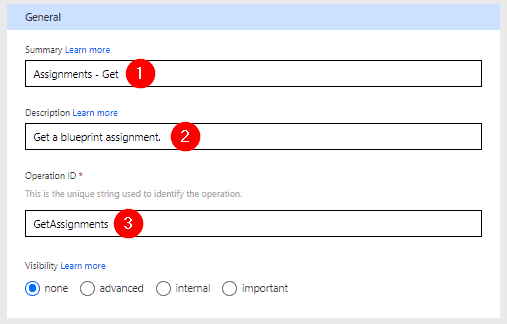
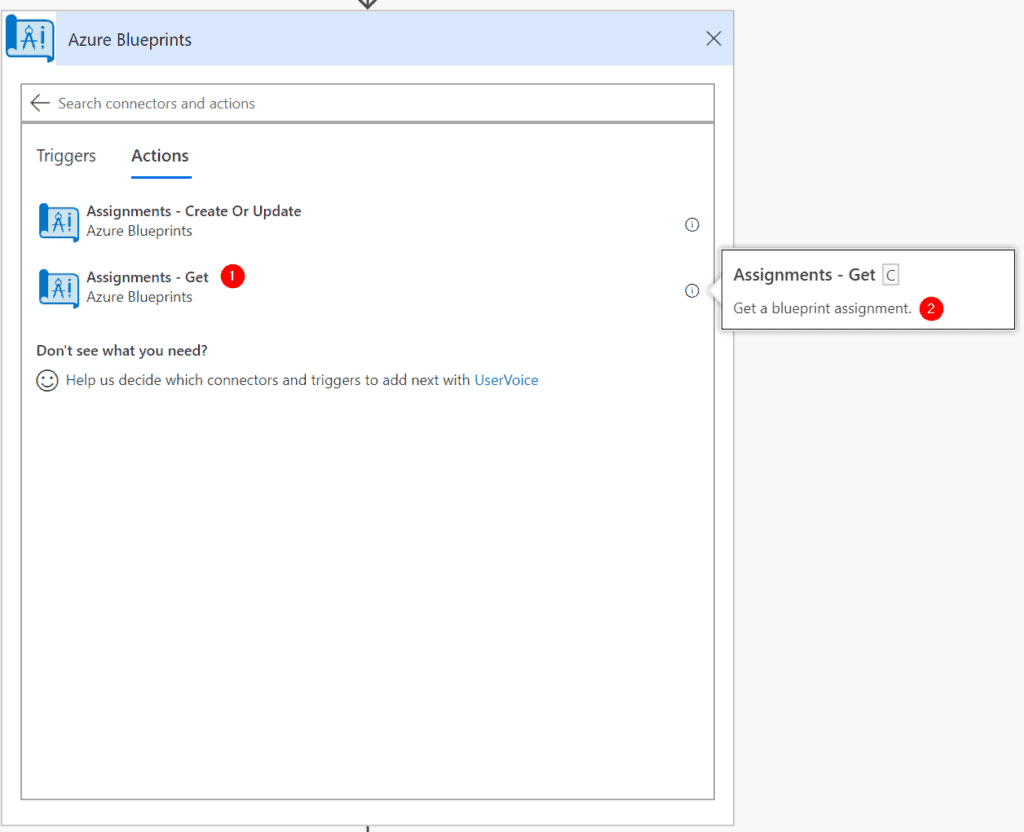
General
- Summary, give a name for the action, is displayed as action name in the custom connector.
- Description, is shown in the custom connector when selecting the information icon.
- Operation ID: This is an unique string used to identify the operation and is internally used into the connector.
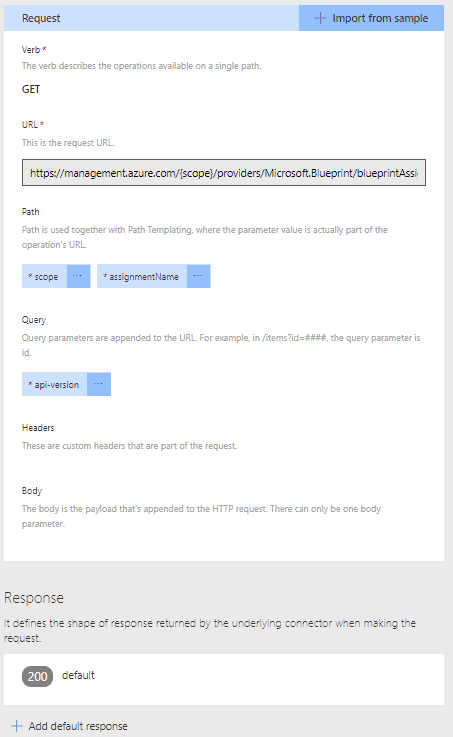
Adding request for the action and responds of the result.
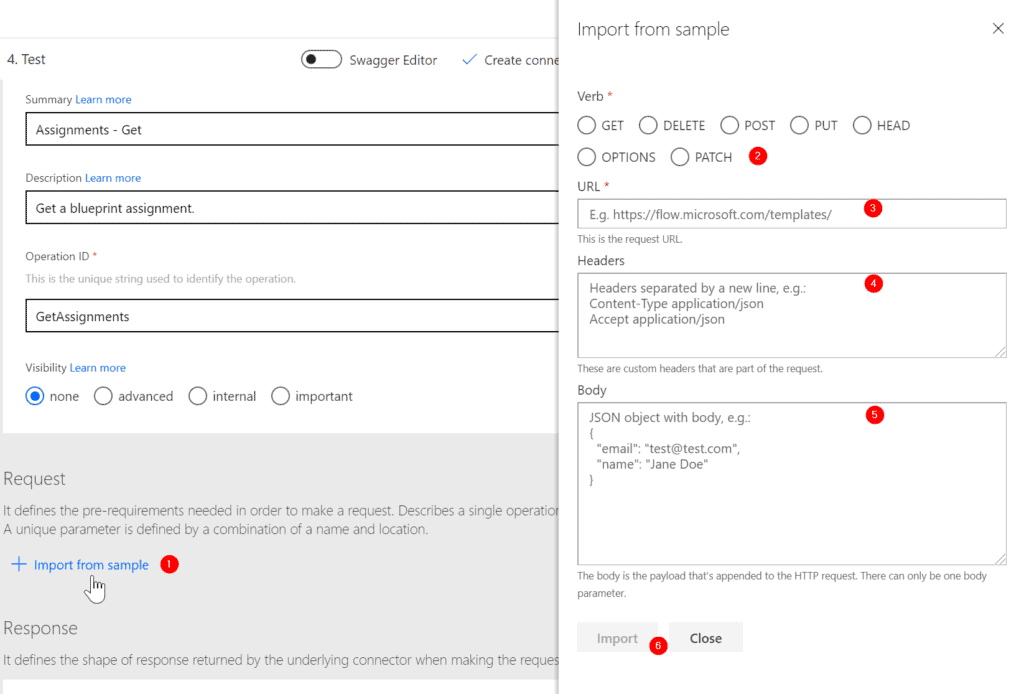
Click “import from template” and complete the fields at your rights side: GET https://management.azure.com/{scope}/providers/Microsoft.Blueprint/blueprintAssignments/{assignmentName}?api-version=2018-11-01-preview
- Verb: GET
- URL: https://management.azure.com/{scope}/providers/Microsoft.Blueprint/blueprintAssignments/{assignmentName}
- Headers: n/a
- Body: Add body example, see REST API information. Copy the result and paste it in the body.
{
  "identity": {
    "type": "SystemAssigned",
    "tenantId": "00000000-0000-0000-0000-000000000000",
    "principalId": "00000000-0000-0000-0000-000000000000"
  },
  "location": "eastus",
  "properties": {
    "description": "enforce pre-defined simpleBlueprint to this XXXXXXXX subscription.",
    "provisioningState": "succeed",
    "blueprintId": "/providers/Microsoft.Management/managementGroups/ContosoOnlineGroup/providers/Microsoft.Blueprint/blueprints/simpleBlueprint",
    "parameters": {
      "storageAccountType": {
        "value": "Standard_LRS"
      },
      "costCenter": {
        "value": "Contoso/Online/Shopping/Production"
      },
      "owners": {
        "value": [
          "johnDoe@contoso.com",
          "johnsteam@contoso.com"
        ]
      }
    },
    "resourceGroups": {
      "storageRG": {
        "name": "defaultRG",
        "location": "eastus"
      }
    }
  },
  "id": "/subscriptions/00000000-0000-0000-0000-000000000000/providers/Microsoft.Blueprint/blueprintAssignments/assignSimpleBlueprint",
  "type": "Microsoft.Blueprint/Assignment",
  "name": "assignSimpleBlueprint"
}
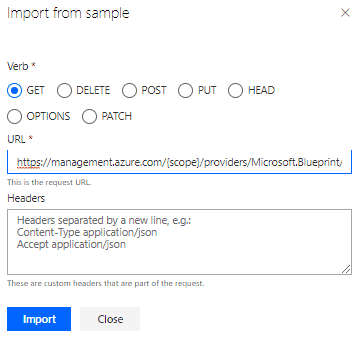
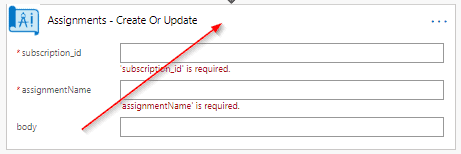
Click “Import” to save your input. The request will be filled in based on the input. Some small changes need to be done before, we can say that this has been completed.


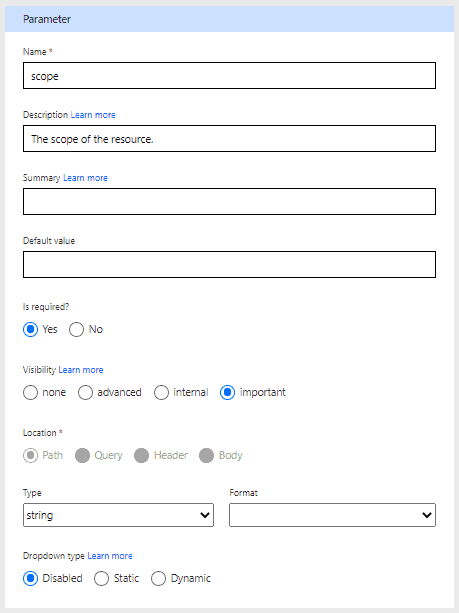
Is required: Will add a red star in the beginning of name value.
Visibility: important, this is visible in the connector, when selected.

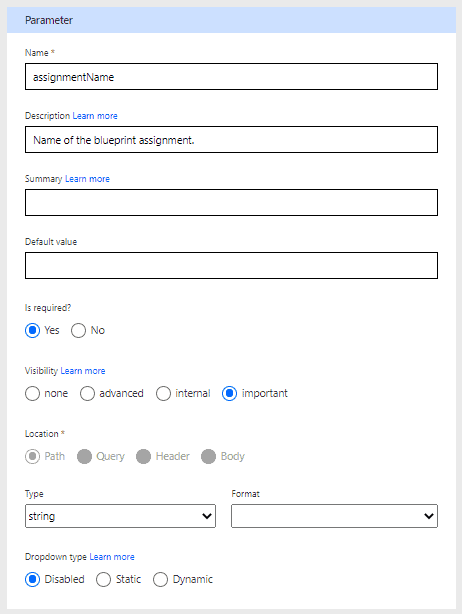
Assignment Name:
API Version:
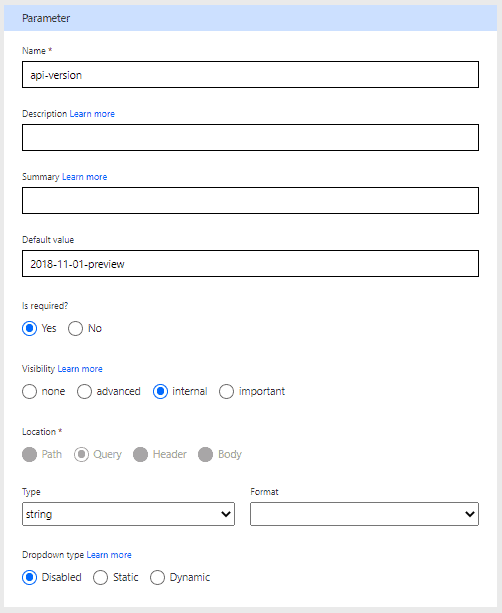
Select is required to “Yes” and visibility to internal. This selection will not been shown in the connector action overview, this setting is directly used internally into the custom connector as a default value for this parameter.
Fill in the “Default value” and select “Is required?” to “Yes” and “Visibility” to “Internal”.
Continue to the add responds, see workflow copy an example from the REST API documentation and add in the import from sample window.


Change the default value to 200.
This is the first action defined into the custom connector:
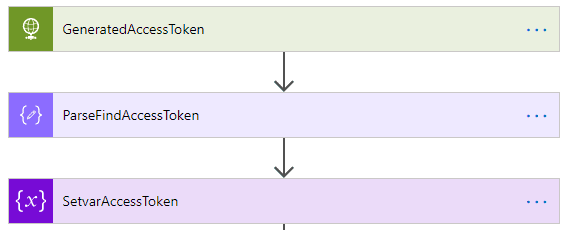
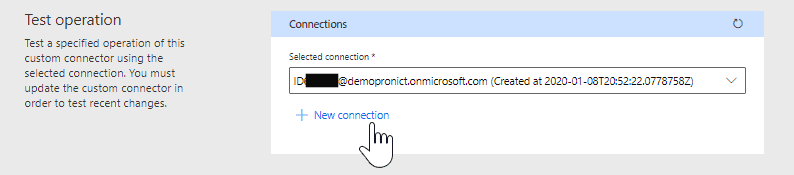
We can test the connector by clicking on test or by adding the connector into a Flow. Create first a new connection to get the token:
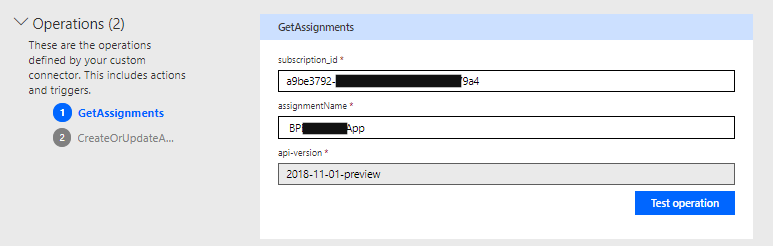
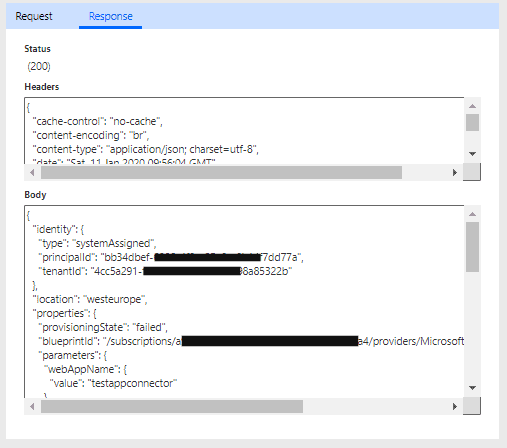
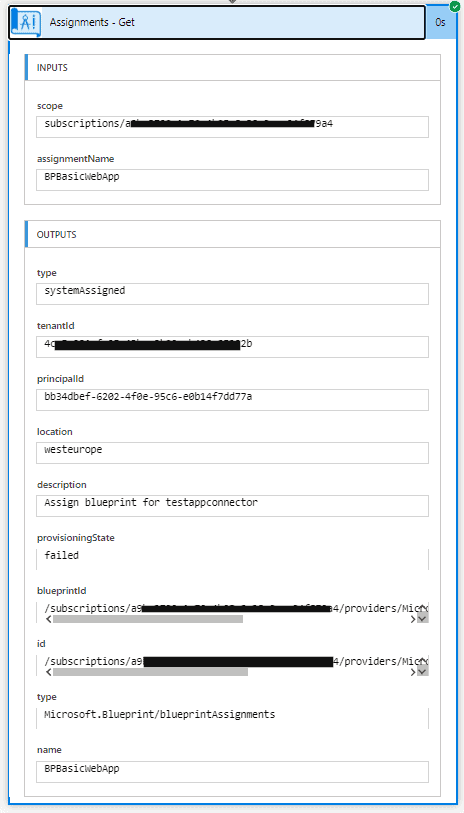
The result of the API request is displayed in the response tab.
Creating a Flow to Get the Assignments of a Azure Blueprint.

Result after running the flow:
Thanks for reading and please like and share!
About the Author:
It’s started 19 years ago, walking threw all the layers of IT. To become an IT operations consultant (On-premises & Azure infrastructures) and now converting towards a Power Platform Consultant.
2 Years ago, I came in contact with the Microsoft Power Platform and there this passion was born. Outside my work, the Power Platform is always near. Being an active member of the Belgian PowerApps and Flow User Group and share knowledge in the community by writing blogs plus presenting at Power Platform community events in Europe.
My viewpoint is mostly from an operations perspective and this is why you will find Azure resources or services into solutions together with the Power Platform components.
Reference:
Bisback, F. (2019). Azure Blueprints – Create custom connector for Power Automate. Available at: https://blog.pronict.net/2020/01/11/azure-blueprints-create-custom-connector-for-power-automate/ [Accessed: 1st April 2020].
Find more great Power Platform content here.